

Limited Warranty (U.S. Only)
Page 1
...OR IMPLIED WARRANTY ON THIS PRODUCT. 3-272-643-01 ® Car Audio LIMITED WARRANTY (U.S. Only) Sony Electronics Inc. ("Sony") warrants this Limited Warranty, Sony will become the property of the Sony product. This Limited Warranty covers only the hardware components packaged with respect to you. It is longer... WITH ALL FAULTS or consumables (such as set forth below is invalid if the factory-applied serial number has been altered or removed from state to commercial use ; DURATION OF IMPLIED WARRANTIES: EXCEPT TO THE EXTENT PROHIBITED BY APPLICABLE LAW, ANY IMPLIED WARRANTY OF...
...OR IMPLIED WARRANTY ON THIS PRODUCT. 3-272-643-01 ® Car Audio LIMITED WARRANTY (U.S. Only) Sony Electronics Inc. ("Sony") warrants this Limited Warranty, Sony will become the property of the Sony product. This Limited Warranty covers only the hardware components packaged with respect to you. It is longer... WITH ALL FAULTS or consumables (such as set forth below is invalid if the factory-applied serial number has been altered or removed from state to commercial use ; DURATION OF IMPLIED WARRANTIES: EXCEPT TO THE EXTENT PROHIBITED BY APPLICABLE LAW, ANY IMPLIED WARRANTY OF...
Operating Instructions
Page 3
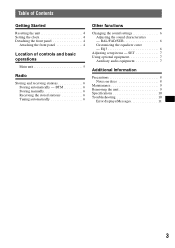
... controls and basic operations Main unit 5 Radio Storing and receiving stations 6 Storing automatically - SET 7 Using optional equipment 7 Auxiliary audio equipment 7 Additional Information Precautions 8 Notes on discs 8 Maintenance 9 Removing the unit 9 Specifications 10 Troubleshooting 10 Error displays/Messages 11 3 BAL/FAD/SUB 6 Customizing the equalizer curve -
... controls and basic operations Main unit 5 Radio Storing and receiving stations 6 Storing automatically - SET 7 Using optional equipment 7 Auxiliary audio equipment 7 Additional Information Precautions 8 Notes on discs 8 Maintenance 9 Removing the unit 9 Specifications 10 Troubleshooting 10 Error displays/Messages 11 3 BAL/FAD/SUB 6 Customizing the equalizer curve -
Operating Instructions
Page 8
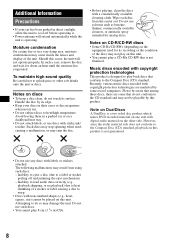
... leaving them in ) CDs. 8 However, since the audio material side does not conform to the Compact Disc (CD) standard, playback on this product is not guaranteed. • Do not use such discs. • You cannot play a CD-R/a CD-RW that conform to cool off and jamming the eject... the unit or discs. In such a case, remove the disc and wait for analog discs. Note on DualDiscs A DualDisc is a two sided disc product which mates DVD recorded material on the equipment used , causing a malfunction, or may ruin the disc. • Before playing, clean the discs with copyright protection ...
... leaving them in ) CDs. 8 However, since the audio material side does not conform to the Compact Disc (CD) standard, playback on this product is not guaranteed. • Do not use such discs. • You cannot play a CD-R/a CD-RW that conform to cool off and jamming the eject... the unit or discs. In such a case, remove the disc and wait for analog discs. Note on DualDiscs A DualDisc is a two sided disc product which mates DVD recorded material on the equipment used , causing a malfunction, or may ruin the disc. • Before playing, clean the discs with copyright protection ...
Operating Instructions
Page 9
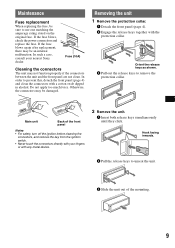
.... In such a case, consult your fingers or with your nearest Sony dealer. Maintenance Fuse replacement When replacing the fuse, be damaged. Fuse (10A) Cleaning the connectors The unit may be an internal malfunction. Removing the unit 1 Remove the protection collar. 1 Detach the front panel (page 4). 2 ...prevent this, detach the front panel (page 4) and clean the connectors with the protection collar. Otherwise, the connectors may be sure to remove the protection collar. Main unit Back of the mounting. 9 Orient the release keys as shown. 3 Pull out the release keys to...
.... In such a case, consult your fingers or with your nearest Sony dealer. Maintenance Fuse replacement When replacing the fuse, be damaged. Fuse (10A) Cleaning the connectors The unit may be an internal malfunction. Removing the unit 1 Remove the protection collar. 1 Detach the front panel (page 4). 2 ...prevent this, detach the front panel (page 4) and clean the connectors with the protection collar. Otherwise, the connectors may be sure to remove the protection collar. Main unit Back of the mounting. 9 Orient the release keys as shown. 3 Pull out the release keys to...


