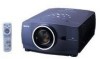

Owners Manual
Page 2
... your projector, and can also be disposed of separately from the ceiling, clean the air intake vents, air filters, and top of this booklet. THIS SYMBOL INDICATES THAT DANGEROUS VOLTAGE CONSTITUTING A RISK OF ELECTRIC SHOCK IS PRESENT WITHIN THIS UNIT. Your SANYO product is not to... for used for a long time, the dust will block the operation of Electronic Computer/Data Processing Equipment, ANSI/NFPA 75. TO THE OWNER Before operating this projector, read this manual again, check operations and cable connections and try the solutions in the "Troubleshooting" section in !...
... your projector, and can also be disposed of separately from the ceiling, clean the air intake vents, air filters, and top of this booklet. THIS SYMBOL INDICATES THAT DANGEROUS VOLTAGE CONSTITUTING A RISK OF ELECTRIC SHOCK IS PRESENT WITHIN THIS UNIT. Your SANYO product is not to... for used for a long time, the dust will block the operation of Electronic Computer/Data Processing Equipment, ANSI/NFPA 75. TO THE OWNER Before operating this projector, read this manual again, check operations and cable connections and try the solutions in the "Troubleshooting" section in !...

Owners Manual
Page 3
...will often require extensive work by the manufacturer as they may touch dangerous voltage points or short out parts that the projector is provided. This projector should not be placed in a built-in Nederland Bij dit product zijn batterijen geleverd. Do not allow anything to ... and retain them for cleaning. Voor de klanten in installation such as the original part. Do not locate this projector from overheating. If the projector has been exposed to qualified service personnel under the following the operating instructions. Adjust only those controls that have the...
...will often require extensive work by the manufacturer as they may touch dangerous voltage points or short out parts that the projector is provided. This projector should not be placed in a built-in Nederland Bij dit product zijn batterijen geleverd. Do not allow anything to ... and retain them for cleaning. Voor de klanten in installation such as the original part. Do not locate this projector from overheating. If the projector has been exposed to qualified service personnel under the following the operating instructions. Adjust only those controls that have the...
Owners Manual
Page 4
... this safety feature. Model Number Trade Name Responsible party Address Telephone No. : PLV-75/PLV-80/PLV-75L/PLV-80L : Sanyo : SANYO FISHER COMPANY : 21605 Plummer Street, Chatsworth, California 91311 : (818)998-7322 AC POWER CORD REQUIREMENT The AC Power Cord supplied with this projector meets the requirement for use the plug with the cover omitted. AC Power...
... this safety feature. Model Number Trade Name Responsible party Address Telephone No. : PLV-75/PLV-80/PLV-75L/PLV-80L : Sanyo : SANYO FISHER COMPANY : 21605 Plummer Street, Chatsworth, California 91311 : (818)998-7322 AC POWER CORD REQUIREMENT The AC Power Cord supplied with this projector meets the requirement for use the plug with the cover omitted. AC Power...

Owners Manual
Page 5
...38 FLOW OF ON-SCREEN MENU OPERATION 18 MENU BAR 19 APPENDIX 44 BASIC OPERATION TURNING ON / OFF PROJECTOR TURNING ON THE PROJECTOR TURNING OFF THE PROJECTOR ADJUSTING SCREEN ZOOM ADJUSTMENT FOCUS ADJUSTMENT LENS SHIFT ADJUSTMENT KEYSTONE ADJUSTMENT PICTURE FREEZE FUNCTION NO SHOW FUNCTION SOUND ... LAMP REPLACE COUNTER 47 22 TROUBLESHOOTING 48 22 MENU TREE 50 22 COMPATIBLE COMPUTER SPECIFICATIONS 52 22 22 23 INDICATORS AND PROJECTOR CONDITION TECHNICAL SPECIFICATIONS 53 55 23 PJ LINK NOTICE 56 23 CONFIGURATIONS OF TERMINALS 57 OPTIONAL PARTS 58 LENS REPLACEMENT 58...
...38 FLOW OF ON-SCREEN MENU OPERATION 18 MENU BAR 19 APPENDIX 44 BASIC OPERATION TURNING ON / OFF PROJECTOR TURNING ON THE PROJECTOR TURNING OFF THE PROJECTOR ADJUSTING SCREEN ZOOM ADJUSTMENT FOCUS ADJUSTMENT LENS SHIFT ADJUSTMENT KEYSTONE ADJUSTMENT PICTURE FREEZE FUNCTION NO SHOW FUNCTION SOUND ... LAMP REPLACE COUNTER 47 22 TROUBLESHOOTING 48 22 MENU TREE 50 22 COMPATIBLE COMPUTER SPECIFICATIONS 52 22 22 23 INDICATORS AND PROJECTOR CONDITION TECHNICAL SPECIFICATIONS 53 55 23 PJ LINK NOTICE 56 23 CONFIGURATIONS OF TERMINALS 57 OPTIONAL PARTS 58 LENS REPLACEMENT 58...

Owners Manual
Page 6
... PJ-Net Organizer (Optional) PJ-Net Organizer enables the projector to display the image of 16.77 million colors, and matrix liquid crystal display (LCD) technology. ◆ Compact Design ◆ Keystone Correction This projector is extremely compact in addition to be made easily, because... they are changed in size and weight. This projector utilizes built-in multimedia features, a palette...
... PJ-Net Organizer (Optional) PJ-Net Organizer enables the projector to display the image of 16.77 million colors, and matrix liquid crystal display (LCD) technology. ◆ Compact Design ◆ Keystone Correction This projector is extremely compact in addition to be made easily, because... they are changed in size and weight. This projector utilizes built-in multimedia features, a palette...

Owners Manual
Page 7
... taken. ● Do not put a flammable object near this area, especially screws and metallic parts. PREPARATION NAME OF EACH PART OF PROJECTOR FRONT OF CABINET TOP CONTROLS AND INDICATORS PROJECTION LENS AIR INTAKE VENT LENS COVER SPEAKERS INFRARED REMOTE RECEIVER BACK OF CABINET EXHAUST VENT POWER CORD... risk of fire and malfunction. ● Do not cover vent slots. ● Keep side clear of Cooling Fans. AIR INTAKE VENTS This projector is used. Air blown from overheating. LAMP COVER CARRYING HANDLE BOTTOM OF CABINET When attached the PJ-Net organizer (optional part) to the...
... taken. ● Do not put a flammable object near this area, especially screws and metallic parts. PREPARATION NAME OF EACH PART OF PROJECTOR FRONT OF CABINET TOP CONTROLS AND INDICATORS PROJECTION LENS AIR INTAKE VENT LENS COVER SPEAKERS INFRARED REMOTE RECEIVER BACK OF CABINET EXHAUST VENT POWER CORD... risk of fire and malfunction. ● Do not cover vent slots. ● Keep side clear of Cooling Fans. AIR INTAKE VENTS This projector is used. Air blown from overheating. LAMP COVER CARRYING HANDLE BOTTOM OF CABINET When attached the PJ-Net organizer (optional part) to the...

Owners Manual
Page 8
... If supplied AC Power Cord does not match your AC outlet, contact your projector. Projector side AC Outlet side For the U.S.A. NOTE ON POWER CORD AC Power Cord ...200 - 240 V AC) To the AC Outlet. (200 - 240 V AC) 8 AC outlet must be near this projector is connected to outlet with chart below and proper AC Power Cord must be easily accessible. It is not used . When this... For safety, unplug AC Power Cord when an appliance is designed to a projector. This projector automatically selects correct input voltage. Confirm an AC plug type with AC Power Cord, an appliance is in use...
... If supplied AC Power Cord does not match your AC outlet, contact your projector. Projector side AC Outlet side For the U.S.A. NOTE ON POWER CORD AC Power Cord ...200 - 240 V AC) To the AC Outlet. (200 - 240 V AC) 8 AC outlet must be near this projector is connected to outlet with chart below and proper AC Power Cord must be easily accessible. It is not used . When this... For safety, unplug AC Power Cord when an appliance is designed to a projector. This projector automatically selects correct input voltage. Confirm an AC plug type with AC Power Cord, an appliance is in use...

Owners Manual
Page 9
...) 25.6' (7.8m) 32.0' (9.8m) 38.4' (11.7m) 52.2' (15.9m) LENS SHIFT ADJUSTMENT Projection lens can be moved up a projector, install Projection Lens on picture quality. Refer to P 22 for Model PLV-75/PLV-80. When install the lens, remove the cover cap in order to provide best image. 12.7'(3.9m) 5.0'(1.5m) 100" 40...
...) 25.6' (7.8m) 32.0' (9.8m) 38.4' (11.7m) 52.2' (15.9m) LENS SHIFT ADJUSTMENT Projection lens can be moved up a projector, install Projection Lens on picture quality. Refer to P 22 for Model PLV-75/PLV-80. When install the lens, remove the cover cap in order to provide best image. 12.7'(3.9m) 5.0'(1.5m) 100" 40...

Owners Manual
Page 10
... and keystone distortion of image can be adjusted using Menu Operation. (Refer to project an image. NO SIDEWAYS Do not put the projector on both sides of a projector. 2 Release FEET LOCK LATCHES to lock ADJUSTABLE FEET and rotate ADJUSTABLE FEET to project an image. 10 Projection angle can be adjusted... by rotating ADJUSTABLE FEET. PREPARATION ADJUSTABLE FEET Picture tilt and projection angle can be adjusted to 10.5 degrees. 1 Lift front of a projector and pull FEET LOCK LATCHES on either side to fine tune position and tilt. 3 To shorten ADJUSTABLE FEET, lift front of...
... and keystone distortion of image can be adjusted using Menu Operation. (Refer to project an image. NO SIDEWAYS Do not put the projector on both sides of a projector. 2 Release FEET LOCK LATCHES to lock ADJUSTABLE FEET and rotate ADJUSTABLE FEET to project an image. 10 Projection angle can be adjusted... by rotating ADJUSTABLE FEET. PREPARATION ADJUSTABLE FEET Picture tilt and projection angle can be adjusted to 10.5 degrees. 1 Lift front of a projector and pull FEET LOCK LATCHES on either side to fine tune position and tilt. 3 To shorten ADJUSTABLE FEET, lift front of...

Owners Manual
Page 11
... lens cover and retract feet to prevent damage to a projector. This may result. ● When carrying a projector, use a suitable carrying case. ● Do not transport a projector by using a courier or transport service in use for best way. 11 When moving a Projector. When this projector is not in an unsuitable transport case. PREPARATION CAUTION IN CARRYING...
... lens cover and retract feet to prevent damage to a projector. This may result. ● When carrying a projector, use a suitable carrying case. ● Do not transport a projector by using a courier or transport service in use for best way. 11 When moving a Projector. When this projector is not in an unsuitable transport case. PREPARATION CAUTION IN CARRYING...

Owners Manual
Page 12
...Connect computer output (Digital DVI-D type) to this jack. (Refer to P14.) 12 This can also be connected. (Refer to P13.) RESET BUTTON This projector uses a micro processor to control this unit, and occasionally, this connector with a control cable. (Refer to P13.) 5 BNC INPUT JACKS Connect component ... processor may malfunction and need to be done by pressing RESET button with Remote Control Cable (not supplied). CONTROL PORT CONNECTOR When controlling the projector from video equipment to VIDEO/Y, Cb/Pb and Cr/Pr jacks or connect computer output {5 BNC Type (Green, Blue, Red, Horiz....
...Connect computer output (Digital DVI-D type) to this jack. (Refer to P14.) 12 This can also be connected. (Refer to P13.) RESET BUTTON This projector uses a micro processor to control this unit, and occasionally, this connector with a control cable. (Refer to P13.) 5 BNC INPUT JACKS Connect component ... processor may malfunction and need to be done by pressing RESET button with Remote Control Cable (not supplied). CONTROL PORT CONNECTOR When controlling the projector from video equipment to VIDEO/Y, Cb/Pb and Cr/Pr jacks or connect computer output {5 BNC Type (Green, Blue, Red, Horiz....

Owners Manual
Page 13
...stereo) ) ✽ • BNC Cable ✽ IBM-compatible computer or Macintosh computer (VGA / SVGA / XGA / SXGA/SXGA+/WXGA/UXGA) Desktop type Laptop type Monitor Output Monitor Output Monitor Output Audio Output Serial port BNC Cable ✽ VGA Cable ✽ DVI-...stereo) Control Cable for Serial Port Terminal AUDIO IN 1 or 2 INPUT TERMINAL (ANALOG) INPUT TERMINAL (DIGITAL) CONTROL PORT 5 BNC (G/B/R/HV/V) Terminals of a Projector ANALOG INPUT 1 DIGITAL(DVI-D) R/C JACK AUDIO 1 RESET CONTROL PORT AUDIO 2 G B R H/V V VIDEO/Y Cb/Pb Cr/Pr INPUT 2 VIDEO/Y Cb...
...stereo) ) ✽ • BNC Cable ✽ IBM-compatible computer or Macintosh computer (VGA / SVGA / XGA / SXGA/SXGA+/WXGA/UXGA) Desktop type Laptop type Monitor Output Monitor Output Monitor Output Audio Output Serial port BNC Cable ✽ VGA Cable ✽ DVI-...stereo) Control Cable for Serial Port Terminal AUDIO IN 1 or 2 INPUT TERMINAL (ANALOG) INPUT TERMINAL (DIGITAL) CONTROL PORT 5 BNC (G/B/R/HV/V) Terminals of a Projector ANALOG INPUT 1 DIGITAL(DVI-D) R/C JACK AUDIO 1 RESET CONTROL PORT AUDIO 2 G B R H/V V VIDEO/Y Cb/Pb Cr/Pr INPUT 2 VIDEO/Y Cb...

Owners Manual
Page 14
...Pr VIDEO Y - Cr/Pr INPUT TERMINAL AUDIO IN S-VIDEO (DIGITAL) Note: When connecting the cable, the power cords of both the projector and the external equipment should be disconnected from AC outlet. 14 ANALOG INPUT 1 DIGITAL(DVI-D) R/C JACK AUDIO 1 RESET CONTROL PORT AUDIO .../Pr INPUT 2 VIDEO/Y Cb/Pb Cr/Pr R-AUDIO-L S-VIDEO (MONO) INPUT 3 Terminals of a Projector Cb/Pb - CONNECTING PROJECTOR CONNECTING TO VIDEO EQUIPMENT Cables used for connection (✽ = Cable is not supplied with this projector.) • Video Cable (RCA x 1 or RCA x 3) ✽ • BNC Cable ✽...
...Pr VIDEO Y - Cr/Pr INPUT TERMINAL AUDIO IN S-VIDEO (DIGITAL) Note: When connecting the cable, the power cords of both the projector and the external equipment should be disconnected from AC outlet. 14 ANALOG INPUT 1 DIGITAL(DVI-D) R/C JACK AUDIO 1 RESET CONTROL PORT AUDIO .../Pr INPUT 2 VIDEO/Y Cb/Pb Cr/Pr R-AUDIO-L S-VIDEO (MONO) INPUT 3 Terminals of a Projector Cb/Pb - CONNECTING PROJECTOR CONNECTING TO VIDEO EQUIPMENT Cables used for connection (✽ = Cable is not supplied with this projector.) • Video Cable (RCA x 1 or RCA x 3) ✽ • BNC Cable ✽...

Owners Manual
Page 15
... DIGITAL ZOOM +/- BUTTON Used to adjust image level. (P35-37) IMAGE BUTTON Used to select image level. (P29, 33) NO SHOW BUTTON Used to turn projector on the remote control for about 10 seconds. mode. (P30) POINT LEFT/RIGHT buttons are also used to expand / compress image in DIGITAL ZOOM mode...
... DIGITAL ZOOM +/- BUTTON Used to adjust image level. (P35-37) IMAGE BUTTON Used to select image level. (P29, 33) NO SHOW BUTTON Used to turn projector on the remote control for about 10 seconds. mode. (P30) POINT LEFT/RIGHT buttons are also used to expand / compress image in DIGITAL ZOOM mode...

Owners Manual
Page 16
...; Maximum operating range for Remote Control Unit is incorrectly replaced. ● Dispose of used battery. ● Avoid contact with pins in front and rear of a projector. 16.4' (5 m) 16.4' (5 m) 60° 16 Two AA size batteries For correct polarity (+ and -), be sure battery terminals are in contact with water or liquid. ●...
...; Maximum operating range for Remote Control Unit is incorrectly replaced. ● Dispose of used battery. ● Avoid contact with pins in front and rear of a projector. 16.4' (5 m) 16.4' (5 m) 60° 16 Two AA size batteries For correct polarity (+ and -), be sure battery terminals are in contact with water or liquid. ●...

Owners Manual
Page 17
...when life of projection lamp draws to select input source. (P24, P31) AUTO PC ADJ. buttons. (P23) POWER ON-OFF BUTTON Used to turn a projector on . And it flashes green in DIGITAL ZOOM mode. (P30) 17 mode. (P30) POINT LEFT/RIGHT buttons are also used as VOLUME +/- BUTTON ...P22) LENS SHIFT BUTTON Used to select LENS SHIFT function. (P22) POINT (VOLUME + / - ) BUTTONS Used to be turned on its top. And bright when a projector is ready to select an item or adjust value in DIGITAL ZOOM +/- They are also used to execute the selected item. BEFORE OPERATION TOP CONTROLS...
...when life of projection lamp draws to select input source. (P24, P31) AUTO PC ADJ. buttons. (P23) POWER ON-OFF BUTTON Used to turn a projector on . And it flashes green in DIGITAL ZOOM mode. (P30) 17 mode. (P30) POINT LEFT/RIGHT buttons are also used as VOLUME +/- BUTTON ...P22) LENS SHIFT BUTTON Used to select LENS SHIFT function. (P22) POINT (VOLUME + / - ) BUTTONS Used to be turned on its top. And bright when a projector is ready to select an item or adjust value in DIGITAL ZOOM +/- They are also used to execute the selected item. BEFORE OPERATION TOP CONTROLS...

Owners Manual
Page 18
... or adjust item through ON-SCREEN MENU. BEFORE OPERATION OPERATING ON-SCREEN MENU HOW TO OPERATE ON-SCREEN MENU You can control and adjust this projector through ON-SCREEN MENU 3 Press POINT UP/DOWN buttons and move POINTER (red frame or red arrow) to ITEM that you want to display ON...
... or adjust item through ON-SCREEN MENU. BEFORE OPERATION OPERATING ON-SCREEN MENU HOW TO OPERATE ON-SCREEN MENU You can control and adjust this projector through ON-SCREEN MENU 3 Press POINT UP/DOWN buttons and move POINTER (red frame or red arrow) to ITEM that you want to display ON...

Owners Manual
Page 19
... FOR PC SOURCE Press MENU BUTTON while connecting to P34) Input Auto Same function as Menu for PC source. GUIDE WINDOW Shows selected item of projector or reset Lamp Replace Counter. (Refer to P38-43) Input SVGA1 INPUT MENU Used to select input source (Input 1, Input 2 or Input 3). (Refer to P24...
... FOR PC SOURCE Press MENU BUTTON while connecting to P34) Input Auto Same function as Menu for PC source. GUIDE WINDOW Shows selected item of projector or reset Lamp Replace Counter. (Refer to P38-43) Input SVGA1 INPUT MENU Used to select input source (Input 1, Input 2 or Input 3). (Refer to P24...

Owners Manual
Page 20
...The preparation display appears on the screen and the count down in Setting on the remote control to operate the projector. Lamp control status For model PLV-80/PLV-80L only. (See page 40 for locking operation of a four-digit number. The number will turn red and...Enter the correct number again. The LAMP Indicator dims, and the cooling fans start to "PIN code". BASIC OPERATION TURNING ON / OFF PROJECTOR TURNING ON THE PROJECTOR 1 Complete peripheral connections (with a computer, VCR, etc.) before turning on the screen. The LAMP Indicator lights RED, and READY ...
...The preparation display appears on the screen and the count down in Setting on the remote control to operate the projector. Lamp control status For model PLV-80/PLV-80L only. (See page 40 for locking operation of a four-digit number. The number will turn red and...Enter the correct number again. The LAMP Indicator dims, and the cooling fans start to "PIN code". BASIC OPERATION TURNING ON / OFF PROJECTOR TURNING ON THE PROJECTOR 1 Complete peripheral connections (with a computer, VCR, etc.) before turning on the screen. The LAMP Indicator lights RED, and READY ...

Owners Manual
Page 21
... DISCONNECT AC POWER CORD WHILE COOLING FANS ARE RUNNING OR BEFORE READY INDICATOR LIGHTS GREEN AGAIN. NOTE; • The projector cannot be turned on. 3 When the projector has cooled down completely, disconnect AC Power Cord. After cooling down , READY Indicator lights GREEN again and you can ...about an hour in shortening the lamp life. You can turn off ?" Continuous use may result in every 24 hours. • This projector monitors internal temperature and automatically controls the running speed of the cooling fans. • If the WARNING TEMP indicator flashes red, see "...
... DISCONNECT AC POWER CORD WHILE COOLING FANS ARE RUNNING OR BEFORE READY INDICATOR LIGHTS GREEN AGAIN. NOTE; • The projector cannot be turned on. 3 When the projector has cooled down completely, disconnect AC Power Cord. After cooling down , READY Indicator lights GREEN again and you can ...about an hour in shortening the lamp life. You can turn off ?" Continuous use may result in every 24 hours. • This projector monitors internal temperature and automatically controls the running speed of the cooling fans. • If the WARNING TEMP indicator flashes red, see "...


