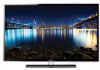
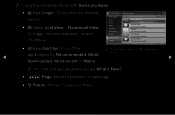
Samsung Tv Model UN40D5550RF
View Results Below
Free Samsung UN40D5550RF manuals!
Problems with Samsung UN40D5550RF?
Ask a Question
Free Samsung UN40D5550RF manuals!
Problems with Samsung UN40D5550RF?
Ask a Question
Related Manual Pages


Similar Questions

Manual Of Slim Fit Tv Model Cs21z45zqq
how are TV channels searched for in Slim fit TV model CS21Z45ZQQ
how are TV channels searched for in Slim fit TV model CS21Z45ZQQ
(Posted by harv 11 years ago)

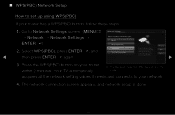
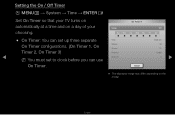
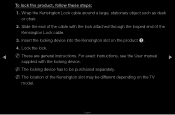
Samsung Lcd Tv Model No Ln40d550 : How To Switch On Tv Using The ' On Timer '.
Hi there, I have 40" Samsung LCD tv Model No LN40D550 : The question is, How to switch on TV using t...
Hi there, I have 40" Samsung LCD tv Model No LN40D550 : The question is, How to switch on TV using t...
(Posted by shashu75 11 years ago)


User Guide For Tv Model Lns3241d
How can I get a User Guide (not Service Manual) for this TV Model ?
How can I get a User Guide (not Service Manual) for this TV Model ?
(Posted by CHEIMIK 12 years ago)
Related Terms
The following terms were also used when searching for Samsung Tv Model UN40D5550RF:- un40d5550rf power supply
- smart tv un40d5550rf
- tv model un40d5550rf
- tv un40d5550rf
- un40d5550rf 3d
- un40d5550rf amazon
- un40d5550rf apps
- un40d5550rf best buy
- un40d5550rf firmware
- un40d5550rf led lcd hdtv
- un40d5550rf list of parts
- un40d5550rf main board
- un40d5550rf manual
- un40d5550rf netflix
- un40d5550rf parts
- un40d5550rf power cycling
- samsung un40d5550rf wifi
- un40d5550rf price
- un40d5550rf prices
- un40d5550rf remote
- un40d5550rf reset
- un40d5550rf review
- un40d5550rf reviews
- un40d5550rf samsung 40 led tv
- un40d5550rf samsung mount holes
- un40d5550rf service manual
- un40d5550rf specs
- un40d5550rf turn on and off
- un40d5550rf tv
- un40d5550rf wall mounts
- un40d5550rf wifi
- un40d5550rf wireless adapter
- samsung tv un40d5550rf
- buy un40d5550rf
- led un40d5550rf
- main board samsung un40d5550rf
- main board un40d5550rf
- model un40d5550rf
- model un40d5550rf tv
- pantalla samsung un40d5550rf
- pantalla un40d5550rf
- samsung 40 un40d5550rf
- samsung led un40d5550rf
- samsung model un40d5550rf
- samsung model un40d5550rf tv
- samsung smart tv led un40d5550rf
- samsung smart tv un40d5550rf
- samsung tv model un40d5550rf
- 40 un40d5550rf
- samsung un40d5550rf amazon
- samsung un40d5550rf firmware
- samsung un40d5550rf led lcd hdtv
- samsung un40d5550rf main board
- samsung un40d5550rf manual
- samsung un40d5550rf power cycling
- samsung un40d5550rf price
- samsung un40d5550rf prices
- samsung un40d5550rf remote
- samsung un40d5550rf reset
- samsung un40d5550rf review
- samsung un40d5550rf reviews
- samsung un40d5550rf service manual
- samsung un40d5550rf specs
- samsung un40d5550rf tv