User Manual (user Manual) (ver.f10) (English)
Page 1
Samsung SCH-R335C MOBILE PHONE User Manual Please read this manual before operating your phone, and keep it for future reference.
Samsung SCH-R335C MOBILE PHONE User Manual Please read this manual before operating your phone, and keep it for future reference.
User Manual (user Manual) (ver.f10) (English)
Page 10
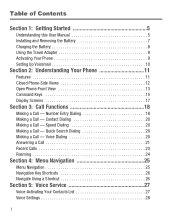
... 7 Charging the Battery 8 Using the Travel Adapter 9 Activating Your Phone 9 Setting Up Voicemail 10 Section 2: Understanding Your Phone 11 Features 11 Closed Phone-Side Views 12 Open Phone-Front View 13 Command Keys 15 Display Screens 17 Section 3: Call Functions 18 Making a Call - Number Entry Dialing 18 Making a Call - Voice Dialing 20 Answering a Call 21 Recent Calls 23 Roaming 24 Section 4: Menu Navigation 25 Menu Navigation 25 Navigation Key Shortcuts 26 Navigate Using a Shortcut 26 Section 5: Voice Service 27 Voice-Activating Your Contacts List 27 Voice Settings...
... 7 Charging the Battery 8 Using the Travel Adapter 9 Activating Your Phone 9 Setting Up Voicemail 10 Section 2: Understanding Your Phone 11 Features 11 Closed Phone-Side Views 12 Open Phone-Front View 13 Command Keys 15 Display Screens 17 Section 3: Call Functions 18 Making a Call - Number Entry Dialing 18 Making a Call - Voice Dialing 20 Answering a Call 21 Recent Calls 23 Roaming 24 Section 4: Menu Navigation 25 Menu Navigation 25 Navigation Key Shortcuts 26 Navigate Using a Shortcut 26 Section 5: Voice Service 27 Voice-Activating Your Contacts List 27 Voice Settings...
User Manual (user Manual) (ver.f10) (English)
Page 18
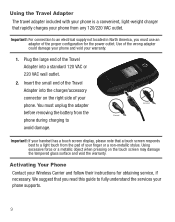
... your phone and void your Wireless Carrier and follow their instructions for the power outlet. We suggest that a touch screen responds best to fully understand the services your finger or a non-metallic stylus. Use of the Travel Adapter into a standard 120 VAC or 220 VAC wall outlet. 2. Important!: If your handset has a touch screen display, please note that you read this guide...
... your phone and void your Wireless Carrier and follow their instructions for the power outlet. We suggest that a touch screen responds best to fully understand the services your finger or a non-metallic stylus. Use of the Travel Adapter into a standard 120 VAC or 220 VAC wall outlet. 2. Important!: If your handset has a touch screen display, please note that you read this guide...
User Manual (user Manual) (ver.f10) (English)
Page 19
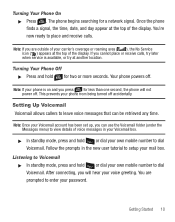
... own mobile number to setup your own mobile number to Voicemail ᮣ In standby mode, press and hold for a network signal. Listening to dial Voicemail. Turning Your Phone Off ᮣ Press and hold or dial your mail box. The phone begins searching for two or more seconds. Setting Up Voicemail Voicemail allows callers to leave voice messages that can use the Voicemail folder (under the Messages menu) to place and receive calls. Note: Once your carrier's coverage or roaming...
... own mobile number to setup your own mobile number to Voicemail ᮣ In standby mode, press and hold for a network signal. Listening to dial Voicemail. Turning Your Phone Off ᮣ Press and hold or dial your mail box. The phone begins searching for two or more seconds. Setting Up Voicemail Voicemail allows callers to leave voice messages that can use the Voicemail folder (under the Messages menu) to place and receive calls. Note: Once your carrier's coverage or roaming...

User Manual (user Manual) (ver.f10) (English)
Page 21
Volume Key - Understanding Your Phone 12 In standby 6 mode, lets you adjust the 1 incoming call ringer volume. 5 When receiving a call, lets 2 you to connect an optional headset (for hands free operation and/or music playback) or an optional TTY device. 7. Power / Accessory Connector - Used to hear music. Camera Lens - The lens of your built-in camera. 7 2. Allows you temporarily mute the 3 ringer. 4 3. When the phone is closed, the external display provides...
Volume Key - Understanding Your Phone 12 In standby 6 mode, lets you adjust the 1 incoming call ringer volume. 5 When receiving a call, lets 2 you to connect an optional headset (for hands free operation and/or music playback) or an optional TTY device. 7. Power / Accessory Connector - Used to hear music. Camera Lens - The lens of your built-in camera. 7 2. Allows you temporarily mute the 3 ringer. 4 3. When the phone is closed, the external display provides...

User Manual (user Manual) (ver.f10) (English)
Page 22
.... 4. Send Key - In text entry mode, deletes characters from the Idle screen and to the previous menu or screen. Use these keys to toggle between Vibration mode and Normal mode. 6. Lets you to navigate through menus and 5 applications. Press and hold to enter numbers, letters, and symbols. 13 Main Display - In menu mode, returns you hear ringing and alert tones, alarm tones, and the 1 other parties to access the 4 11 Main menu from the display. Numeric Keypad - Open Phone...
.... 4. Send Key - In text entry mode, deletes characters from the Idle screen and to the previous menu or screen. Use these keys to toggle between Vibration mode and Normal mode. 6. Lets you to navigate through menus and 5 applications. Press and hold to enter numbers, letters, and symbols. 13 Main Display - In menu mode, returns you hear ringing and alert tones, alarm tones, and the 1 other parties to access the 4 11 Main menu from the display. Numeric Keypad - Open Phone...

User Manual (user Manual) (ver.f10) (English)
Page 23
... Key - Navigation Key - Star Key- END Key - Used to access the Browser from the Idle screen and to them. 10. When you scroll through a menu, accepts the highlighted choice in a menu. 14. Press the Right soft key to voicemail. 12. Toggles capitalization for text input between words and characters. Press and hold to activate Voice Commands. 9. Microphone - In Standby mode, press and hold this key to turn the vibrate mode...
... Key - Navigation Key - Star Key- END Key - Used to access the Browser from the Idle screen and to them. 10. When you scroll through a menu, accepts the highlighted choice in a menu. 14. Press the Right soft key to voicemail. 12. Toggles capitalization for text input between words and characters. Press and hold to activate Voice Commands. 9. Microphone - In Standby mode, press and hold this key to turn the vibrate mode...

User Manual (user Manual) (ver.f10) (English)
Page 24
... from your phone. • Press twice in the display above each soft key. Press again to switch back to launch the Browser. Send Key The Send key ( ) is used to answer calls, dial calls, and to recall the last number(s) dialed, received, or missed. • Press once to answer calls. • Enter a number and briefly press to make a call . BACK Key The BACK key ( ) is used to erase or clear numbers, text, or symbols from any menu. • If you enter an incorrect...
... from your phone. • Press twice in the display above each soft key. Press again to switch back to launch the Browser. Send Key The Send key ( ) is used to answer calls, dial calls, and to recall the last number(s) dialed, received, or missed. • Press once to answer calls. • Enter a number and briefly press to make a call . BACK Key The BACK key ( ) is used to erase or clear numbers, text, or symbols from any menu. • If you enter an incorrect...
User Manual (user Manual) (ver.f10) (English)
Page 29
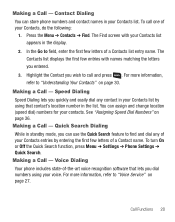
... Contacts list by entering the first few letters of -the-art voice recognition software that contact's location number in standby mode, you dial numbers using your Contacts entries by using that lets you can assign and change location (speed dial) numbers for your Contacts, do the following: 1. Making a Call - Speed Dialing Speed Dialing lets you quickly and easily dial any of your voice. Quick Search Dialing While in the list. To turn On or Off the Quick Search function, press Menu ➔ Settings ➔ Phone Settings ➔ Quick Search. Voice Dialing...
... Contacts list by entering the first few letters of -the-art voice recognition software that contact's location number in standby mode, you dial numbers using your Contacts entries by using that lets you can assign and change location (speed dial) numbers for your Contacts, do the following: 1. Making a Call - Speed Dialing Speed Dialing lets you quickly and easily dial any of your voice. Quick Search Dialing While in the list. To turn On or Off the Quick Search function, press Menu ➔ Settings ➔ Phone Settings ➔ Quick Search. Voice Dialing...

User Manual (user Manual) (ver.f10) (English)
Page 31
... menu items appear in the display: 2. The following options: Messages, Contacts, Recent Calls, Connect Bluetooth, Send DTMF, Voice Privacy, Location and Speaker On/Off. Exit the menu by pressing the Mute / Unmute soft key. While in a call. The caller is disconnected while you ignore an incoming call, the call is immediately forwarded to standby mode. 1. Tip: You can block/restore sound going to your voice mail. Muting the Ringer To temporarily mute the Incoming Call ringer when receiving a call...
... menu items appear in the display: 2. The following options: Messages, Contacts, Recent Calls, Connect Bluetooth, Send DTMF, Voice Privacy, Location and Speaker On/Off. Exit the menu by pressing the Mute / Unmute soft key. While in a call. The caller is disconnected while you ignore an incoming call, the call is immediately forwarded to standby mode. 1. Tip: You can block/restore sound going to your voice mail. Muting the Ringer To temporarily mute the Incoming Call ringer when receiving a call...
User Manual (user Manual) (ver.f10) (English)
Page 36
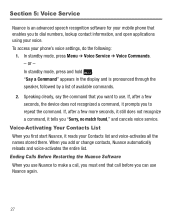
... device does not recognized a command, it prompts you to make a call, you must end that call before you want to dial numbers, lookup contact information, and open applications using your mobile phone that you can use . Section 5: Voice Service Nuance is pronounced through the speaker, followed by a list of available commands. 2. "Say a Command" appears in the display and is an advanced speech recognition software for your voice. Voice-Activating Your Contacts List When...
... device does not recognized a command, it prompts you to make a call, you must end that call before you want to dial numbers, lookup contact information, and open applications using your mobile phone that you can use . Section 5: Voice Service Nuance is pronounced through the speaker, followed by a list of available commands. 2. "Say a Command" appears in the display and is an advanced speech recognition software for your voice. Voice-Activating Your Contacts List When...
User Manual (user Manual) (ver.f10) (English)
Page 39
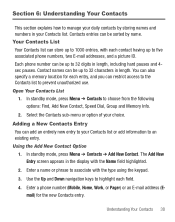
... the display with the type using the keypad. 3. The Add New Entry screen appears in length, including hard pauses and 4sec pauses. Use the Up and Down navigation keys to five associated phone numbers, two E-mail addresses, and a picture ID. Each phone number can be up to highlight each entry, and you can also specify a memory location for the new Contacts entry. Select the Contacts sub-menu or option of your Contacts list or add information...
... the display with the type using the keypad. 3. The Add New Entry screen appears in length, including hard pauses and 4sec pauses. Use the Up and Down navigation keys to five associated phone numbers, two E-mail addresses, and a picture ID. Each phone number can be up to highlight each entry, and you can also specify a memory location for the new Contacts entry. Select the Contacts sub-menu or option of your Contacts list or add information...

User Manual (user Manual) (ver.f10) (English)
Page 40
... in the display: Save, Erase, Lock/Unlock, Erase All and View Timer. 4. Select Save. In standby mode, press Menu ➔ Recent Calls. 2. Select from the Calls logs to store your Contacts. 1. The following Calls logs: Outgoing, Incoming, Missed, or All Calls. Press SAVE ( ) to a Group. The Create New and Update Existing options display. Select an image and press OK ( ). 9. Storing Number from a Calls Log You can enter a Fax number. 8. Press the Options soft key. Make your...
... in the display: Save, Erase, Lock/Unlock, Erase All and View Timer. 4. Select Save. In standby mode, press Menu ➔ Recent Calls. 2. Select from the Calls logs to store your Contacts. 1. The following Calls logs: Outgoing, Incoming, Missed, or All Calls. Press SAVE ( ) to a Group. The Create New and Update Existing options display. Select an image and press OK ( ). 9. Storing Number from a Calls Log You can enter a Fax number. 8. Press the Options soft key. Make your...

User Manual (user Manual) (ver.f10) (English)
Page 44
... clear all phone numbers in the display. 35 for example, 888-987). 2. Search by Number This option allows you to find a Contacts list entry by searching on page 33. 2. Press the Edit soft key. The Edit Contact screen appears in this contact entry. 4. To backspace and delete numbers, press highlighted field, press and hold . . Your changes are saved and a confirmation message appears in your Contacts list that contain the entered digits...
... clear all phone numbers in the display. 35 for example, 888-987). 2. Search by Number This option allows you to find a Contacts list entry by searching on page 33. 2. Press the Edit soft key. The Edit Contact screen appears in this contact entry. 4. To backspace and delete numbers, press highlighted field, press and hold . . Your changes are saved and a confirmation message appears in your Contacts list that contain the entered digits...

User Manual (user Manual) (ver.f10) (English)
Page 45
... standby mode, press Menu ➔ Contacts ➔ Speed Dial. 2. To discard the new setting, press the No soft key. To save the new Speed Dial number assignment. Highlight a number stored in the Contacts list. 2. If a speed dial number has been set previously, you can assign and change a contact's Speed Dial number. 1. Note: If a Contact has more than one stored number (such as Home and Office), you speed dial that Contact. 4. Press the Options soft key. 5. You can select which of these numbers your phone dials...
... standby mode, press Menu ➔ Contacts ➔ Speed Dial. 2. To discard the new setting, press the No soft key. To save the new Speed Dial number assignment. Highlight a number stored in the Contacts list. 2. If a speed dial number has been set previously, you can assign and change a contact's Speed Dial number. 1. Note: If a Contact has more than one stored number (such as Home and Office), you speed dial that Contact. 4. Press the Options soft key. 5. You can select which of these numbers your phone dials...

User Manual (user Manual) (ver.f10) (English)
Page 47
... connects with the other device and sends the selected Contact entries. Note: For information on turning off the Bluetooth connection, see "Turn Bluetooth On/Off" on page 58. 4. Understanding Your Contacts 38 The Choose Device screen appears in your phone memory (up to 1000), the Used number that you currently have marked all the entries you to view the Total number of the receiving device, then press . Memory Info The Memory Info menu...
... connects with the other device and sends the selected Contact entries. Note: For information on turning off the Bluetooth connection, see "Turn Bluetooth On/Off" on page 58. 4. Understanding Your Contacts 38 The Choose Device screen appears in your phone memory (up to 1000), the Used number that you currently have marked all the entries you to view the Total number of the receiving device, then press . Memory Info The Memory Info menu...

User Manual (user Manual) (ver.f10) (English)
Page 48
...Contacts, Groups and Recent Calls lists. 3. Creating and Sending New Messages This section guides you 're finished composing your message using the keypad. 5. In standby mode, press the Menu ➔ Messages ➔ Create Message ➔ Text Message. Enter the text for creating and sending text and pictures. Creating and Sending a Picture Message 1. This section also describes the features and functionality associated with messaging. Once you through procedures for your message, press SEND ( ). Address your lists and entering number(s) or E-mail address(es) of messages...
...Contacts, Groups and Recent Calls lists. 3. Creating and Sending New Messages This section guides you 're finished composing your message using the keypad. 5. In standby mode, press the Menu ➔ Messages ➔ Create Message ➔ Text Message. Enter the text for creating and sending text and pictures. Creating and Sending a Picture Message 1. This section also describes the features and functionality associated with messaging. Once you through procedures for your message, press SEND ( ). Address your lists and entering number(s) or E-mail address(es) of messages...

User Manual (user Manual) (ver.f10) (English)
Page 49
... Sounds soft key. To set message send options, press the Options soft key. The Sound field becomes highlighted. 13. To add a sound file to your lists and entering number(s) or E-mail address(es) of message recipient(s) and press . 4. Once you wish to create your picture message, do one of your picture message, the Subject field becomes highlighted. 5. If desired, enter the Subject text using the keypad. 8. The Text field becomes highlighted. 7. The Create Pic Msg screen...
... Sounds soft key. To set message send options, press the Options soft key. The Sound field becomes highlighted. 13. To add a sound file to your lists and entering number(s) or E-mail address(es) of message recipient(s) and press . 4. Once you wish to create your picture message, do one of your picture message, the Subject field becomes highlighted. 5. If desired, enter the Subject text using the keypad. 8. The Text field becomes highlighted. 7. The Create Pic Msg screen...

User Manual (user Manual) (ver.f10) (English)
Page 50
... screen then displays. 4. Press the Down navigation key until the Text field is highlighted. Enter text. 7. Press Send ( ) to complete message text and message send options. 9. Enter the phone number or E-mail address of the recipient of the Picture message, then press . 5. If you wish to send appears in the display. 2. Send Picture Messages in Camera Mode Picture messages can even accompany a Picture message with compatible phones or devices. Enter a subject for the Picture message using the keypad. 6. Highlight an option, then press to highlight the Sound...
... screen then displays. 4. Press the Down navigation key until the Text field is highlighted. Enter text. 7. Press Send ( ) to complete message text and message send options. 9. Enter the phone number or E-mail address of the recipient of the Picture message, then press . 5. If you wish to send appears in the display. 2. Send Picture Messages in Camera Mode Picture messages can even accompany a Picture message with compatible phones or devices. Enter a subject for the Picture message using the keypad. 6. Highlight an option, then press to highlight the Sound...
User Manual (user Manual) (ver.f10) (English)
Page 105
... it uses less power; Downloadable Ring Tones may require additional subscription and/or usage charges. See your phone does get wet, immediately turn the power off and remove the battery. Battery Precautions • Avoid dropping the cell phone. Battery Standby and Talk Time Standby and talk times will vary depending on the cellular network and the parameters set by the network operator. • Follow battery usage, storage and charging guidelines found in the user's guide...
... it uses less power; Downloadable Ring Tones may require additional subscription and/or usage charges. See your phone does get wet, immediately turn the power off and remove the battery. Battery Precautions • Avoid dropping the cell phone. Battery Standby and Talk Time Standby and talk times will vary depending on the cellular network and the parameters set by the network operator. • Follow battery usage, storage and charging guidelines found in the user's guide...


