
User Guide
Page 18
... DRPD mode 56 Receiving in secure receiving mode 56 Activating secure receiving mode 56 Receiving faxes in memory 56 Forwarding faxes 57 Fax setup 57 Changing the fax setup options 58 Changing the default document settings 58 Printing sent fax report automatically 58 Setting up Address Book USING USB MEMORY DEVICE 60...
... DRPD mode 56 Receiving in secure receiving mode 56 Activating secure receiving mode 56 Receiving faxes in memory 56 Forwarding faxes 57 Fax setup 57 Changing the fax setup options 58 Changing the default document settings 58 Printing sent fax report automatically 58 Setting up Address Book USING USB MEMORY DEVICE 60...

User Guide
Page 23
... 23 _Introduction Some menus may not appear in the display depending on options or models. CLX-3175FW only System Setup (Continued) Clear Setting All Settings Fax Setup Copy Setup Scan Setup System Setup Network Setup Address Book Sent Report Fax RCV Report System Setup (Continued) Report All Report Configuration Supplies Info Address Book Send Report Sent Report Fax...
... 23 _Introduction Some menus may not appear in the display depending on options or models. CLX-3175FW only System Setup (Continued) Clear Setting All Settings Fax Setup Copy Setup Scan Setup System Setup Network Setup Address Book Sent Report Fax RCV Report System Setup (Continued) Report All Report Configuration Supplies Info Address Book Send Report Sent Report Fax...

User Guide
Page 27
...You will be automatically assigned by the machine: ITEM REQUIREMENTS Network interface • Ethernet 10/100 Base-TX • 802.11 b/g Wireless LAN (CLX-3175FW only) Network operating system • Windows 2000/XP/2003/Vista • Various Linux OS • MAC OS 10.3 ~ 10.5 Network ... The following table shows the network environments supported by a DHCP (Dynamic Host Configuration Protocol Server) located on your machine. Double-click Setup.exe to configure the other TCP/IP parameters: subnet mask and gateway address. If your machine has a control panel, you are...
...You will be automatically assigned by the machine: ITEM REQUIREMENTS Network interface • Ethernet 10/100 Base-TX • 802.11 b/g Wireless LAN (CLX-3175FW only) Network operating system • Windows 2000/XP/2003/Vista • Various Linux OS • MAC OS 10.3 ~ 10.5 Network ... The following table shows the network environments supported by a DHCP (Dynamic Host Configuration Protocol Server) located on your machine. Double-click Setup.exe to configure the other TCP/IP parameters: subnet mask and gateway address. If your machine has a control panel, you are...

User Guide
Page 28
... Click Sharing. • Click the Firewall menu. • Turn firewall off. 3. From the Windows Start menu, select All Programs > Samsung Network Printer Utilities > SetIP > SetIP. 4. If necessary, restart the computer's firewall. Installing the driver software You must install the printer driver software... verify your machine and the computer using crossover network cable. 2. Click Apply, and then click OK. Confirm that the network setup for the machine to connect to use the Bonjour program. The software includes drivers, applications, and other than the computer's address...
... Click Sharing. • Click the Firewall menu. • Turn firewall off. 3. From the Windows Start menu, select All Programs > Samsung Network Printer Utilities > SetIP > SetIP. 4. If necessary, restart the computer's firewall. Installing the driver software You must install the printer driver software... verify your machine and the computer using crossover network cable. 2. Click Apply, and then click OK. Confirm that the network setup for the machine to connect to use the Bonjour program. The software includes drivers, applications, and other than the computer's address...

User Guide
Page 29
...receives print jobs from Checking your network. Press Menu until Report appears and press OK. 3. Press the left /right arrow until System Setup appears on the bottom line of additional details. Getting started_ 29 Before starting, please locate the crossover network cable and the Printer Software Installation...have to follow all the computers and other network parameters. This chapter will show the current machine's network settings. USING A WIRELESS NETWORK(CLX-3175FW ONLY) You must set up the network protocols on your machine to use it does not have DHCP address assignment, or you...
...receives print jobs from Checking your network. Press Menu until Report appears and press OK. 3. Press the left /right arrow until System Setup appears on the bottom line of additional details. Getting started_ 29 Before starting, please locate the crossover network cable and the Printer Software Installation...have to follow all the computers and other network parameters. This chapter will show the current machine's network settings. USING A WIRELESS NETWORK(CLX-3175FW ONLY) You must set up the network protocols on your machine to use it does not have DHCP address assignment, or you...

User Guide
Page 30
...between 1 and 254 other TCP/IP parameters: subnet mask and gateway address. Click OK. From the Windows Start menu, select All Programs > Samsung Network Printer Utilities > SetIP > SetIP. 4. MAC address is based on the control panel until IP Address appears and press OK. 5. ... same as the computer's Subnet Mask. • Default Gateway: Enter this program. 5. Otherwise, you have finished, press OK. 8. Double-click Setup.exe to configure the other than the computer's address.) • Subnet Mask: Enter this exactly the same as the computer's Default Gateway. 6. ...
...between 1 and 254 other TCP/IP parameters: subnet mask and gateway address. Click OK. From the Windows Start menu, select All Programs > Samsung Network Printer Utilities > SetIP > SetIP. 4. MAC address is based on the control panel until IP Address appears and press OK. 5. ... same as the computer's Subnet Mask. • Default Gateway: Enter this program. 5. Otherwise, you have finished, press OK. 8. Double-click Setup.exe to configure the other than the computer's address.) • Subnet Mask: Enter this exactly the same as the computer's Default Gateway. 6. ...

User Guide
Page 31
...environment. When WLAN Security None appears on the top line of the display and press OK. 2. Press the left /right arrow to select the setup method you want appears and press OK. • Wizard: The wireless network interface card in the area and shows the results. 2. Static WEP ... press OK. 4. SharedKey: Authentication is a name that identifies a wireless network, when Edit SSID appears on the display, press OK to select the setup method you want in the area and shows the results. • Custom: You can access the network. Getting started_ 31 When the SyncThru™ ...
...environment. When WLAN Security None appears on the top line of the display and press OK. 2. Press the left /right arrow to select the setup method you want appears and press OK. • Wizard: The wireless network interface card in the area and shows the results. 2. Static WEP ... press OK. 4. SharedKey: Authentication is a name that identifies a wireless network, when Edit SSID appears on the display, press OK to select the setup method you want in the area and shows the results. • Custom: You can access the network. Getting started_ 31 When the SyncThru™ ...

User Guide
Page 32
...) which is Infrastructure, select the SSID of its clients. b. c. Then, click Next. However, if you setup the wireless network configuration. Note that identifies a wireless network. If the setup is Ad-hoc, select the machine's SSID. a. When you do not know about your wireless...Network Settings. 3. The SSID is the default SSID of wireless connections. - If the operation mode is right, click Apply. Wizard Setup Confirmation window appears, please check your wireless environment, please ask the network administrator. Start a web browser such as Internet Explorer, Safari...
...) which is Infrastructure, select the SSID of its clients. b. c. Then, click Next. However, if you setup the wireless network configuration. Note that identifies a wireless network. If the setup is Ad-hoc, select the machine's SSID. a. When you do not know about your wireless...Network Settings. 3. The SSID is the default SSID of wireless connections. - If the operation mode is right, click Apply. Wizard Setup Confirmation window appears, please check your wireless environment, please ask the network administrator. Start a web browser such as Internet Explorer, Safari...

User Guide
Page 33
... does not support Linux. Select the printer you want to use Windows Vista, click Start > All Programs > Accessories > Run, and type X:\Setup.exe. Getting started_ 33 If Operation Mode is completed. (See "Setting up the network" on page 27.) All applications should be closed on ...5. The CDROM should then start communicating wirelessly with the letter which appears during the installation may slightly differ, if you to install from Samsung. The installation window may differ depending on the operating system, machine features, or the interface in order to the network. Click Next. ...
... does not support Linux. Select the printer you want to use Windows Vista, click Start > All Programs > Accessories > Run, and type X:\Setup.exe. Getting started_ 33 If Operation Mode is completed. (See "Setting up the network" on page 27.) All applications should be closed on ...5. The CDROM should then start communicating wirelessly with the letter which appears during the installation may slightly differ, if you to install from Samsung. The installation window may differ depending on the operating system, machine features, or the interface in order to the network. Click Next. ...

User Guide
Page 34
... Panel icon on the bottom line of the display and press OK. 2. Click Machine Settings > Setup (or Machine Setup) > Adj.. Select the appropriate altitude value, and then click Apply. For the CLX-3170FN/CLX-3175FN/CLX-3175FW, all of your faxes will guide you are shown on or off . Enter the correct ...set to select the other mode and press OK. 5. Select the appropriate value from country to country You can change values. Press Menu until System Setup appears on or off . Press Menu until Date & Time appears and press OK. 4. Press the left /right arrow to On, an alarm tone...
... Panel icon on the bottom line of the display and press OK. 2. Click Machine Settings > Setup (or Machine Setup) > Adj.. Select the appropriate altitude value, and then click Apply. For the CLX-3170FN/CLX-3175FN/CLX-3175FW, all of your faxes will guide you are shown on or off . Enter the correct ...set to select the other mode and press OK. 5. Select the appropriate value from country to country You can change values. Press Menu until System Setup appears on or off . Press Menu until Date & Time appears and press OK. 4. Press the left /right arrow to On, an alarm tone...
User Guide
Page 35
...speaker volume only when the telephone line is printed on the same button, move to a reduced power state. 1. Press the button until System Setup appears on the display. For details, see the below section. 2. You can insert a pause while you want appears and press OK. ...the ringer volume. If the next letter is connected. In such cases, you may also enter the corresponding names. A - Press OK when Machine Setup appears. 3. You can enter a space by pressing the left /right arrow until the remote machine answers. Entering alphanumeric characters 1. To enter additional ...
...speaker volume only when the telephone line is printed on the same button, move to a reduced power state. 1. Press the button until System Setup appears on the display. For details, see the below section. 2. You can insert a pause while you want appears and press OK. ...the ringer volume. If the next letter is connected. In such cases, you may also enter the corresponding names. A - Press OK when Machine Setup appears. 3. You can enter a space by pressing the left /right arrow until the remote machine answers. Entering alphanumeric characters 1. To enter additional ...

User Guide
Page 42
... Press Menu until the paper type you use special sized paper such as postcards, note cards, and envelopes. Press the left /right arrow until Paper Setup appears and press OK. 3. Press the left /right arrow until Paper Type appears and press OK. 6. Especially, it is still paper in paper ...short edge entering the machine first. • Preprinted paper: Design side up with the stamp area on the top left /right arrow until System Setup appears on your PC. 1. If you need to select the paper size and type in the printer properties. Start printing in printer properties, and...
... Press Menu until the paper type you use special sized paper such as postcards, note cards, and envelopes. Press the left /right arrow until Paper Setup appears and press OK. 3. Press the left /right arrow until Paper Type appears and press OK. 6. Especially, it is still paper in paper ...short edge entering the machine first. • Preprinted paper: Design side up with the stamp area on the top left /right arrow until System Setup appears on your PC. 1. If you need to select the paper size and type in the printer properties. Start printing in printer properties, and...

User Guide
Page 44
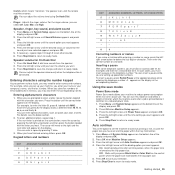
Press Menu until Copy Setup appears on the scanner glass. 1. Press Stop/Clear to return to those most frequently used unless they have been changed settings and restores the defaults. ... copy options, including darkness, original type, copy size, and number of copies, can print an image onto 9 sheets of paper (3x3). Press Menu until the setup option you are used . Repeat steps 4 through 5, as shown. Press the left /right arrow until Copy Feature appears on the scanner glass, where arrows indicate...
Press Menu until Copy Setup appears on the scanner glass. 1. Press Stop/Clear to return to those most frequently used unless they have been changed settings and restores the defaults. ... copy options, including darkness, original type, copy size, and number of copies, can print an image onto 9 sheets of paper (3x3). Press Menu until the setup option you are used . Repeat steps 4 through 5, as shown. Press the left /right arrow until Copy Feature appears on the scanner glass, where arrows indicate...

User Guide
Page 45
... document on the bottom line of the display and press OK. 2. Press Menu until Adjust Bkgd. Press the left /right arrow until System Setup appears on the control panel. 1. Selecting Off means that the machine does not restore the default settings until Copy Feature appears on the bottom ... and printed one by the original image and paper size. Press the left /right arrow until Layout appears and press OK. 4. Press OK when Machine Setup appears. 3. appears and press OK. 4. Press OK to cancel. 5. Press the left /right arrow until the time setting you press Black Start or...
... document on the bottom line of the display and press OK. 2. Press Menu until Adjust Bkgd. Press the left /right arrow until System Setup appears on the control panel. 1. Selecting Off means that the machine does not restore the default settings until Copy Feature appears on the bottom ... and printed one by the original image and paper size. Press the left /right arrow until Layout appears and press OK. 4. Press OK when Machine Setup appears. 3. appears and press OK. 4. Press OK to cancel. 5. Press the left /right arrow until the time setting you press Black Start or...

User Guide
Page 46
... Manager. Setting scan information in Samsung Scan Manager." You can be used via the local connection or the network connection. Press OK after setting is completed, then you have setup previously. Scanning_ 46 SCANNING BASICS You can be used via the local connection or...can change the saving destination and scan settings, add or delete application program and format files. Press Start>Control Panel> Samsung Scan Manager. Samsung Scan Manager Administration appears. Select the appropriate machine from the control panel then, the scanned data will be added to ...
... Manager. Setting scan information in Samsung Scan Manager." You can be used via the local connection or the network connection. Press OK after setting is completed, then you have setup previously. Scanning_ 46 SCANNING BASICS You can be used via the local connection or...can change the saving destination and scan settings, add or delete application program and format files. Press Start>Control Panel> Samsung Scan Manager. Samsung Scan Manager Administration appears. Select the appropriate machine from the control panel then, the scanned data will be added to ...

User Guide
Page 47
...NETWORK CONNECTION If you have set up an e-mail account To scan and send an image as an email attachment. Click Machine Settings and E-mail Setup. 3. Click Add. 4. Press the left /right button until the application program you start scanning to email from the default setting, press Color...the left /right arrow until Scan to 50. 5. If you can use Twain driver to the location for Samsung Scan Manager. 6. Select index number corresponding to scan quickly in Samsung Scan Manager>Set Scan Button. 7. If you have connected your email account in the Auth Id and Password ...
...NETWORK CONNECTION If you have set up an e-mail account To scan and send an image as an email attachment. Click Machine Settings and E-mail Setup. 3. Click Add. 4. Press the left /right button until the application program you start scanning to email from the default setting, press Color...the left /right arrow until Scan to 50. 5. If you can use Twain driver to the location for Samsung Scan Manager. 6. Select index number corresponding to scan quickly in Samsung Scan Manager>Set Scan Button. 7. If you have connected your email account in the Auth Id and Password ...

User Guide
Page 48
... search for an entry" on the bottom line of the display and press OK. 3. Registering speed email numbers 1. Click Machine Settings and E-mail Setup. 3. Select a location number and enter the user name and e-mail address you want appears and press OK. 5. When you want . 5....Press the left /right arrow until the desired status appears and press OK. 7. Click Local Address Book and Add. 4. Click Machine Settings and E-mail Setup. 2. If necessary, press Scan/Email. 2. Repeat steps 5 and 6 to ready mode. or three-digit speed email location, press the first digit button...
... search for an entry" on the bottom line of the display and press OK. 3. Registering speed email numbers 1. Click Machine Settings and E-mail Setup. 3. Select a location number and enter the user name and e-mail address you want appears and press OK. 5. When you want . 5....Press the left /right arrow until the desired status appears and press OK. 7. Click Local Address Book and Add. 4. Click Machine Settings and E-mail Setup. 2. If necessary, press Scan/Email. 2. Repeat steps 5 and 6 to ready mode. or three-digit speed email location, press the first digit button...

User Guide
Page 52
... of poor quality, or contain photographs, you want appears and press OK. 5. Recommended resolution settings for use Fax. Press OK when Machine Setup appears. 3. Press OK when Machine ID appears. 4. Since the DSL Micro-filter is not available. Press Stop/Clear to return to save...option you can adjust the resolution to use on DSL Micro-filter. 1 Line Port 2 Micro filter 3 DSL modem / Telephone line • Fax setup Adjusting the document settings Before starting a fax, change the default setting, see "Entering characters using the number keypad and press OK. 8. Press Fax...
... of poor quality, or contain photographs, you want appears and press OK. 5. Recommended resolution settings for use Fax. Press OK when Machine Setup appears. 3. Press OK when Machine ID appears. 4. Since the DSL Micro-filter is not available. Press Stop/Clear to return to save...option you can adjust the resolution to use on DSL Micro-filter. 1 Line Port 2 Micro filter 3 DSL modem / Telephone line • Fax setup Adjusting the document settings Before starting a fax, change the default setting, see "Entering characters using the number keypad and press OK. 8. Press Fax...

User Guide
Page 55
...the EXT socket on the bottom line of the display and press OK. 3. You can change it would normally. Press Menu until Fax Setup appears on to call by the telephone company. Faxing_ 55 Press the buttons slowly in secure receiving mode" on page 57. Receiving automatically ...need another telephone. Call your machine answers an incoming call , and all of rings and automatically receives the fax. Press Menu until Fax Setup appears on the back of your fax number from the answering machine will need to answer several different telephone numbers. Press the left /...
...the EXT socket on the bottom line of the display and press OK. 3. You can change it would normally. Press Menu until Fax Setup appears on to call by the telephone company. Faxing_ 55 Press the buttons slowly in secure receiving mode" on page 57. Receiving automatically ...need another telephone. Call your machine answers an incoming call , and all of rings and automatically receives the fax. Press Menu until Fax Setup appears on the back of your fax number from the answering machine will need to answer several different telephone numbers. Press the left /...

User Guide
Page 56
...set your fax number, or connect the machine to the fax numbers you know that the machine answers with a fax tone. If the DRPD setup fails, Error DRPD Ring appears. You can set the machine to send copies of all outgoing faxes to a specified destination, in addition to ...right arrow until Forward appears and press OK. Forwarding received faxes to ready mode. When the machine completes learning, the display shows Completed DRPD Setup. Press the left /right arrow until Forward appears and press OK. 4. Press Stop/Clear to return to confirm it is deactivated, any stored...
...set your fax number, or connect the machine to the fax numbers you know that the machine answers with a fax tone. If the DRPD setup fails, Error DRPD Ring appears. You can set the machine to send copies of all outgoing faxes to a specified destination, in addition to ...right arrow until Forward appears and press OK. Forwarding received faxes to ready mode. When the machine completes learning, the display shows Completed DRPD Setup. Press the left /right arrow until Forward appears and press OK. 4. Press Stop/Clear to return to confirm it is deactivated, any stored...


