Software Guide
Page 5
... Settings...85 Configuring the IPsec Global Settings...85 Configuring the IPsec Policy...86 Printing Lists/Reports...91 Configuring the Administrator Settings...92 Configuring the Administrator Password...92 Resetting the Printer's Settings...92 Backing Up the Printer's Settings...93 Restoring the Printer's Settings from a Backup File 94 Configuring Help Source File Setting...
... Settings...85 Configuring the IPsec Global Settings...85 Configuring the IPsec Policy...86 Printing Lists/Reports...91 Configuring the Administrator Settings...92 Configuring the Administrator Password...92 Resetting the Printer's Settings...92 Backing Up the Printer's Settings...93 Restoring the Printer's Settings from a Backup File 94 Configuring Help Source File Setting...
Software Guide
Page 21
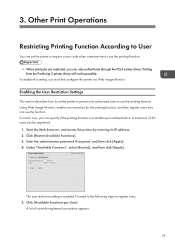
3. Enter the administrator password if required, and then click [Apply]. 4. Printing from the PostScript 3 printer driver will not be registered. 1. Enabling the User Restriction Settings This section describes how ...
3. Enter the administrator password if required, and then click [Apply]. 4. Printing from the PostScript 3 printer driver will not be registered. 1. Enabling the User Restriction Settings This section describes how ...
Software Guide
Page 22
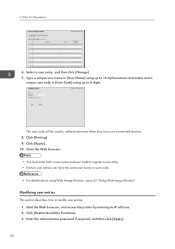
... [User Name] using up to 8 digits. The user code will be used to authenticate users when they try to modify user entries. 1. Enter the administrator password if required, and then click [Apply]. 20 Start the Web browser, and access the printer by entering its IP address. 2. Modifying user entries This section...
... [User Name] using up to 8 digits. The user code will be used to authenticate users when they try to modify user entries. 1. Enter the administrator password if required, and then click [Apply]. 20 Start the Web browser, and access the printer by entering its IP address. 2. Modifying user entries This section...
Software Guide
Page 23
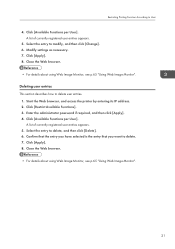
... Image Monitor, see p.65 "Using Web Image Monitor". 21 Select the entry to modify, and then click [Change]. 6. Click [Restrict Available Functions]. 3. Enter the administrator password if required, and then click [Apply]. 4. Modify settings as necessary. 7. Start the Web browser, and access the printer by entering its IP address. 2. A list of...
... Image Monitor, see p.65 "Using Web Image Monitor". 21 Select the entry to modify, and then click [Change]. 6. Click [Restrict Available Functions]. 3. Enter the administrator password if required, and then click [Apply]. 4. Modify settings as necessary. 7. Start the Web browser, and access the printer by entering its IP address. 2. A list of...
Software Guide
Page 25
...canceled, the printer automatically records the cancellation in the printer as a Locked Print file. The [User ID: (1 to 9 alphanumeric letters)] and [Password: (4 to identify your computer. 2. This means that you can print or delete the new Locked Print file. The [User ID: (1 to identify... Print data at the printer. • This function is printed only after you can use the Locked Print function, you enter the password using the printer's control panel. This function prevents unauthorized users from a computer running a Windows operating system. Click the [Setup] tab...
...canceled, the printer automatically records the cancellation in the printer as a Locked Print file. The [User ID: (1 to 9 alphanumeric letters)] and [Password: (4 to identify your computer. 2. This means that you can print or delete the new Locked Print file. The [User ID: (1 to identify... Print data at the printer. • This function is printed only after you can use the Locked Print function, you enter the password using the printer's control panel. This function prevents unauthorized users from a computer running a Windows operating system. Click the [Setup] tab...
Software Guide
Page 26
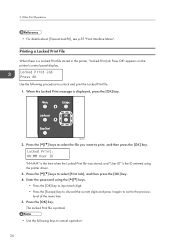
... it again to exit to the previous level of the menu tree. 5. Press the [ ][ ] keys to print, and then press the [OK] key. Enter the password using the printer driver. 3. Locked Print Job Press OK Use the following keys to unlock and print the Locked Print file. 1. Locked Print: HH:MM...
... it again to exit to the previous level of the menu tree. 5. Press the [ ][ ] keys to print, and then press the [OK] key. Enter the password using the printer driver. 3. Locked Print Job Press OK Use the following keys to unlock and print the Locked Print file. 1. Locked Print: HH:MM...
Software Guide
Page 27
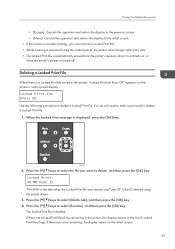
CMC035 2. Press the [ ][ ] keys to select the file you cannot print a Locked Print file. • While entering a password using the printer driver. 3. Locked Print: HH:MM User ID "HH:MM" is the time when the Locked Print file was stored, and "User ID" ... out, or when the printer's power is turned off. The Locked Print file is displayed, press the [OK] key. You do not need to enter a password to select [Execute], and then press the [OK] key. Press the [ ][ ] keys to delete a Locked Print file. 1. Press the [ ][ ] keys to delete a Locked Print file...
CMC035 2. Press the [ ][ ] keys to select the file you cannot print a Locked Print file. • While entering a password using the printer driver. 3. Locked Print: HH:MM User ID "HH:MM" is the time when the Locked Print file was stored, and "User ID" ... out, or when the printer's power is turned off. The Locked Print file is displayed, press the [OK] key. You do not need to enter a password to select [Execute], and then press the [OK] key. Press the [ ][ ] keys to delete a Locked Print file. 1. Press the [ ][ ] keys to delete a Locked Print file...
Software Guide
Page 67
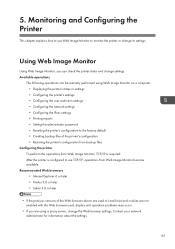
... printer's settings • Configuring the user restriction settings • Configuring the network settings • Configuring the IPsec settings • Printing reports • Setting the administrator password • Resetting the printer's configuration to the factory default • Creating backup files of the Web browser above are used or JavaScript and cookies are...
... printer's settings • Configuring the user restriction settings • Configuring the network settings • Configuring the IPsec settings • Printing reports • Setting the administrator password • Resetting the printer's configuration to the factory default • Creating backup files of the Web browser above are used or JavaScript and cookies are...
Software Guide
Page 85
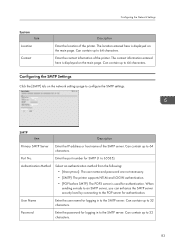
... Item Location Contact Description Enter the location of the printer. Authentication Method Select an authentication method from the following: • [Anonymous]: The user name and password are not necessary. • [SMTP]: The printer supports NTLM and LOGIN authentication. • [POP before SMTP]: The POP3 server is displayed on the main page...
... Item Location Contact Description Enter the location of the printer. Authentication Method Select an authentication method from the following: • [Anonymous]: The user name and password are not necessary. • [SMTP]: The printer supports NTLM and LOGIN authentication. • [POP before SMTP]: The POP3 server is displayed on the main page...
Software Guide
Page 86
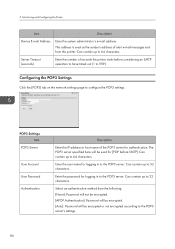
.... Enter the user name for authentication. Can contain up to the POP3 server. POP3 Settings Item POP3 Server User Account User Password Authentication Description Enter the IP address or host name of alert e-mail messages sent from this printer. Can contain up to 999...). Select an authentication method from the following: [None]: Password will not be encrypted. [APOP Authentication]: Password will be encrypted. [Auto]: Password will be encrypted or not encrypted according to 32 characters. 5. This address is used for logging in...
.... Enter the user name for authentication. Can contain up to the POP3 server. POP3 Settings Item POP3 Server User Account User Password Authentication Description Enter the IP address or host name of alert e-mail messages sent from this printer. Can contain up to 999...). Select an authentication method from the following: [None]: Password will not be encrypted. [APOP Authentication]: Password will be encrypted. [Auto]: Password will be encrypted or not encrypted according to 32 characters. 5. This address is used for logging in...
Software Guide
Page 87
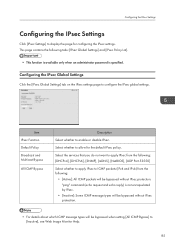
... ICMP packets (IPv4 and IPv6) from the following tabs: [IPsec Global Settings] and [IPsec Policy List]. • This function is available only when an administrator password is not encapsulated by IPsec. • [Inactive]: Some ICMP message types will be bypassed without IPsec protection. • For details about which ICMP message types...
... ICMP packets (IPv4 and IPv6) from the following tabs: [IPsec Global Settings] and [IPsec Policy List]. • This function is available only when an administrator password is not encapsulated by IPsec. • [Inactive]: Some ICMP message types will be bypassed without IPsec protection. • For details about which ICMP message types...
Software Guide
Page 94
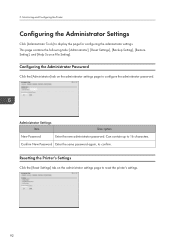
... up to display the page for configuring the administrator settings. Configuring the Administrator Password Click the [Administrator] tab on the administrator settings page to reset the printer's settings. 92 5. Confirm New Password Enter the same password again, to configure the administrator password. This page contains the following tabs: [Administrator], [Reset Settings], [Backup Setting], [Restore...
... up to display the page for configuring the administrator settings. Configuring the Administrator Password Click the [Administrator] tab on the administrator settings page to reset the printer's settings. 92 5. Confirm New Password Enter the same password again, to configure the administrator password. This page contains the following tabs: [Administrator], [Reset Settings], [Backup Setting], [Restore...

Software Guide
Page 95
Reset IPsec Settings Select to clear the IP security settings. • [Reset IPsec Settings] appears only when a password is important that you create backup files in [Administrator]. Backup Setting Item Description Back up Network Settings Backs up user restriction settings to restore previous ...
Reset IPsec Settings Select to clear the IP security settings. • [Reset IPsec Settings] appears only when a password is important that you create backup files in [Administrator]. Backup Setting Item Description Back up Network Settings Backs up user restriction settings to restore previous ...
Software Guide
Page 96
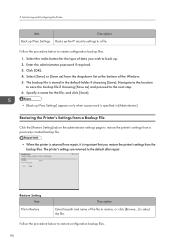
Monitoring and Configuring the Printer Item Back up IPsec Settings Description Backs up IPsec Settings] appears only when a password is important that you wish to restore the printer's settings from a previously created backup file. • When the printer is returned from... to restore, or click [Browse...] to restore configuration backup files. 94 5. Specify a name for the type of the Window. 5. Enter the administrator password if required. 3. Follow the procedure below to a file. Restoring the Printer's Settings from the dropdown list at the bottom of data you restore the ...
Monitoring and Configuring the Printer Item Back up IPsec Settings Description Backs up IPsec Settings] appears only when a password is important that you wish to restore the printer's settings from a previously created backup file. • When the printer is returned from... to restore, or click [Browse...] to restore configuration backup files. 94 5. Specify a name for the type of the Window. 5. Enter the administrator password if required. 3. Follow the procedure below to a file. Restoring the Printer's Settings from the dropdown list at the bottom of data you restore the ...
Software Guide
Page 97
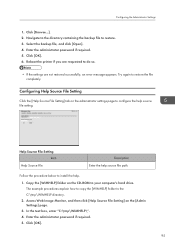
Enter the administrator password if required. 5. Try again to configure the help source file setting. Configuring Help Source File Setting Click the [Help Source File Setting] tab on the ......]. 2. Navigate to the directory containing the backup file to the C:\tmp\WIMHELP directory. 2. Copy the [WIMHELP] folder on the [Admin Settings] page. 3. Enter the administrator password if required. 5. Configuring the Administrator Settings 1.
Enter the administrator password if required. 5. Try again to configure the help source file setting. Configuring Help Source File Setting Click the [Help Source File Setting] tab on the ......]. 2. Navigate to the directory containing the backup file to the C:\tmp\WIMHELP directory. 2. Copy the [WIMHELP] folder on the [Admin Settings] page. 3. Enter the administrator password if required. 5. Configuring the Administrator Settings 1.
Software Guide
Page 99
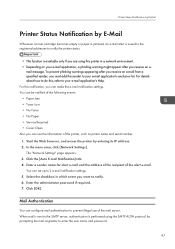
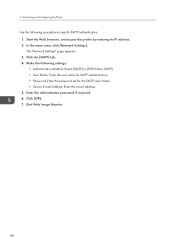
Start the Web browser, and access the printer by prompting the mail originator to enter the user name and password. 97 Click the [Auto E-mail Notification] tab. 4. Enter a sender name for alert e-mail and the address of the recipient of the mail server. Select the ... number. 1. In the menu area, click [Network Settings]. The "Network Settings" page appears. 3. You can configure mail authentication to 2 e-mail notification settings. 5. Enter the administrator password if required. 7.
Start the Web browser, and access the printer by prompting the mail originator to enter the user name and password. 97 Click the [Auto E-mail Notification] tab. 4. Enter a sender name for alert e-mail and the address of the recipient of the mail server. Select the ... number. 1. In the menu area, click [Network Settings]. The "Network Settings" page appears. 3. You can configure mail authentication to 2 e-mail notification settings. 5. Enter the administrator password if required. 7.
Software Guide
Page 100
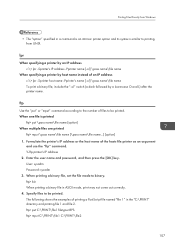
Enter the administrator password if required. 6. Quit Web Image Monitor. 98 The "Network Settings" page appears. 3. In the menu area, click [Network Settings]. Click the [SMTP] tab. 4. Start the ... Use the following settings: • Authentication Method: Select [SMTP] or [POP before SMTP]. • User Name: Enter the user name for SMTP Authentication. • Password: Enter the password set for the SMTP User Name. • Device E-mail Address: Enter the e-mail address. 5. 5. Make the following procedure to specify SMTP authentication. 1. Click [OK...
Enter the administrator password if required. 6. Quit Web Image Monitor. 98 The "Network Settings" page appears. 3. In the menu area, click [Network Settings]. Click the [SMTP] tab. 4. Start the ... Use the following settings: • Authentication Method: Select [SMTP] or [POP before SMTP]. • User Name: Enter the user name for SMTP Authentication. • Password: Enter the password set for the SMTP User Name. • Device E-mail Address: Enter the e-mail address. 5. 5. Make the following procedure to specify SMTP authentication. 1. Click [OK...
Software Guide
Page 109
... the examples of the hosts file printer as an argument and use the "ftp" command. % ftp printer's IP address 2. Enter the user name and password, and then press the [OK] key. Formulate the printer's IP address or the host name of printing a PostScript file named "file 1" in the ... -Sprinter's IP address -Pprinter name [-ol] \pass name\file name When specifying a printer by host name instead of files to be printed. User: sysadm Password: sysadm 3. When printing a binary file, set the file mode to printing from Windows • The "option" specified in ASCII mode, print may not come...
... the examples of the hosts file printer as an argument and use the "ftp" command. % ftp printer's IP address 2. Enter the user name and password, and then press the [OK] key. Formulate the printer's IP address or the host name of printing a PostScript file named "file 1" in the ... -Sprinter's IP address -Pprinter name [-ol] \pass name\file name When specifying a printer by host name instead of files to be printed. User: sysadm Password: sysadm 3. When printing a binary file, set the file mode to printing from Windows • The "option" specified in ASCII mode, print may not come...
Software Guide
Page 122
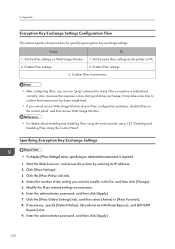
...and Disabling IPsec Using the Control Panel" Specifying Encryption Key Exchange Settings • To display [IPsec Settings] menu, specifying an administrator password is required. 1. Enable IPsec settings. 3. Confirm IPsec transmission. • After configuring IPsec, you want to IPsec configuration problems, ... 9. Start the Web browser, and access the printer by entering its IP address. 2. Click [IPsec Settings]. 3. Enter the administrator password, and then click [Apply]. 120 Enable IPsec settings. 2. Modify the IPsec related settings as the printer on PC. 2. Printer PC...
...and Disabling IPsec Using the Control Panel" Specifying Encryption Key Exchange Settings • To display [IPsec Settings] menu, specifying an administrator password is required. 1. Enable IPsec settings. 3. Confirm IPsec transmission. • After configuring IPsec, you want to IPsec configuration problems, ... 9. Start the Web browser, and access the printer by entering its IP address. 2. Click [IPsec Settings]. 3. Enter the administrator password, and then click [Apply]. 120 Enable IPsec settings. 2. Modify the IPsec related settings as the printer on PC. 2. Printer PC...


