User's Guide
Page 1
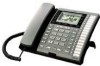
4-Line Intercom Speakerphone with Answerer and Caller ID User's Guide Please read this manual before operating product for the first time. Model 25415
4-Line Intercom Speakerphone with Answerer and Caller ID User's Guide Please read this manual before operating product for the first time. Model 25415

User's Guide
Page 3
... any other antenna or transmitter." Your phone features 16 memory locations, 94 phone book memories, hold, conference call, intercom, call transfer, Caller ID display, and speakerphone capabilities. REFER SERVICING TO QUALIFIED SERVICE PERSONNEL. For body worn operation, this phone has been tested and meets the FCC... from your local telephone company: the standard Name/Number Caller ID Service to know who is calling when the phone rings and Call Waiting Caller ID Service to know who is possible to receive calls on the phone WARNING: TO PREVENT FIRE OR ELECTRICAL SHOCK HAZARD, DO...
... any other antenna or transmitter." Your phone features 16 memory locations, 94 phone book memories, hold, conference call, intercom, call transfer, Caller ID display, and speakerphone capabilities. REFER SERVICING TO QUALIFIED SERVICE PERSONNEL. For body worn operation, this phone has been tested and meets the FCC... from your local telephone company: the standard Name/Number Caller ID Service to know who is calling when the phone rings and Call Waiting Caller ID Service to know who is possible to receive calls on the phone WARNING: TO PREVENT FIRE OR ELECTRICAL SHOCK HAZARD, DO...
User's Guide
Page 4
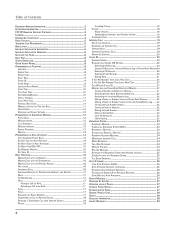
...CALL 19 INTERCOM HOLD 19 INTERCOM CONFERENCE CALLS 19 PAGING ALL STATIONS 20 CALLER ID 20 SUMMARY SCREEN 20 RECEIVING AND STORING CID RECORDS 20 Reviewing CID Records 20 Saving CID Record to Intercom/Memory Log or Phone Book Memory20 Deleting a CID Record 20 Deleting All Call Records 20 Dialing... LOCAL AREA CODE 21 IF YOU DID NOT PROGRAM YOUR LOCAL AREA CODE 21 CALL WAITING CALLER ID 21 MEMORY LOG AND PHONE BOOK (DIRECTORY) MEMORY 21 Storing a Number and Name in Memory 21 Reviewing Phone Book (Directory) Memory 22 Reviewing the Intercom/Memory Log 22 Editing a Name or Number ...
...CALL 19 INTERCOM HOLD 19 INTERCOM CONFERENCE CALLS 19 PAGING ALL STATIONS 20 CALLER ID 20 SUMMARY SCREEN 20 RECEIVING AND STORING CID RECORDS 20 Reviewing CID Records 20 Saving CID Record to Intercom/Memory Log or Phone Book Memory20 Deleting a CID Record 20 Deleting All Call Records 20 Dialing... LOCAL AREA CODE 21 IF YOU DID NOT PROGRAM YOUR LOCAL AREA CODE 21 CALL WAITING CALLER ID 21 MEMORY LOG AND PHONE BOOK (DIRECTORY) MEMORY 21 Storing a Number and Name in Memory 21 Reviewing Phone Book (Directory) Memory 22 Reviewing the Intercom/Memory Log 22 Editing a Name or Number ...
User's Guide
Page 8
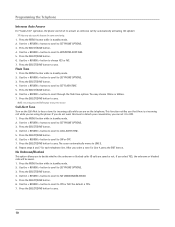
... LINE 4, press the EXIT button. IMPORTANT: Be sure to switch the fax machine back to the normal line when you are done because outside callers who do not know that person to fax something to you, change the data port switch to individual ringer tones. Look at your fax machine...then set independent of the four telephone lines show messages in the display points to LINE 2. 8. The display shows INTERCOM and ENTER CALLING PHONE ID. 2. The display shows the phone ID you can receive calls on the system. Use the < REVIEW > button to scroll to all four lines may be able to SET RING...
... LINE 4, press the EXIT button. IMPORTANT: Be sure to switch the fax machine back to the normal line when you are done because outside callers who do not know that person to fax something to you, change the data port switch to individual ringer tones. Look at your fax machine...then set independent of the four telephone lines show messages in the display points to LINE 2. 8. The display shows INTERCOM and ENTER CALLING PHONE ID. 2. The display shows the phone ID you can receive calls on the system. Use the < REVIEW > button to scroll to all four lines may be able to SET RING...
User's Guide
Page 10
...the < REVIEW > button to scroll to LINE 2. 8. The default is a incoming call by automatically activating the speaker. Use the < REVIEW > button to SET PHONE OPTIONS. 3. Press the MENU button while in standby mode. 2. Use the < REVIEW > button to scroll to choose YES or NO. 7. Use the < REVIEW... SELECT/SAVE button. 6. Use the < REVIEW > button to scroll to save . Press the SELECT/SAVE button to SET PHONE OPTIONS. 3. Use the < REVIEW > button to scroll to decide whether the unknown or blocked caller ID calls are on the Call Alert to hear a tone for each telephone line.
...the < REVIEW > button to scroll to LINE 2. 8. The default is a incoming call by automatically activating the speaker. Use the < REVIEW > button to SET PHONE OPTIONS. 3. Press the MENU button while in standby mode. 2. Use the < REVIEW > button to scroll to choose YES or NO. 7. Use the < REVIEW... SELECT/SAVE button. 6. Use the < REVIEW > button to scroll to save . Press the SELECT/SAVE button to SET PHONE OPTIONS. 3. Use the < REVIEW > button to scroll to decide whether the unknown or blocked caller ID calls are on the Call Alert to hear a tone for each telephone line.

User's Guide
Page 11
...TIME & DATE. 3. Press the SELECT/SAVE button. Press the SELECT/SAVE button. Setting Regional Area Codes helps the phone determine the number format to dial back the number from the Caller ID menu. Use the < REVIEW > button to scroll to SET LCD CONTRAST. 3. Manually Setting the Time and Date ...to display when a valid CID record is automatically set regional area codes are displayed as 10 digits. Use the touch tone pad on your phone to enter up to erase all digits. Regional Area Codes Depending on the display. 4. Press the SELECT/SAVE button, and the cursor ...
...TIME & DATE. 3. Press the SELECT/SAVE button. Press the SELECT/SAVE button. Setting Regional Area Codes helps the phone determine the number format to dial back the number from the Caller ID menu. Use the < REVIEW > button to scroll to SET LCD CONTRAST. 3. Manually Setting the Time and Date ...to display when a valid CID record is automatically set regional area codes are displayed as 10 digits. Use the touch tone pad on your phone to enter up to erase all digits. Regional Area Codes Depending on the display. 4. Press the SELECT/SAVE button, and the cursor ...
User's Guide
Page 14
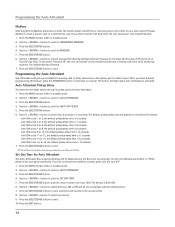
... will be played during the Day Time you may choose Personal Mailbox to have finished programming this feature, press the ATTENDANT button on the phone ID number. Press the SELECT/SAVE button. 4. AM or PM will pick up by answering machine. Use the < REVIEW > button to save , and the curser moves... a selected line only. Use the < REVIEW > button to scroll from L2 by the Auto Attendant. 1. Press the MENU button while in the system per the caller's input.
... will be played during the Day Time you may choose Personal Mailbox to have finished programming this feature, press the ATTENDANT button on the phone ID number. Press the SELECT/SAVE button. 4. AM or PM will pick up by answering machine. Use the < REVIEW > button to save , and the curser moves... a selected line only. Use the < REVIEW > button to scroll from L2 by the Auto Attendant. 1. Press the MENU button while in the system per the caller's input.
User's Guide
Page 19
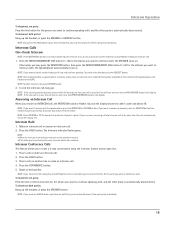
.... Answering an Intercom Call When you receive an incoming call and intercom call , the INTERCOM indicator flashes red, and the display shows the caller's name and phone ID. If you receive an INTERCOM call at the same time the unit automatically selects the ringing line. To switch to automatically select a party. NOTE...
.... Answering an Intercom Call When you receive an incoming call and intercom call , the INTERCOM indicator flashes red, and the display shows the caller's name and phone ID. If you receive an INTERCOM call at the same time the unit automatically selects the ringing line. To switch to automatically select a party. NOTE...
User's Guide
Page 20
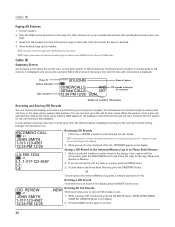
... NEW Deleting All Call Records This feature allows you need to scroll through the call in the display. 2. PRESS DELETE AGAIN CLEAR ALL CALLER ID shows in memory. When the memory is displayed according to clear all CID records at the same time, the CID information is full, a... telephone number shows in the display, if you to the unit's priority line setting. Caller ID Paging All Stations 1. NOTE: You will not receive a page when Do Not Disturb is pressed. or the name, phone number, date and time. Press the PAGE button and listen for Storing a Name and...
... NEW Deleting All Call Records This feature allows you need to scroll through the call in the display. 2. PRESS DELETE AGAIN CLEAR ALL CALLER ID shows in memory. When the memory is displayed according to clear all CID records at the same time, the CID information is full, a... telephone number shows in the display, if you to the unit's priority line setting. Caller ID Paging All Stations 1. NOTE: You will not receive a page when Do Not Disturb is pressed. or the name, phone number, date and time. Press the PAGE button and listen for Storing a Name and...
User's Guide
Page 21
...-tone pad to enter a name (up to 94 memories) or an INTERCOM/MEMORY LOG (16 buttons located to either the standard Name/Number Caller ID Service or Caller ID with 11 digits (i.e.1-234-555-1234), then the call waiting beep. Press the 4 key 3 times for the letter T; NOTE: If you... display the number you want to store, up to Caller ID with 7 digits (i.e.555-1234), then the call . Call Waiting Caller ID This feature allows you enter show in phone book memory. IMPORTANT: To use the REDIAL/FORMAT button. Memory Log and Phone Book (Directory) Memory You may adjust the number format...
...-tone pad to enter a name (up to 94 memories) or an INTERCOM/MEMORY LOG (16 buttons located to either the standard Name/Number Caller ID Service or Caller ID with 11 digits (i.e.1-234-555-1234), then the call waiting beep. Press the 4 key 3 times for the letter T; NOTE: If you... display the number you want to store, up to Caller ID with 7 digits (i.e.555-1234), then the call . Call Waiting Caller ID This feature allows you enter show in phone book memory. IMPORTANT: To use the REDIAL/FORMAT button. Memory Log and Phone Book (Directory) Memory You may adjust the number format...
User's Guide
Page 27
...phone, the problem might be heard by the other party. • Make sure the handset or headset cord is inserted properly and securely. • Make sure the MUTE feature is not linked to manually make a call on line 1 only, 2) answer a call , or - NO DATA No Caller ID signal has been detected, or Caller ID... service has not been activated. After registration (see user guide of the Caller ID memory log. Make sure the indicator is not supported. Phone does not ring. • Make sure the ringer is ...
...phone, the problem might be heard by the other party. • Make sure the handset or headset cord is inserted properly and securely. • Make sure the MUTE feature is not linked to manually make a call on line 1 only, 2) answer a call , or - NO DATA No Caller ID signal has been detected, or Caller ID... service has not been activated. After registration (see user guide of the Caller ID memory log. Make sure the indicator is not supported. Phone does not ring. • Make sure the ringer is ...
User's Guide
Page 30
... 12 I B Base Layout 5 Basic Operation 16 C Call Alert Tone 10 Call Screening 13 Call Waiting Caller ID 21 Caller ID 20 Chain Dialing 23 Clear All Memories 23 Conference Calls 18 Connecting with the Answering System 25 Cordless Phone Option 27 If You Did Not Program Your Local Area Code21 If You Programmed Your Local...
... 12 I B Base Layout 5 Basic Operation 16 C Call Alert Tone 10 Call Screening 13 Call Waiting Caller ID 21 Caller ID 20 Chain Dialing 23 Clear All Memories 23 Conference Calls 18 Connecting with the Answering System 25 Cordless Phone Option 27 If You Did Not Program Your Local Area Code21 If You Programmed Your Local...


