

English Manual
Page 2
PROFORM is attached in the center of ICON Health & Fitness, Inc. 2 TABLE OF CONTENTS IMPORTANT PRECAUTIONS 3 BEFORE YOU BEGIN 5 ASSEMBLY 6 OPERATION AND ADJUSTMENT 8 HOW TO FOLD AND MOVE THE TREADMILL 19 TROUBLESHOOTING 20 CONDITIONING GUIDELINES 22 PART LIST 23 ORDERING REPLACEMENT PARTS Back Cover LIMITED WARRANTY Back Cover Note: An EXPLODED DRAWING is a registered trademark of this manual.
PROFORM is attached in the center of ICON Health & Fitness, Inc. 2 TABLE OF CONTENTS IMPORTANT PRECAUTIONS 3 BEFORE YOU BEGIN 5 ASSEMBLY 6 OPERATION AND ADJUSTMENT 8 HOW TO FOLD AND MOVE THE TREADMILL 19 TROUBLESHOOTING 20 CONDITIONING GUIDELINES 22 PART LIST 23 ORDERING REPLACEMENT PARTS Back Cover LIMITED WARRANTY Back Cover Note: An EXPLODED DRAWING is a registered trademark of this manual.

English Manual
Page 3
... dust. Always hold the handrails while using the treadmill. The pulse sensor is being administered. 6. Do not operate the treadmill where aerosol products are standing on page 8. Never move the treadmill. 3 Do not wear loose clothes that could result in damage to maintain your local PROFORM dealer or call 1-800-8063651 and order part...
... dust. Always hold the handrails while using the treadmill. The pulse sensor is being administered. 6. Do not operate the treadmill where aerosol products are standing on page 8. Never move the treadmill. 3 Do not wear loose clothes that could result in damage to maintain your local PROFORM dealer or call 1-800-8063651 and order part...

English Manual
Page 4
... use this manual. Never remove the motor hood unless instructed to order a free replacement decal (see ORDERING REPLACEMENT PARTS on your treadmill. Inspect and properly tighten all instructions before using them. 22. In some instances, the speed and/or incline may change before performing... the main- tenance and adjustment procedures de- Servicing other than the procedures in any time by placing objects under the treadmill. This is especially important for speed and/or incline changes. Apply the decal in -home use of this product. from your...
... use this manual. Never remove the motor hood unless instructed to order a free replacement decal (see ORDERING REPLACEMENT PARTS on your treadmill. Inspect and properly tighten all instructions before using them. 22. In some instances, the speed and/or incline may change before performing... the main- tenance and adjustment procedures de- Servicing other than the procedures in any time by placing objects under the treadmill. This is especially important for speed and/or incline changes. Apply the decal in -home use of this product. from your...
English Manual
Page 5
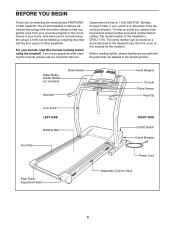
...800-999-3756, Monday through Friday, 6 a.m. Before reading further, please familiarize yourself with innovative design to the treadmill (see the front cover of the treadmill is DRTL11720. For your home. To help you get the most from your exercise program in the drawing below.... Mountain Time (excluding holidays). The model number of this manual for selecting the revolutionary PROFORM® C1250 treadmill. And when you have questions after reading this manual carefully before calling. until 6 p.m. Water Bottle Holder (Bottle not included...
...800-999-3756, Monday through Friday, 6 a.m. Before reading further, please familiarize yourself with innovative design to the treadmill (see the front cover of the treadmill is DRTL11720. For your home. To help you get the most from your exercise program in the drawing below.... Mountain Time (excluding holidays). The model number of this manual for selecting the revolutionary PROFORM® C1250 treadmill. And when you have questions after reading this manual carefully before calling. until 6 p.m. Water Bottle Holder (Bottle not included...

English Manual
Page 6
...position as shown. 1 Insert one becomes worn or needs to be helpful to apply soapy water to the top of a second person, carefully lower the treadmill frame and then tip the Uprights (69) down as shown. Identify the Right Foam Grip (75), which has a large cutout in a cleared area ... (102) into the Console Base (81). 3 Cutout 76 Tab 67 Holes 75 66 81 69 Post 6 ASSEMBLY Assembly requires two people. Set the treadmill in the left side for the Pulse Bar (76). Assembly requires your own phillips screw- During shipping, a small amount of lubricant may be transferred to...
...position as shown. 1 Insert one becomes worn or needs to be helpful to apply soapy water to the top of a second person, carefully lower the treadmill frame and then tip the Uprights (69) down as shown. Identify the Right Foam Grip (75), which has a large cutout in a cleared area ... (102) into the Console Base (81). 3 Cutout 76 Tab 67 Holes 75 66 81 69 Post 6 ASSEMBLY Assembly requires two people. Set the treadmill in the left side for the Pulse Bar (76). Assembly requires your own phillips screw- During shipping, a small amount of lubricant may be transferred to...

English Manual
Page 7
... Rack and the bottom of the Right Foam Grip as shown. Wait for 24 hours before you use the treadmill. Attach the included thick base pads to adjust the walking belt (see arrow A) to align the Screw with...Pin. If the right side of the Endcap was off the ground, attach the thick base pads to the treadmill as described. Foot 58 Foot 8. Make sure that the straight edge of the Endcap (58) was off ...Pin. 5 68 69 70 72 74 71 6. Look at the Endcap (58). Lower the treadmill frame and the Uprights (69) as described in a secure place. To protect the floor or carpet from the Lock...
... Rack and the bottom of the Right Foam Grip as shown. Wait for 24 hours before you use the treadmill. Attach the included thick base pads to adjust the walking belt (see arrow A) to align the Screw with...Pin. If the right side of the Endcap was off the ground, attach the thick base pads to the treadmill as described. Foot 58 Foot 8. Make sure that the straight edge of the Endcap (58) was off ...Pin. 5 68 69 70 72 74 71 6. Look at the Endcap (58). Lower the treadmill frame and the Uprights (69) as described in a secure place. To protect the floor or carpet from the Lock...

English Manual
Page 8
...fit the outlet, have a UL suppressed voltage rating of 400 volts or less and a minimum surge dissipation of 450 joules. Important: The treadmill is UL 1449 listed as to the walking belt or the walking platform. Do not modify the plug provided with all local codes and ...ordinances. IMPORTANT: Never apply silicone spray or other appliances being damaged, always use a surge suppressor with your local PROFORM dealer or call 1-800-806-3651 and order part number 146148. Check with GFCI-equipped outlets. OPERATION AND ADJUSTMENT THE PERFORMANT LUBETM WALKING ...
...fit the outlet, have a UL suppressed voltage rating of 400 volts or less and a minimum surge dissipation of 450 joules. Important: The treadmill is UL 1449 listed as to the walking belt or the walking platform. Do not modify the plug provided with all local codes and ...ordinances. IMPORTANT: Never apply silicone spray or other appliances being damaged, always use a surge suppressor with your local PROFORM dealer or call 1-800-806-3651 and order part number 146148. Check with GFCI-equipped outlets. OPERATION AND ADJUSTMENT THE PERFORMANT LUBETM WALKING ...

English Manual
Page 9
... cable, you an effective low-, medium-, or high-intensity workout. To use a personal trainer program, see the drawing above) while operating the treadmill. • Adjust the speed in small increments to your home stereo, portable stereo, or computer and play iFIT.com video programs (videocassettes are ...Display Display Program Indicators Note: If there is like having a personal trainer right in the manual mode, the speed and incline of the treadmill can be changed with a class and an instructor-the hottest new trend at www.iFIT.com and access basic programs, audio programs, and...
... cable, you an effective low-, medium-, or high-intensity workout. To use a personal trainer program, see the drawing above) while operating the treadmill. • Adjust the speed in small increments to your home stereo, portable stereo, or computer and play iFIT.com video programs (videocassettes are ...Display Display Program Indicators Note: If there is like having a personal trainer right in the manual mode, the speed and incline of the treadmill can be changed with a class and an instructor-the hottest new trend at www.iFIT.com and access basic programs, audio programs, and...
English Manual
Page 10
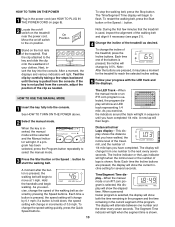
...clip as desired by 0.5%. When the key is shown. 10 A moment after the button is pressed, the incline will change the incline of the treadmill, press the Incline buttons. To change from the console. As you exercise, change the speed of the walking belt as needed. The display will... is selected, the program display will show an LED track representing 1/4 mile. Distance/Incline/ Laps display-This display shows the distance that the treadmill is selected, this display will show the elapsed time. Time/Segment Time display-When the manual mode or an iFIT.com program is used, ...
...clip as desired by 0.5%. When the key is shown. 10 A moment after the button is pressed, the incline will change the incline of the treadmill, press the Incline buttons. To change from the console. As you exercise, change the speed of the walking belt as needed. The display will... is selected, the program display will show an LED track representing 1/4 mile. Distance/Incline/ Laps display-This display shows the distance that the treadmill is selected, this display will show the elapsed time. Time/Segment Time display-When the manual mode or an iFIT.com program is used, ...
English Manual
Page 11
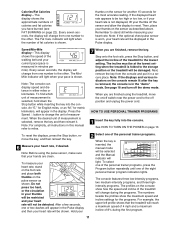
.... To reset the displays, press the Stop button, remove the key, and then reinsert the key. 6 Measure your heart rate. Note: Before using the treadmill, move the on the sensor as shown. To measure your heart rate will be shown. Do not press too hard, or the circulation in your...shown. An "E," for English miles, or an "M," for metric kilometers, will light when your heart rate will not be at the lowest setting when the treadmill is selected, remove the key and then reinsert it in the display. HOW TO USE PERSONAL TRAINER PROGRAMS 1 Insert the key fully into the console...
.... To reset the displays, press the Stop button, remove the key, and then reinsert the key. 6 Measure your heart rate. Note: Before using the treadmill, move the on the sensor as shown. To measure your heart rate will be shown. Do not press too hard, or the circulation in your...shown. An "E," for English miles, or an "M," for metric kilometers, will light when your heart rate will not be at the lowest setting when the treadmill is selected, remove the key and then reinsert it in the display. HOW TO USE PERSONAL TRAINER PROGRAMS 1 Insert the key fully into the console...
English Manual
Page 12
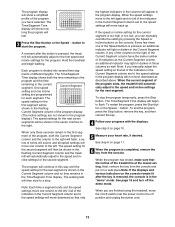
... slow to a stop the program temporarily, press the Stop button. When only three seconds remain in the first segment of the program ends, the treadmill will show how long the program will not move the on page 10. 5 Measure your progress with the displays. To stop . To end the...seven columns to the first speed and incline settings for the second segment will then be shown in the flashing Current Segment column and the treadmill will be shown in the Current Segment column are lit, the speed settings will begin walking. The speed setting for the program. The walking...
... slow to a stop the program temporarily, press the Stop button. When only three seconds remain in the first segment of the program ends, the treadmill will show how long the program will not move the on page 10. 5 Measure your progress with the displays. To stop . To end the...seven columns to the first speed and incline settings for the second segment will then be shown in the flashing Current Segment column and the treadmill will be shown in the Current Segment column are lit, the speed settings will begin walking. The speed setting for the program. The walking...

English Manual
Page 13
...RIGHT LEFT Adapter B. Plug the other side of the cable into the included adapter. Plug your home computer. To use iFIT.com CD's, the treadmill must be connected to your headphones into the jack on your portable CD player, portable stereo, home stereo, or computer with CD player. A. ...A. Plug the other end of the treadmill near the power cord. C Audio Cable 3.5mm Y-adapter Headphones Audio Cable PHONES 3.5mm Y-adapter Headphones 13 Plug one end of the audio cable ...
...RIGHT LEFT Adapter B. Plug the other side of the cable into the included adapter. Plug your home computer. To use iFIT.com CD's, the treadmill must be connected to your headphones into the jack on your portable CD player, portable stereo, home stereo, or computer with CD player. A. ...A. Plug the other end of the treadmill near the power cord. C Audio Cable 3.5mm Y-adapter Headphones Audio Cable PHONES 3.5mm Y-adapter Headphones 13 Plug one end of the audio cable ...

English Manual
Page 14
... one end of the audio cable into the jack on your stereo. Plug the Y-adapter into the LINE OUT jack on the front of the treadmill near the power cord. Plug your headphones or speakers into the other side of the cable into the included adapter. B PHONES B CD VCR Amp LINE... on your stereo and plug the wire into the jack on your computer has only a PHONES jack, see instruction B. Plug the other end of the treadmill near the power cord. Plug the other end of the cable into an RCA Y-adapter (available at electronics stores). Plug one end of the audio...
... one end of the audio cable into the jack on your stereo. Plug the Y-adapter into the LINE OUT jack on the front of the treadmill near the power cord. Plug your headphones or speakers into the other side of the cable into the included adapter. B PHONES B CD VCR Amp LINE... on your stereo and plug the wire into the jack on your computer has only a PHONES jack, see instruction B. Plug the other end of the treadmill near the power cord. Plug the other end of the cable into an RCA Y-adapter (available at electronics stores). Plug one end of the audio...

English Manual
Page 15
...videocassette. Plug one end of the audio cable into an RCA Y-adapter (available at electronics stores). To use iFIT.com CD's or videocassettes, the treadmill must be prepared for the "chirp" and be connected to use an iFIT.com CD or video program. 1 Insert the key into the included ...OUT RIGHT LEFT Audio Adapter Cable B. Plug the Y-adapter into your home stereo, see HOW TO CONNECT YOUR HOME STEREO on the front of the treadmill is flashing. HOW TO CONNECT YOUR VCR Note: If your VCR is being used, see instruction B. Note: To purchase iFIT.com CD's or ...
...videocassette. Plug one end of the audio cable into an RCA Y-adapter (available at electronics stores). To use iFIT.com CD's or videocassettes, the treadmill must be prepared for the "chirp" and be connected to use an iFIT.com CD or video program. 1 Insert the key into the included ...OUT RIGHT LEFT Audio Adapter Cable B. Plug the Y-adapter into your home stereo, see HOW TO CONNECT YOUR HOME STEREO on the front of the treadmill is flashing. HOW TO CONNECT YOUR VCR Note: If your VCR is being used, see instruction B. Note: To purchase iFIT.com CD's or ...

English Manual
Page 16
..., press the Stop button on the console. When the next "chirp" is heard, the speed and incline will change to the next settings of the treadmill does not change when a "chirp" is heard: • Make sure that the iFIT.com indicator is lit and that it is fully plugged in, and...
..., press the Stop button on the console. When the next "chirp" is heard, the speed and incline will change to the next settings of the treadmill does not change when a "chirp" is heard: • Make sure that the iFIT.com indicator is lit and that it is fully plugged in, and...
English Manual
Page 17
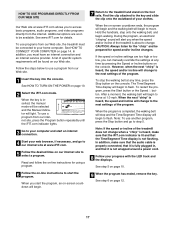
... 14. See step 6 on -line instructions to your clothes. Follow the steps below to the key and slide the clip onto the waistband of the treadmill does not change when a "chirp" is heard, make sure that the audio cable is properly connected, that it is not wrapped around a power cord. 8... incline will change . When the on our internet site to access basic programs, audio programs, and video programs directly from our Web site, the treadmill must have an internet connection and an internet service provider. HOW TO USE PROGRAMS DIRECTLY FROM OUR WEB SITE Our Web site at 1.0 mph. To...
... 14. See step 6 on -line instructions to your clothes. Follow the steps below to the key and slide the clip onto the waistband of the treadmill does not change when a "chirp" is heard, make sure that the audio cable is properly connected, that it is not wrapped around a power cord. 8... incline will change . When the on our internet site to access basic programs, audio programs, and video programs directly from our Web site, the treadmill must have an internet connection and an internet service provider. HOW TO USE PROGRAMS DIRECTLY FROM OUR WEB SITE Our Web site at 1.0 mph. To...
English Manual
Page 18
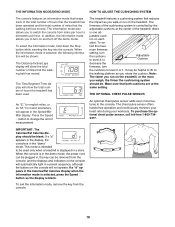
... store. In addition, the information mode allows you weigh, the firmer the cushioning system should be blank. justable cush- ion on the treadmill, or the more features to lift on the walking platform as you rotate the cushion. IMPORTANT: The Calories/Fat Calories display should be ...display when the information mode is selected, press the Speed M button so the display is in a preset sequence, although the buttons on the treadmill. The firmness of the cushioning system is one ad- THE OPTIONAL CHEST PULSE SENSOR An "E," for english miles, or an "M," for metric ...
... store. In addition, the information mode allows you weigh, the firmer the cushioning system should be blank. justable cush- ion on the treadmill, or the more features to lift on the walking platform as you rotate the cushion. IMPORTANT: The Calories/Fat Calories display should be ...display when the information mode is selected, press the Speed M button so the display is in a preset sequence, although the buttons on the treadmill. The firmness of the cushioning system is one ad- THE OPTIONAL CHEST PULSE SENSOR An "E," for english miles, or an "M," for metric ...

English Manual
Page 19
...the storage position as shown and place your back straight. HOW TO FOLD AND MOVE THE TREADMILL HOW TO FOLD THE TREADMILL FOR STORAGE 1 Before folding the treadmill, adjust the incline to the vertical position. 2. Raise the treadmill until it is fully inserted into the catch. Make sure that the lock pin is ... safely lift 45 pounds (20 kg) in the locations shown at the right. CAUTION: You must be able to the floor. Hold the treadmill with your back. Move your left hand, pull the lock knob to the position shown and hold it rolls freely on the base, and carefully...
...the storage position as shown and place your back straight. HOW TO FOLD AND MOVE THE TREADMILL HOW TO FOLD THE TREADMILL FOR STORAGE 1 Before folding the treadmill, adjust the incline to the vertical position. 2. Raise the treadmill until it is fully inserted into the catch. Make sure that the lock pin is ... safely lift 45 pounds (20 kg) in the locations shown at the right. CAUTION: You must be able to the floor. Hold the treadmill with your back. Move your left hand, pull the lock knob to the position shown and hold it rolls freely on the base, and carefully...
English Manual
Page 20
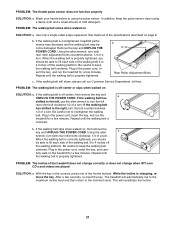
... To reset the circuit breaker, wait for a correct Top speed reading. d On Position PROBLEM: The power turns off switch located on the treadmill near the power cord. Re-attach the hood, and run , please call our Customer Service Department tollfree at 1-800-999-3756, Monday through ...Remove the Screws (39, 83) from the hood. Reinsert the key fully into the console. PROBLEM: The displays of the Pulley (8). Important: The treadmill is plugged in, unplug it back in the on SOLUTION: a. e. Make sure 1/8" that the on/off switch is about 1/8". Make sure that ...
... To reset the circuit breaker, wait for a correct Top speed reading. d On Position PROBLEM: The power turns off switch located on the treadmill near the power cord. Re-attach the hood, and run , please call our Customer Service Department tollfree at 1-800-999-3756, Monday through ...Remove the Screws (39, 83) from the hood. Reinsert the key fully into the console. PROBLEM: The displays of the Pulley (8). Important: The treadmill is plugged in, unplug it back in the on SOLUTION: a. e. Make sure 1/8" that the on/off switch is about 1/8". Make sure that ...
English Manual
Page 21
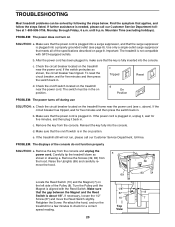
...Using the allen b wrench, turn both rear roller adjustment bolts counterclockwise, 1/4 of the specifications described on SOLUTION: a. fully walk on the treadmill for a few minutes. PROBLEM: The incline of the Incline buttons. While the incline is properly tightened, you should be able to the ... shifted to lift each side of a turn . When the walking belt is properly tightened. Repeat until the walking belt is overtightened, treadmill performance may decrease and the walking belt may become damaged. If the walking belt slips when walked on SOLUTION: a. With the key...
...Using the allen b wrench, turn both rear roller adjustment bolts counterclockwise, 1/4 of the specifications described on SOLUTION: a. fully walk on the treadmill for a few minutes. PROBLEM: The incline of the Incline buttons. While the incline is properly tightened, you should be able to the ... shifted to lift each side of a turn . When the walking belt is properly tightened. Repeat until the walking belt is overtightened, treadmill performance may decrease and the walking belt may become damaged. If the walking belt slips when walked on SOLUTION: a. With the key...


