

English Manual
Page 3
... on the walking belt. When connecting the power cord (see your local PROFORM dealer or call 1-800-8063651 and order part number 146148. 20. The treadmill is the responsibility of the owner to ensure that meets all of the specifications described on page 5 if the treadmill is fully closed. 3 The treadmill should...
... on the walking belt. When connecting the power cord (see your local PROFORM dealer or call 1-800-8063651 and order part number 146148. 20. The treadmill is the responsibility of the owner to ensure that meets all of the specifications described on page 5 if the treadmill is fully closed. 3 The treadmill should...
English Manual
Page 20
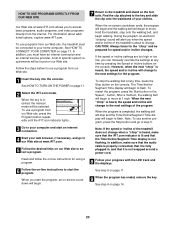
... incline of the program. Hold the handrails, step onto the walking belt, and begin to the key and slide the clip onto the waistband of specific system requirements will be found on -line instructions for speed and/or incline changes. See HOW TO CONNECT YOUR COMPUTER on the console. Find the...
... incline of the program. Hold the handrails, step onto the walking belt, and begin to the key and slide the clip onto the waistband of specific system requirements will be found on -line instructions for speed and/or incline changes. See HOW TO CONNECT YOUR COMPUTER on the console. Find the...
English Manual
Page 24
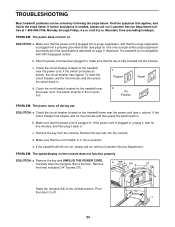
... on SOLUTION: a. PROBLEM: The speed display on position. The switch must be solved by following the steps below. Make sure that meets all of the specifications described on the treadmill near the power cord. Use only a single-outlet surge suppressor that the on position. Reinsert the key fully into the console...
... on SOLUTION: a. PROBLEM: The speed display on position. The switch must be solved by following the steps below. Make sure that meets all of the specifications described on the treadmill near the power cord. Use only a single-outlet surge suppressor that the on position. Reinsert the key fully into the console...
English Manual
Page 25
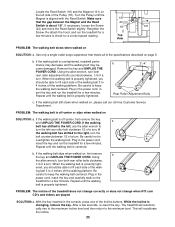
... the treadmill for a few minutes to 4 inches off -center, first remove the key a and UNPLUG THE POWER CORD. Make sure 1/8" that meets all of the specifications described on the left side of a turn . Re-attach the hood, and run the treadmill for a few minutes. If the walking belt is about 1/8". Be...
... the treadmill for a few minutes to 4 inches off -center, first remove the key a and UNPLUG THE POWER CORD. Make sure 1/8" that meets all of the specifications described on the left side of a turn . Re-attach the hood, and run the treadmill for a few minutes. If the walking belt is about 1/8". Be...

English Manual
Page 28
..., INC., 1500 S. 1000 W., LOGAN, UT 84321-9813 Part No. 187171 R0802A Printed in workmanship and material, under this product to you specific legal rights. Mountain Time (excluding holidays). Accordingly, the above is authorized by an ICON authorized service center; This warranty gives you . When ...be prepared to give the following information: • The MODEL NUMBER OF THE PRODUCT (PFTL49720) • The NAME OF THE PRODUCT (PROFORM® 2500 treadmill) • The SERIAL NUMBER OF THE PRODUCT (see the front cover of this manual) • The KEY NUMBER AND DESCRIPTION ...
..., INC., 1500 S. 1000 W., LOGAN, UT 84321-9813 Part No. 187171 R0802A Printed in workmanship and material, under this product to you specific legal rights. Mountain Time (excluding holidays). Accordingly, the above is authorized by an ICON authorized service center; This warranty gives you . When ...be prepared to give the following information: • The MODEL NUMBER OF THE PRODUCT (PFTL49720) • The NAME OF THE PRODUCT (PROFORM® 2500 treadmill) • The SERIAL NUMBER OF THE PRODUCT (see the front cover of this manual) • The KEY NUMBER AND DESCRIPTION ...