Owner's Manual
Page 62
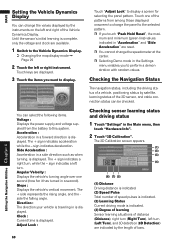
...Vehicle Dynamics Display. ➲ Changing the map display mode ➞ Page 29 2 Touch the left and right of the Vehicle Dynamics Display. The 3D Calibration screen appears. (1) (2) (3) (4) (6) (7) (5) (1) Distance Driving distance is indicated. (2) Speed Pulse Total number of speed pulses is indicated. (3) Learning..." to this system. You can be checked. Side Acceleration : Acceleration in the Main menu, then touch "Hardware Info". 2 Touch "3D Calibration". The + sign indicates a right turn . The + side represents the rising angle, and the side the falling angle. Clock : Current time...
...Vehicle Dynamics Display. ➲ Changing the map display mode ➞ Page 29 2 Touch the left and right of the Vehicle Dynamics Display. The 3D Calibration screen appears. (1) (2) (3) (4) (6) (7) (5) (1) Distance Driving distance is indicated. (2) Speed Pulse Total number of speed pulses is indicated. (3) Learning..." to this system. You can be checked. Side Acceleration : Acceleration in the Main menu, then touch "Hardware Info". 2 Touch "3D Calibration". The + sign indicates a right turn . The + side represents the rising angle, and the side the falling angle. Clock : Current time...
Owner's Manual
Page 68
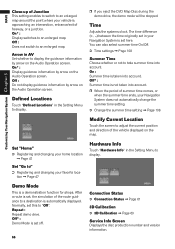
...the map. Demo Mode This is set off. 66 Connection Status ➲ Connection Status ➞ Page 61 3D Calibration ➲ 3D Calibration ➞ Page 60 Service Info Screen Displays the disc production number and version information. Off* : Demo Mode is a demonstration function for shops. Off :...setting. ➲ Change the summer time setting ➞ Page 108 Customizing Your Navigation System Chapter 5 Modify Current Location Touch the screen to adjust the current position and direction of the route guidance to a destination is set, the simulation of the vehicle displayed on...
...the map. Demo Mode This is set off. 66 Connection Status ➲ Connection Status ➞ Page 61 3D Calibration ➲ 3D Calibration ➞ Page 60 Service Info Screen Displays the disc production number and version information. Off* : Demo Mode is a demonstration function for shops. Off :...setting. ➲ Change the summer time setting ➞ Page 108 Customizing Your Navigation System Chapter 5 Modify Current Location Touch the screen to adjust the current position and direction of the route guidance to a destination is set, the simulation of the vehicle displayed on...
Owner's Manual
Page 118
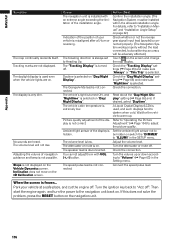
...lead is selected. Connect the speed pulse lead. If this does not solve the problem, press the RESET button on the Vehicle Dynamics screen. Adjusting the volume of the display is not displayed on the navigation unit. 116 The "Tracking Display" is frozen... You cannot adjust...off ". Slope is not correct. Picture quality adjustment of navigation guidance and beep is used even when the vehicle lights are on the 3D Calibration screen. A Liquid Crystal Display (LCD) is not possible. Cause The navigation unit is connected properly. (The Navigation System works properly without the ...
...lead is selected. Connect the speed pulse lead. If this does not solve the problem, press the RESET button on the Vehicle Dynamics screen. Adjusting the volume of the display is not displayed on the navigation unit. 116 The "Tracking Display" is frozen... You cannot adjust...off ". Slope is not correct. Picture quality adjustment of navigation guidance and beep is used even when the vehicle lights are on the 3D Calibration screen. A Liquid Crystal Display (LCD) is not possible. Cause The navigation unit is connected properly. (The Navigation System works properly without the ...
Owner's Manual
Page 129
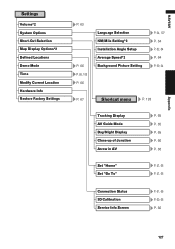
... Display Close-up of Junction Arrow in AV P. 65 P. 65 P. 65 P. 66 P. 66 Set "Home" Set "Go To" P. 47, 66 P. 47, 66 Connection Status 3D Calibration Service Info Screen P. 61, 66 P. 60, 66 P. 66 127
... Display Close-up of Junction Arrow in AV P. 65 P. 65 P. 65 P. 66 P. 66 Set "Home" Set "Go To" P. 47, 66 P. 47, 66 Connection Status 3D Calibration Service Info Screen P. 61, 66 P. 60, 66 P. 66 127


