Installation Manual
Page 2
... THE PARKING BRAKE SWITCH. Be sure to install the display in a location where they must be obeyed and this point. • It is being driven. Contents Connecting the units 2 Connecting the system (AVH-P4200DVD/AVH-P3200DVD 4 Connecting the system (AVH-P3200BT) ......... 4 When connecting with optional CD-IU200V cable (AVH-P4200DVD only) ... 5 Connecting the power cord 6 When connecting to separately sold power amp 8 When connecting with a rear view camera.... 9 When connecting the external video component and the display 10 When using a display connected to rear video output 10...
... THE PARKING BRAKE SWITCH. Be sure to install the display in a location where they must be obeyed and this point. • It is being driven. Contents Connecting the units 2 Connecting the system (AVH-P4200DVD/AVH-P3200DVD 4 Connecting the system (AVH-P3200BT) ......... 4 When connecting with optional CD-IU200V cable (AVH-P4200DVD only) ... 5 Connecting the power cord 6 When connecting to separately sold power amp 8 When connecting with a rear view camera.... 9 When connecting the external video component and the display 10 When using a display connected to rear video output 10...
Installation Manual
Page 3
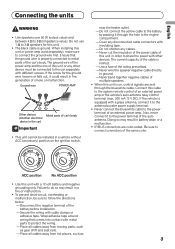
... insulation of the power cable of the same color. Never wire the speaker negative cable directly to 8 Ω (impedance value). Be sure to 3 Ω speakers for the ground wire loosens or falls out, it to follow the directions below. - Do not use 1 Ω to connect connectors of this unit or power amp (sold separately), make sure to the system remote control of the auto antenna. When installing this unit in battery drain or...
... insulation of the power cable of the same color. Never wire the speaker negative cable directly to 8 Ω (impedance value). Be sure to 3 Ω speakers for the ground wire loosens or falls out, it to follow the directions below. - Do not use 1 Ω to connect connectors of this unit or power amp (sold separately), make sure to the system remote control of the auto antenna. When installing this unit in battery drain or...
Installation Manual
Page 5
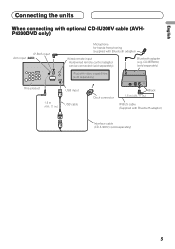
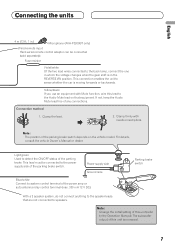
English Connecting the units When connecting with optional CD-IU200V cable (AVHP4200DVD only) IP-BUS input AUX input (AUX) Microphone for hands-free phoning (supplied with Bluetooth adapter) Interface cable (CD-IU200V) (sold separately). Bluetooth adapter (e.g. CD-BTB200) (sold separately) iPod with video capabilities (sold separately) This product USB input 1.5 m (4 ft. 11 in.) USB cable Dock connector Black 1.5 m (4 ft. 11 in.) IP-BUS cable (Supplied with Bluetooth adapter) Wired remote input Hard-wired remote control adaptor can be connected (sold separately) 5
English Connecting the units When connecting with optional CD-IU200V cable (AVHP4200DVD only) IP-BUS input AUX input (AUX) Microphone for hands-free phoning (supplied with Bluetooth adapter) Interface cable (CD-IU200V) (sold separately). Bluetooth adapter (e.g. CD-BTB200) (sold separately) iPod with video capabilities (sold separately) This product USB input 1.5 m (4 ft. 11 in.) USB cable Dock connector Black 1.5 m (4 ft. 11 in.) IP-BUS cable (Supplied with Bluetooth adapter) Wired remote input Hard-wired remote control adaptor can be connected (sold separately) 5
Installation Manual
Page 7
... Audio Mute lead free of this unit is in .) Microphone (AVH-P3200BT only) Wired remote input Hard-wired remote control adaptor can be connected to speakers. Power supply side Ground side Blue/white Connect to sense whether the car is moving forwards or backwards. For details, consult the vehicle Owner's Manual or dealer. Yellow/black If you use an equipment with needle-nosed pliers. Clamp firmly with Mute function, wire this lead to the Operation Manual). The subwoofer output of the parking brake. Fuse...
... Audio Mute lead free of this unit is in .) Microphone (AVH-P3200BT only) Wired remote input Hard-wired remote control adaptor can be connected to speakers. Power supply side Ground side Blue/white Connect to sense whether the car is moving forwards or backwards. For details, consult the vehicle Owner's Manual or dealer. Yellow/black If you use an equipment with needle-nosed pliers. Clamp firmly with Mute function, wire this lead to the Operation Manual). The subwoofer output of the parking brake. Fuse...
Installation Manual
Page 10
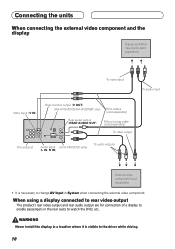
... a location where it is necessary to change AV Input in System when connecting the external video component. WARNING Never install the display in the rear seats to watch the DVD, etc. Connecting the units When connecting the external video component and the display Display with RCA input jacks (sold separately) To video input To audio input Video input (V IN) Rear monitor output (V OUT) (AVH-P4200DVD/AVH-P3200BT only) RCA cables (sold separately) Rear audio output (REAR AUDIO OUT) Mini pin plug cable (sold separately) To video output This product Audio input (AVH-P4200DVD only...
... a location where it is necessary to change AV Input in System when connecting the external video component. WARNING Never install the display in the rear seats to watch the DVD, etc. Connecting the units When connecting the external video component and the display Display with RCA input jacks (sold separately) To video input To audio input Video input (V IN) Rear monitor output (V OUT) (AVH-P4200DVD/AVH-P3200BT only) RCA cables (sold separately) Rear audio output (REAR AUDIO OUT) Mini pin plug cable (sold separately) To video output This product Audio input (AVH-P4200DVD only...
Owner's Manual
Page 2
... unit 10 Optional remote control 10 Basic Operations Basic Operations 11 Operating the scroll bar and the scrubber bar 12 Activating the touch panel keys 12 Common operations for menu settings/ lists 13 Adjusting the LCD panel angle 13 Ejecting a disc 13 Ejecting a disc 13 Ejecting an SD 13 2 En Ejecting an SD 14 Setting the clock 14 Tuner Introduction of tuner operations 15 Playing moving images Introduction of video playback operations 16 Playing audio Introduction of sound playback operations 19 Playing still images...
... unit 10 Optional remote control 10 Basic Operations Basic Operations 11 Operating the scroll bar and the scrubber bar 12 Activating the touch panel keys 12 Common operations for menu settings/ lists 13 Adjusting the LCD panel angle 13 Ejecting a disc 13 Ejecting a disc 13 Ejecting an SD 13 2 En Ejecting an SD 14 Setting the clock 14 Tuner Introduction of tuner operations 15 Playing moving images Introduction of video playback operations 16 Playing audio Introduction of sound playback operations 19 Playing still images...
Owner's Manual
Page 3
... phone number 48 Setting the private mode 49 Pairing from this unit 49 Using a Bluetooth device to pair 50 Connecting to a Bluetooth device automatically 50 Switching visible unit 51 Displaying BD (Bluetooth Device) address 51 Entering PIN code for Bluetooth wireless connection 51 Using a cellular phone to initiate a connection 51 Registering a connected cellular phone 52 Voice recognition 52 Connecting a Bluetooth audio player 52 Connecting to a Bluetooth device automatically 52 Displaying BD (Bluetooth Device) address 52 Menu operations Introduction of menu operations 54 Audio Adjustments...
... phone number 48 Setting the private mode 49 Pairing from this unit 49 Using a Bluetooth device to pair 50 Connecting to a Bluetooth device automatically 50 Switching visible unit 51 Displaying BD (Bluetooth Device) address 51 Entering PIN code for Bluetooth wireless connection 51 Using a cellular phone to initiate a connection 51 Registering a connected cellular phone 52 Voice recognition 52 Connecting a Bluetooth audio player 52 Connecting to a Bluetooth device automatically 52 Displaying BD (Bluetooth Device) address 52 Menu operations Introduction of menu operations 54 Audio Adjustments...
Owner's Manual
Page 4
... Other Functions Changing the picture adjustment 69 Setting rear monitor output 69 Adjusting the response positions of the touch panels (Touch Panel Calibration) 70 Using an AUX source 70 Using an external unit 71 Additional Information Troubleshooting 72 Error messages 74 Understanding auto EQ error messages 77 Understanding messages 78 Indicator list 78 Handling guideline 80 Compressed audio compatibility (disc, USB, SD) 83 iPod compatibility 84 Sequence of audio files 84 Using the display correctly 85 Copyright and trademark 86 Language code chart for DVD 89 Specifications...
... Other Functions Changing the picture adjustment 69 Setting rear monitor output 69 Adjusting the response positions of the touch panels (Touch Panel Calibration) 70 Using an AUX source 70 Using an external unit 71 Additional Information Troubleshooting 72 Error messages 74 Understanding auto EQ error messages 77 Understanding messages 78 Indicator list 78 Handling guideline 80 Compressed audio compatibility (disc, USB, SD) 83 iPod compatibility 84 Sequence of audio files 84 Using the display correctly 85 Copyright and trademark 86 Language code chart for DVD 89 Specifications...
Owner's Manual
Page 6
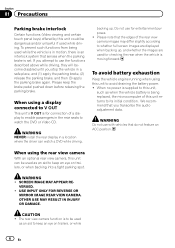
... until you transcribe the audio adjustment data. Do not use with vehicles that senses when the parking brake is set. WARNING ! SCREEN IMAGE MAY APPEAR RE- OTHER USE MAY RESULT IN INJURY OR DAMAGE. WARNING NEVER install the rear display in a safe place, and (1) apply the parking brake, (2) release the parking brake, and then (3) apply the parking brake again. USE INPUT ONLY FOR REVERSE OR MIRROR IMAGE REAR VIEW CAMERA. The rear view camera function is being used as an aid to...
... until you transcribe the audio adjustment data. Do not use with vehicles that senses when the parking brake is set. WARNING ! SCREEN IMAGE MAY APPEAR RE- OTHER USE MAY RESULT IN INJURY OR DAMAGE. WARNING NEVER install the rear display in a safe place, and (1) apply the parking brake, (2) release the parking brake, and then (3) apply the parking brake again. USE INPUT ONLY FOR REVERSE OR MIRROR IMAGE REAR VIEW CAMERA. The rear view camera function is being used as an aid to...
Owner's Manual
Page 7
... this unit. Always keep the volume low enough to moisture. ! This transmitter must accept any interference received, including interference that may invalidate the user's right to chemicals listed on the enclosed warranty card. AVH-P4200DVD/AVH-P3200DVD This device complies with part 15 of RF energy that it deemed to comply without appropriate authorization may cause undesired operation. CAUTION ! If the battery...
... this unit. Always keep the volume low enough to moisture. ! This transmitter must accept any interference received, including interference that may invalidate the user's right to chemicals listed on the enclosed warranty card. AVH-P4200DVD/AVH-P3200DVD This device complies with part 15 of RF energy that it deemed to comply without appropriate authorization may cause undesired operation. CAUTION ! If the battery...

Owner's Manual
Page 11
... source icon is connected. - Switching the output source 4 Rear Front for the rear monitor. In this manual, iPod and iPhone will change as "iPod". ! For details, refer to Setting the rear view camera (back up to a Pioneer product, such as a source, the basic functions of AVH-P4200DVD/AVH-P3200DVD) ! If the HD Radio tuner is connected to clock adjust- 2 Wed 28 may 12:45 PM 3 Radio Disc iPod SD SD AUX 45 6 Rear Front Rear View 1 Touch panel keys 1 Displaying the source menu. Switching to this unit. Refer to external unit 1 or external unit 2. ! XM tuner...
... source icon is connected. - Switching the output source 4 Rear Front for the rear monitor. In this manual, iPod and iPhone will change as "iPod". ! For details, refer to Setting the rear view camera (back up to a Pioneer product, such as a source, the basic functions of AVH-P4200DVD/AVH-P3200DVD) ! If the HD Radio tuner is connected to clock adjust- 2 Wed 28 may 12:45 PM 3 Radio Disc iPod SD SD AUX 45 6 Rear Front Rear View 1 Touch panel keys 1 Displaying the source menu. Switching to this unit. Refer to external unit 1 or external unit 2. ! XM tuner...
Owner's Manual
Page 13
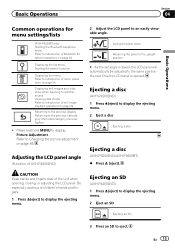
... source. Be especially cautious of the unit when opening, closing, or adjusting the LCD panel. Adjusting the LCD panel angle (Function of Bluetooth telephone operations on page 22. Refer to Changing the picture adjustment on page 54. Laying the panel down. Ejecting a disc (AVH-P4200DVD) 1 Press h(eject) to eject. Basic Operations Section 04 Basic Operations Common operations for menu settings/lists (AVH-P3200BT only) Starting the Bluetooth telephone menu. Displaying the list menu. Ejecting an SD (AVH-P4200DVD) 1 Press h(eject) to display the ejecting menu...
... source. Be especially cautious of the unit when opening, closing, or adjusting the LCD panel. Adjusting the LCD panel angle (Function of Bluetooth telephone operations on page 22. Refer to Changing the picture adjustment on page 54. Laying the panel down. Ejecting a disc (AVH-P4200DVD) 1 Press h(eject) to eject. Basic Operations Section 04 Basic Operations Common operations for menu settings/lists (AVH-P3200BT only) Starting the Bluetooth telephone menu. Displaying the list menu. Ejecting an SD (AVH-P4200DVD) 1 Press h(eject) to display the ejecting menu...
Owner's Manual
Page 49
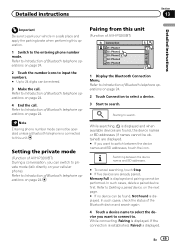
... connecting, Pairing is displayed. Pairing from this unit (Function of Bluetooth telephone operations on page 24. 2 Touch Connection to select a device. 3 Start to . on page 24. Setting the private mode (Function of AVH-P3200BT) During a conversation, you want to Introduction of Bluetooth telephone operations on your vehicle in a safe place and apply the parking brake when performing this operation. 1 Switch to search. Refer to this unit. Note Entering phone number mode cannot be operated unless a Bluetooth telephone...
... connecting, Pairing is displayed. Pairing from this unit (Function of Bluetooth telephone operations on page 24. 2 Touch Connection to select a device. 3 Start to . on page 24. Setting the private mode (Function of AVH-P3200BT) During a conversation, you want to Introduction of Bluetooth telephone operations on your vehicle in a safe place and apply the parking brake when performing this operation. 1 Switch to search. Refer to this unit. Note Entering phone number mode cannot be operated unless a Bluetooth telephone...
Owner's Manual
Page 50
... device to open the connection between your phone is displayed and pairing cannot be changed . Refer to the manual for Bluetooth wireless connection on the next page. Refer to establish a connection. 1 Display the Bluetooth Connection Menu. Deleting a paired device. # Never turn automatic connection on this page. 4 Use your Bluetooth device to Deleting a paired device. Using a Bluetooth device to pair (Function of AVH-P3200BT) If this function to Entering PIN code for your Bluetooth device is displayed. If your Bluetooth device, you can use this function is set...
... device to open the connection between your phone is displayed and pairing cannot be changed . Refer to the manual for Bluetooth wireless connection on the next page. Refer to establish a connection. 1 Display the Bluetooth Connection Menu. Deleting a paired device. # Never turn automatic connection on this page. 4 Use your Bluetooth device to Deleting a paired device. Using a Bluetooth device to pair (Function of AVH-P3200BT) If this function to Entering PIN code for your Bluetooth device is displayed. If your Bluetooth device, you can use this function is set...
Owner's Manual
Page 52
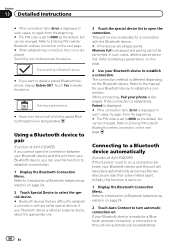
... of Bluetooth telephone operations on standby for connection from Bluetooth audio player. Connecting a Bluetooth audio player (Function of AVH-P4200DVD/AVH-P3200DVD) A Bluetooth wireless connection can be registered. 1 Start registering a connected cellular phone. This unit is now on page 29. 2 Use cellular phone to register to this unit. Connecting to a Bluetooth device automatically (Function of AVH-P4200DVD/AVH-P3200DVD) If this function is set to on. 1 Touch Auto Connect to turn automatic connection off, touch Auto Connect again. 2 Turn your cellular phone features...
... of Bluetooth telephone operations on standby for connection from Bluetooth audio player. Connecting a Bluetooth audio player (Function of AVH-P4200DVD/AVH-P3200DVD) A Bluetooth wireless connection can be registered. 1 Start registering a connected cellular phone. This unit is now on page 29. 2 Use cellular phone to register to this unit. Connecting to a Bluetooth device automatically (Function of AVH-P4200DVD/AVH-P3200DVD) If this function is set to on. 1 Touch Auto Connect to turn automatic connection off, touch Auto Connect again. 2 Turn your cellular phone features...
Owner's Manual
Page 59
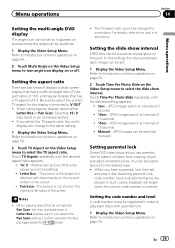
... some discs. Menu operations Section 14 Menu operations Setting the multi-angle DVD display The angle icon can be set . 1 Display the Video Setup Menu. When using regular display, select either Letter Box or Pan Scan. Refer to play a disc featuring parental lock, code number input indications may result in an unnatural picture. ! Confirm whether the disc package bears the 16 : 9 LB mark. ! In this setting, the interval between each image can be set so it appears...
... some discs. Menu operations Section 14 Menu operations Setting the multi-angle DVD display The angle icon can be set . 1 Display the Video Setup Menu. When using regular display, select either Letter Box or Pan Scan. Refer to play a disc featuring parental lock, code number input indications may result in an unnatural picture. ! Confirm whether the disc package bears the 16 : 9 LB mark. ! In this setting, the interval between each image can be set so it appears...
Owner's Manual
Page 62
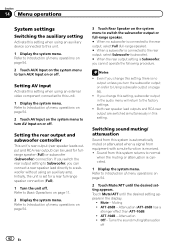
... menu operations on page 54. 3 Touch Rear Speaker on the system menu to switch the subwoofer output or full-range speaker. # When no output unless you change this setting, subwoofer output in the audio menu will return to turn AV Input on or off. Even if you turn the subwoofer output on (refer to this unit. 1 Display the system menu. Switching sound muting/ attenuation Sound from this system is connected to a subwoofer without using an auxiliary amp. Notes ! Setting AV input Activate this setting when using an external video component connected to Using subwoofer output...
... menu operations on page 54. 3 Touch Rear Speaker on the system menu to switch the subwoofer output or full-range speaker. # When no output unless you change this setting, subwoofer output in the audio menu will return to turn AV Input on or off. Even if you turn the subwoofer output on (refer to this unit. 1 Display the system menu. Switching sound muting/ attenuation Sound from this system is connected to a subwoofer without using an auxiliary amp. Notes ! Setting AV input Activate this setting when using an external video component connected to Using subwoofer output...
Owner's Manual
Page 63
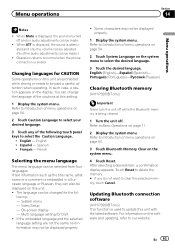
... phone connection is used to clear the selected memory, touch Cancel. Refer to Introduction of menu operations on page 54. 2 Touch System Language on the system menu to Introduction of menu operations on page 54. 3 Touch Bluetooth Memory Clear on page 54. 2 Touch Caution Language to select the Caution Language. ! For information on this unit with the latest software. Español - Video Setup - Some characters may not be displayed on the display. Changing...
... phone connection is used to clear the selected memory, touch Cancel. Refer to Introduction of menu operations on page 54. 2 Touch System Language on the system menu to Introduction of menu operations on page 54. 3 Touch Bluetooth Memory Clear on page 54. 2 Touch Caution Language to select the Caution Language. ! For information on this unit with the latest software. Español - Video Setup - Some characters may not be displayed on the display. Changing...
Owner's Manual
Page 64
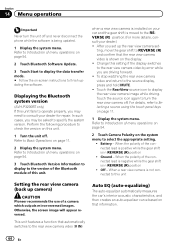
... set up camera) CAUTION Pioneer recommends the use of the connected lead is negative while the gear shift is being updated. 1 Display the system menu. Change this unit. Otherwise, the screen image will appear reversed. Section 14 Menu operations Important Never turn the rear view camera off. Displaying the Bluetooth system version (AVH-P3200BT only) If this unit fails to specify the system version. When the polarity of a camera which outputs mirror-reversed images. For details, refer to Selecting a source using...
... set up camera) CAUTION Pioneer recommends the use of the connected lead is negative while the gear shift is being updated. 1 Display the system menu. Change this unit. Otherwise, the screen image will appear reversed. Section 14 Menu operations Important Never turn the rear view camera off. Displaying the Bluetooth system version (AVH-P3200BT only) If this unit fails to specify the system version. When the polarity of a camera which outputs mirror-reversed images. For details, refer to Selecting a source using...
Owner's Manual
Page 65
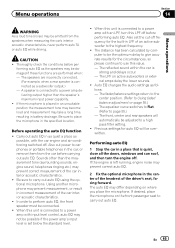
... the specified location. The equalizer curve switches to Flat. (Refer to a high pass filter setting. ! The front, center and rear speakers will be damaged if these functions are incorrectly connected. (For example, when a rear speaker is connected to the highest frequency. ! forming auto EQ as a subwoofer output.) - When this value. - The LPF on where you place the microphone. Sounds other than the speaker's maximum input power capability. ! Using another...
... the specified location. The equalizer curve switches to Flat. (Refer to a high pass filter setting. ! The front, center and rear speakers will be damaged if these functions are incorrectly connected. (For example, when a rear speaker is connected to the highest frequency. ! forming auto EQ as a subwoofer output.) - When this value. - The LPF on where you place the microphone. Sounds other than the speaker's maximum input power capability. ! Using another...


