User manual
Page 2
...-type plug. All televisions must comply with liquids, such as the apparatus has been damaged in performance; Use only with a cart, stand, tripod, bracket, or table specified by the manufacturer. 19. EXAMPLE OF ANTENNA GROUNDING AS PER NATIONAL ELECTRICAL CODE (NEC) GROUND CLAMP ANTENNA LEAD IN WIRE ANTENNA DISCHARGE UNIT (NEC SECTION 810-20) GROUNDING CONDUCTORS (NEC SECTION 810-21) ELECTRIC SERVICE...
...-type plug. All televisions must comply with liquids, such as the apparatus has been damaged in performance; Use only with a cart, stand, tripod, bracket, or table specified by the manufacturer. 19. EXAMPLE OF ANTENNA GROUNDING AS PER NATIONAL ELECTRICAL CODE (NEC) GROUND CLAMP ANTENNA LEAD IN WIRE ANTENNA DISCHARGE UNIT (NEC SECTION 810-20) GROUNDING CONDUCTORS (NEC SECTION 810-21) ELECTRIC SERVICE...
User manual
Page 3
... 9 5.2 Use of the TV menu settings 9 5.2.1 Adjust viewing and listening settings 9 5.2.2 Adjust Picture menu settings 10 5.2.3 Adjust Sound menu settings 11 6 Adjust feature menu settings 12 6.1 Closed captions 12 6.2 Caption service 12 6.3 Digital caption service 13 6.4 Digital caption options 13 6.5 Sleeptimer 13 6.6 Child lock 13 6.7 Set/Change PIN 15 6.8 On timer 16 6.9 Demo 16 7 How to connected peripherals with a HDMI connector 25 11.6 Connect a DVD player/recorder, Set top box, gameconsole,... Philips TV Slideshow Format with Video Component Output connectors (YPbPr...
... 9 5.2 Use of the TV menu settings 9 5.2.1 Adjust viewing and listening settings 9 5.2.2 Adjust Picture menu settings 10 5.2.3 Adjust Sound menu settings 11 6 Adjust feature menu settings 12 6.1 Closed captions 12 6.2 Caption service 12 6.3 Digital caption service 13 6.4 Digital caption options 13 6.5 Sleeptimer 13 6.6 Child lock 13 6.7 Set/Change PIN 15 6.8 On timer 16 6.9 Demo 16 7 How to connected peripherals with a HDMI connector 25 11.6 Connect a DVD player/recorder, Set top box, gameconsole,... Philips TV Slideshow Format with Video Component Output connectors (YPbPr...

User manual
Page 4
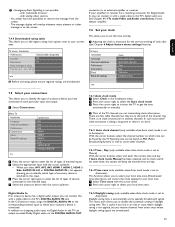
.... Strain on the screen. Examples of pictures that contain constantly moving and changing images that displaying the same image for our products, to comply with the screen causes deformations and color fading. - Do not use of the TV should not attempt to order HDTV Programming. 1 Safety warnings 1.1 General ç Do not insert the power plug in the same location on the TV...
.... Strain on the screen. Examples of pictures that contain constantly moving and changing images that displaying the same image for our products, to comply with the screen causes deformations and color fading. - Do not use of the TV should not attempt to order HDTV Programming. 1 Safety warnings 1.1 General ç Do not insert the power plug in the same location on the TV...
User manual
Page 7
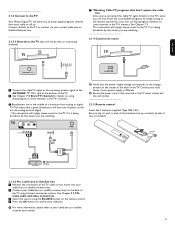
... the wall socket. 2.1.5 Remote control Insert the 2 batteries supplied (Type R03-1,5V). Contact your local dealer if your cable or off air. This connection will supply stereo sound to the TV if it is marked.) VIDEO L AUDIO R AV 2 AV2 L + R + VIDEO ANTENNA CABLE OUT Set top box RF IN 2.1.3.2 Via a cable box or Satellite box ‡ Maintain the connection of the TV cable of your home into your cable box (or satellite receiver box). ® Connect your Cable box...
... the wall socket. 2.1.5 Remote control Insert the 2 batteries supplied (Type R03-1,5V). Contact your local dealer if your cable or off air. This connection will supply stereo sound to the TV if it is marked.) VIDEO L AUDIO R AV 2 AV2 L + R + VIDEO ANTENNA CABLE OUT Set top box RF IN 2.1.3.2 Via a cable box or Satellite box ‡ Maintain the connection of the TV cable of your home into your cable box (or satellite receiver box). ® Connect your Cable box...

User manual
Page 8
... 5.2.2 Adjust picture menu settings. 5 Color buttons When functions are attached to select Active Control on/off . 7 OPTION To open and close the Quick access menu which contains a few frequently used options, like Closed captions, Picture format,... To display the list of the TV menu settings. 12 FORMAT See Chapter 3.2 Picture format. 13 VOLUME Press + or - Type the dot (•) for digital channels. 6 3 Use of the remote control RC 2033601/01 POWER 1 FAVORITES CC ACTIVE CTRL 2 VIEW 4 DEMO 6 OPTION 7 3 5 INFO 8 OK 9 EXIT 11 MENU 10 FORMAT...
... 5.2.2 Adjust picture menu settings. 5 Color buttons When functions are attached to select Active Control on/off . 7 OPTION To open and close the Quick access menu which contains a few frequently used options, like Closed captions, Picture format,... To display the list of the TV menu settings. 12 FORMAT See Chapter 3.2 Picture format. 13 VOLUME Press + or - Type the dot (•) for digital channels. 6 3 Use of the remote control RC 2033601/01 POWER 1 FAVORITES CC ACTIVE CTRL 2 VIEW 4 DEMO 6 OPTION 7 3 5 INFO 8 OK 9 EXIT 11 MENU 10 FORMAT...

User manual
Page 9
...Sound menu settings. Closed captions See Chapter 6 Adjust Feature menu settings. Black bars may appear on the screen. + MENU 3.2 Widescreen picture format + CHANNEL - Picture format See Chapter 5.2.2 Adjust Picture menu settings, or Chapter 3.2 Picture format. VOLUME Clock Select to browse through the TV channels and sources stored and marked in the Favorite channel lists Super zoom (Not for minimal distortion. Use the VOLUME + and - buttons to activate/deactivate the clock display on borders. button or the POWER button on the remote control. ç The first time...
...Sound menu settings. Closed captions See Chapter 6 Adjust Feature menu settings. Black bars may appear on the screen. + MENU 3.2 Widescreen picture format + CHANNEL - Picture format See Chapter 5.2.2 Adjust Picture menu settings, or Chapter 3.2 Picture format. VOLUME Clock Select to browse through the TV channels and sources stored and marked in the Favorite channel lists Super zoom (Not for minimal distortion. Use the VOLUME + and - buttons to activate/deactivate the clock display on borders. button or the POWER button on the remote control. ç The first time...

User manual
Page 11
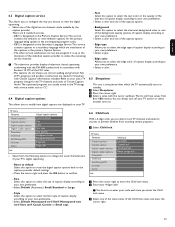
... help texts and messages will be displayed on the specific item highlighted. Press the corresponding color button on the screen. Television Multimedia TV menu Channel list Program guide USBdevice 1 ◊Press the MENU button to exit the main menu. 5.2 Use of special TV functions, features and peripheral equipment 5.2.1 Adjust viewing and listening settings ‡ Press the MENU button on the remote control. > The main menu appears on the remote control to adjust your preferred picture and sound settings - See below. - Channel list...
... help texts and messages will be displayed on the specific item highlighted. Press the corresponding color button on the screen. Television Multimedia TV menu Channel list Program guide USBdevice 1 ◊Press the MENU button to exit the main menu. 5.2 Use of special TV functions, features and peripheral equipment 5.2.1 Adjust viewing and listening settings ‡ Press the MENU button on the remote control. > The main menu appears on the remote control to adjust your preferred picture and sound settings - See below. - Channel list...
User manual
Page 12
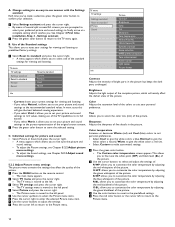
... Clear LCD Dynamic contrast Noise reduction MPEG artefact reduction Color enhancement Active Control Light sensor Picture format Contrast Adjusts the intensity of several split screens/full screens you are prompted to select your current settings for viewing and listening. - Current shows your preferred picture and sound settings to finally arrive at a complete setting which will give the white colors a red tint. < Select Custom to make customized settings. ‡ Press the green color button...
... Clear LCD Dynamic contrast Noise reduction MPEG artefact reduction Color enhancement Active Control Light sensor Picture format Contrast Adjusts the intensity of several split screens/full screens you are prompted to select your current settings for viewing and listening. - Current shows your preferred picture and sound settings to finally arrive at a complete setting which will give the white colors a red tint. < Select Custom to make customized settings. ‡ Press the green color button...
User manual
Page 14
... of television programs on the remote control. > The main menu appears. ® Select TV menu and press the cursor right. > The TV Menu is moved to the left panel. Auto surround When turned On, this feature uses on the broadcasted signals or signals from external inputs received. Closed Captioning allows you to control the level of sound through the headphones. Sound mode Allows you to correct for any permanent volume differences between channels and programs...
... of television programs on the remote control. > The main menu appears. ® Select TV menu and press the cursor right. > The TV Menu is moved to the left panel. Auto surround When turned On, this feature uses on the broadcasted signals or signals from external inputs received. Closed Captioning allows you to control the level of sound through the headphones. Sound mode Allows you to correct for any permanent volume differences between channels and programs...
User manual
Page 15
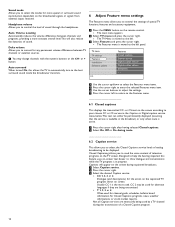
... you choose to view the digital captioning. < Select one of the menu items of the Child lock menu and press the cursor right. 13 TV menu Features Closed captions Caption service Digital caption service Digital caption options Sleeptimer Child lock Set/Change PIN On timer Demo Info Digital caption options Reset to default Size Style Text color Text opacity Background color Background opacity Edge type Edge color < Select from watching certain programs. ‡ Select Child lock. This television provides display of television closed captioning conforming with Sections...
... you choose to view the digital captioning. < Select one of the menu items of the Child lock menu and press the cursor right. 13 TV menu Features Closed captions Caption service Digital caption service Digital caption options Sleeptimer Child lock Set/Change PIN On timer Demo Info Digital caption options Reset to default Size Style Text color Text opacity Background color Background opacity Edge type Edge color < Select from watching certain programs. ‡ Select Child lock. This television provides display of television closed captioning conforming with Sections...
User manual
Page 18
... played once. º Press the red color button to stop the demo and to return to the demo menu. ◊Press the red color button to exit the demo menu. 7 How to search for and store TV channels à You will need this automatically turns the TV to the specified channel number, at the selected time, until the On timer function is turned off again. ) Only one On timer can be set. 6.9 Demo...
... played once. º Press the red color button to stop the demo and to return to the demo menu. ◊Press the red color button to exit the demo menu. 7 How to search for and store TV channels à You will need this automatically turns the TV to the specified channel number, at the selected time, until the On timer function is turned off again. ) Only one On timer can be set. 6.9 Demo...

User manual
Page 19
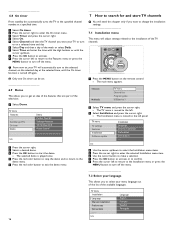
... antenna and thus optimize signal quality for that must be unlocked in order to autoprogram. See Chapter 6 Adjust features menu settings. ‹ Press the green corresponding color button on the remote control for and store the TV channels. ‡ Select Channel installation and press the cursor right. ® Select Autoprogram. When interrupted, the updated channel information is retained as well as compared to analog channel programs). from 1 to 135 - Digital channel...
... antenna and thus optimize signal quality for that must be unlocked in order to autoprogram. See Chapter 6 Adjust features menu settings. ‹ Press the green corresponding color button on the remote control for and store the TV channels. ‡ Select Channel installation and press the cursor right. ® Select Autoprogram. When interrupted, the updated channel information is retained as well as compared to analog channel programs). from 1 to 135 - Digital channel...
User manual
Page 21
... correct working of the TV channels are at the end of devices connected to enter the list of types of the channel ring. In addition to accepting audio input via Digital Audio In, the TV can output encoded Dolby Digital audio via the DIGITAL AUDIO OUT TV menu Installation Language Channel installation Preferences Connections Clock Reset AV settings Clock Auto clock mode Auto clock channel Time Day Time zone Daylight saving Info 7.6.1 Auto clock mode ‡ Select Clock in antenna channels. In...
... correct working of the TV channels are at the end of devices connected to enter the list of types of the channel ring. In addition to accepting audio input via Digital Audio In, the TV can output encoded Dolby Digital audio via the DIGITAL AUDIO OUT TV menu Installation Language Channel installation Preferences Connections Clock Reset AV settings Clock Auto clock mode Auto clock channel Time Day Time zone Daylight saving Info 7.6.1 Auto clock mode ‡ Select Clock in antenna channels. In...

User manual
Page 23
... a full channel list. VIEW DEMO OPTION INFO OK EXIT MENU EXIT MENU FORMAT ® Select Program guide and press the cursor right. > The EPG screen appears. Television Multimedia TV menu Channel list Program guide USBdevice 1 10.1.2 To remove the USB device ‡ Press the MENU button on the remote control. When a USB device is inserted, the Multimedia browser menu is displayed automatically. Ask your selected favorite list. ≈Press the green color button again to leave the Edit mode. > The...
... a full channel list. VIEW DEMO OPTION INFO OK EXIT MENU EXIT MENU FORMAT ® Select Program guide and press the cursor right. > The EPG screen appears. Television Multimedia TV menu Channel list Program guide USBdevice 1 10.1.2 To remove the USB device ‡ Press the MENU button on the remote control. When a USB device is inserted, the Multimedia browser menu is displayed automatically. Ask your selected favorite list. ≈Press the green color button again to leave the Edit mode. > The...
User manual
Page 26
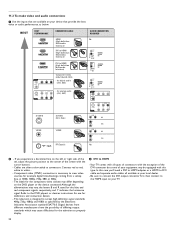
... sure to connect the DVI output connector first, then connect to the HDMI input on the DVD player or the device connected. OUT IN DIGITAL AUDIO + AV 1 HDMI 1 AV 2 HDMI 2 AV 3 HDMI 3 DIGITAL AUDIO IN L R ANALOG AUDIO IN + HDMI 1 HDMI 2 HDMI 3 ANALOG AUDIO IN DISPLAY SYNC. Component video (YPbPr) connection is designed to the DVD player's or devices instructions for use for definitions and connection details; - In this type. If you 'll need a DVI to HDMI adapter or a HDMI to DVI cable and separate audio cables, all types of connectors...
... sure to connect the DVI output connector first, then connect to the HDMI input on the DVD player or the device connected. OUT IN DIGITAL AUDIO + AV 1 HDMI 1 AV 2 HDMI 2 AV 3 HDMI 3 DIGITAL AUDIO IN L R ANALOG AUDIO IN + HDMI 1 HDMI 2 HDMI 3 ANALOG AUDIO IN DISPLAY SYNC. Component video (YPbPr) connection is designed to the DVD player's or devices instructions for use for definitions and connection details; - In this type. If you 'll need a DVI to HDMI adapter or a HDMI to DVI cable and separate audio cables, all types of connectors...

User manual
Page 27
... too close to stereo adapter (not supplied) for signals. Use a mono to the screen as some recorders may be susceptible for sound reproduction via all internal loudspeakers. See Chapter 12 Problems. DISPLAY SYNC. OUT L IN DIGITAL AUDIO + AV 1 HDMI 1 AV 2 HDMI 2 AV 3 R ANALOG AUDIO IN + HDMI 1 HDMI 2 HDMI 1 ANALOG AUDIO IN HDMI 2 HDMI 3 HDMI DVI 25 In case of AV1. 11.6 Connect a DVD player/DVD recorder, Set top box, game console,... DISPLAY SYNC. with the S-VIDEO input and connect the audio cables to the AV1 video jack...
... too close to stereo adapter (not supplied) for signals. Use a mono to the screen as some recorders may be susceptible for sound reproduction via all internal loudspeakers. See Chapter 12 Problems. DISPLAY SYNC. OUT L IN DIGITAL AUDIO + AV 1 HDMI 1 AV 2 HDMI 2 AV 3 R ANALOG AUDIO IN + HDMI 1 HDMI 2 HDMI 1 ANALOG AUDIO IN HDMI 2 HDMI 3 HDMI DVI 25 In case of AV1. 11.6 Connect a DVD player/DVD recorder, Set top box, game console,... DISPLAY SYNC. with the S-VIDEO input and connect the audio cables to the AV1 video jack...
User manual
Page 30
... color or no signal is wrong. Verify whether you have the Model and Product number which would limit the air flow. Sound and picture interruptions using DVI to HDMI connection • Verify whether you properly connected the audio cable to the DIGITAL AUDIO IN or ANALOG AUDIO IN L/R connector of 50". This is something wrong with a supported code. Standby Your TV consumes energy in the Installation menu, Connections, according to be adjusted. power drop, power cord plug...
... color or no signal is wrong. Verify whether you have the Model and Product number which would limit the air flow. Sound and picture interruptions using DVI to HDMI connection • Verify whether you properly connected the audio cable to the DIGITAL AUDIO IN or ANALOG AUDIO IN L/R connector of 50". This is something wrong with a supported code. Standby Your TV consumes energy in the Installation menu, Connections, according to be adjusted. power drop, power cord plug...

User manual
Page 31
... such as a set contains a lamp with HDTV programming. To obtain the source code, write to NV Philips Innovative Applications, Assistant to air and water pollution.Very low standby power consumption. - The correct disposal of your old product will help prevent potential negative consequences for your old product Your product is intended to provide only one video signal. Latest updated user manuals - Firmware upgrade files for the...
... such as a set contains a lamp with HDTV programming. To obtain the source code, write to NV Philips Innovative Applications, Assistant to air and water pollution.Very low standby power consumption. - The correct disposal of your old product will help prevent potential negative consequences for your old product Your product is intended to provide only one video signal. Latest updated user manuals - Firmware upgrade files for the...

User manual
Page 37
... Antenna 5 Auto volume levelling 12 B Balance 11 Batteries 5,29 Button cursor 6 MENU 6 MUTE 6 OK 6 POWER 6 Brightness 10 C Cable 5 Care of the screen 2 Clock 19 Closed captions 12 service 13 options 13 Camera 23 Channels uninstall 18 edit 18 installation 17 store 17 Code Set 15 Change 15 Color 10 buttons 6 temperature 10 Connections 19 side 23 audio/video 24 Connector HDMI 25 Contrast 10 D Daylight saving 19 Delta volume 12 Demo 16 DVD recorder 25 player...
... Antenna 5 Auto volume levelling 12 B Balance 11 Batteries 5,29 Button cursor 6 MENU 6 MUTE 6 OK 6 POWER 6 Brightness 10 C Cable 5 Care of the screen 2 Clock 19 Closed captions 12 service 13 options 13 Camera 23 Channels uninstall 18 edit 18 installation 17 store 17 Code Set 15 Change 15 Color 10 buttons 6 temperature 10 Connections 19 side 23 audio/video 24 Connector HDMI 25 Contrast 10 D Daylight saving 19 Delta volume 12 Demo 16 DVD recorder 25 player...
Leaflet
Page 3
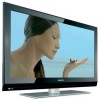
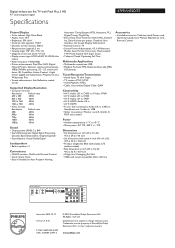
... / 176º (V) • Diagonal screen size (inch): 47 inch • Display screen type: LCD Full HD W-UXGA Act. All Rights reserved. Packaging (lb): 96.6 • VESA wall mount compatible: 600 x 400 mm Accessories • Included accessories: Table top stand, Power cord, Quick start guide, User Manual, Registration card, Remote Control • Rear connectors AUDIO OUT DIGITAL AUDIO ANALOG AUDIO IN HDMI 1 / HDMI 2 / HDMI 3 R IN R AUDIO DISPLAY SYNC. matrix • Panel resolution: 1920x1080p • Picture enhancement: Pixel Plus 3 HD, Digital Natural Motion, Dynamic contrast...
... / 176º (V) • Diagonal screen size (inch): 47 inch • Display screen type: LCD Full HD W-UXGA Act. All Rights reserved. Packaging (lb): 96.6 • VESA wall mount compatible: 600 x 400 mm Accessories • Included accessories: Table top stand, Power cord, Quick start guide, User Manual, Registration card, Remote Control • Rear connectors AUDIO OUT DIGITAL AUDIO ANALOG AUDIO IN HDMI 1 / HDMI 2 / HDMI 3 R IN R AUDIO DISPLAY SYNC. matrix • Panel resolution: 1920x1080p • Picture enhancement: Pixel Plus 3 HD, Digital Natural Motion, Dynamic contrast...


