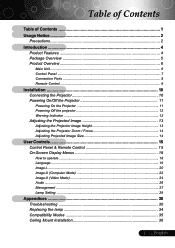
User Guide
Page 1
...Control Panel ...7 Connection Ports ...8 Remote Control ...9 Installation 10 Connecting the Projector 10 Powering On/Off the Projector 11 Powering On the Projector 11 Powering Off the projector 12 Warning Indicator ...12 Adjusting the Projected Image 13 Adjusting the Projector Image Height 13 Adjusting the Projector Zoom / Focus 14 Adjusting Projected Image Size 14 User Controls 15...22 Image-II (Video Mode 24 Audio ...26 Management ...27 Lamp Setting ...29 Appendices 30 Troubleshooting 30 Replacing the lamp 34 Compatibility Modes 35 Ceiling Mount Installation 36 1 ... English
...Control Panel ...7 Connection Ports ...8 Remote Control ...9 Installation 10 Connecting the Projector 10 Powering On/Off the Projector 11 Powering On the Projector 11 Powering Off the projector 12 Warning Indicator ...12 Adjusting the Projected Image 13 Adjusting the Projector Image Height 13 Adjusting the Projector Zoom / Focus 14 Adjusting Projected Image Size 14 User Controls 15...22 Image-II (Video Mode 24 Audio ...26 Management ...27 Lamp Setting ...29 Appendices 30 Troubleshooting 30 Replacing the lamp 34 Compatibility Modes 35 Ceiling Mount Installation 36 1 ... English
User Guide
Page 27
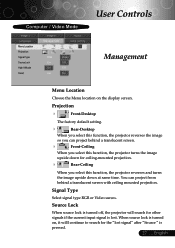
..." after "Source " is lost. Source Lock When source lock is turned off, the projector will search for ceiling-mounted projection. 4 Rear-Ceiling When you select this function, the projector turns the image upside down at same time. You can project behind a translucent screen. ...4 Front-Ceiling When you select this function, the projector reverses the image so you can project from behind a translucent screen with ceiling mounted projection. Signal Type Select signal type RGB or Video surces. Projection ...
..." after "Source " is lost. Source Lock When source lock is turned off, the projector will search for ceiling-mounted projection. 4 Rear-Ceiling When you select this function, the projector turns the image upside down at same time. You can project behind a translucent screen. ...4 Front-Ceiling When you select this function, the projector reverses the image so you can project from behind a translucent screen with ceiling mounted projection. Signal Type Select signal type RGB or Video surces. Projection ...

User Guide
Page 36
To prevent damaging your projector, please use a third party ceiling mount kit, please ensure the screws used to attached a mount to use the ceiling mount package for installation. 2. Appendices Ceiling Mount Installation 1. If you wish to the projector met the following specifications: ™Please note that damage resulting from incorrect installation will invalidate the warranty. 4 Screw type: M2.6 4 Maximum screw...
To prevent damaging your projector, please use a third party ceiling mount kit, please ensure the screws used to attached a mount to use the ceiling mount package for installation. 2. Appendices Ceiling Mount Installation 1. If you wish to the projector met the following specifications: ™Please note that damage resulting from incorrect installation will invalidate the warranty. 4 Screw type: M2.6 4 Maximum screw...


