
Reference Manual
Page 7
... manual 3 Composition of the manual 5 Names of parts 12 Camera 12 Viewfinder and monitor indications 14 Memory gauge 17 Battery check 17 1 Getting started 18 Attaching the strap 18 Battery/card basics 19 Charging the battery 19 Card basics 20 Inserting and removing the battery and card 21 Using an AC adapter (optional 24 Power...
... manual 3 Composition of the manual 5 Names of parts 12 Camera 12 Viewfinder and monitor indications 14 Memory gauge 17 Battery check 17 1 Getting started 18 Attaching the strap 18 Battery/card basics 19 Charging the battery 19 Card basics 20 Inserting and removing the battery and card 21 Using an AC adapter (optional 24 Power...

Reference Manual
Page 12
... absolutely avoided. Contents 11 Miscellaneous 200 Error codes 200 Troubleshooting 201 List of factory default settings 209 Modes and Shooting Functions 212 Camera maintenance 215 How to replace the battery (CR2025) of the remote control device 216 Specifications 217 Glossary of terms 219 List of menus 223 Index 229 Indications used in...
... absolutely avoided. Contents 11 Miscellaneous 200 Error codes 200 Troubleshooting 201 List of factory default settings 209 Modes and Shooting Functions 212 Camera maintenance 215 How to replace the battery (CR2025) of the remote control device 216 Specifications 217 Glossary of terms 219 List of menus 223 Index 229 Indications used in...

Reference Manual
Page 14
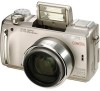
Names of parts Viewfinder gP.14, 32, 51, 161 Diopter adjustment dial gP.32 AE Lock/Custom button (x) gP.81, 86, 88, 149 Rotation button (y) gP.138 Self-timer/Remote control button (Z) gP.92, 93 Erase button (S) gP.145 Flash mode button (#) gP.61 Protect button (0) gP.143 Flash button gP.61 Card access lamp gP.51 QUICK VIEW button gP.125 Arrow pad (acbd) gP.34, 124 OK/Menu button (e) gP.34 Monitor button (f) gP.51 Power switch gP.25 Monitor g P.14, 51, 161 Tripod socket Battery compartment/card cover gP.21 13
Names of parts Viewfinder gP.14, 32, 51, 161 Diopter adjustment dial gP.32 AE Lock/Custom button (x) gP.81, 86, 88, 149 Rotation button (y) gP.138 Self-timer/Remote control button (Z) gP.92, 93 Erase button (S) gP.145 Flash mode button (#) gP.61 Protect button (0) gP.143 Flash button gP.61 Card access lamp gP.51 QUICK VIEW button gP.125 Arrow pad (acbd) gP.34, 124 OK/Menu button (e) gP.34 Monitor button (f) gP.51 Power switch gP.25 Monitor g P.14, 51, 161 Tripod socket Battery compartment/card cover gP.21 13

Reference Manual
Page 15
... value F2.8 - Page P.47 P.75 P.74 P.112 P.76 P.17 P.52 P.63 P.90 P.91 P.83 P.120 14 F8.0 4 Exposure compensation -2.0 - +2.0 Exposure differential -3.0 - +3.0 5 Battery check e, f 6 Green lamp | 7 Flash stand-by # (Lights) Camera movement # (Blinks) warning/Flash charge 8 Macro mode & Super macro mode % Manual focus MF 9 Noise reduction O Ref. Screens with the Information display set...
... value F2.8 - Page P.47 P.75 P.74 P.112 P.76 P.17 P.52 P.63 P.90 P.91 P.83 P.120 14 F8.0 4 Exposure compensation -2.0 - +2.0 Exposure differential -3.0 - +3.0 5 Battery check e, f 6 Green lamp | 7 Flash stand-by # (Lights) Camera movement # (Blinks) warning/Flash charge 8 Macro mode & Super macro mode % Manual focus MF 9 Noise reduction O Ref. Screens with the Information display set...

Reference Manual
Page 17
... 0.0 '04.06.17 15:30 MPEG4 6 640 480 7 11 '04.06.17 15:30 13 00:00/00:20 14 Still picture Movie Item Indications 1 Battery check e, f 2 Switch frame J 3 Print reservation, < × 10 Number of prints Movie 4 Sound record 5 Protect n H 9 6 Record mode TIFF, SHQ, HQ, SQ1, SQ2, MPEG4 7 Resolution 2288 ×...
... 0.0 '04.06.17 15:30 MPEG4 6 640 480 7 11 '04.06.17 15:30 13 00:00/00:20 14 Still picture Movie Item Indications 1 Battery check e, f 2 Switch frame J 3 Print reservation, < × 10 Number of prints Movie 4 Sound record 5 Protect n H 9 6 Record mode TIFF, SHQ, HQ, SQ1, SQ2, MPEG4 7 Resolution 2288 ×...

Reference Manual
Page 18
...changes as follows when the camera is off after a while) Remaining power level: high f Blinks (red) Remaining power level: low Charge the battery. The indication is displayed. Battery check HQ 2288 1712 Memory gauge a Shoot Before shooting (Gauge is turned on the card. BATTERY EMPTY is not displayed during ...gauge The memory gauge lights up when you take the next shot. While the gauge is lit, the camera is storing the picture on or while the camera is low, the battery check indication changes as shown below depending on the left to the status on the shooting status. e...
...changes as follows when the camera is off after a while) Remaining power level: high f Blinks (red) Remaining power level: low Charge the battery. The indication is displayed. Battery check HQ 2288 1712 Memory gauge a Shoot Before shooting (Gauge is turned on the card. BATTERY EMPTY is not displayed during ...gauge The memory gauge lights up when you take the next shot. While the gauge is lit, the camera is storing the picture on or while the camera is low, the battery check indication changes as shown below depending on the left to the status on the shooting status. e...

Reference Manual
Page 20
... wall outlet. marks on the battery charger. 2 Plug the power cord into the battery charger while aligning the + - AC wall outlet Lithium-ion battery (LI-10B) Connection Battery polarity terminals Charging indicator 19 The battery is complete, the indicator lights green. Battery/card basics Charging the battery This camera uses an Olympus lithium-ion battery (LI-10B). Other types of...
... wall outlet. marks on the battery charger. 2 Plug the power cord into the battery charger while aligning the + - AC wall outlet Lithium-ion battery (LI-10B) Connection Battery polarity terminals Charging indicator 19 The battery is complete, the indicator lights green. Battery/card basics Charging the battery This camera uses an Olympus lithium-ion battery (LI-10B). Other types of...

Reference Manual
Page 21
...8226; xD-Picture Card (16 - 512MB) • This camera may become hot during charging; Getting started • The battery may not recognize a non-Olympus card or a card that the battery has malfunctioned. 1 • Charging of the battery usually takes 2 hours. g"CARD SETUP - Card basics "Card..." in the area the camera is not properly attached or that was...
...8226; xD-Picture Card (16 - 512MB) • This camera may become hot during charging; Getting started • The battery may not recognize a non-Olympus card or a card that the battery has malfunctioned. 1 • Charging of the battery usually takes 2 hours. g"CARD SETUP - Card basics "Card..." in the area the camera is not properly attached or that was...

Reference Manual
Page 22
... out of power consumed varies considerably depending on the operations performed on the digital camera. Removing the battery Slide the knob in injury. A Do not use an exhausted battery, the camera may turn off . • The lens is not extended. 2 Slide the battery compartment/card cover in the direction of A, then lift B 1 in the direction of...
... out of power consumed varies considerably depending on the operations performed on the digital camera. Removing the battery Slide the knob in injury. A Do not use an exhausted battery, the camera may turn off . • The lens is not extended. 2 Slide the battery compartment/card cover in the direction of A, then lift B 1 in the direction of...

Reference Manual
Page 23
Battery/card basics • The life of time. • Repeated zoom adjustments. • Repeated auto-focus by the camera varies considerably depending on . • When the monitor is in the appropriate direction. • Insert the card while keeping it straight. • ..., data may vary according to the card. Getting started Inserting a card Insert the card in the playback mode for an extended period of the battery may not be written to the shooting conditions, etc. Note • The amount of power consumed by depressing the shutter button halfway. •...
Battery/card basics • The life of time. • Repeated zoom adjustments. • Repeated auto-focus by the camera varies considerably depending on . • When the monitor is in the appropriate direction. • Insert the card while keeping it straight. • ..., data may vary according to the card. Getting started Inserting a card Insert the card in the playback mode for an extended period of the battery may not be written to the shooting conditions, etc. Note • The amount of power consumed by depressing the shutter button halfway. •...

Reference Manual
Page 24
.../card cover, or remove the card or the battery while the camera is ejected a short way and then stops. Hold the card straight and pull it out. 1 Getting started 4 Close the battery compartment/card cover in direction C and then slide it in the C direction shown D. Once destroyed, data cannot be restored. • Do... hard or pointed items such as this could destroy the data stored on the card. Doing so could prevent the card from being ejected. 23 Battery/card basics Removing the card Push the card all the way in may cause it to unlock it, then let it return slowly. • The...
.../card cover, or remove the card or the battery while the camera is ejected a short way and then stops. Hold the card straight and pull it out. 1 Getting started 4 Close the battery compartment/card cover in direction C and then slide it in the C direction shown D. Once destroyed, data cannot be restored. • Do... hard or pointed items such as this could destroy the data stored on the card. Doing so could prevent the card from being ejected. 23 Battery/card basics Removing the card Push the card all the way in may cause it to unlock it, then let it return slowly. • The...

Reference Manual
Page 25
... computer or printer. • Do not remove or load the battery or connect or disconnect the AC adapter while the camera is connected to a computer. Be sure to use the AC adapter when connected to power your nearest Olympus dealer or service center for details. 1 AC wall outlet Power...or printer, the image data may be lost or damaged. Consult your digital camera from a common AC wall outlet. The AC adapter does not charge the battery in the camera. It is loaded in the camera. 24 Doing so could affect the camera's internal settings or functions. • When using an AC adapter,...
... computer or printer. • Do not remove or load the battery or connect or disconnect the AC adapter while the camera is connected to a computer. Be sure to use the AC adapter when connected to power your nearest Olympus dealer or service center for details. 1 AC wall outlet Power...or printer, the image data may be lost or damaged. Consult your digital camera from a common AC wall outlet. The AC adapter does not charge the battery in the camera. It is loaded in the camera. 24 Doing so could affect the camera's internal settings or functions. • When using an AC adapter,...

Reference Manual
Page 27
...there is continuously used for a long period of time, the internal temperature of the camera may rise. The camera activates again as soon as you operate the 1 shutter button or zoom lever. g"SLEEP - The camera will be displayed on the monitor and sound that will record movies or play back ...pictures regardless of the position of the mode dial. • To save battery power, the camera automatically enters the sleep mode and ...
...there is continuously used for a long period of time, the internal temperature of the camera may rise. The camera activates again as soon as you operate the 1 shutter button or zoom lever. g"SLEEP - The camera will be displayed on the monitor and sound that will record movies or play back ...pictures regardless of the position of the mode dial. • To save battery power, the camera automatically enters the sleep mode and ...

Reference Manual
Page 32
Consequently, 2 p.m. e button • The date and time settings will be returned to the factory default settings if the camera is displayed as 14:00. 9 Press e. • For a more quickly if the battery was only loaded in the 24-hour format. SELECt SEt GO • The following date formats: Y-M-D (Year/Month/Day...to the previous setting, press b. • The first two digits of the year are fixed. 2004 SELECt SEt GO 8 Repeat this procedure until the date and time are correct. 31 Power switch 10 To turn the camera off, slide the power switch to the year setting. The settings...
Consequently, 2 p.m. e button • The date and time settings will be returned to the factory default settings if the camera is displayed as 14:00. 9 Press e. • For a more quickly if the battery was only loaded in the 24-hour format. SELECt SEt GO • The following date formats: Y-M-D (Year/Month/Day...to the previous setting, press b. • The first two digits of the year are fixed. 2004 SELECt SEt GO 8 Repeat this procedure until the date and time are correct. 31 Power switch 10 To turn the camera off, slide the power switch to the year setting. The settings...

Reference Manual
Page 54
... 3 minutes, the monitor and viewfinder turn the viewfinder or monitor on the image in the digital zoom range. Operate the shutter button or zoom lever to turn off or the batteries are focusing on the card regardless of pictures you are replaced or removed. • Never ...8594; Go to "Monitor brightness Adjustment" and adjust the brightness. Doing so could destroy stored pictures and prevent storage of whether the camera is turned off automatically. Taking still pictures To record sound with still pictures" (P.103) You can record sound when taking pictures ...
... 3 minutes, the monitor and viewfinder turn the viewfinder or monitor on the image in the digital zoom range. Operate the shutter button or zoom lever to turn off or the batteries are focusing on the card regardless of pictures you are replaced or removed. • Never ...8594; Go to "Monitor brightness Adjustment" and adjust the brightness. Doing so could destroy stored pictures and prevent storage of whether the camera is turned off automatically. Taking still pictures To record sound with still pictures" (P.103) You can record sound when taking pictures ...

Reference Manual
Page 80
g"How to use the menus" (P.35) • Press e again to exit the menu. 5 Arrow pad OK button SEt CARD PIC CAMERA Advanced shooting SLO W NOISE REDUCtION DIGItAL ZOOM FULLtIME AF OFF ON • Battery consumption increases when FULLTIME AF is used. • FULLTIME AF cannot be used when R is also automatically kept in n mode. The... of the lens in focus at all times, without having to ON in focus during movie recording. 1 In the top menu, select MODE MENU Æ CAMERA Æ FULLTIME AF Æ ON, and press e.
g"How to use the menus" (P.35) • Press e again to exit the menu. 5 Arrow pad OK button SEt CARD PIC CAMERA Advanced shooting SLO W NOISE REDUCtION DIGItAL ZOOM FULLtIME AF OFF ON • Battery consumption increases when FULLTIME AF is used. • FULLTIME AF cannot be used when R is also automatically kept in n mode. The... of the lens in focus at all times, without having to ON in focus during movie recording. 1 In the top menu, select MODE MENU Æ CAMERA Æ FULLTIME AF Æ ON, and press e.

Reference Manual
Page 95
...remote control mode is running low. Advanced shooting 94 g"How to replace the battery (CR2025) of the remote control device" (P.216) How to strong light, the effective signal distance may be too far from the camera. Remote control shooting TIPS The self-timer/remote control lamp does not blink... after shooting. Move closer to the camera and press the shutter button on the remote control device again. → The battery in the remote control device is not canceled automatically after pressing the shutter button on the remote...
...remote control mode is running low. Advanced shooting 94 g"How to replace the battery (CR2025) of the remote control device" (P.216) How to strong light, the effective signal distance may be too far from the camera. Remote control shooting TIPS The self-timer/remote control lamp does not blink... after shooting. Move closer to the camera and press the shutter button on the remote control device again. → The battery in the remote control device is not canceled automatically after pressing the shutter button on the remote...

Reference Manual
Page 98
... or ±1.0, then press d. You can stop shooting at 1/30 sec. and the picture is taken in 7 mode. • If the battery power is not possible in Advanced shooting SHQ mode. - Whether or not all of the shots are saved depends on the card for the number... fixed at any time by releasing the shutter button. • Sequential shooting (j, i, k, 7) is low and the battery check blinks during sequential shooting, shooting stops and the camera starts saving the pictures you cannot continue shooting. 97 2 Select the exposure differential. When NOISE REDUCTION is set to ON...
... or ±1.0, then press d. You can stop shooting at 1/30 sec. and the picture is taken in 7 mode. • If the battery power is not possible in Advanced shooting SHQ mode. - Whether or not all of the shots are saved depends on the card for the number... fixed at any time by releasing the shutter button. • Sequential shooting (j, i, k, 7) is low and the battery check blinks during sequential shooting, shooting stops and the camera starts saving the pictures you cannot continue shooting. 97 2 Select the exposure differential. When NOISE REDUCTION is set to ON...

Reference Manual
Page 130
Playback '04.06.17 15:30 • You are used, the Note camera will not stop the slideshow automatically. 129 Slideshow This function displays still pictures stored in the card one after about 30 minutes and stop until ...you cancel 7 it by pressing e. Only the first frame of time. a button e button INFO MODE MENU SWItCH FRAME 3 Press e to start the slideshow. If batteries are recommended to use the optional AC adapter when running a slideshow for a long period of movies is played back. 1 Select a still picture, then press e to...
Playback '04.06.17 15:30 • You are used, the Note camera will not stop the slideshow automatically. 129 Slideshow This function displays still pictures stored in the card one after about 30 minutes and stop until ...you cancel 7 it by pressing e. Only the first frame of time. a button e button INFO MODE MENU SWItCH FRAME 3 Press e to start the slideshow. If batteries are recommended to use the optional AC adapter when running a slideshow for a long period of movies is played back. 1 Select a still picture, then press e to...

Reference Manual
Page 133
...; Pictures created from the extracted movie frame and is created from movies are captured in the shooting mode using QUICK VIEW. Do 7 not open the battery compartment/ card cover while the card access lamp is blinking, as a still picture is reading the movie from the card. Viewing movies zIf you selected... press e. Note • You cannot create an index if there is insufficient memory space on the card. • The card access lamp blinks while the camera is displayed. f Press ac to select CAPTURE, then press e.
...; Pictures created from the extracted movie frame and is created from movies are captured in the shooting mode using QUICK VIEW. Do 7 not open the battery compartment/ card cover while the card access lamp is blinking, as a still picture is reading the movie from the card. Viewing movies zIf you selected... press e. Note • You cannot create an index if there is insufficient memory space on the card. • The card access lamp blinks while the camera is displayed. f Press ac to select CAPTURE, then press e.


