
User Guide
Page 2
If the printer is being used with your dealer or with the printer, make any cover may expose hot surfaces. Allow enough room around the printer for adequate ventilation and easy access. • Do not use an adapter to have the power outlet replaced. you could get a shock or cause a fire. • Aside from the routine maintenance described in this user's guide as damaged may...
If the printer is being used with your dealer or with the printer, make any cover may expose hot surfaces. Allow enough room around the printer for adequate ventilation and easy access. • Do not use an adapter to have the power outlet replaced. you could get a shock or cause a fire. • Aside from the routine maintenance described in this user's guide as damaged may...

User Guide
Page 12
... turned off. 2. Connect the other end of the printer and connect the printer cable to the printer. 4. Computer & Power Connection Note: A printer cable is not normally supplied with the printer. Open the hinged cover on the printer. 4 User's Guide Note: The printer has two interface ports fitted as standard - Connect the power cable into a power outlet that is recommended to use a shielded printer cable when connecting your printer to the applicable printer port on the printer. 3. parallel or serial. 5. Switch on the power supply, then switch...
... turned off. 2. Connect the other end of the printer and connect the printer cable to the printer. 4. Computer & Power Connection Note: A printer cable is not normally supplied with the printer. Open the hinged cover on the printer. 4 User's Guide Note: The printer has two interface ports fitted as standard - Connect the power cable into a power outlet that is recommended to use a shielded printer cable when connecting your printer to the applicable printer port on the printer. 3. parallel or serial. 5. Switch on the power supply, then switch...
User Guide
Page 14
... continuous forms. Paper can be loaded onto both paper feeds at the same time. Select the required printer port and click on the Setup... Select the option for your computer. 3. Select Oki ML4410 and follow the remaining instructions to copy and install the printer driver files. The paper path is software selectable through the printer driver or manually on the Close button to configure the options for use the online help facility in Windows. Click on the printer. 6 User's Guide Insert...
... continuous forms. Paper can be loaded onto both paper feeds at the same time. Select the required printer port and click on the Setup... Select the option for your computer. 3. Select Oki ML4410 and follow the remaining instructions to copy and install the printer driver files. The paper path is software selectable through the printer driver or manually on the Close button to configure the options for use the online help facility in Windows. Click on the printer. 6 User's Guide Insert...

User Guide
Page 16
.../LOAD button and the paper feeds into position ready for printing. 3. Select the paper feed path on the printer. 8 User's Guide Press the ONLINE button. Move the left tractor to centre the paper holes on the printer will be carried out from front to rear or rear to turn the printer off any printed pages, then press ONLINE button to front. Note: A paper path that has been manually selected on the pins and lock the tractor in place by software commands if the selected paper...
.../LOAD button and the paper feeds into position ready for printing. 3. Select the paper feed path on the printer. 8 User's Guide Press the ONLINE button. Move the left tractor to centre the paper holes on the printer will be carried out from front to rear or rear to turn the printer off any printed pages, then press ONLINE button to front. Note: A paper path that has been manually selected on the pins and lock the tractor in place by software commands if the selected paper...
User Guide
Page 17
... control panel and the LCD display changes to Menu Mode in Operation. 2. Note: For further explanation of three emulations - Oki Microline. After the printing is in the required position 4. However and if required, the TOF can be manually adjusted as follows: 1. IBM Proprinter III; Press the ONLINE button to select the printer emulation. English Top of Form The top of form (TOF) is automatically set to Epson FX. SELF TESTS To check if your printer is paper loaded into the printer. Make...
... control panel and the LCD display changes to Menu Mode in Operation. 2. Note: For further explanation of three emulations - Oki Microline. After the printing is in the required position 4. However and if required, the TOF can be manually adjusted as follows: 1. IBM Proprinter III; Press the ONLINE button to select the printer emulation. English Top of Form The top of form (TOF) is automatically set to Epson FX. SELF TESTS To check if your printer is paper loaded into the printer. Make...
User Guide
Page 18
... ASCII test then starts printing. 6. IBM Proprinter III; Oki ML - 288 (H) x 144 (V) dpi max NLQ - The hex data dump test allows you to diagnose problems in your printer. 8. To stop the test, press the ON LINE button or turn the power off the printer. 3. Oki HSP network card interface (optional) Epson/IBM - 240 (H) x 216 (V) dpi max; Oki Microline Standard Centronics parallel; UPC E; For the rolling ASCII test, press and hold the FF/LOAD button while turning the printer on...
... ASCII test then starts printing. 6. IBM Proprinter III; Oki ML - 288 (H) x 144 (V) dpi max NLQ - The hex data dump test allows you to diagnose problems in your printer. 8. To stop the test, press the ON LINE button or turn the power off the printer. 3. Oki HSP network card interface (optional) Epson/IBM - 240 (H) x 216 (V) dpi max; Oki Microline Standard Centronics parallel; UPC E; For the rolling ASCII test, press and hold the FF/LOAD button while turning the printer on...

User Guide
Page 23
... button to turn the printer back on-line. OKI-ML Font Print Mode Utility; Line graphics; Using Menu Mode 1. The selected option is indicated with an asterisk (*). 5. Italics Size Single; Standard; EPS-FX; HSD Pitch 10 CPI; 12 CPI; 15 CPI; 17.1 CPI; 20 CPI Proportional Spacing No; Set II; Summary of the printer or press the ON-LINE button to turn the printer offline, then keep pressing the GROUP button until the required menu group is displayed. 2. NLQ Courier; Double Symbol Sets Character Set...
... button to turn the printer back on-line. OKI-ML Font Print Mode Utility; Line graphics; Using Menu Mode 1. The selected option is indicated with an asterisk (*). 5. Italics Size Single; Standard; EPS-FX; HSD Pitch 10 CPI; 12 CPI; 15 CPI; 17.1 CPI; 20 CPI Proportional Spacing No; Set II; Summary of the printer or press the ON-LINE button to turn the printer offline, then keep pressing the GROUP button until the required menu group is displayed. 2. NLQ Courier; Double Symbol Sets Character Set...

User Guide
Page 24
...mm Right; 0.05 mm Right; 0 8; 7 Full Operation; Limit Operation 16 User's Guide Danish I -855; French Canadian; Canada French; Serbo Croatic I ; Windows Greek; Windows CEE; Hebrew NC (862); Baltic 774; Cyrillic Latvia; Group Rear Feed Front Feed Set-Up Item Language Set Zero Character Code Page Slashed O Line Spacing Form Tear-off Skip Over Perf. Page Width Page Length Line Spacing Form Tear-off Skip Over Perf. Buffer Ppr Out Override Registration 1 Registration 2 Registration 3 Registration 4 Registration 5 Registration 6 Registration 7 Data Word Size (Oki mode...
...mm Right; 0.05 mm Right; 0 8; 7 Full Operation; Limit Operation 16 User's Guide Danish I -855; French Canadian; Canada French; Serbo Croatic I ; Windows Greek; Windows CEE; Hebrew NC (862); Baltic 774; Cyrillic Latvia; Group Rear Feed Front Feed Set-Up Item Language Set Zero Character Code Page Slashed O Line Spacing Form Tear-off Skip Over Perf. Page Width Page Length Line Spacing Form Tear-off Skip Over Perf. Buffer Ppr Out Override Registration 1 Registration 2 Registration 3 Registration 4 Registration 5 Registration 6 Registration 7 Data Word Size (Oki mode...

User Guide
Page 25
...; Parallel; English Group Parallel I/F Serial I/F OKI HSP Item Reset Inhibit Print Suppress Auto LF Auto CR (IBM mode only) Print DEL Code (Oki mode only) SI Pitch (10) (IBM mode only) SI Pitch (12) (IBM mode only) Time Out Print Auto Select ESC SI Pitch (IBM mode only) Intr Chr Sub st (Epson mode only) Host Interface I/F Time Out Default Path Auto Path Impact Mode LF Speed Width Control I-Prime Pin 18 Auto Feed XT (Epson mode only) Bi-Direction Parity # Serial Bits Protocol Diagnostic Test Busy Line...
...; Parallel; English Group Parallel I/F Serial I/F OKI HSP Item Reset Inhibit Print Suppress Auto LF Auto CR (IBM mode only) Print DEL Code (Oki mode only) SI Pitch (10) (IBM mode only) SI Pitch (12) (IBM mode only) Time Out Print Auto Select ESC SI Pitch (IBM mode only) Intr Chr Sub st (Epson mode only) Host Interface I/F Time Out Default Path Auto Path Impact Mode LF Speed Width Control I-Prime Pin 18 Auto Feed XT (Epson mode only) Bi-Direction Parity # Serial Bits Protocol Diagnostic Test Busy Line...

User Guide
Page 26
... spaced, select no. Character Set: Select which paper path is required. Data Word Size: Oki mode only - ESC SI Pitch: IBM mode only - Graphics: Default setting is received at 18 User's Guide Code Page: Choose the code page for faster printing of graphics. Current path sets the paper path to use when the printer was switched off position. Rear path always sets to the printer to the paper path in use the rear path on initialisation. Auto LF: Automatically adds a line feed to 20 CPI setting. Emulation Mode...
... spaced, select no. Character Set: Select which paper path is required. Data Word Size: Oki mode only - ESC SI Pitch: IBM mode only - Graphics: Default setting is received at 18 User's Guide Code Page: Choose the code page for faster printing of graphics. Current path sets the paper path to use when the printer was switched off position. Rear path always sets to the printer to the paper path in use the rear path on initialisation. Auto LF: Automatically adds a line feed to 20 CPI setting. Emulation Mode...
User Guide
Page 27
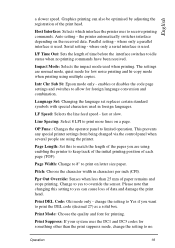
... Set: Changing the language set replaces certain standard symbols with special characters used . OP Func.: Changes the operator panel to override the sensor. Pitch: Choose the character width in foreign languages. Print Suppress: If your system uses the DC1 and DC3 codes for foreign language conversion and combination. Graphics printing can cause loss of paper remains and stops printing. where only a parallel interface is used in characters per inch (CPI). Serial setting - Impact Mode: Selects the impact mode used . English a slower speed. enables or disables the code...
... Set: Changing the language set replaces certain standard symbols with special characters used . OP Func.: Changes the operator panel to override the sensor. Pitch: Choose the character width in foreign languages. Print Suppress: If your system uses the DC1 and DC3 codes for foreign language conversion and combination. Graphics printing can cause loss of paper remains and stops printing. where only a parallel interface is used in characters per inch (CPI). Serial setting - Impact Mode: Selects the impact mode used . English a slower speed. enables or disables the code...
User Guide
Page 28
... received. Size: Change to be engaged when the printer control panel is selected. Set to no , the characters ¢ and ¥ appear at the start of characters when printing. Style: Change to italics if you want the printed characters to double for registration problems with device time-outs, select a smaller buffer size. Auto Feed XT: Epson mode only - If the computer has problems with some graphis software packages. SI Pitch (10): IBM mode only...
... received. Size: Change to be engaged when the printer control panel is selected. Set to no , the characters ¢ and ¥ appear at the start of characters when printing. Style: Change to italics if you want the printed characters to double for registration problems with device time-outs, select a smaller buffer size. Auto Feed XT: Epson mode only - If the computer has problems with some graphis software packages. SI Pitch (10): IBM mode only...
User Guide
Page 29
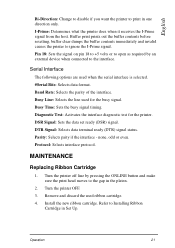
... pin 18 to +5 volts or to open as required by pressing the ONLINE button and make sure the print head moves to the gap in Set Up. MAINTENANCE Replacing Ribbon Cartridge 1. Turn the printer off line by an external device when connected to Installing Ribbon Cartridge in the platen. 2. Refer to the interface. Buffer print prints out the buffer contents before resetting, buffer clear dumps the buffer contents immediately and invalid causes the printer to print in one direction only. Baud Rate: Selects...
... pin 18 to +5 volts or to open as required by pressing the ONLINE button and make sure the print head moves to the gap in Set Up. MAINTENANCE Replacing Ribbon Cartridge 1. Turn the printer off line by an external device when connected to Installing Ribbon Cartridge in the platen. 2. Refer to the interface. Buffer print prints out the buffer contents before resetting, buffer clear dumps the buffer contents immediately and invalid causes the printer to print in one direction only. Baud Rate: Selects...

User Guide
Page 32
... cancel the alarm and turn the printer back on . Load more continuous form paper. Is the ONLINE indicator on the selected path. Press the ONLINE button to turn the printer back on if the TOF paper is loaded correctly. Load Jam Remove any embedded printer commands have been entered correctly. TROUBLESHOOTING Problem Nothing happens when the printer is turned on line and ready for your printer. Solution Check power cable connection and power outlet for printing. are as follows: Alarm Solution Cover Open The top access cover...
... cancel the alarm and turn the printer back on . Load more continuous form paper. Is the ONLINE indicator on the selected path. Press the ONLINE button to turn the printer back on if the TOF paper is loaded correctly. Load Jam Remove any embedded printer commands have been entered correctly. TROUBLESHOOTING Problem Nothing happens when the printer is turned on line and ready for your printer. Solution Check power cable connection and power outlet for printing. are as follows: Alarm Solution Cover Open The top access cover...

User Guide
Page 33
... Installing ribbon Cartridge in the LCD panel displays ERROR, the printer has a non-recoverable alarm or error. Make sure the paper has not jammed. Press the ONLINE button to cancel and clear the alarm. Ribbon Jam Indicates that paper parking has not operated correctly when carrying out a paper path change. Remove any paper causing the jam and make sure the paper is loaded correctly. The printer pauses between the printing of the space motor is installed correctly (refer to cancel and clear the alarm. Press the ONLINE button...
... Installing ribbon Cartridge in the LCD panel displays ERROR, the printer has a non-recoverable alarm or error. Make sure the paper has not jammed. Press the ONLINE button to cancel and clear the alarm. Ribbon Jam Indicates that paper parking has not operated correctly when carrying out a paper path change. Remove any paper causing the jam and make sure the paper is loaded correctly. The printer pauses between the printing of the space motor is installed correctly (refer to cancel and clear the alarm. Press the ONLINE button...

User Guide
Page 54
... character, a space is set to YES in the printer's menu must be set to NO, these commands will be active. If the printer receives a code value for printing has to be found in a document, the following formula: n2 = int (Total number of characters/256) n1 = Total number of characters - (n2 * 256) When the ESC \ command is sent, the control codes do not operate but are printed as a left arrow. Print suppress mode...
... character, a space is set to YES in the printer's menu must be set to NO, these commands will be active. If the printer receives a code value for printing has to be found in a document, the following formula: n2 = int (Total number of characters/256) n1 = Total number of characters - (n2 * 256) When the ESC \ command is sent, the control codes do not operate but are printed as a left arrow. Print suppress mode...

User Guide
Page 69
... character 127 7F DEL F If the code to the current print head position. If the last data was a space, CHR$(32), one space will not reselect the printer. The printer can be reset to its default menu settings, print buffer cleared, and Top Of Form set to NO, the commands will flash. ASCII Comp. Master Reset The printer can only be reselected with DC1-the ONLINE button will be Epson FX Mode 61 Master reset Decimal Hex. Print suppress Print...
... character 127 7F DEL F If the code to the current print head position. If the last data was a space, CHR$(32), one space will not reselect the printer. The printer can be reset to its default menu settings, print buffer cleared, and Top Of Form set to NO, the commands will flash. ASCII Comp. Master Reset The printer can only be reselected with DC1-the ONLINE button will be Epson FX Mode 61 Master reset Decimal Hex. Print suppress Print...

User Guide
Page 118
... 70 ESC SI Pitch 18 110 F Feed Jam 25 FF/Load Button 14 Form Tear-Off 18 Formatting 64, 68 Front paper feed 7 G Graphic modes 68 Graphics 18 Graphics density 64, 68 Group Button 13 H Head Thermal 25 Hex data dump test 10 Horizontal tabs 64, 68 Host Interface 19 I I/F Time Out 19 IBM Mode Automatic line feed 63 Character Pitch 63 Character Set 63 Double height 63 Double width 63 Downline loadable character generator 63...
... 70 ESC SI Pitch 18 110 F Feed Jam 25 FF/Load Button 14 Form Tear-Off 18 Formatting 64, 68 Front paper feed 7 G Graphic modes 68 Graphics 18 Graphics density 64, 68 Group Button 13 H Head Thermal 25 Hex data dump test 10 Horizontal tabs 64, 68 Host Interface 19 I I/F Time Out 19 IBM Mode Automatic line feed 63 Character Pitch 63 Character Set 63 Double height 63 Double width 63 Downline loadable character generator 63...

User Guide
Page 119
..., 69 Load Jam 24 M Margins 65, 69 Menu Button 14 Menu Items # Graphics Bits 18 #Serial Bits 21 Auto CR 18 Auto Feed XT 20 Auto LF 18 Auto Path 18 Auto Select 18 Baud Rate 21 Bi-Direction 21 Busy Line 21 Busy Time 21 Index Character Set 18 Code Page 18 Data Word Size 18 Default Path 18 Diagnostic Test 21 DSR Signal 21 DTR Signal 21 Emulation Mode 18 ESC SI Pitch 18 Form Tear-Off...
..., 69 Load Jam 24 M Margins 65, 69 Menu Button 14 Menu Items # Graphics Bits 18 #Serial Bits 21 Auto CR 18 Auto Feed XT 20 Auto LF 18 Auto Path 18 Auto Select 18 Baud Rate 21 Bi-Direction 21 Busy Line 21 Busy Time 21 Index Character Set 18 Code Page 18 Data Word Size 18 Default Path 18 Diagnostic Test 21 DSR Signal 21 DTR Signal 21 Emulation Mode 18 ESC SI Pitch 18 Form Tear-Off...
User Guide
Page 120
... Print DEL Code 19 Print head direction 65, 69 Print Mode 19 Print Suppress 19, 65, 69 Printer cable 4 Printer Drivers Windows 3.1x 5 Windows 95/98 5 Windows NT 6 Printer emulation 9 Proportional Spacing 20, 65, 69 Protocol 21 R Rcv. Buffer 20 Rear paper feed 7 Recoverable Alarms Cover Open 24 Data Remain 24 Eject Jam 25 Feed Jam 25 Load Jam 24 Paper End 24 Paper Jam 25 Park Jam 25 Path Change Jam 25 Ribbon Jam 25 SP Thermal 25 Registration 20 Reset Button 13 Reset Inhibit 20 Ribbon Cartridge Installing 2 Replacing 21 Ribbon Jam 25 Ribbon Jam 25 User's Guide...
... Print DEL Code 19 Print head direction 65, 69 Print Mode 19 Print Suppress 19, 65, 69 Printer cable 4 Printer Drivers Windows 3.1x 5 Windows 95/98 5 Windows NT 6 Printer emulation 9 Proportional Spacing 20, 65, 69 Protocol 21 R Rcv. Buffer 20 Rear paper feed 7 Recoverable Alarms Cover Open 24 Data Remain 24 Eject Jam 25 Feed Jam 25 Load Jam 24 Paper End 24 Paper Jam 25 Park Jam 25 Path Change Jam 25 Ribbon Jam 25 SP Thermal 25 Registration 20 Reset Button 13 Reset Inhibit 20 Ribbon Cartridge Installing 2 Replacing 21 Ribbon Jam 25 Ribbon Jam 25 User's Guide...


