
SpectraView User's Manual - English
Page 7
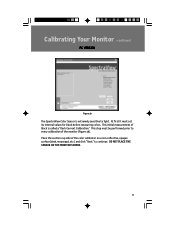
Calibrating Your Monitor -continued MAC VERSION OSX OS9 Figure 3b The SpectraView Color Sensor is called a "Dark Current Calibration." At first it must be performed prior to every calibration of the monitor(Figure 3b). This initial measurement of the color calibrator on a non-reflective, opaque surface(desk, mousepad, etc.) and click "Next" to light. Place the suction cup side of black is extremely sensitive to continue. DO NOT PLACE THE SENSOR ON THE MONITOR SCREEN. 7 This step must set its internal values for black before measuring colors.
Calibrating Your Monitor -continued MAC VERSION OSX OS9 Figure 3b The SpectraView Color Sensor is called a "Dark Current Calibration." At first it must be performed prior to every calibration of the monitor(Figure 3b). This initial measurement of the color calibrator on a non-reflective, opaque surface(desk, mousepad, etc.) and click "Next" to light. Place the suction cup side of black is extremely sensitive to continue. DO NOT PLACE THE SENSOR ON THE MONITOR SCREEN. 7 This step must set its internal values for black before measuring colors.

SpectraView User's Manual - English
Page 8
Once the calibrator is full screen). Attach the suction cup side of the CRT directly over the black circle located in the software menu(Figure 3c). The process indicator within the menu will indicate which adjustments are currently being made. 8 Throughout the calibration ...
Once the calibrator is full screen). Attach the suction cup side of the CRT directly over the black circle located in the software menu(Figure 3c). The process indicator within the menu will indicate which adjustments are currently being made. 8 Throughout the calibration ...

SpectraView User's Manual - English
Page 11
Calibrating Your Monitor -continued MAC VERSION Attach the suction cup side of the calibrator to complete the ambient adjustment. OSX OS9 Figure 3f 11 Note: This process should be repeated if the ambient lighting conditions in the software menu(Figure 3f). Once the calibrator is attached to the monitor's face click "Next" to the face of the CRT directly over the black circle located in the environment change.
Calibrating Your Monitor -continued MAC VERSION Attach the suction cup side of the calibrator to complete the ambient adjustment. OSX OS9 Figure 3f 11 Note: This process should be repeated if the ambient lighting conditions in the software menu(Figure 3f). Once the calibrator is attached to the monitor's face click "Next" to the face of the CRT directly over the black circle located in the environment change.
SpectraView User's Manual - English
Page 17
Place the suction cup side of the color calibrator on a non-reflective, opaque surface(desk, mousepad, etc.) and click "Next" to light. At first it must be performed prior to every calibration of black is extremely sensitive to continue. This initial measurement of the monitor(Figure 3b). This step must set its internal values for black before measuring colors. DO NOT PLACE THE SENSOR ON THE MONITOR SCREEN. 17 Calibrating Your Monitor -continued PC VERSION Figure 3b The SpectraView Color Sensor is called a "Dark Current Calibration."
Place the suction cup side of the color calibrator on a non-reflective, opaque surface(desk, mousepad, etc.) and click "Next" to light. At first it must be performed prior to every calibration of black is extremely sensitive to continue. This initial measurement of the monitor(Figure 3b). This step must set its internal values for black before measuring colors. DO NOT PLACE THE SENSOR ON THE MONITOR SCREEN. 17 Calibrating Your Monitor -continued PC VERSION Figure 3b The SpectraView Color Sensor is called a "Dark Current Calibration."

SpectraView User's Manual - English
Page 18
The process indicator within the menu will start the color calibration of the monitor. Calibrating Your Monitor -continued PC VERSION Figure 3c The next step will indicate which adjustments are currently being made. 18 Throughout the calibration process you will see many changes to continue. Once the calibrator is attached to the monitor's face click "Next" to the colors and brightness of the CRT directly over the black circle located in the software menu(Figure 3c). Attach the suction cup side of the calibrator to the face of the screen.
The process indicator within the menu will start the color calibration of the monitor. Calibrating Your Monitor -continued PC VERSION Figure 3c The next step will indicate which adjustments are currently being made. 18 Throughout the calibration process you will see many changes to continue. Once the calibrator is attached to the monitor's face click "Next" to the colors and brightness of the CRT directly over the black circle located in the software menu(Figure 3c). Attach the suction cup side of the calibrator to the face of the screen.

SpectraView User's Manual - English
Page 21
Calibrating Your Monitor -continued PC VERSION Hold the color calibrator near the face of the CRT directly over the black circle located in the software menu(Figure 3g). Click "Next" to complete the ambient adjustment. Figure 3g 21 Once the calibrator is blocking the sensors ...
Calibrating Your Monitor -continued PC VERSION Hold the color calibrator near the face of the CRT directly over the black circle located in the software menu(Figure 3g). Click "Next" to complete the ambient adjustment. Figure 3g 21 Once the calibrator is blocking the sensors ...

