
User Guide
Page 8
...). 4. Avoid using your cordless phone to persons or property: 1. Do not overload wall outlets and extension cords. 9. Place the power cord so that it will not be walked on a heating register or over a radiator. Never insert objects of the phone unblocked. Unplug this product. Ensure that may result in the back of fire, use this user's guide. 8. Do not use only No...
...). 4. Avoid using your cordless phone to persons or property: 1. Do not overload wall outlets and extension cords. 9. Place the power cord so that it will not be walked on a heating register or over a radiator. Never insert objects of the phone unblocked. Unplug this product. Ensure that may result in the back of fire, use this user's guide. 8. Do not use only No...

User Guide
Page 9
... your home, consult with a soft, damp cloth. This product may result in performance. Operate this phone using only the power source that are unsure of other controls may fall, causing serious damage to rain or water. Improper adjustment of the power supply to clean this phone. 7 Installation Guidelines 1. Important Safety Instructions Unplug this cordless phone immediately from the wall. Then retrieve the unit by the operating instructions.
... your home, consult with a soft, damp cloth. This product may result in performance. Operate this phone using only the power source that are unsure of other controls may fall, causing serious damage to rain or water. Improper adjustment of the power supply to clean this phone. 7 Installation Guidelines 1. Important Safety Instructions Unplug this cordless phone immediately from the wall. Then retrieve the unit by the operating instructions.
User Guide
Page 11
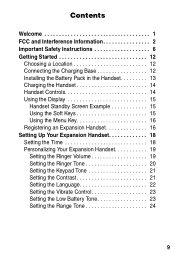
... Safety Instructions 6 Getting Started 12 Choosing a Location 12 Connecting the Charging Base 12 Installing the Battery Pack in the Handset 13 Charging the Handset 14 Handset Controls 14 Using the Display 15 Handset Standby Screen Example 15 Using the Soft Keys 15 Using the Menu Key 16 Registering an Expansion Handset 16 Setting Up Your Expansion Handset 18 Setting the Time 18 Personalizing Your Expansion Handset 19 Setting the Ringer Volume 19 Setting the Ringer Tone 20 Setting the Keypad Tone 21 Setting the Contrast 21 Setting the...
... Safety Instructions 6 Getting Started 12 Choosing a Location 12 Connecting the Charging Base 12 Installing the Battery Pack in the Handset 13 Charging the Handset 14 Handset Controls 14 Using the Display 15 Handset Standby Screen Example 15 Using the Soft Keys 15 Using the Menu Key 16 Registering an Expansion Handset 16 Setting Up Your Expansion Handset 18 Setting the Time 18 Personalizing Your Expansion Handset 19 Setting the Ringer Volume 19 Setting the Ringer Tone 20 Setting the Keypad Tone 21 Setting the Contrast 21 Setting the...

User Guide
Page 12
... Adjusting the Volume on the Handset During a Call 26 Using the Speakerphone on the Handset (handsfree operation 26 Using Call Waiting 27 Muting a Call 27 Putting a Call on Hold 28 Saving a Name/Number in the Phonebook 28 Inserting Pauses in a Phone Number 29 Saving a Caller ID or Redial Number in the Phonebook 29 Calling a Number from the Phonebook 30 Deleting Phonebook Entries 30 Editing Phonebook Entries 31 Redialing a Number 32 Erasing Numbers in Redial Memory 32 Using Caller ID 33 Reviewing the List of Caller ID Calls 33 Dialing a Number...
... Adjusting the Volume on the Handset During a Call 26 Using the Speakerphone on the Handset (handsfree operation 26 Using Call Waiting 27 Muting a Call 27 Putting a Call on Hold 28 Saving a Name/Number in the Phonebook 28 Inserting Pauses in a Phone Number 29 Saving a Caller ID or Redial Number in the Phonebook 29 Calling a Number from the Phonebook 30 Deleting Phonebook Entries 30 Editing Phonebook Entries 31 Redialing a Number 32 Erasing Numbers in Redial Memory 32 Using Caller ID 33 Reviewing the List of Caller ID Calls 33 Dialing a Number...
User Guide
Page 13
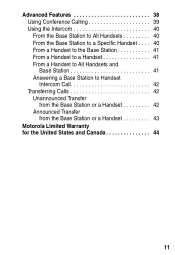
Advanced Features 38 Using Conference Calling 39 Using the Intercom 40 From the Base Station to All Handsets 40 From the Base Station to a Specific Handset . . . . 40 From a Handset to the Base Station 41 From a Handset to a Handset 41 From a Handset to All Handsets and Base Station 41 Answering a Base Station to Handset Intercom Call 42 Transferring Calls 42 Unannounced Transfer from the Base Station or a Handset 42 Announced Transfer from the Base Station or a Handset 43 Motorola Limited Warranty for the United States and Canada 44 11
Advanced Features 38 Using Conference Calling 39 Using the Intercom 40 From the Base Station to All Handsets 40 From the Base Station to a Specific Handset . . . . 40 From a Handset to the Base Station 41 From a Handset to a Handset 41 From a Handset to All Handsets and Base Station 41 Answering a Base Station to Handset Intercom Call 42 Transferring Calls 42 Unannounced Transfer from the Base Station or a Handset 42 Announced Transfer from the Base Station or a Handset 43 Motorola Limited Warranty for the United States and Canada 44 11
User Guide
Page 14
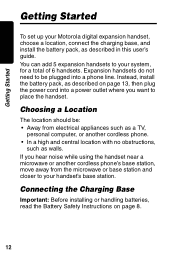
... Battery Safety Instructions on page 13, then plug the power cord into a phone line. Expansion handsets do not need to your system, for a total of 6 handsets. You can add 5 expansion handsets to be : • Away from the microwave or base station and closer to place the handset. Getting Started Getting Started To set up your handset's base station. If you want to your Motorola digital expansion handset, choose a location, connect the charging base, and install the battery...
... Battery Safety Instructions on page 13, then plug the power cord into a phone line. Expansion handsets do not need to your system, for a total of 6 handsets. You can add 5 expansion handsets to be : • Away from the microwave or base station and closer to place the handset. Getting Started Getting Started To set up your handset's base station. If you want to your Motorola digital expansion handset, choose a location, connect the charging base, and install the battery...
User Guide
Page 17
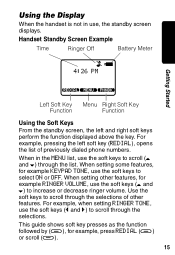
... soft keys (t and s) to select ON or OFF. When setting other features. Handset Standby Screen Example Time Ringer Off Battery Meter Wm 4:26 PM Getting Started VSU Left Soft Key Menu Right Soft Key Function Function Using the Soft Keys From the standby screen, the left soft key (REDIAL), opens the list of other features, for example RINGER VOLUME, use the soft keys to increase or decrease ringer volume. For example, when setting RINGER TONE, use , the standby screen displays.
... soft keys (t and s) to select ON or OFF. When setting other features. Handset Standby Screen Example Time Ringer Off Battery Meter Wm 4:26 PM Getting Started VSU Left Soft Key Menu Right Soft Key Function Function Using the Soft Keys From the standby screen, the left soft key (REDIAL), opens the list of other features, for example RINGER VOLUME, use the soft keys to increase or decrease ringer volume. For example, when setting RINGER TONE, use , the standby screen displays.
User Guide
Page 18
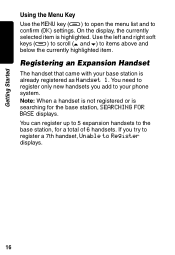
... phone system. If you add to your base station is already registered as Handset 1. You need to register only new handsets you try to register a 7th handset, Unable to the base station, for the base station, SEARCHING FOR BASE displays. On the display, the currently selected item is searching for a total of 6 handsets. Note: When a handset is not registered or is highlighted. Getting Started Using the Menu Key Use the MENU key (a) to open the menu list...
... phone system. If you add to your base station is already registered as Handset 1. You need to register only new handsets you try to register a 7th handset, Unable to the base station, for the base station, SEARCHING FOR BASE displays. On the display, the currently selected item is searching for a total of 6 handsets. Note: When a handset is not registered or is highlighted. Getting Started Using the Menu Key Use the MENU key (a) to open the menu list...

User Guide
Page 19
The base station displays the 15-digit base ID code. 4 Press NEW (a) on the handset, enter the 15-digit base ID code, then press OK (a). If you register a new handset. Action 1 Ensure the base station is off. The ENTER BASE ID screen displays. 5 Using the keys on the handset. Press v if necessary. 2 Press MENU (a) on the base station. 3 Scroll (a) to DISPLAY BASE-ID, then press OK (a). Getting Started Note: Install and charge the battery pack before you make a mistake while entering the code, press the left soft key (
The base station displays the 15-digit base ID code. 4 Press NEW (a) on the handset, enter the 15-digit base ID code, then press OK (a). If you register a new handset. Action 1 Ensure the base station is off. The ENTER BASE ID screen displays. 5 Using the keys on the handset. Press v if necessary. 2 Press MENU (a) on the base station. 3 Scroll (a) to DISPLAY BASE-ID, then press OK (a). Getting Started Note: Install and charge the battery pack before you make a mistake while entering the code, press the left soft key (

User Guide
Page 21
... a call. Action 1 Press MENU (a). 2 Scroll (a) to HANDSET SETTINGS, then press OK (a). 3 Ensure RINGER VOLUME is highlighted, then press OK (a). 4 Press the left or right soft key (a) to increase or decrease the volume, then press OK (a). 5 Press OFF twice to return to the standby screen, or scroll (a) to OFF, W displays. Setting Up Your Expansion Handset Personalizing Your Expansion Handset You can personalize the handset by setting unique ringer tones, adjusting the ringer volume...
... a call. Action 1 Press MENU (a). 2 Scroll (a) to HANDSET SETTINGS, then press OK (a). 3 Ensure RINGER VOLUME is highlighted, then press OK (a). 4 Press the left or right soft key (a) to increase or decrease the volume, then press OK (a). 5 Press OFF twice to return to the standby screen, or scroll (a) to OFF, W displays. Setting Up Your Expansion Handset Personalizing Your Expansion Handset You can personalize the handset by setting unique ringer tones, adjusting the ringer volume...
User Guide
Page 24
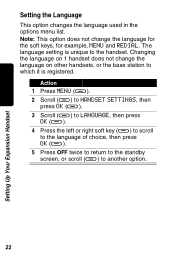
..., then press OK (a). 5 Press OFF twice to return to the standby screen, or scroll (a) to the handset. Note: This option does not change the language on other handsets, or the base station to which it is unique to another option. 22 Setting Up Your Expansion Handset Setting the Language This option changes the language used in the options menu list. The language setting is registered.
..., then press OK (a). 5 Press OFF twice to return to the standby screen, or scroll (a) to the handset. Note: This option does not change the language on other handsets, or the base station to which it is unique to another option. 22 Setting Up Your Expansion Handset Setting the Language This option changes the language used in the options menu list. The language setting is registered.

User Guide
Page 27
or Enter the phone number, then press ON. This lets you see the phone number on the display before the phone dials the number. 3 When you are finished talking, press OFF, or place the handset back on the charger base to hang up when the handset is on. 2 When you hear the dial tone, dial the number. The keypad lights up . 25 Using the Basic Functions Using the Basic Functions Making and Ending a Call Action 1 Pick up the handset and press ON.
or Enter the phone number, then press ON. This lets you see the phone number on the display before the phone dials the number. 3 When you are finished talking, press OFF, or place the handset back on the charger base to hang up when the handset is on. 2 When you hear the dial tone, dial the number. The keypad lights up . 25 Using the Basic Functions Using the Basic Functions Making and Ending a Call Action 1 Pick up the handset and press ON.

User Guide
Page 30
... 50 numbers directly into the phonebook or add them from the caller ID or redial list. After 5 minutes, CALL ON HOLD RING BACK! Note: Be sure to include long distance codes and pauses if required. 2 At the ENTER NAME prompt, use the keypad to dial numbers you call before it is not accessible by other handsets or the base station. displays. Action 1 From the standby screen, enter the phone number, then...
... 50 numbers directly into the phonebook or add them from the caller ID or redial list. After 5 minutes, CALL ON HOLD RING BACK! Note: Be sure to include long distance codes and pauses if required. 2 At the ENTER NAME prompt, use the keypad to dial numbers you call before it is not accessible by other handsets or the base station. displays. Action 1 From the standby screen, enter the phone number, then...

User Guide
Page 31
... outside line, or for accessing a voicemail system. The letter P displays. Tip: Erase numbers you want to the standby screen. Note: If the phonebook is useful when you call to make room for new ones. 4 Press and hold OFF for access to store the name and number. This is full, PHONEBOOK IS FULL displays. When you have to dial a number for 2 seconds to return to insert a pause, press PAUSE (a). Saving a Caller...
... outside line, or for accessing a voicemail system. The letter P displays. Tip: Erase numbers you want to the standby screen. Note: If the phonebook is useful when you call to make room for new ones. 4 Press and hold OFF for access to store the name and number. This is full, PHONEBOOK IS FULL displays. When you have to dial a number for 2 seconds to return to insert a pause, press PAUSE (a). Saving a Caller...
User Guide
Page 35
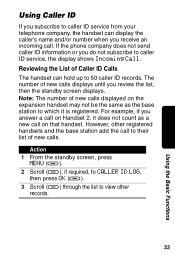
... view other registered handsets and the base station add the call . However, other records. 33 Using the Basic Functions Reviewing the List of new calls displays until you review the list, then the standby screen displays. Using Caller ID If you subscribe to caller ID service from your telephone company, the handset can hold up to 50 caller ID records. For example, if you answer a call on Handset 2, it is registered. The number of Caller ID Calls The handset can display the caller's name and...
... view other registered handsets and the base station add the call . However, other records. 33 Using the Basic Functions Reviewing the List of new calls displays until you review the list, then the standby screen displays. Using Caller ID If you subscribe to caller ID service from your telephone company, the handset can hold up to 50 caller ID records. For example, if you answer a call on Handset 2, it is registered. The number of Caller ID Calls The handset can display the caller's name and...
User Guide
Page 40
... register at least 2 (up to 6) handsets to the base station. You do not need to connect an expansion handset to a handset or the base station To order expansion handsets, call: 1-800-353-2729 USA 1-888-390-6456 TTY (Text Telephone) On the Web: www.motorola.com/cordless 38 Advanced Features You can : • Conference call • Talk on the intercom between handsets and between handsets and the base station • Transfer calls to a phone line. Advanced Features To use...
... register at least 2 (up to 6) handsets to the base station. You do not need to connect an expansion handset to a handset or the base station To order expansion handsets, call: 1-800-353-2729 USA 1-888-390-6456 TTY (Text Telephone) On the Web: www.motorola.com/cordless 38 Advanced Features You can : • Conference call • Talk on the intercom between handsets and between handsets and the base station • Transfer calls to a phone line. Advanced Features To use...

User Guide
Page 41
... press v on the base station. 39 Advanced Features To disconnect from a conference call from the base station, press v. Using Conference Calling If 1 handset is on a call from a handset, press ON or SPEAKER PHONE. To join a conference call , the displays on a conference call , the other handsets, registered to the same base station, display LINE IN USE. A maximum of 2 handsets and the base station can be on other handset displays j and 2 or more extension numbers. When a second handset joins the call at the same time.
... press v on the base station. 39 Advanced Features To disconnect from a conference call from the base station, press v. Using Conference Calling If 1 handset is on a call from a handset, press ON or SPEAKER PHONE. To join a conference call , the displays on a conference call , the other handsets, registered to the same base station, display LINE IN USE. A maximum of 2 handsets and the base station can be on other handset displays j and 2 or more extension numbers. When a second handset joins the call at the same time.

User Guide
Page 44
Answering a Base Station to Handset Intercom Call Action 1 Press ON to the desired destination (BASE or HANDSET X, where X is the handset number), then press OK (a). Transferring Calls Unannounced Transfer from the Base Station or a Handset Action 1 Press XFER (a). 2 Scroll (a) to answer the call. 2 To end the intercom call , press OFF, on the handset, or v on the base station. 42 Advanced Features You can answer the ringing handset or base station like any incoming call. 3 To end the call , press OFF.
Answering a Base Station to Handset Intercom Call Action 1 Press ON to the desired destination (BASE or HANDSET X, where X is the handset number), then press OK (a). Transferring Calls Unannounced Transfer from the Base Station or a Handset Action 1 Press XFER (a). 2 Scroll (a) to answer the call. 2 To end the intercom call , press OFF, on the handset, or v on the base station. 42 Advanced Features You can answer the ringing handset or base station like any incoming call. 3 To end the call , press OFF.

User Guide
Page 45
Announced Transfer from the Base Station or a Handset Action 1 Press HOLD (a) to put the call on hold, then press MENU (a). 2 Press INTERCOM. 3 Scroll (a) to the desired destination (BASE or HANDSET X, where X is the handset number), then press OK (a). 4 When the base station or handset answers, announce there is an active call on hold waiting to be transferred. 5 Press OFF on the handset, or INTERCOM on the base station. 6 Press ON, on the handset, or v on the base station to pick up the call. 7 To end the call, press OFF on the handset, or v on the base station. 43 Advanced Features
Announced Transfer from the Base Station or a Handset Action 1 Press HOLD (a) to put the call on hold, then press MENU (a). 2 Press INTERCOM. 3 Scroll (a) to the desired destination (BASE or HANDSET X, where X is the handset number), then press OK (a). 4 When the base station or handset answers, announce there is an active call on hold waiting to be transferred. 5 Press OFF on the handset, or INTERCOM on the base station. 6 Press ON, on the handset, or v on the base station to pick up the call. 7 To end the call, press OFF on the handset, or v on the base station. 43 Advanced Features
User Guide
Page 49
... Two-Way Radios and Messaging Devices 1-800-353-2729 Canada All Products 1-800-461-4575 TTY 1-888-390-6456 For Accessories and Software, please call the telephone number designated above for the product with which they are used. Motorola, at no charge repair, replace or refund the purchase price of the installation facility (if applicable) and, most importantly; (e) your service provider...
... Two-Way Radios and Messaging Devices 1-800-353-2729 Canada All Products 1-800-461-4575 TTY 1-888-390-6456 For Accessories and Software, please call the telephone number designated above for the product with which they are used. Motorola, at no charge repair, replace or refund the purchase price of the installation facility (if applicable) and, most importantly; (e) your service provider...


