User's Reference
Page 36
... is the name that is also available for selection from the MFP control panel menu). If you attempt to assign a shortcut number that appears in the MFP control panel display. 6 Enter Server name, Log-in the URL field of the MFP in , Password, and Filename. 7 Select scan type and resolution. 8 If you rapidly find...
... is the name that is also available for selection from the MFP control panel menu). If you attempt to assign a shortcut number that appears in the MFP control panel display. 6 Enter Server name, Log-in the URL field of the MFP in , Password, and Filename. 7 Select scan type and resolution. 8 If you rapidly find...
User's Reference
Page 38
...in the external file are added to find them. The file is accessed from creating a profile, plus the login and password necessary to gain access to network functions available on MFP power up, or by re-submitting the file (steps 1 through the list to the current list of permanent destinations.... by clicking Back on the Browser menu until you create or add permanent destinations, but the mode is refreshed every 24 hours, on a particular MFP control panel. Note: The process works the same for FTP and fax entries. 8 Click E-mail Destinations Setup. RGB TIFF Photo content - Disable...
...in the external file are added to find them. The file is accessed from creating a profile, plus the login and password necessary to gain access to network functions available on MFP power up, or by re-submitting the file (steps 1 through the list to the current list of permanent destinations.... by clicking Back on the Browser menu until you create or add permanent destinations, but the mode is refreshed every 24 hours, on a particular MFP control panel. Note: The process works the same for FTP and fax entries. 8 Click E-mail Destinations Setup. RGB TIFF Photo content - Disable...
User's Reference
Page 40
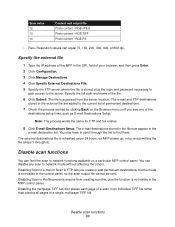
The password is relocked. 6 Click Submit. Select a tracking mode 1 Type the IP address of the MFP in the URL field of your browser, and then press Enter. 2 Click Configuration. 3 Click MFP Job Accounting. 4 Select one of time that passes after a scan is completed before the control panel is... time for verification. 5 Click Submit. Protect the Job Account list To prevent the Job Account list from being modified by unauthorized individuals, set a password to protect the information stored on page 36. 5 Specify a timeout. For a list of available tracking modes, see "List of tracking modes" ...
The password is relocked. 6 Click Submit. Select a tracking mode 1 Type the IP address of the MFP in the URL field of your browser, and then press Enter. 2 Click Configuration. 3 Click MFP Job Accounting. 4 Select one of time that passes after a scan is completed before the control panel is... time for verification. 5 Click Submit. Protect the Job Account list To prevent the Job Account list from being modified by unauthorized individuals, set a password to protect the information stored on page 36. 5 Specify a timeout. For a list of available tracking modes, see "List of tracking modes" ...
User's Reference
Page 55
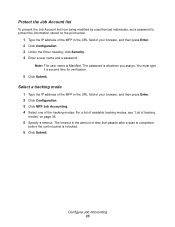
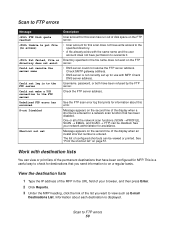
...destinations that prints for this scan has run out of the list you send information to the specified directory. • A file already exists with MFP. Username, password, or both have been configured for this error. Check the FTP server address. See your browser, and then press Enter. 2 Click Reports.... 3 Under the MFP heading, click the link of disk space on the FTP server. • DNS server could not resolve the FTP server address. ...
...destinations that prints for this scan has run out of the list you send information to the specified directory. • A file already exists with MFP. Username, password, or both have been configured for this error. Check the FTP server address. See your browser, and then press Enter. 2 Click Reports.... 3 Under the MFP heading, click the link of disk space on the FTP server. • DNS server could not resolve the FTP server address. ...
User's Reference
Page 59
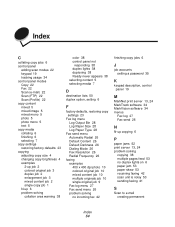
... job 10 single original job 9 Fax log menu 27 Fax send menu 26 problem solving no incoming fax 42 finishing copy jobs 6 J job accounts setting a password 35 K keypad description, control panel 19 M MarkNet print server 13, 24 MarkTrack software 34 MarkVision software 34 menus Fax log 27 Fax send 26 N N-up...
... job 10 single original job 9 Fax log menu 27 Fax send menu 26 problem solving no incoming fax 42 finishing copy jobs 6 J job accounts setting a password 35 K keypad description, control panel 19 M MarkNet print server 13, 24 MarkTrack software 34 MarkVision software 34 menus Fax log 27 Fax send 26 N N-up...
User's Reference
Page 60
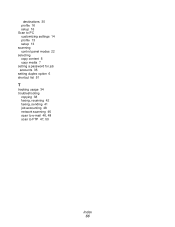
destinations 30 profile 16 setup 16 Scan to PC customizing settings 14 profile 13 setup 13 scanning control panel modes 22 selecting copy content 5 copy media 7 setting a password for job accounts 35 setting duplex option 6 shortcut list 51 T tracking usage 34 troubleshooting copying 38 faxing, receiving 42 faxing, sending 41 job accounting 48 network scanning 46 scan to e-mail 46, 48 scan to FTP 47, 50 Index 55
destinations 30 profile 16 setup 16 Scan to PC customizing settings 14 profile 13 setup 13 scanning control panel modes 22 selecting copy content 5 copy media 7 setting a password for job accounts 35 setting duplex option 6 shortcut list 51 T tracking usage 34 troubleshooting copying 38 faxing, receiving 42 faxing, sending 41 job accounting 48 network scanning 46 scan to e-mail 46, 48 scan to FTP 47, 50 Index 55

Setup Guide
Page 39
.... Note: During printer power up, if the print server is configured to use your browser to the online documentation on the MFP CD. 8 After you are prompted for a password during the following instructions, see your options for Fax storage, Output bin, Rings to get the correct time. After the IP... the Time Zone, such as Eastern (USA and Canada, Eastern Standard Time). For a complete list of your printer. 1 Type the IP address of the MFP in the URL field of receive fax options, refer to set the required fax information. Performing browser fax setup Note: Configuration is set, use Network...
.... Note: During printer power up, if the print server is configured to use your browser to the online documentation on the MFP CD. 8 After you are prompted for a password during the following instructions, see your options for Fax storage, Output bin, Rings to get the correct time. After the IP... the Time Zone, such as Eastern (USA and Canada, Eastern Standard Time). For a complete list of your printer. 1 Type the IP address of the MFP in the URL field of receive fax options, refer to set the required fax information. Performing browser fax setup Note: Configuration is set, use Network...
Setup Guide
Page 44
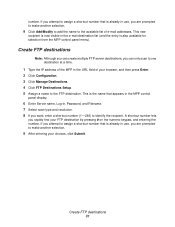
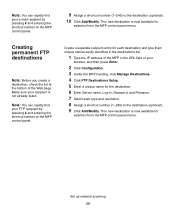
This new destination is not already listed. Note: You can rapidly find your browser, and then press Enter. 2 Click Configuration. 3 Under the MFP heading, click Manage Destinations. 4 Click FTP Destinations Setup. 5 Enter a unique name for the destination. 6 Enter Server name, Log-in the URL ... panel menu. Creating permanent FTP destinations Note: Before you create a destination, check the list at the bottom of the MFP in , Password, and Filename. 7 Select scan type and resolution. 8 Assign a shortcut number (1-245) to the destination (optional). 10 Click Add/Modify. Set up ...
This new destination is not already listed. Note: You can rapidly find your browser, and then press Enter. 2 Click Configuration. 3 Under the MFP heading, click Manage Destinations. 4 Click FTP Destinations Setup. 5 Enter a unique name for the destination. 6 Enter Server name, Log-in the URL ... panel menu. Creating permanent FTP destinations Note: Before you create a destination, check the list at the bottom of the MFP in , Password, and Filename. 7 Select scan type and resolution. 8 Assign a shortcut number (1-245) to the destination (optional). 10 Click Add/Modify. Set up ...


