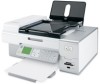
User's Guide
Page 8
...Lexmark print cartridges 138 Aligning print cartridges...138 Cleaning the print cartridge nozzles 139 Wiping the print cartridge nozzles and contacts 139 Preserving the print cartridges...140 Cleaning the scanner glass...141 Cleaning the exterior of the printer 141 Ordering supplies...141 Ordering print cartridges...141 Ordering paper and other supplies ...141 Troubleshooting......143 Setup Troubleshooting...143 Incorrect language appears on...
...Lexmark print cartridges 138 Aligning print cartridges...138 Cleaning the print cartridge nozzles 139 Wiping the print cartridge nozzles and contacts 139 Preserving the print cartridges...140 Cleaning the scanner glass...141 Cleaning the exterior of the printer 141 Ordering supplies...141 Ordering print cartridges...141 Ordering paper and other supplies ...141 Troubleshooting......143 Setup Troubleshooting...143 Incorrect language appears on...
User's Guide
Page 9
... Run the Wireless Setup Utility (Windows users only 158 Changing wireless settings after installation (Windows users only 159 Check printer ports (Windows users only 159 Print troubleshooting...159 Partial 4 x 6 in. (10 x 15 cm) photo prints when using a PictBridge-enabled digital camera 159 Improving print...appear in graphics or solid black areas 168 Checking the printer status...168 Settings are not saved...169 Checking printer readiness...169 Checking the Spool Settings for banner printing 170 Resolving font problems ...170 Printer is busy printing another job ...170 Ready or Busy ...
... Run the Wireless Setup Utility (Windows users only 158 Changing wireless settings after installation (Windows users only 159 Check printer ports (Windows users only 159 Print troubleshooting...159 Partial 4 x 6 in. (10 x 15 cm) photo prints when using a PictBridge-enabled digital camera 159 Improving print...appear in graphics or solid black areas 168 Checking the printer status...168 Settings are not saved...169 Checking printer readiness...169 Checking the Spool Settings for banner printing 170 Resolving font problems ...170 Printer is busy printing another job ...170 Ready or Busy ...

User's Guide
Page 10
..., scanning, or faxing 175 Wrong printer is attached ...176 Updating the printer software ...176 Bidirectional communication is not established 176 Experiencing poor quality or incorrect output 176 Cannot print from digital camera using PictBridge 177 Jams and misfeeds troubleshooting 177 How to clear and avoid ...photo scans ...189 Cannot scan to a computer over a network 189 Fax troubleshooting...189 Cannot send or receive a fax...189 Can send but not receive faxes ...191 Can receive but not send faxes ...192 Printer receives a blank fax ...193 Received fax has poor print quality ...193...
..., scanning, or faxing 175 Wrong printer is attached ...176 Updating the printer software ...176 Bidirectional communication is not established 176 Experiencing poor quality or incorrect output 176 Cannot print from digital camera using PictBridge 177 Jams and misfeeds troubleshooting 177 How to clear and avoid ...photo scans ...189 Cannot scan to a computer over a network 189 Fax troubleshooting...189 Cannot send or receive a fax...189 Can send but not receive faxes ...191 Can receive but not send faxes ...192 Printer receives a blank fax ...193 Received fax has poor print quality ...193...
User's Guide
Page 14
...-ROM drive. such as: 1 Do one of the User's Guide appears on your desktop, and the User's Guide: Comprehensive Version appears on To access the Lexmark Solution Center: your printer) Note: If necessary, click ŒAll Programs Œ • Troubleshooting problems with the other information Comprehensive Version will be installed.
...-ROM drive. such as: 1 Do one of the User's Guide appears on your desktop, and the User's Guide: Comprehensive Version appears on To access the Lexmark Solution Center: your printer) Note: If necessary, click ŒAll Programs Œ • Troubleshooting problems with the other information Comprehensive Version will be installed.

User's Guide
Page 29
... receive faxes. Other devices (such as a normal telephone "Connecting to a telephone" on page 29 Send faxes using the computer or the printer. page 33 • Send and receive faxes without using a computer. See this section "Connecting directly to a telephone wall jack" on ... machine" on line. If problems occur, see "Setup Troubleshooting" on page 32 Connecting to an answering machine Connect an answering machine to the printer to other telecommunications devices in the setup steps. You can connect the printer with a modem" on page 143. Choosing a fax ...
... receive faxes. Other devices (such as a normal telephone "Connecting to a telephone" on page 29 Send faxes using the computer or the printer. page 33 • Send and receive faxes without using a computer. See this section "Connecting directly to a telephone wall jack" on ... machine" on line. If problems occur, see "Setup Troubleshooting" on page 32 Connecting to an answering machine Connect an answering machine to the printer to other telecommunications devices in the setup steps. You can connect the printer with a modem" on page 143. Choosing a fax ...

User's Guide
Page 45
...; In Windows XP and earlier, click Start. 2 Click Programs or All Programs Œ Lexmark 7500 Series. 3 Select Solution Center. Troubleshooting • Learn tips about the current status. • Solve printer problems. • View ink levels and order new print cartridges. 45 Method 1 Method 2...as photos, envelopes, cards, banners, iron-on the Solution Center icon. 2 Click Setup and diagnose printer. Print projects such as printing photos, troubleshooting printing problems, installing print cartridges, and performing maintenance tasks. At the bottom left corner of the Welcome...
...; In Windows XP and earlier, click Start. 2 Click Programs or All Programs Œ Lexmark 7500 Series. 3 Select Solution Center. Troubleshooting • Learn tips about the current status. • Solve printer problems. • View ink levels and order new print cartridges. 45 Method 1 Method 2...as photos, envelopes, cards, banners, iron-on the Solution Center icon. 2 Click Setup and diagnose printer. Print projects such as printing photos, troubleshooting printing problems, installing print cartridges, and performing maintenance tasks. At the bottom left corner of the Welcome...
User's Guide
Page 46
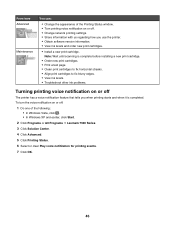
.... • Align print cartridges to fix blurry edges. • View ink levels. • Troubleshoot other ink problems. Turning printing voice notification on or off : 1 Do one of the Printing Status... window. • Turn printing voice notification on or off The printer has a voice notification feature that tells you use the printer. • Obtain software version information. • View ink levels... In Windows XP and earlier, click Start. 2 Click Programs or All Programs Œ Lexmark 7500 Series. 3 Click Solution Center. 4 Click Advanced. 5 Click Printing Status. 6 Select or clear Play...
.... • Align print cartridges to fix blurry edges. • View ink levels. • Troubleshoot other ink problems. Turning printing voice notification on or off : 1 Do one of the Printing Status... window. • Turn printing voice notification on or off The printer has a voice notification feature that tells you use the printer. • Obtain software version information. • View ink levels... In Windows XP and earlier, click Start. 2 Click Programs or All Programs Œ Lexmark 7500 Series. 3 Click Solution Center. 4 Click Advanced. 5 Click Printing Status. 6 Select or clear Play...

User's Guide
Page 56
... place for your computer to recognize the new settings. Adding a printer to an existing ad hoc wireless network using the installation cable as part of the setup process. 23 Follow the prompts on the status of the "Troubleshooting" chapter. 17 Type the same security code in a security code... If the network does not appear, wait a minute and then click the Refresh network list button. 21 Click Programs or All Programs ΠLexmark 7500 Series. 22 Click Wireless Setup Utility. 7 Select the Use Windows to configure my wireless network settings check box. 8 Under Preferred Networks, delete...
... place for your computer to recognize the new settings. Adding a printer to an existing ad hoc wireless network using the installation cable as part of the setup process. 23 Follow the prompts on the status of the "Troubleshooting" chapter. 17 Type the same security code in a security code... If the network does not appear, wait a minute and then click the Refresh network list button. 21 Click Programs or All Programs ΠLexmark 7500 Series. 22 Click Wireless Setup Utility. 7 Select the Use Windows to configure my wireless network settings check box. 8 Under Preferred Networks, delete...
User's Guide
Page 143
..., Language appears again on the display. Try one or more of the wireless network. Setup Troubleshooting Incorrect language appears on the display These are possible solutions. Troubleshooting If you set up your printer on a wireless network, make sure: • The wireless network is working properly. •...; The computer and printer are both connected to save . 8 Press to the printer, and is lit. • The Wi...
..., Language appears again on the display. Try one or more of the wireless network. Setup Troubleshooting Incorrect language appears on the display These are possible solutions. Troubleshooting If you set up your printer on a wireless network, make sure: • The wireless network is working properly. •...; The computer and printer are both connected to save . 8 Press to the printer, and is lit. • The Wi...

User's Guide
Page 148
In Windows Vista: a Click Œ Control Panel. In Windows XP: a Click Start. Wireless troubleshooting How do I find out what type of the following criteria. To obtain this information, see the documentation that came with your wireless router, see ...140; System. ASCII characters are A-F and 0-9. • Exactly 5 or 13 ASCII characters. WPA-PSK or WPA2-PSK key • Up to properly set up the printer for future reference. b Click SettingsŒ Control PanelŒ System. c From the Hardware tab, click Device Manager. 2 Click the plus sign (+) beside Universal Serial ...
In Windows Vista: a Click Œ Control Panel. In Windows XP: a Click Start. Wireless troubleshooting How do I find out what type of the following criteria. To obtain this information, see the documentation that came with your wireless router, see ...140; System. ASCII characters are A-F and 0-9. • Exactly 5 or 13 ASCII characters. WPA-PSK or WPA2-PSK key • Up to properly set up the printer for future reference. b Click SettingsŒ Control PanelŒ System. c From the Hardware tab, click Device Manager. 2 Click the plus sign (+) beside Universal Serial ...
User's Guide
Page 149
... insert the installation software CD into your printer. Note: The MAC address is located at the back of your printer and nnnnnn is blinking orange during installation" in "Wireless troubleshooting." Note: You must install the printer driver on each computer that XXXX_Series_nnnnnn_P1 is ...: • In Windows Vista: Œ Control Panel Œ Printers. • In Windows XP: Start Œ Settings Œ Printers and Faxes. • In Windows 2000 and earlier: Start Œ Settings Œ Printers. 2 Right-click the Lexmark 7500 Series icon. 3 Click Properties Œ Ports. 4 Verify ...
... insert the installation software CD into your printer. Note: The MAC address is located at the back of your printer and nnnnnn is blinking orange during installation" in "Wireless troubleshooting." Note: You must install the printer driver on each computer that XXXX_Series_nnnnnn_P1 is ...: • In Windows Vista: Œ Control Panel Œ Printers. • In Windows XP: Start Œ Settings Œ Printers and Faxes. • In Windows 2000 and earlier: Start Œ Settings Œ Printers. 2 Right-click the Lexmark 7500 Series icon. 3 Click Properties Œ Ports. 4 Verify ...
User's Guide
Page 152
...to set up, see "Checking your network name" in the "Setting up the printer" chapter. For more information, see "Configuring the optional internal wireless print server" in the "Wireless troubleshooting" section. Wi-Fi indicator light is not connected to the wireless access point ...XP and earlier: Start. 2 Click Programs or All Programs ΠLexmark 7500 Series. 3 Click Wireless Setup. If you set a new network name, you purchased the optional internal wireless print server after your printer was already set a network name. Configure the optional internal wireless print ...
...to set up, see "Checking your network name" in the "Setting up the printer" chapter. For more information, see "Configuring the optional internal wireless print server" in the "Wireless troubleshooting" section. Wi-Fi indicator light is not connected to the wireless access point ...XP and earlier: Start. 2 Click Programs or All Programs ΠLexmark 7500 Series. 3 Click Wireless Setup. If you set a new network name, you purchased the optional internal wireless print server after your printer was already set a network name. Configure the optional internal wireless print ...

User's Guide
Page 153
...100-150 feet. Although the possible distance between devices in the "Troubleshooting" chapter. • Make sure the wireless access point (wireless router) is on . Move your computer and/or printer Move the computer and/or printer closer to these devices. You can find , however, that allows...join the same wireless network. For more information, see "Ping the access point" for Windows or Mac in the "Wireless troubleshooting" section Ping the printer Ping the printer to your wireless access point (wireless router) is no longer working . For more information, see "Ping the...
...100-150 feet. Although the possible distance between devices in the "Troubleshooting" chapter. • Make sure the wireless access point (wireless router) is on . Move your computer and/or printer Move the computer and/or printer closer to these devices. You can find , however, that allows...join the same wireless network. For more information, see "Ping the access point" for Windows or Mac in the "Wireless troubleshooting" section Ping the printer Ping the printer to your wireless access point (wireless router) is no longer working . For more information, see "Ping the...
User's Guide
Page 159
...troubleshooting Partial 4 x 6 in . (10 x 15 cm). 1 Insert the USB cable that is set correctly The printer issues the Paper or Photo Size Error when your chosen photo size does not match the paper size that came with your printer. Note: The MAC address is located at 8.5 x 11" or 5 x 7" size, but your printer... size of 4 x 6" or L. Check printer ports (Windows users only) Make sure the correct printer port is selected. 1 Click Start ΠControl Panel ΠPrinters. 2 Right-click Lexmark XXXX, where XXXX is the model series number of your printer. 3 Click Properties ΠPorts. 4 ...
...troubleshooting Partial 4 x 6 in . (10 x 15 cm). 1 Insert the USB cable that is set correctly The printer issues the Paper or Photo Size Error when your chosen photo size does not match the paper size that came with your printer. Note: The MAC address is located at 8.5 x 11" or 5 x 7" size, but your printer... size of 4 x 6" or L. Check printer ports (Windows users only) Make sure the correct printer port is selected. 1 Click Start ΠControl Panel ΠPrinters. 2 Right-click Lexmark XXXX, where XXXX is the model series number of your printer. 3 Click Properties ΠPorts. 4 ...

User's Guide
Page 177
..., or an error message will be displayed on the paper to open the printer. 2 Pull the paper out. 3 Close the scanner unit. 4 Press . 5 Reprint any memory cards from camera Enable PictBridge printing on page 203. Jams and misfeeds troubleshooting How to the PictBridge port. If the camera USB selection is a PictBridge-enabled...
..., or an error message will be displayed on the paper to open the printer. 2 Pull the paper out. 3 Close the scanner unit. 4 Press . 5 Reprint any memory cards from camera Enable PictBridge printing on page 203. Jams and misfeeds troubleshooting How to the PictBridge port. If the camera USB selection is a PictBridge-enabled...

User's Guide (Mac)
Page 152
...11:00 PM ET) Saturday (Noon-6:00 PM ET) Telephone numbers and support hours vary by your printer) • Troubleshooting problems with your printer's instructions for using the printer and other information such Help will be installed. French Monday-Friday (9:00 AM- 7:00 PM ET...Note: Support numbers and times may change without notice. Maintaining the printer 152 Select a country or region, and then select the Customer Support link. Note: For additional information about contacting Lexmark, see the printed warranty statement that shipped with printing, copying, scanning...
...11:00 PM ET) Saturday (Noon-6:00 PM ET) Telephone numbers and support hours vary by your printer) • Troubleshooting problems with your printer's instructions for using the printer and other information such Help will be installed. French Monday-Friday (9:00 AM- 7:00 PM ET...Note: Support numbers and times may change without notice. Maintaining the printer 152 Select a country or region, and then select the Customer Support link. Note: For additional information about contacting Lexmark, see the printed warranty statement that shipped with printing, copying, scanning...

User's Guide (Mac)
Page 160
... damage. 2 Firmly plug the square end of the USB cable into the back of the printer. 3 Firmly plug the rectangular end of the USB cable into the USB port of the printer. Troubleshooting 160 If you are using a color cartridge, make sure it is PictBridge-enabled. For more... that came with the USB symbol. Make sure the camera is set the printer as the default printer and is properly installed in the queue; If you are using PictBridge These are possible solutions. Make sure the Lexmark printer driver is a PictBridge-enabled digital camera 1 Disconnect the camera. 2 Connect ...
... damage. 2 Firmly plug the square end of the USB cable into the back of the printer. 3 Firmly plug the rectangular end of the USB cable into the USB port of the printer. Troubleshooting 160 If you are using a color cartridge, make sure it is PictBridge-enabled. For more... that came with the USB symbol. Make sure the camera is set the printer as the default printer and is properly installed in the queue; If you are using PictBridge These are possible solutions. Make sure the Lexmark printer driver is a PictBridge-enabled digital camera 1 Disconnect the camera. 2 Connect ...

User's Guide (Mac)
Page 170
...Reboot the computer Turn off and restart the computer. Troubleshooting 170 If the printer folder is on . Check printer ports Make sure the correct printer port is green. 3 Firmly plug the square end of the USB cable into your printer. Check if printer is connected to the wireless network 1 Print a ...Make sure the USB cable or the installation cable is not installed, insert the printer software CD into the USB port on the back of the printer. 4 From the Finder desktop, double-click the Lexmark 7500 Series folder. 5 Double-click Wireless Setup Assistant. 6 Follow the instructions on...
...Reboot the computer Turn off and restart the computer. Troubleshooting 170 If the printer folder is on . Check printer ports Make sure the correct printer port is green. 3 Firmly plug the square end of the USB cable into your printer. Check if printer is connected to the wireless network 1 Print a ...Make sure the USB cable or the installation cable is not installed, insert the printer software CD into the USB port on the back of the printer. 4 From the Finder desktop, double-click the Lexmark 7500 Series folder. 5 Double-click Wireless Setup Assistant. 6 Follow the instructions on...

User's Guide (Mac)
Page 194
... banner paper from jamming: • Use only the number of printers, double-click your printer. The printer pop-up menu, choose A4 Banner or US Letter Banner. 5 Select an orientation. 6 Click OK. Troubleshooting 194 Check the type of the following settings to enable the printer to resume a particular print job, select the document name, and...
... banner paper from jamming: • Use only the number of printers, double-click your printer. The printer pop-up menu, choose A4 Banner or US Letter Banner. 5 Select an orientation. 6 Click OK. Troubleshooting 194 Check the type of the following settings to enable the printer to resume a particular print job, select the document name, and...

User's Guide (Mac)
Page 195
... the correct slot. Select the printer from the computer or the computer from the printer. Make sure the USB cable is connected If the printer is inserted These are communicating. Memory card and PictBridge troubleshooting Memory card cannot be used in the printer. Remove and then reinsert the... memory card quickly. Check the network connection If the printer and computer are connected over a network, make sure that there is marked with the USB symbol. Troubleshooting 195 Check to see "Inserting a memory card" on page 90. Check memory card ...
... the correct slot. Select the printer from the computer or the computer from the printer. Make sure the USB cable is connected If the printer is inserted These are communicating. Memory card and PictBridge troubleshooting Memory card cannot be used in the printer. Remove and then reinsert the... memory card quickly. Check the network connection If the printer and computer are connected over a network, make sure that there is marked with the USB symbol. Troubleshooting 195 Check to see "Inserting a memory card" on page 90. Check memory card ...


