X4500, X7500 MFP Options User's Guide
Page 12
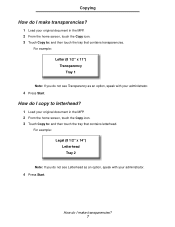
...: Legal (8 1/2" x 14") Letterhead Tray 2 Note: If you do not see Letterhead as an option, speak with your administrator. 4 Press Start. How do I make transparencies? 1 Load your original document in the MFP. 2 From the home screen, touch the Copy icon. 3 Touch Copy to : and then touch... x 11") Transparency Tray 1 Note: If you do not see Transparency as an option, speak with your administrator. 4 Press Start. Copying How do I make transparencies? 7 How do I copy to letterhead? 1 Load your original document in the MFP. 2 From the home screen, touch the Copy icon. 3 Touch Copy to ...
...: Legal (8 1/2" x 14") Letterhead Tray 2 Note: If you do not see Letterhead as an option, speak with your administrator. 4 Press Start. How do I make transparencies? 1 Load your original document in the MFP. 2 From the home screen, touch the Copy icon. 3 Touch Copy to : and then touch... x 11") Transparency Tray 1 Note: If you do not see Transparency as an option, speak with your administrator. 4 Press Start. Copying How do I make transparencies? 7 How do I copy to letterhead? 1 Load your original document in the MFP. 2 From the home screen, touch the Copy icon. 3 Touch Copy to ...
X4500, X7500 MFP Options User's Guide
Page 21
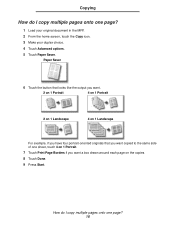
Copying How do I copy multiple pages onto one page? 1 Load your original document in the MFP. 2 From the home screen, touch the Copy icon. 3 Make your duplex choice. 4 Touch Advanced options. 5 Touch Paper Saver. Paper Saver 6 Touch the button that looks like the output you want. 2 on 1 Portrait 4 on 1 Portrait 2 on 1 Landscape 4 on...
Copying How do I copy multiple pages onto one page? 1 Load your original document in the MFP. 2 From the home screen, touch the Copy icon. 3 Make your duplex choice. 4 Touch Advanced options. 5 Touch Paper Saver. Paper Saver 6 Touch the button that looks like the output you want. 2 on 1 Portrait 4 on 1 Portrait 2 on 1 Landscape 4 on...
X4500, X7500 MFP Options User's Guide
Page 22
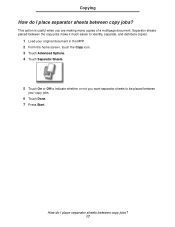
How do I place separator sheets between copy jobs? 17 Copying How do I place separator sheets between copy jobs? This option is useful when you want separator sheets to be placed between the copy jobs make it much easier to indicate whether or not you are making many copies of a multipage document. Separator sheets placed between your original document in the MFP. 2 From the home screen, touch the Copy icon. 3 Touch Advanced Options. 4 Touch Separator Sheets. 5 Touch On or Off to identify, separate, and distribute copies. 1 Load your copy jobs. 6 Touch Done. 7 Press Start.
How do I place separator sheets between copy jobs? 17 Copying How do I place separator sheets between copy jobs? This option is useful when you want separator sheets to be placed between the copy jobs make it much easier to indicate whether or not you are making many copies of a multipage document. Separator sheets placed between your original document in the MFP. 2 From the home screen, touch the Copy icon. 3 Touch Advanced Options. 4 Touch Separator Sheets. 5 Touch On or Off to identify, separate, and distribute copies. 1 Load your copy jobs. 6 Touch Done. 7 Press Start.
X4500, X7500 MFP Options User's Guide
Page 23
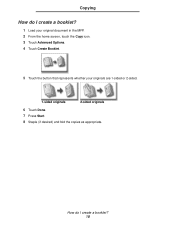
How do I create a booklet? 18 Copying How do I create a booklet? 1 Load your original document in the MFP. 2 From the home screen, touch the Copy icon. 3 Touch Advanced Options. 4 Touch Create Booklet. 5 Touch the button that represents whether your originals are 1-sided or 2-sided. 1-sided originals 2-sided originals 6 Touch Done. 7 Press Start. 8 Staple (if desired) and fold the copies as appropriate.
How do I create a booklet? 18 Copying How do I create a booklet? 1 Load your original document in the MFP. 2 From the home screen, touch the Copy icon. 3 Touch Advanced Options. 4 Touch Create Booklet. 5 Touch the button that represents whether your originals are 1-sided or 2-sided. 1-sided originals 2-sided originals 6 Touch Done. 7 Press Start. 8 Staple (if desired) and fold the copies as appropriate.
X4500, X7500 MFP Options User's Guide
Page 24
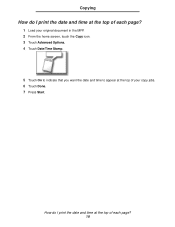
Copying How do I print the date and time at the top of each page? 1 Load your copy jobs. 6 Touch Done. 7 Press Start. How do I print the date and time at the top of your original document in the MFP. 2 From the home screen, touch the Copy icon. 3 Touch Advanced Options. 4 Touch Date/Time Stamp. 5 Touch On to indicate that you want the date and time to appear at the top of each page? 19
Copying How do I print the date and time at the top of each page? 1 Load your copy jobs. 6 Touch Done. 7 Press Start. How do I print the date and time at the top of your original document in the MFP. 2 From the home screen, touch the Copy icon. 3 Touch Advanced Options. 4 Touch Date/Time Stamp. 5 Touch On to indicate that you want the date and time to appear at the top of each page? 19

X4500, X7500 MFP Options User's Guide
Page 25
How do I add a message overlay to copies? 20 Message Overlay 5 Touch the button that represents the message you want to appear on your original document in the MFP. 2 From the home screen, touch the Copy icon. 3 Touch Advanced Options. 4 Touch Message Overlay. Copying How do I add a message overlay to copies? 1 Load your copies. 6 Touch Done. 7 Press Start.
How do I add a message overlay to copies? 20 Message Overlay 5 Touch the button that represents the message you want to appear on your original document in the MFP. 2 From the home screen, touch the Copy icon. 3 Touch Advanced Options. 4 Touch Message Overlay. Copying How do I add a message overlay to copies? 1 Load your copies. 6 Touch Done. 7 Press Start.
X4500, X7500 MFP Options User's Guide
Page 26
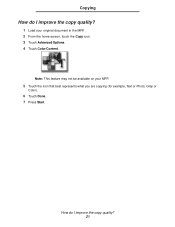
Note: This feature may not be available on your original document in the MFP. 2 From the home screen, touch the Copy icon. 3 Touch Advanced Options. 4 Touch Color/Content. How do I improve the copy quality? 21 Copying How do I improve the copy quality? 1 Load your MFP. 5 Touch the icon that best represents what you are copying (for example, Text or Photo, Gray or Color). 6 Touch Done. 7 Press Start.
Note: This feature may not be available on your original document in the MFP. 2 From the home screen, touch the Copy icon. 3 Touch Advanced Options. 4 Touch Color/Content. How do I improve the copy quality? 21 Copying How do I improve the copy quality? 1 Load your MFP. 5 Touch the icon that best represents what you are copying (for example, Text or Photo, Gray or Color). 6 Touch Done. 7 Press Start.
X4500, X7500 MFP Options User's Guide
Page 28
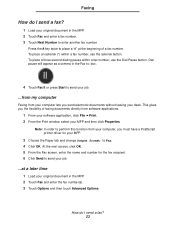
... beginning of faxing documents directly from your computer, you send electronic documents without leaving your original document in the MFP. 2 Touch Fax and enter the fax number(s). 3 Touch Options and then touch Advanced Options. Note: In order to place a "#" at a later time 1 Load your desk. At the next ...screen, click OK. 5 From the Fax screen, enter the name and number for your MFP. 3 Choose the Paper tab and change ...
... beginning of faxing documents directly from your computer, you send electronic documents without leaving your original document in the MFP. 2 Touch Fax and enter the fax number(s). 3 Touch Options and then touch Advanced Options. Note: In order to place a "#" at a later time 1 Load your desk. At the next ...screen, click OK. 5 From the Fax screen, enter the name and number for your MFP. 3 Choose the Paper tab and change ...
X4500, X7500 MFP Options User's Guide
Page 33
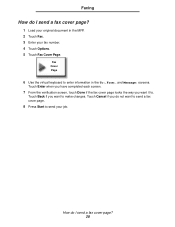
Touch Enter when you have completed each screen. 7 From the verification screen, touch Done if the fax cover page looks the way you want to . Touch Cancel if you do not want it to make changes. How do I send a fax cover page? 1 Load your original document in the To:, From:, and Message: screens. Touch Back if you want to send a fax cover page. 8 Press Start to enter information in the MFP. 2 Touch Fax. 3 Enter your job. Faxing How do I send a fax cover page? 28 Fax Cover Page 6 Use the virtual keyboard to send your fax number. 4 Touch Options. 5 Touch Fax Cover Page.
Touch Enter when you have completed each screen. 7 From the verification screen, touch Done if the fax cover page looks the way you want to . Touch Cancel if you do not want it to make changes. How do I send a fax cover page? 1 Load your original document in the To:, From:, and Message: screens. Touch Back if you want to send a fax cover page. 8 Press Start to enter information in the MFP. 2 Touch Fax. 3 Enter your job. Faxing How do I send a fax cover page? 28 Fax Cover Page 6 Use the virtual keyboard to send your fax number. 4 Touch Options. 5 Touch Fax Cover Page.
X4500, X7500 MFP Options User's Guide
Page 34
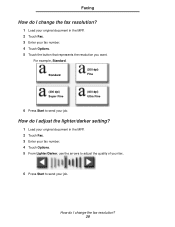
For example, Standard. How do I change the fax resolution? 1 Load your original document in the MFP. 2 Touch Fax. 3 Enter your fax number. 4 Touch Options. 5 From Lighter/Darker, use the arrows to adjust the quality of your fax. 6 Press Start to send your job. Standard (200 dpi) ...400 dpi) Ultra Fine 6 Press Start to send your job. How do I adjust the lighter/darker setting? 1 Load your original document in the MFP. 2 Touch Fax. 3 Enter your fax number. 4 Touch Options. 5 Touch the button that represents the resolution you want. Faxing How do I change the fax resolution? 29
For example, Standard. How do I change the fax resolution? 1 Load your original document in the MFP. 2 Touch Fax. 3 Enter your fax number. 4 Touch Options. 5 From Lighter/Darker, use the arrows to adjust the quality of your fax. 6 Press Start to send your job. Standard (200 dpi) ...400 dpi) Ultra Fine 6 Press Start to send your job. How do I adjust the lighter/darker setting? 1 Load your original document in the MFP. 2 Touch Fax. 3 Enter your fax number. 4 Touch Options. 5 Touch the button that represents the resolution you want. Faxing How do I change the fax resolution? 29

X4500, X7500 MFP Options User's Guide
Page 39
...printer are lost when you to Verify Print, Reserve Print, or Repeat Print. 4 Enter a user name. 5 Click OK. For example, this option makes it convenient for printing at a later time. JOB MENU Print All Jobs Menu Select Return Go Stop - Reserve Print lets you print the requested... Reserve, and Repeat jobs? 34 Printing How do I print Verify, Reserve, and Repeat jobs? At the next screen, click OK. 6 From the MFP, access the virtual printer operator panel. 7 Access the virtual printer operator panel. 8 Touch Menu until you either continue printing the job or delete the ...
...printer are lost when you to Verify Print, Reserve Print, or Repeat Print. 4 Enter a user name. 5 Click OK. For example, this option makes it convenient for printing at a later time. JOB MENU Print All Jobs Menu Select Return Go Stop - Reserve Print lets you print the requested... Reserve, and Repeat jobs? 34 Printing How do I print Verify, Reserve, and Repeat jobs? At the next screen, click OK. 6 From the MFP, access the virtual printer operator panel. 7 Access the virtual printer operator panel. 8 Touch Menu until you either continue printing the job or delete the ...

X4500, X7500 MFP Options User's Guide
Page 44
Scanning to send your original document in the MFP. 2 Touch E-mail. 3 Enter an e-mail address. 4 Touch Options. 5 Touch E-mail Subject. E-mail Subject 6 Use the virtual keyboard to enter a subject line and then touch Enter. 7 Touch E-mail Message. 8 Use the virtual keyboard to enter a message and then touch Enter. 9 Press Start to e-mail How do I add an e-mail subject and message? 1 Load your job. How do I add an e-mail subject and message? 39
Scanning to send your original document in the MFP. 2 Touch E-mail. 3 Enter an e-mail address. 4 Touch Options. 5 Touch E-mail Subject. E-mail Subject 6 Use the virtual keyboard to enter a subject line and then touch Enter. 7 Touch E-mail Message. 8 Use the virtual keyboard to enter a message and then touch Enter. 9 Press Start to e-mail How do I add an e-mail subject and message? 1 Load your job. How do I add an e-mail subject and message? 39
X4500, X7500 MFP Options User's Guide
Page 45
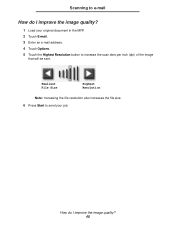
Scanning to e-mail How do I improve the image quality? 1 Load your original document in the MFP. 2 Touch E-mail. 3 Enter an e-mail address. 4 Touch Options. 5 Touch the Highest Resolution button to send your job. Smallest File Size Highest Resolution Note: Increasing the file resolution also increases the file size. 6 Press Start to increase the scan dots per inch (dpi) of the image that will be sent. How do I improve the image quality? 40
Scanning to e-mail How do I improve the image quality? 1 Load your original document in the MFP. 2 Touch E-mail. 3 Enter an e-mail address. 4 Touch Options. 5 Touch the Highest Resolution button to send your job. Smallest File Size Highest Resolution Note: Increasing the file resolution also increases the file size. 6 Press Start to increase the scan dots per inch (dpi) of the image that will be sent. How do I improve the image quality? 40
X4500, X7500 MFP Options User's Guide
Page 46
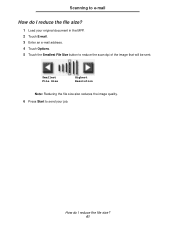
Smallest File Size Highest Resolution Note: Reducing the file size also reduces the image quality. 6 Press Start to reduce the scan dpi of the image that will be sent. How do I reduce the file size? 41 Scanning to e-mail How do I reduce the file size? 1 Load your original document in the MFP. 2 Touch E-mail. 3 Enter an e-mail address. 4 Touch Options. 5 Touch the Smallest File Size button to send your job.
Smallest File Size Highest Resolution Note: Reducing the file size also reduces the image quality. 6 Press Start to reduce the scan dpi of the image that will be sent. How do I reduce the file size? 41 Scanning to e-mail How do I reduce the file size? 1 Load your original document in the MFP. 2 Touch E-mail. 3 Enter an e-mail address. 4 Touch Options. 5 Touch the Smallest File Size button to send your job.
X4500, X7500 MFP Options User's Guide
Page 47
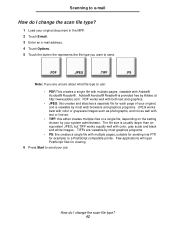
... the scan file type? 42 Few applications will open PostScript files for viewing. 6 Press Start to send your original document in the MFP. 2 Touch E-mail. 3 Enter an e-mail address. 4 Touch Options. 5 Touch the button the represents the file type you want to send. .PDF .JPEG .TIFF .PS Note: If you are viewable...
... the scan file type? 42 Few applications will open PostScript files for viewing. 6 Press Start to send your original document in the MFP. 2 Touch E-mail. 3 Enter an e-mail address. 4 Touch Options. 5 Touch the button the represents the file type you want to send. .PDF .JPEG .TIFF .PS Note: If you are viewable...

X4500, X7500 MFP Options User's Guide
Page 48
Color Note: This feature may not be available on your MFP. 6 Press Start to e-mail How do I scan in color? 1 Load your job. How do I scan in color? 43 Scanning to send your original document in the MFP. 2 Touch E-mail. 3 Enter an e-mail address. 4 Touch Options. 5 Touch Color.
Color Note: This feature may not be available on your MFP. 6 Press Start to e-mail How do I scan in color? 1 Load your job. How do I scan in color? 43 Scanning to send your original document in the MFP. 2 Touch E-mail. 3 Enter an e-mail address. 4 Touch Options. 5 Touch Color.
Setup Guide
Page 5
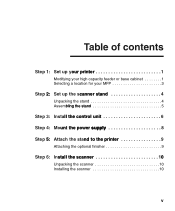
Step 1: Set up your printer 1 Modifying your high capacity feeder or base cabinet 1 Selecting a location for your MFP 3 Step 2: Set up the scanner stand 4 Unpacking the stand 4 Assembling the stand 5 Step 3: Install the control unit 6 Step 4: Mount the power supply 8 Step 5: Attach the stand to the printer 9 Attaching the optional finisher 9 Step 6: Install the scanner 10 Unpacking the scanner 10 Installing the scanner 10 v
Step 1: Set up your printer 1 Modifying your high capacity feeder or base cabinet 1 Selecting a location for your MFP 3 Step 2: Set up the scanner stand 4 Unpacking the stand 4 Assembling the stand 5 Step 3: Install the control unit 6 Step 4: Mount the power supply 8 Step 5: Attach the stand to the printer 9 Attaching the optional finisher 9 Step 6: Install the scanner 10 Unpacking the scanner 10 Installing the scanner 10 v
Setup Guide
Page 21
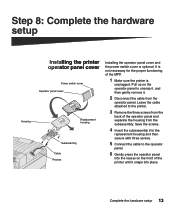
... housing Subassembly Cable Recess Installing the operator panel cover and the power switch cover is unplugged. Pull up on the front of the MFP. 1 Make sure the printer is optional. Save the screws. 4 Insert the subassembly into the replacement housing and then secure with three screws. 5 Connect the cable to the operator...
... housing Subassembly Cable Recess Installing the operator panel cover and the power switch cover is unplugged. Pull up on the front of the MFP. 1 Make sure the printer is optional. Save the screws. 4 Insert the subassembly into the replacement housing and then secure with three screws. 5 Connect the cable to the operator...
Setup Guide
Page 39
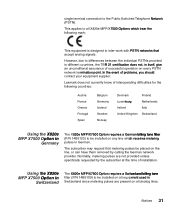
... Lexmark does not currently know of interoperating difficulties for the following mark: This equipment is designed to be installed on the line, or can have them removed by the subscriber at the time of installation. Using the X820e MFP X7500 Option in Switzerland The X820e MFP/X7500 Option ... on all analog lines. Notices 31 The subscriber may request that accept analog signals. However, due to all X820e MFP/X7500 Options which receives metering pulses in Switzerland since metering pulses are not provided unless specifically requested by calling the German network provider...
... Lexmark does not currently know of interoperating difficulties for the following mark: This equipment is designed to be installed on the line, or can have them removed by the subscriber at the time of installation. Using the X820e MFP X7500 Option in Switzerland The X820e MFP/X7500 Option ... on all analog lines. Notices 31 The subscriber may request that accept analog signals. However, due to all X820e MFP/X7500 Options which receives metering pulses in Switzerland since metering pulses are not provided unless specifically requested by calling the German network provider...


