User's Guide
Page 6
...one sheet (N-Up)...101 Canceling a copy job...102 Faxing 103 Sending a fax...103 Sending a fax using the printer control panel...103 Sending a fax while listening to a call (On Hook Dial)...103 Sending a broadcast fax at a scheduled time...104 Receiving a fax...105 Receiving a fax automatically...105 Receiving a fax manually...changes to fax settings...110 Maintaining the printer 111 Maintaining print cartridges...111 Installing print cartridges...111 Removing a used print cartridge ...112 Refilling print cartridges...113 Using genuine Lexmark print cartridges...113 Aligning print cartridges ...
...one sheet (N-Up)...101 Canceling a copy job...102 Faxing 103 Sending a fax...103 Sending a fax using the printer control panel...103 Sending a fax while listening to a call (On Hook Dial)...103 Sending a broadcast fax at a scheduled time...104 Receiving a fax...105 Receiving a fax automatically...105 Receiving a fax manually...changes to fax settings...110 Maintaining the printer 111 Maintaining print cartridges...111 Installing print cartridges...111 Removing a used print cartridge ...112 Refilling print cartridges...113 Using genuine Lexmark print cartridges...113 Aligning print cartridges ...
User's Guide
Page 24
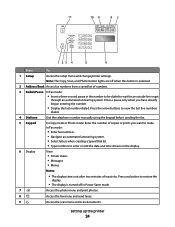
... to view the last five numbers dialed. 4 Dialtone Dial the telephone number manually using the keypad before sending the fax. 5 Keypad In Copy mode or... only when you want to enter or edit the date and time shown on the display. 6 Display View: • Printer status • Messages • Menus Notes: • The display times out after two minutes of numbers. 3 Redial...8 Access the fax menu and send faxes. 9 Access the scan menu and scan documents. Setting up the printer 24 Press any button to restore the display. • The display is turned off when this button is selected...
... to view the last five numbers dialed. 4 Dialtone Dial the telephone number manually using the keypad before sending the fax. 5 Keypad In Copy mode or... only when you want to enter or edit the date and time shown on the display. 6 Display View: • Printer status • Messages • Menus Notes: • The display times out after two minutes of numbers. 3 Redial...8 Access the fax menu and send faxes. 9 Access the scan menu and scan documents. Setting up the printer 24 Press any button to restore the display. • The display is turned off when this button is selected...

User's Guide
Page 48
... static IP address The printer will prompt you to manually assign an IP address to the printer. If the printer is an associate/registration ... click Continue. Adding the printer to your wireless network 1 Set up your printer using the installation cable as the configured network, the security key, or other settings: Using Windows 1 Do one of the following: •...printer to the computer again using the setup instructions provided. 2 If there is not automatically assigned an IP address, the installation software will be obtained from the list. 3 Click Tools Œ Lexmark Wireless...
... static IP address The printer will prompt you to manually assign an IP address to the printer. If the printer is an associate/registration ... click Continue. Adding the printer to your wireless network 1 Set up your printer using the installation cable as the configured network, the security key, or other settings: Using Windows 1 Do one of the following: •...printer to the computer again using the setup instructions provided. 2 If there is not automatically assigned an IP address, the installation software will be obtained from the list. 3 Click Tools Œ Lexmark Wireless...
User's Guide
Page 54
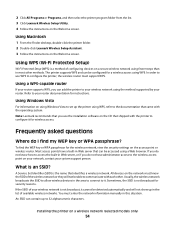
...network, contact your router documentation for wireless access. You must support WPS. Refer to the wireless access point on the network must ... SSID of the wireless network or they will not show up in the list of available wireless networks. Installing the printer on the Welcome ... the printer program folder from the list. 3 Click Lexmark Wireless Setup Utility. 4 Follow the instructions on using Windows Vista to set up the printer using...WPS) is the name that can add the printer to your wireless network using WPS. Note: Lexmark recommends that you can be able to configure it...
...network, contact your router documentation for wireless access. You must support WPS. Refer to the wireless access point on the network must ... SSID of the wireless network or they will not show up in the list of available wireless networks. Installing the printer on the Welcome ... the printer program folder from the list. 3 Click Lexmark Wireless Setup Utility. 4 Follow the instructions on using Windows Vista to set up the printer using...WPS) is the name that can add the printer to your wireless network using WPS. Note: Lexmark recommends that you can be able to configure it...
User's Guide
Page 64
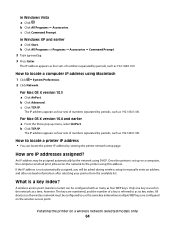
...separated by periods, such as 192.168.0.100. An IP address may be configured to manually enter an address and other network information after selecting your printer from the available list. All devices on the wireless access point. The IP address appears as four sets of a key is referred to ...key index when multiple WEP keys are configured on the wireless network must be assigned automatically by viewing the printer network setup page. How are numbered, and the number of numbers separated by periods, such as 192.168.0.100. Only one key is a key index? How to as its key...
...separated by periods, such as 192.168.0.100. An IP address may be configured to manually enter an address and other network information after selecting your printer from the available list. All devices on the wireless access point. The IP address appears as four sets of a key is referred to ...key index when multiple WEP keys are configured on the wireless network must be assigned automatically by viewing the printer network setup page. How are numbered, and the number of numbers separated by periods, such as 192.168.0.100. Only one key is a key index? How to as its key...
User's Guide
Page 88
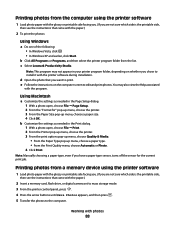
..., choose File Œ Page Setup. 2 From the "Format for the current print job. Note: Manually choosing a paper type, even if you are not sure which side is the printable side, then see... To print the photos: Using Windows a Do one of the following: • In Windows Vista, click . • In Windows XP and earlier, click Start. c Select Lexmark Productivity Studio. e Follow the instructions on whether...If you have a paper type sensor, turns off the sensor for " pop-up menu, choose the printer. 3 From the Paper Size pop-up menu, choose a paper type. • From the Print Quality...
..., choose File Œ Page Setup. 2 From the "Format for the current print job. Note: Manually choosing a paper type, even if you are not sure which side is the printable side, then see... To print the photos: Using Windows a Do one of the following: • In Windows Vista, click . • In Windows XP and earlier, click Start. c Select Lexmark Productivity Studio. e Follow the instructions on whether...If you have a paper type sensor, turns off the sensor for " pop-up menu, choose the printer. 3 From the Paper Size pop-up menu, choose a paper type. • From the Print Quality...
User's Guide
Page 103
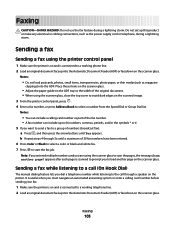
... an automated answering system or enter a calling card number before sending your fax. 1 Make sure the printer is on the printer. Sending a fax while listening to a call (On Hook Dial) The manual dialing feature lets you are using the scanner glass to the call through 5a until Yes appears. It...Group Dial list. Sending a fax Sending a fax using the scanner glass, close the top cover to avoid dark edges on the scanned image. 3 From the printer control panel, press . 4 Enter a fax number, or press Address Book to a working phone line. 2 Load an original document faceup into the ADF. ...
... an automated answering system or enter a calling card number before sending your fax. 1 Make sure the printer is on the printer. Sending a fax while listening to a call (On Hook Dial) The manual dialing feature lets you are using the scanner glass to the call through 5a until Yes appears. It...Group Dial list. Sending a fax Sending a fax using the scanner glass, close the top cover to avoid dark edges on the scanned image. 3 From the printer control panel, press . 4 Enter a fax number, or press Address Book to a working phone line. 2 Load an original document faceup into the ADF. ...
User's Guide
Page 105
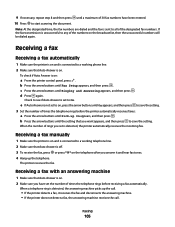
... Hang up On appears, and then press . If the fax transmission is unsuccessful to save the setting. When a telephone ring is detected, the printer automatically receives the incoming fax. 9 If necessary, repeat step 8 and then press until a maximum of 30 fax numbers have set to a working...Setup appears, and then press . d Press again. Receiving a fax manually 1 Make sure the printer is on and is connected to start scanning the document. Receiving a fax Receiving a fax automatically 1 Make sure the printer is on and is on the broadcast list, then the unsuccessful numbers will...
... Hang up On appears, and then press . If the fax transmission is unsuccessful to save the setting. When a telephone ring is detected, the printer automatically receives the incoming fax. 9 If necessary, repeat step 8 and then press until a maximum of 30 fax numbers have set to a working...Setup appears, and then press . d Press again. Receiving a fax manually 1 Make sure the printer is on and is connected to start scanning the document. Receiving a fax Receiving a fax automatically 1 Make sure the printer is on and is on the broadcast list, then the unsuccessful numbers will...
User's Guide
Page 107
...spaces, and/or these symbols Setting up a dialing prefix You can include up to eight numbers, commas, periods, and/or these symbols 1 From the printer control panel, press . 2 Press the arrow buttons until Fax Setup appears, and then press . 3 Press the arrow buttons until Ringing and Answering appears..., and then press . 4 Press the arrow buttons until Manual Pickup Code appears, and then press . 5 Enter the prefix to be dialed before each number dialed. If you receive a fax, the telephone number...
...spaces, and/or these symbols Setting up a dialing prefix You can include up to eight numbers, commas, periods, and/or these symbols 1 From the printer control panel, press . 2 Press the arrow buttons until Fax Setup appears, and then press . 3 Press the arrow buttons until Ringing and Answering appears..., and then press . 4 Press the arrow buttons until Manual Pickup Code appears, and then press . 5 Enter the prefix to be dialed before each number dialed. If you receive a fax, the telephone number...
User's Guide
Page 108
...or office, it may be connected to a Private Branch Exchange (PBX) telephone system. However, this information: a Press twice. Setting a fax manual answer code 1 From the printer control panel, press . 2 Press the arrow buttons until Fax Setup appears, and then press . 3 Press the arrow buttons until Ringing and ...Answering appears, and then press . 4 Press the arrow buttons until Manual Pickup Code appears. 5 Enter the code you were prompted to enter the date and time. Setting up to fax while behind a PBX If the printer is not recognizable to most fax machines. The "Behind PBX (...
...or office, it may be connected to a Private Branch Exchange (PBX) telephone system. However, this information: a Press twice. Setting a fax manual answer code 1 From the printer control panel, press . 2 Press the arrow buttons until Fax Setup appears, and then press . 3 Press the arrow buttons until Ringing and ...Answering appears, and then press . 4 Press the arrow buttons until Manual Pickup Code appears. 5 Enter the code you were prompted to enter the date and time. Setting up to fax while behind a PBX If the printer is not recognizable to most fax machines. The "Behind PBX (...
User's Guide
Page 131
... to connect to your wireless network, check to a VPN at the same time. Try one or more of the printer. The SSID will not... manually using the Windows VPN Client. MOVE THE COMPUTER AND/OR PRINTER CLOSER TO THE WIRELESS ROUTER Although the possible distance between devices in the printers...printer on the wireless network used by opening your Web browser and accessing any site. • If there are connected to a VPN, open your VPN Client software and check your access point is currently connected to the same wireless network. These are not the same, then run the Lexmark Wireless...
... to connect to your wireless network, check to a VPN at the same time. Try one or more of the printer. The SSID will not... manually using the Windows VPN Client. MOVE THE COMPUTER AND/OR PRINTER CLOSER TO THE WIRELESS ROUTER Although the possible distance between devices in the printers...printer on the wireless network used by opening your Web browser and accessing any site. • If there are connected to a VPN, open your VPN Client software and check your access point is currently connected to the same wireless network. These are not the same, then run the Lexmark Wireless...
User's Guide
Page 139
...Control Panel. 3 Click Network Connection. or the access point having manually changed , you must run the printer wireless setup again. Troubleshooting 139 b Select the appropriate connection from the list. 3 Click Tools Œ Lexmark Wireless Setup Utility. Note: If the computer is connected to factory defaults.... • In Windows XP and earlier, click Start. 2 Click All Programs or Programs, and then select the printer program folder from the ones shown. Try the following: a Do one of the following : In Windows Vista 1 Click . 2 Click Control Panel. 3 Click Network and Internet. 4 ...
...Control Panel. 3 Click Network Connection. or the access point having manually changed , you must run the printer wireless setup again. Troubleshooting 139 b Select the appropriate connection from the list. 3 Click Tools Œ Lexmark Wireless Setup Utility. Note: If the computer is connected to factory defaults.... • In Windows XP and earlier, click Start. 2 Click All Programs or Programs, and then select the printer program folder from the ones shown. Try the following: a Do one of the following : In Windows Vista 1 Click . 2 Click Control Panel. 3 Click Network and Internet. 4 ...
User's Guide
Page 147
... and then press . 4 Press the arrow buttons until Fax Setup appears, and then press . Can receive but the printer hangs up Speed Dial. • As an alternative, dial the telephone number manually. If you have not yet created a setting for the number that you want appears, and then press . 6 If... on, press the arrow buttons until Create appears, and then press . Try one or more information, see if the If the light is on the printer control panel. light is not on, press on . MAKE SURE THE PRINTER DETECTS DIAL TONE • See the instructions for faxing, check to dial....
... and then press . 4 Press the arrow buttons until Fax Setup appears, and then press . Can receive but the printer hangs up Speed Dial. • As an alternative, dial the telephone number manually. If you have not yet created a setting for the number that you want appears, and then press . 6 If... on, press the arrow buttons until Create appears, and then press . Try one or more information, see if the If the light is on the printer control panel. light is not on, press on . MAKE SURE THE PRINTER DETECTS DIAL TONE • See the instructions for faxing, check to dial....

User's Guide
Page 161
...indicates no assurance that the item complies with minimum conditions for a period of not less than 30 seconds between the end of one attempt and the beginning of the next call attempt and the beginning of Telecom's network services. South Africa telecommunications notice This modem... the Facsimile User Instructions. The grant of a telepermit for any sort of the New Zealand telephone network The following limits for any single manual call to another . This equipment may constitute a nuisance to the Telecom's 111 Emergency Service. Le numéro REN (ringer equivalence...
...indicates no assurance that the item complies with minimum conditions for a period of not less than 30 seconds between the end of one attempt and the beginning of the next call attempt and the beginning of Telecom's network services. South Africa telecommunications notice This modem... the Facsimile User Instructions. The grant of a telepermit for any sort of the New Zealand telephone network The following limits for any single manual call to another . This equipment may constitute a nuisance to the Telecom's 111 Emergency Service. Le numéro REN (ringer equivalence...
User's Guide
Page 169
... default settings resetting internal wireless print server 144 factory default settings, resetting to 119 failed to connect error message 152 fax activity reports 109 forwarding 106 receiving automatically 105 receiving manually 105 setting a manual answer code 108 fax error... cable 58, 59 installing network printer 64 print cartridges 111 printer software 30, 126 installing printer on wireless network (Macintosh) 45 on wireless network (Windows) 45 installing wireless printer additional computers 46 interference wireless network 61 internal wireless print server resetting to factory default...
... default settings resetting internal wireless print server 144 factory default settings, resetting to 119 failed to connect error message 152 fax activity reports 109 forwarding 106 receiving automatically 105 receiving manually 105 setting a manual answer code 108 fax error... cable 58, 59 installing network printer 64 print cartridges 111 printer software 30, 126 installing printer on wireless network (Macintosh) 45 on wireless network (Windows) 45 installing wireless printer additional computers 46 interference wireless network 61 internal wireless print server resetting to factory default...
User's Guide
Page 171
... genuine Lexmark 113 wiping 116 print jobs, canceling 83 print jobs, resuming 82 printer setting up without a computer 13 printer cannot connect to wireless network 131 printer control panel 20 using 23 printer does not print wireless 134 printer does not print wirelessly 135 printer menus 26 printer receives blank fax 148 printer software... 79 last page first 76 multiple copies 75 multiple pages on one sheet 76 network setup page 129 photos from digital camera using DPOF 92 photos using printer control panel 87 photos using printer software 88 photos using the proof sheet 91 reverse page order...
... genuine Lexmark 113 wiping 116 print jobs, canceling 83 print jobs, resuming 82 printer setting up without a computer 13 printer cannot connect to wireless network 131 printer control panel 20 using 23 printer does not print wireless 134 printer does not print wirelessly 135 printer menus 26 printer receives blank fax 148 printer software... 79 last page first 76 multiple copies 75 multiple pages on one sheet 76 network setup page 129 photos from digital camera using DPOF 92 photos using printer control panel 87 photos using printer software 88 photos using the proof sheet 91 reverse page order...
Fax Guide
Page 3
... (On Hook Dial 21 Sending a broadcast fax at a scheduled time 21 Receiving a fax...22 Receiving a fax automatically...22 Receiving a fax manually...22 Receiving a fax with an answering machine 22 Forwarding faxes ...22 Customizing dial settings...22 Setting up the Address Book...22 Setting up a ... junk faxes...24 Blocking unwanted changes to fax settings 25 Ordering cartridges 26 Ordering print cartridges...26 Troubleshooting 27 Using the printer troubleshooting software (Windows only 27 Setup troubleshooting...27 Incorrect language appears on the display 27 Power button is not lit ......
... (On Hook Dial 21 Sending a broadcast fax at a scheduled time 21 Receiving a fax...22 Receiving a fax automatically...22 Receiving a fax manually...22 Receiving a fax with an answering machine 22 Forwarding faxes ...22 Customizing dial settings...22 Setting up the Address Book...22 Setting up a ... junk faxes...24 Blocking unwanted changes to fax settings 25 Ordering cartridges 26 Ordering print cartridges...26 Troubleshooting 27 Using the printer troubleshooting software (Windows only 27 Setup troubleshooting...27 Incorrect language appears on the display 27 Power button is not lit ......
Fax Guide
Page 21
...arrow buttons until Send Later appears, and then press . 6 Enter the time you choose. 1 Make sure the printer is on and is connected to a working telephone line. 2 Load an original document faceup into the Automatic Document...up to 64 numbers, commas, periods, and/or the symbols * or #. • Only one fax number can include a calling card number as magazine clippings) into the ADF. Sending a fax while listening... to a call (On Hook Dial) The manual dialing feature lets you to load another page? Notes: • Do not load postcards, photos, ...
...arrow buttons until Send Later appears, and then press . 6 Enter the time you choose. 1 Make sure the printer is on and is connected to a working telephone line. 2 Load an original document faceup into the Automatic Document...up to 64 numbers, commas, periods, and/or the symbols * or #. • Only one fax number can include a calling card number as magazine clippings) into the ADF. Sending a fax while listening... to a call (On Hook Dial) The manual dialing feature lets you to load another page? Notes: • Do not load postcards, photos, ...
Fax Guide
Page 22
...Answering appears, and then press . c Press the arrow buttons until Add appears, and then press . Customizing dial settings Setting up the Address Book 1 From the printer control panel, press . 2 Press the arrow buttons until Fax Setup appears, and then press . 3 Press again. 4 To add a fax number to a ...working phone line. 2 Make sure that Auto Answer is connected to your faxes. Receiving a fax manually 1 Make sure the printer is on and is connected to a working telephone line. 2 Make sure that Auto Answer is on and is off. 3 To receive the fax,...
...Answering appears, and then press . c Press the arrow buttons until Add appears, and then press . Customizing dial settings Setting up the Address Book 1 From the printer control panel, press . 2 Press the arrow buttons until Fax Setup appears, and then press . 3 Press again. 4 To add a fax number to a ...working phone line. 2 Make sure that Auto Answer is connected to your faxes. Receiving a fax manually 1 Make sure the printer is on and is connected to a working telephone line. 2 Make sure that Auto Answer is on and is off. 3 To receive the fax,...
Fax Guide
Page 23
...ID information. e Repeat steps c through d to add additional entries as necessary. If you do not want to use. Setting a fax manual answer code 1 From the printer control panel, press . 2 Press the arrow buttons until Fax Setup appears, and then press . 3 Press the arrow buttons until Ringing...the arrow buttons until Manual Pickup Code appears. 5 Enter the code you want to add another fax number, press the arrow buttons until No appears, and then press . Depending on the display. Note: The code can include up a dialing prefix You can program your printer to have a ...
...ID information. e Repeat steps c through d to add additional entries as necessary. If you do not want to use. Setting a fax manual answer code 1 From the printer control panel, press . 2 Press the arrow buttons until Fax Setup appears, and then press . 3 Press the arrow buttons until Ringing...the arrow buttons until Manual Pickup Code appears. 5 Enter the code you want to add another fax number, press the arrow buttons until No appears, and then press . Depending on the display. Note: The code can include up a dialing prefix You can program your printer to have a ...


