

Wireless Setup Guide
Page 12
The MAC address appears in the following format: 00:04:12:34:56:78 Note: Print a network setup page if you cannot locate the printer MAC address. It will appear on the Software and Documentation CD. For more information on printing a network setup page, see the User's Guide on the network setup page. Preparing to connect wirelessly 12 If the printer has a factory-installed internal print server, then the MAC address is a series of letters and numbers located on the MAC address sheet that came with the printer.
The MAC address appears in the following format: 00:04:12:34:56:78 Note: Print a network setup page if you cannot locate the printer MAC address. It will appear on the Software and Documentation CD. For more information on printing a network setup page, see the User's Guide on the network setup page. Preparing to connect wirelessly 12 If the printer has a factory-installed internal print server, then the MAC address is a series of letters and numbers located on the MAC address sheet that came with the printer.

Wireless Setup Guide
Page 19
...8226; The SSID is using WPA security). • The printer is secure). Printing a network setup page A network setup page lists the configuration settings of the wireless network. This information is located away from other electronic devices that may interfere with the wireless ...security system cameras, other computers on the wireless network. Print a network setup page to troubleshoot the wireless printer, verify that could block the wireless signal. Troubleshooting wireless setup For more information on printing a network setup page, see the User's Guide on the Software...
...8226; The SSID is using WPA security). • The printer is secure). Printing a network setup page A network setup page lists the configuration settings of the wireless network. This information is located away from other electronic devices that may interfere with the wireless ...security system cameras, other computers on the wireless network. Print a network setup page to troubleshoot the wireless printer, verify that could block the wireless signal. Troubleshooting wireless setup For more information on printing a network setup page, see the User's Guide on the Software...

Wireless Setup Guide
Page 20
...possible distance between devices in the address field of the wireless access point in 802.11b or 802.11g networks is 300 feet, the maximum range for details on printing a network setup page. MOVE YOUR ACCESS POINT TO MINIMIZE INTERFERENCE There may be temporary interference from other devices such as ...or resources on your printer for optimal performance is generally 100-150 feet. CHECK WHETHER THE PRINTER IS ON THE SAME WIRELESS NETWORK AS THE COMPUTER Print a network setup page. If you do not know the IP address of the following : MAKE SURE YOUR COMPUTER IS CONNECTED TO YOUR ...
...possible distance between devices in the address field of the wireless access point in 802.11b or 802.11g networks is 300 feet, the maximum range for details on printing a network setup page. MOVE YOUR ACCESS POINT TO MINIMIZE INTERFERENCE There may be temporary interference from other devices such as ...or resources on your printer for optimal performance is generally 100-150 feet. CHECK WHETHER THE PRINTER IS ON THE SAME WIRELESS NETWORK AS THE COMPUTER Print a network setup page. If you do not know the IP address of the following : MAKE SURE YOUR COMPUTER IS CONNECTED TO YOUR ...

Wireless Setup Guide
Page 34
...lets them communicate at much higher speeds than parallel cables A small, rectangular port on ad hoc wireless networks. A device that connects wireless devices together to form a wireless network A router that lets the printer communicate with the computer at high speeds A security setting that helps ... the technology used to create an interoperable wireless local area network (WLAN) A security setting that helps prevent unauthorized access to support this. WPA is being received The name of WPA. To find the UAA, print a network setup page and look for the UAA listing.
...lets them communicate at much higher speeds than parallel cables A small, rectangular port on ad hoc wireless networks. A device that connects wireless devices together to form a wireless network A router that lets the printer communicate with the computer at high speeds A security setting that helps ... the technology used to create an interoperable wireless local area network (WLAN) A security setting that helps prevent unauthorized access to support this. WPA is being received The name of WPA. To find the UAA, print a network setup page and look for the UAA listing.

Wireless Setup Guide
Page 35
... MAC address, finding 11 Macintosh wireless network installation 15 N network printer does not show up in printer selection list during installation (Windows) 28 network setup page printing 19 P power 26 printer does not print 27 wireless 28 printing network setup page 19 S selecting connection type 10... setting up the printer local connection 30 steps setting up printer 5 T troubleshooting wireless network 19 troubleshooting, wireless cannot print over wireless network 20 network printer does not show up in ...
... MAC address, finding 11 Macintosh wireless network installation 15 N network printer does not show up in printer selection list during installation (Windows) 28 network setup page printing 19 P power 26 printer does not print 27 wireless 28 printing network setup page 19 S selecting connection type 10... setting up the printer local connection 30 steps setting up printer 5 T troubleshooting wireless network 19 troubleshooting, wireless cannot print over wireless network 20 network printer does not show up in ...

User's Guide
Page 24
...the printer is not installed correctly. Additional printer setup 24 If an option you installed is not listed, then it again. • Network setup page-If your printer is a network model and is attached to a network, print a network setup page to verify that all hardware and software ...options are installed and the printer is turned on, verify that aids network printing configuration. Remove the option ...
...the printer is not installed correctly. Additional printer setup 24 If an option you installed is not listed, then it again. • Network setup page-If your printer is a network model and is attached to a network, print a network setup page to verify that all hardware and software ...options are installed and the printer is turned on, verify that aids network printing configuration. Remove the option ...

User's Guide
Page 25
...you have a wireless printer model, the wireless network may be configured properly. Printing a network setup page If the printer is attached to a network, print a network setup page to verify printer options are installed correctly. Additional printer setup 25 Printing a menu settings page Print a ...press . This page also provides important information that aids network printing configuration. 1 Make sure the printer is "Connected." After the network setup page prints, Ready appears. 5 Check the first section on the network setup page, and confirm that lets the computer communicate with...
...you have a wireless printer model, the wireless network may be configured properly. Printing a network setup page If the printer is attached to a network, print a network setup page to verify printer options are installed correctly. Additional printer setup 25 Printing a menu settings page Print a ...press . This page also provides important information that aids network printing configuration. 1 Make sure the printer is "Connected." After the network setup page prints, Ready appears. 5 Check the first section on the network setup page, and confirm that lets the computer communicate with...
User's Guide
Page 33
... Continue. 7 From the Easy Install screen, click Install. 8 Type the user password, and then click OK. For information on printing a network setup page, see "Printing a network setup page" on page 25. 3 Locate the printer IP address in the CD or DVD drive. 2 Double-click the installer package for the... click Run. b Add the printer: • For IP printing: Additional printer setup 33 For Macintosh users 1 Allow the network DHCP server to assign an IP address to accept the terms of the network setup page. All the necessary software is installed on the computer. 9 Click Restart when...
... Continue. 7 From the Easy Install screen, click Install. 8 Type the user password, and then click OK. For information on printing a network setup page, see "Printing a network setup page" on page 25. 3 Locate the printer IP address in the CD or DVD drive. 2 Double-click the installer package for the... click Run. b Add the printer: • For IP printing: Additional printer setup 33 For Macintosh users 1 Allow the network DHCP server to assign an IP address to accept the terms of the network setup page. All the necessary software is installed on the computer. 9 Click Restart when...

User's Guide
Page 37
...Notices chapter • The Environmental Sustainability section of minutes for the printer to enter the number of the Lexmark Web site at www.lexmark.com/environment • The Lexmark recycling program at www.lexmark.com/recycling Minimizing your Web browser. Submitting changes appears. 9 Press , and then press until Ready ... buttons to wait before entering the Power Saver mode. Note: If you do not know the IP address of the printer, then print a network setup page and locate the IP address in the TCP/IP section. 2 Click Settings, and then click General Settings. 3 Click Timeouts. 4 In...
...Notices chapter • The Environmental Sustainability section of minutes for the printer to enter the number of the Lexmark Web site at www.lexmark.com/environment • The Lexmark recycling program at www.lexmark.com/recycling Minimizing your Web browser. Submitting changes appears. 9 Press , and then press until Ready ... buttons to wait before entering the Power Saver mode. Note: If you do not know the IP address of the printer, then print a network setup page and locate the IP address in the TCP/IP section. 2 Click Settings, and then click General Settings. 3 Click Timeouts. 4 In...

User's Guide
Page 53
... the Embedded Web Server or MarkVision ProfessionalTM to your Web browser. Note: If you do not know the IP address of the printer, then print a network setup page and locate the IP address in a Custom Name box. Custom Types appears, followed by your custom name. 8 Select a Paper Type setting from the Embedded...
... the Embedded Web Server or MarkVision ProfessionalTM to your Web browser. Note: If you do not know the IP address of the printer, then print a network setup page and locate the IP address in a Custom Name box. Custom Types appears, followed by your custom name. 8 Select a Paper Type setting from the Embedded...

User's Guide
Page 66
.... 4 Press the arrow buttons until Prt Quality Pgs appears, and then press . Printing information pages See "Printing a menu settings page" on page 25 and "Printing a network setup page" on page 25 for more information on and Ready appears. 2 From the printer control panel, press . 3 Press the arrow buttons until Reports appears, and...
.... 4 Press the arrow buttons until Prt Quality Pgs appears, and then press . Printing information pages See "Printing a menu settings page" on page 25 and "Printing a network setup page" on page 25 for more information on and Ready appears. 2 From the printer control panel, press . 3 Press the arrow buttons until Reports appears, and...

User's Guide
Page 75
..., or B5 JIS. • The Copy Size must be set to save paper, you do not know the IP address of the printer, then print a network setup page and locate the address in the TCP/IP section. 2 Click Settings. 3 Click Copy Settings. 4 Click Separator Sheets. 6 Press the arrow buttons until Paper Saver...
..., or B5 JIS. • The Copy Size must be set to save paper, you do not know the IP address of the printer, then print a network setup page and locate the address in the TCP/IP section. 2 Click Settings. 3 Click Copy Settings. 4 Click Separator Sheets. 6 Press the arrow buttons until Paper Saver...

User's Guide
Page 78
... Getting ready to e-mail Setting up the e-mail function: 1 Type the printer IP address into the address field of the printer, then print a network setup page and locate the IP address in the TCP/IP section. 2 Click Settings. 3 Under Default Settings, click E-mail/FTP Settings. 4 Click E-mail Settings.... 5 Click Setup E-mail Server. 6 Fill in the printer configuration and have a valid IP address or gateway address. Use the scanner glass for multiple-page documents. E-...
... Getting ready to e-mail Setting up the e-mail function: 1 Type the printer IP address into the address field of the printer, then print a network setup page and locate the IP address in the TCP/IP section. 2 Click Settings. 3 Under Default Settings, click E-mail/FTP Settings. 4 Click E-mail Settings.... 5 Click Setup E-mail Server. 6 Fill in the printer configuration and have a valid IP address or gateway address. Use the scanner glass for multiple-page documents. E-...
User's Guide
Page 79
.... 5 Change the e-mail settings as magazine clippings) into the ADF. If you do not know the IP address of the printer, then print a network setup page and locate the address in use, then you are entering multiple addresses, then separate each address with a comma (,). 6 Select the scan settings (... Resolution). 7 Enter a shortcut number, and then click Add. Note: If you do not know the IP address of the printer, then print a network setup page and locate the IP address in the TCP/IP section. 2 Click Settings. 3 Under Other Settings, click Manage Shortcuts. 4 Click E-mail Shortcut...
.... 5 Change the e-mail settings as magazine clippings) into the ADF. If you do not know the IP address of the printer, then print a network setup page and locate the address in use, then you are entering multiple addresses, then separate each address with a comma (,). 6 Select the scan settings (... Resolution). 7 Enter a shortcut number, and then click Add. Note: If you do not know the IP address of the printer, then print a network setup page and locate the IP address in the TCP/IP section. 2 Click Settings. 3 Under Other Settings, click Manage Shortcuts. 4 Click E-mail Shortcut...

User's Guide
Page 83
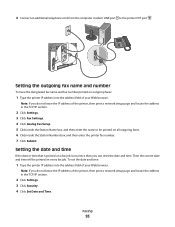
The first time you press the button, the number for fax setup 1 Type the printer IP address into the address field of your DSL provider for a DSL ...corresponds with the number you want. When you press the button again, one of the printer, then print a network setup page and locate the address in the setup steps. • If you want a digital connection such as ISDN, DSL, or ADSL, a third-party ... in the TCP/IP section. 2 Click Settings. 3 Click Fax Settings. 4 Click Analog Fax Setup. 5 Click inside the Station Number box, and then enter the printer fax number. 7 Click Submit.
The first time you press the button, the number for fax setup 1 Type the printer IP address into the address field of your DSL provider for a DSL ...corresponds with the number you want. When you press the button again, one of the printer, then print a network setup page and locate the address in the setup steps. • If you want a digital connection such as ISDN, DSL, or ADSL, a third-party ... in the TCP/IP section. 2 Click Settings. 3 Click Fax Settings. 4 Click Analog Fax Setup. 5 Click inside the Station Number box, and then enter the printer fax number. 7 Click Submit.
User's Guide
Page 93
... printer IP address into the address field of your Web browser. Note: If you do not know the IP address of the printer, then print a network setup page and locate the address in the TCP/IP section. 2 Click Settings. 3 Click Security. 4 Click Set Date and Time. Faxing 93 6 Connect an ... is incorrect, then you do not know the IP address of the printer, then print a network setup page and locate the address in the TCP/IP section. 2 Click Settings. 3 Click Fax Settings. 4 Click Analog Fax Setup. 5 Click inside the Station Name box, and then enter the name to the printer EXT ...
... printer IP address into the address field of your Web browser. Note: If you do not know the IP address of the printer, then print a network setup page and locate the address in the TCP/IP section. 2 Click Settings. 3 Click Security. 4 Click Set Date and Time. Faxing 93 6 Connect an ... is incorrect, then you do not know the IP address of the printer, then print a network setup page and locate the address in the TCP/IP section. 2 Click Settings. 3 Click Fax Settings. 4 Click Analog Fax Setup. 5 Click inside the Station Name box, and then enter the name to the printer EXT ...
User's Guide
Page 94
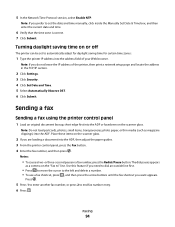
5 In the Network Time Protocol section, select Enable NTP. Note: Do not load postcards, photos, small items, transparencies, photo paper, or thin media (such as a comma on or ... the Fax button. 4 Enter the fax number, and then press . Note: If you are loading a document into the address field of the printer, then print a network setup page and locate the address in a fax number, press the Redial/Pause button. Note: If you want appears. Use this feature if you need to...
5 In the Network Time Protocol section, select Enable NTP. Note: Do not load postcards, photos, small items, transparencies, photo paper, or thin media (such as a comma on or ... the Fax button. 4 Enter the fax number, and then press . Note: If you are loading a document into the address field of the printer, then print a network setup page and locate the address in a fax number, press the Redial/Pause button. Note: If you want appears. Use this feature if you need to...
User's Guide
Page 97
If you receive an error, "No fax modems were found", follow these directions to add your system support person. 4 Click Fax Shortcut Setup. 5 Type a unique name for the group. Note: Separate each time you want to send a fax, you can be required. If you enter a number that ... fax number in the TCP/IP section. 2 Click Settings. 3 Click Manage Shortcuts. If you do not know the IP address of the printer, then print a network setup page and locate the IP address in the group with a semicolon (;). 6 Assign a shortcut number. 3 Select Fax, and then enter the recipient name, number, and...
If you receive an error, "No fax modems were found", follow these directions to add your system support person. 4 Click Fax Shortcut Setup. 5 Type a unique name for the group. Note: Separate each time you want to send a fax, you can be required. If you enter a number that ... fax number in the TCP/IP section. 2 Click Settings. 3 Click Manage Shortcuts. If you do not know the IP address of the printer, then print a network setup page and locate the IP address in the group with a semicolon (;). 6 Assign a shortcut number. 3 Select Fax, and then enter the recipient name, number, and...

User's Guide
Page 100
... the scanner glass. 2 If you do not know the IP address of the printer, then print a network setup page and locate the address in the TCP/IP section. 2 Click Settings. 3 Click Fax Settings. 4 Click Analog Fax Setup. 5 Click inside the Fax Forwarding box, and then select one of your Web browser. Set Send...
... the scanner glass. 2 If you do not know the IP address of the printer, then print a network setup page and locate the address in the TCP/IP section. 2 Click Settings. 3 Click Fax Settings. 4 Click Analog Fax Setup. 5 Click inside the Fax Forwarding box, and then select one of your Web browser. Set Send...

User's Guide
Page 101
... the address field of specific fax callers you want to block. Note: If you do not know the IP address of the printer, then print a network setup page and locate the IP address in the TCP/IP section. 2 Click Settings. 3 Click Fax Settings. 4 Click Analog Fax... the Block No Name Fax option. Note: If you do not know the IP address of the printer, then print a network setup page and locate the IP address in the TCP/IP section. 2 Click Settings. 3 Click Reports. 4 Click Fax Job Log or Fax Call Log. To cancel a ...
... the address field of specific fax callers you want to block. Note: If you do not know the IP address of the printer, then print a network setup page and locate the IP address in the TCP/IP section. 2 Click Settings. 3 Click Fax Settings. 4 Click Analog Fax... the Block No Name Fax option. Note: If you do not know the IP address of the printer, then print a network setup page and locate the IP address in the TCP/IP section. 2 Click Settings. 3 Click Reports. 4 Click Fax Job Log or Fax Call Log. To cancel a ...


