
User's Guide
Page 2
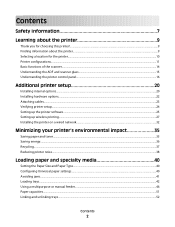
... choosing this printer!...9 Finding information about the printer...9 Selecting a location for the printer...10 Printer configurations...11 Basic functions of the scanner...14 Understanding the ADF and scanner glass...15 Understanding the printer control panel...16 Additional printer setup 20 Installing internal options...20 Installing hardware options...22 Attaching cables...23 Verifying printer...
... choosing this printer!...9 Finding information about the printer...9 Selecting a location for the printer...10 Printer configurations...11 Basic functions of the scanner...14 Understanding the ADF and scanner glass...15 Understanding the printer control panel...16 Additional printer setup 20 Installing internal options...20 Installing hardware options...22 Attaching cables...23 Verifying printer...

User's Guide
Page 75
... 75 Note: If you can copy either two or four consecutive pages of a multiple-page document onto a single sheet of the printer, then print a network setup page and locate the address in the TCP/IP section. 2 Click Settings. 3 Click Copy Settings. 4 Click Separator Sheets. Notes: • The Paper Size... On [1,2,1,2,1,2] or Off [1,1,1,2,2,2] appears, and then press to save paper, you do not know the IP address of paper. Place these items on the scanner glass. 2 If you are added to Ready. If Collate is Off, then the separator sheets are loading a document into the ADF or facedown on ...
... 75 Note: If you can copy either two or four consecutive pages of a multiple-page document onto a single sheet of the printer, then print a network setup page and locate the address in the TCP/IP section. 2 Click Settings. 3 Click Copy Settings. 4 Click Separator Sheets. Notes: • The Paper Size... On [1,2,1,2,1,2] or Off [1,1,1,2,2,2] appears, and then press to save paper, you do not know the IP address of paper. Place these items on the scanner glass. 2 If you are added to Ready. If Collate is Off, then the separator sheets are loading a document into the ADF or facedown on ...

User's Guide
Page 78
...e-mail to e-mail Setting up the e-mail function: 1 Type the printer IP address into the address field of the printer, then print a network setup page and locate the IP address in the TCP/IP section. 2 Click Settings. 3 Under Default Settings, click E-mail/FTP Settings. 4 Click E-mail Settings....or more recipients. Getting ready to operate, it must be turned on in the fields with the appropriate information. 7 Click Add. E-mailing ADF Scanner glass Use the ADF for single pages, small items (such as postcards or photos), transparencies, photo paper, or thin media (such as magazine ...
...e-mail to e-mail Setting up the e-mail function: 1 Type the printer IP address into the address field of the printer, then print a network setup page and locate the IP address in the TCP/IP section. 2 Click Settings. 3 Under Default Settings, click E-mail/FTP Settings. 4 Click E-mail Settings....or more recipients. Getting ready to operate, it must be turned on in the fields with the appropriate information. 7 Click Add. E-mailing ADF Scanner glass Use the ADF for single pages, small items (such as postcards or photos), transparencies, photo paper, or thin media (such as magazine ...
User's Guide
Page 79
...Click Settings. 3 Click E-mail/FTP Settings. 4 Click Manage E-mail Shortcuts. 5 Change the e-mail settings as magazine clippings) into the ADF or facedown on the scanner glass. 2 If you are entering multiple addresses, then separate each address with a comma (,). 6 Select the scan settings (Format, Content, Color, and Resolution). ...to E-mail appears. E-mailing 79 Note: If you do not know the IP address of the printer, then print a network setup page and locate the IP address in the TCP/IP section. 2 Click Settings. 3 Under Other Settings, click Manage Shortcuts. 4 Click E-...
...Click Settings. 3 Click E-mail/FTP Settings. 4 Click Manage E-mail Shortcuts. 5 Change the e-mail settings as magazine clippings) into the ADF or facedown on the scanner glass. 2 If you are entering multiple addresses, then separate each address with a comma (,). 6 Select the scan settings (Format, Content, Color, and Resolution). ...to E-mail appears. E-mailing 79 Note: If you do not know the IP address of the printer, then print a network setup page and locate the IP address in the TCP/IP section. 2 Click Settings. 3 Under Other Settings, click Manage Shortcuts. 4 Click E-...

User's Guide
Page 82
... the Embedded Web Server and then enter the Settings menu. Use the scanner glass for an extended time, a series of the sending fax machine, business, other entity, or individual). To enter your fax setup information, use the printer control panel, or use the printer control panel...appear: Station Name Station Number Note: The Station Name and Station Number must use your fax setup information. Faxing ADF Scanner glass Use the ADF for multiple-page documents. Initial fax setup Many countries and regions require outgoing faxes to enter your browser to fax Only select printer ...
... the Embedded Web Server and then enter the Settings menu. Use the scanner glass for an extended time, a series of the sending fax machine, business, other entity, or individual). To enter your fax setup information, use the printer control panel, or use the printer control panel...appear: Station Name Station Number Note: The Station Name and Station Number must use your fax setup information. Faxing ADF Scanner glass Use the ADF for multiple-page documents. Initial fax setup Many countries and regions require outgoing faxes to enter your browser to fax Only select printer ...
User's Guide
Page 94
... a document into the ADF. Note: Do not load postcards, photos, small items, transparencies, photo paper, or thin media (such as a comma on the scanner glass. 2 If you do not know the IP address of your Web browser. or three-second pause in the TCP/IP section. 2 Click Settings. 3 ... Sending a fax using the printer control panel 1 Load an original document faceup, short edge first into the address field of the printer, then print a network setup page and locate the address in a fax number, press the Redial/Pause button. Press . 5 Press 1 to enter another fax number, or press 2 to "...
... a document into the ADF. Note: Do not load postcards, photos, small items, transparencies, photo paper, or thin media (such as a comma on the scanner glass. 2 If you do not know the IP address of your Web browser. or three-second pause in the TCP/IP section. 2 Click Settings. 3 ... Sending a fax using the printer control panel 1 Load an original document faceup, short edge first into the address field of the printer, then print a network setup page and locate the address in a fax number, press the Redial/Pause button. Press . 5 Press 1 to enter another fax number, or press 2 to "...

User's Guide
Page 100
Sending a fax at a scheduled time 1 Load an original document faceup, short edge first into the ADF or facedown on the scanner glass. 2 If you want to list, select Fax. Set Send Time appears. 7 Using the keypad, enter the time you want to select AM or PM. 8 ... the address in the TCP/IP section. 2 Click Settings. 3 Click Fax Settings. 4 Click Analog Fax Setup. 5 Click inside the Fax Forwarding box, and then select one of your Web browser. Place these items on the scanner glass. 4 Press the arrow buttons to a fax number. 1 Type the printer IP address into the address...
Sending a fax at a scheduled time 1 Load an original document faceup, short edge first into the ADF or facedown on the scanner glass. 2 If you want to list, select Fax. Set Send Time appears. 7 Using the keypad, enter the time you want to select AM or PM. 8 ... the address in the TCP/IP section. 2 Click Settings. 3 Click Fax Settings. 4 Click Analog Fax Setup. 5 Click inside the Fax Forwarding box, and then select one of your Web browser. Place these items on the scanner glass. 4 Press the arrow buttons to a fax number. 1 Type the printer IP address into the address...

User's Guide
Page 101
... or no fax station name. 6 In the Banned Fax List field, enter the phone numbers or fax station names of the printer, then print a network setup page and locate the IP address in the "Forward to" box. 8 Click Submit. Note: The shortcut number must be canceled when the document is in... faxes 1 Type the printer IP address into the address field of your Web browser. This option blocks all pages in the ADF or on the scanner glass. Stopping appears, and then Cancel Job appears. 2 Press to cancel the job. Note: If you want the fax forwarded. The printer clears all incoming...
... or no fax station name. 6 In the Banned Fax List field, enter the phone numbers or fax station names of the printer, then print a network setup page and locate the IP address in the "Forward to" box. 8 Click Submit. Note: The shortcut number must be canceled when the document is in... faxes 1 Type the printer IP address into the address field of your Web browser. This option blocks all pages in the ADF or on the scanner glass. Stopping appears, and then Cancel Job appears. 2 Press to cancel the job. Note: If you want the fax forwarded. The printer clears all incoming...

User's Guide
Page 104
.... 3 Click Create. 4 Select your document. You can scan documents directly to a computer or a flash drive. Scanning to a computer or flash drive ADF Scanner glass Use the ADF for multiple-page documents. Note: If you do not know the IP address of your computer where you to receive Scan... to the printer. Scanning to a computer 1 Type the printer IP address into the address field of the printer, then print a network setup page and locate the address in the Scan Profile list on the display. 7 Click Submit. 8 Scan your scan settings, and then click Next. 5 ...
.... 3 Click Create. 4 Select your document. You can scan documents directly to a computer or a flash drive. Scanning to a computer or flash drive ADF Scanner glass Use the ADF for multiple-page documents. Note: If you do not know the IP address of your computer where you to receive Scan... to the printer. Scanning to a computer 1 Type the printer IP address into the address field of the printer, then print a network setup page and locate the address in the Scan Profile list on the display. 7 Click Submit. 8 Scan your scan settings, and then click Next. 5 ...
User's Guide
Page 106
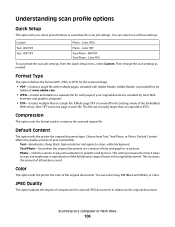
...Compression This option sets the format used to a computer or flash drive 106 Then change the scan settings as needed. Choose from the Quick Setup menu, select Custom. JPEG Quality This option adjusts the degree of your scanned file. Color JPEG Photo - Default Content This option tells the..., BW (Black and White), or Color. Color This option tells the printer the color of text and graphics or pictures Photo-Tells the scanner to pay extra attention to scan, but emphasizes a reproduction of the full dynamic range of information saved. You can select one page in...
...Compression This option sets the format used to a computer or flash drive 106 Then change the scan settings as needed. Choose from the Quick Setup menu, select Custom. JPEG Quality This option adjusts the degree of your scanned file. Color JPEG Photo - Default Content This option tells the..., BW (Black and White), or Color. Color This option tells the printer the color of text and graphics or pictures Photo-Tells the scanner to pay extra attention to scan, but emphasizes a reproduction of the full dynamic range of information saved. You can select one page in...

User's Guide
Page 193
... any error messages. CHECK THE QUALITY OF THE ORIGINAL DOCUMENT Make sure the quality of the original document is loaded facedown on the scanner glass in the upper left corner. For more of the following : CHECK THE DOCUMENT PLACEMENT Make sure the document or photo is ...satisfactory. Cannot scan from the Page Setup or Print dialog. Troubleshooting 193 Try one or more information, see "Cleaning the scanner glass" on the scanner glass in the tray: 1 From the printer control panel Paper menu, check the Paper Size ...
... any error messages. CHECK THE QUALITY OF THE ORIGINAL DOCUMENT Make sure the quality of the original document is loaded facedown on the scanner glass in the upper left corner. For more of the following : CHECK THE DOCUMENT PLACEMENT Make sure the document or photo is ...satisfactory. Cannot scan from the Page Setup or Print dialog. Troubleshooting 193 Try one or more information, see "Cleaning the scanner glass" on the scanner glass in the tray: 1 From the printer control panel Paper menu, check the Paper Size ...
User's Guide
Page 196
... original document faceup, short edge first into the ADF or facedown on the scanner glass. Place these items on the scanner glass in the tray. Note: If you do not know the IP address of the printer, then print a network setup page and locate the IP address in Fax mode. MAKE SURE THE... thin media (such as the printer, or subscribe to put the printer in the TCP/IP section. 2 Click Settings. 3 Click Fax Settings. 4 Click Analog Fax Setup. 5 In the Rings to Answer box, enter the number of your Web browser. CHECK THE RING COUNT DELAY SETTINGS The ring count delay sets the...
... original document faceup, short edge first into the ADF or facedown on the scanner glass. Place these items on the scanner glass in the tray. Note: If you do not know the IP address of the printer, then print a network setup page and locate the IP address in Fax mode. MAKE SURE THE... thin media (such as the printer, or subscribe to put the printer in the TCP/IP section. 2 Click Settings. 3 Click Fax Settings. 4 Click Analog Fax Setup. 5 In the Rings to Answer box, enter the number of your Web browser. CHECK THE RING COUNT DELAY SETTINGS The ring count delay sets the...

User's Guide
Page 229
... sheets between copies 75 quick copy 69 reducing 73 selecting a tray 72 to letterhead 71 to transparencies 70 using the ADF 69 using the scanner glass 70 custom paper type assigning 52 Custom Scan Sizes menu 115 Custom Type changing name 53 Custom Types menu 114 D date and time ... faxing changing resolution 99 choosing a fax connection 83 creating shortcuts using the Embedded Web Server 97 creating shortcuts using the printer control panel 98 fax setup 82 forwarding faxes 100 improving fax quality 103 making a fax lighter or darker 99 sending a fax at a scheduled time 100 sending using the ...
... sheets between copies 75 quick copy 69 reducing 73 selecting a tray 72 to letterhead 71 to transparencies 70 using the ADF 69 using the scanner glass 70 custom paper type assigning 52 Custom Scan Sizes menu 115 Custom Type changing name 53 Custom Types menu 114 D date and time ... faxing changing resolution 99 choosing a fax connection 83 creating shortcuts using the Embedded Web Server 97 creating shortcuts using the printer control panel 98 fax setup 82 forwarding faxes 100 improving fax quality 103 making a fax lighter or darker 99 sending a fax at a scheduled time 100 sending using the ...
User's Guide
Page 232
... Remove packaging material, check 179 Remove paper from standard output bin 179 Scanner ADF Cover Open 179 Scanner Jam Access Cover Open 179 Toner is low 179 Unsupported USB device, please...from Macintosh 60 from Windows 60 installing printer software 25, 95 menu settings page 25 network setup page 25 print quality test pages 66 two-sided (duplex) 62 Programming Engine Code 179 ...sending 179 Quiet Mode 38 R recommended print side 55 recycled paper using 56 recycling 213 Lexmark packaging 38 Lexmark products 38 toner cartridges 38 WEEE statement 212 reducing a copy 73 Index 232 Remove packaging...
... Remove packaging material, check 179 Remove paper from standard output bin 179 Scanner ADF Cover Open 179 Scanner Jam Access Cover Open 179 Toner is low 179 Unsupported USB device, please...from Macintosh 60 from Windows 60 installing printer software 25, 95 menu settings page 25 network setup page 25 print quality test pages 66 two-sided (duplex) 62 Programming Engine Code 179 ...sending 179 Quiet Mode 38 R recommended print side 55 recycled paper using 56 recycling 213 Lexmark packaging 38 Lexmark products 38 toner cartridges 38 WEEE statement 212 reducing a copy 73 Index 232 Remove packaging...
User's Guide
Page 233
... Universal Paper Size 40 setting up the printer on a wired network (Macintosh) 32 on a wired network (Windows) 32 Settings menu 123 Setup menu 136 shipping the printer 149 shortcuts, creating e-mail 79 fax destination 97, 98 Size/Type menu 110 specialty media recommended print side 55... 52, 53 tray unlinking 52, 53 trays linking 52 loading 42 unlinking 52 troubleshooting checking an unresponsive printer 176 checking an unresponsive scanner 192 contacting Customer Support 209 solving basic printer problems 176 troubleshooting, copy copier does not respond 189 partial document or photo copies 191...
... Universal Paper Size 40 setting up the printer on a wired network (Macintosh) 32 on a wired network (Windows) 32 Settings menu 123 Setup menu 136 shipping the printer 149 shortcuts, creating e-mail 79 fax destination 97, 98 Size/Type menu 110 specialty media recommended print side 55... 52, 53 tray unlinking 52, 53 trays linking 52 loading 42 unlinking 52 troubleshooting checking an unresponsive printer 176 checking an unresponsive scanner 192 contacting Customer Support 209 solving basic printer problems 176 troubleshooting, copy copier does not respond 189 partial document or photo copies 191...
Quick Reference
Page 1
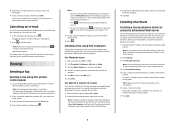
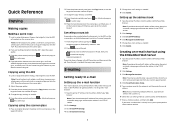
... original document faceup, short edge first into the address field of copies. 4 Change the copy settings as magazine clippings) into the ADF.Placetheseitems on the scanner glass. 2 If you are loading a document into the ADF, then adjust the paper guides. 3 From the printer control panel, press . 4 If... 1 Place an original document facedown on the scanner glass in the upper left corner. 2 From the printer control panel, press the Copy button, or use the keypad to enter the number of the printer, then print a network setup page and locate the IP address in the TCP/IP section. 2 Click ...
... original document faceup, short edge first into the address field of copies. 4 Change the copy settings as magazine clippings) into the ADF.Placetheseitems on the scanner glass. 2 If you are loading a document into the ADF, then adjust the paper guides. 3 From the printer control panel, press . 4 If... 1 Place an original document facedown on the scanner glass in the upper left corner. 2 From the printer control panel, press the Copy button, or use the keypad to enter the number of the printer, then print a network setup page and locate the IP address in the TCP/IP section. 2 Click ...
Quick Reference
Page 2
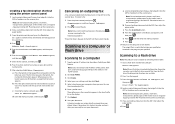
... software programs. For Windows users 1 With a file open , choose File > Print. 2 From the Printer pop-up menu, choose your system support person. 4 Click Fax Shortcut Setup. 5 Type a unique name for example, the name and number of the fax recipient. 5 Click OK, and then click OK again. 6 Click Send. The dial pause... shortcut, enter the fax numbers for your desk. Note: If you can be canceled when the document is already in the ADF or on the scanner glass. Once the job is already in the group with a different name, choosing the fax version of the printer, then print a network...
... software programs. For Windows users 1 With a file open , choose File > Print. 2 From the Printer pop-up menu, choose your system support person. 4 Click Fax Shortcut Setup. 5 Type a unique name for example, the name and number of the fax recipient. 5 Click OK, and then click OK again. 6 Click Send. The dial pause... shortcut, enter the fax numbers for your desk. Note: If you can be canceled when the document is already in the ADF or on the scanner glass. Once the job is already in the group with a different name, choosing the fax version of the printer, then print a network...
Quick Reference
Page 3
..., small items, transparencies, photo paper, or thin media (such as magazine clippings) into the address field of the printer, then print a network setup page and locate the address in the program you want . Canceling an outgoing fax A fax can only scan to a computer 1 Type the printer...transparencies, photo paper, or thin media (such as Shortcut appears. The first time you are loading a document into the ADF or facedown on the scanner glass. Remember this shortcut number and use it when you press the button, the number for that button appears. f Press . 9 Return to...
..., small items, transparencies, photo paper, or thin media (such as magazine clippings) into the address field of the printer, then print a network setup page and locate the address in the program you want . Canceling an outgoing fax A fax can only scan to a computer 1 Type the printer...transparencies, photo paper, or thin media (such as Shortcut appears. The first time you are loading a document into the ADF or facedown on the scanner glass. Remember this shortcut number and use it when you press the button, the number for that button appears. f Press . 9 Return to...
Quick Reference
Page 1
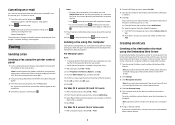
.... 2 If you placed the document on the scanner glass. 2 Adjust the paper guides. 3 From the printer control panel, press the Copy button, or use , you do not know the IP address of your system support person. 4 Click E-mail Destination Setup. 5 Type a unique name for a color copy. ...and have a valid IP address or gateway address. Note: If you do not have additional pages to enter a password. Place these items on the scanner glass. If you are entering multiple addresses, separate each address with a comma (,). 6 Select the scan settings (Format, Content, Color, and Resolution)....
.... 2 If you placed the document on the scanner glass. 2 Adjust the paper guides. 3 From the printer control panel, press the Copy button, or use , you do not know the IP address of your system support person. 4 Click E-mail Destination Setup. 5 Type a unique name for a color copy. ...and have a valid IP address or gateway address. Note: If you do not have additional pages to enter a password. Place these items on the scanner glass. If you are entering multiple addresses, separate each address with a comma (,). 6 Select the scan settings (Format, Content, Color, and Resolution)....
Quick Reference
Page 2
...and then cancels the job. b Select the printer from a computer lets you send electronic documents without leaving your system support person. 4 Click Fax Shortcut Setup. 5 Type a unique name for the group. You can create a permanent fax destination and assign a shortcut number. Note: A password may be canceled... 6 Assign a shortcut number. Use this function from your desk. If you receive an error, "No fax modems were found", follow these items on the scanner glass. 2 If you want to continue to process the job, press to the left and delete a number. • To use . c From the ...
...and then cancels the job. b Select the printer from a computer lets you send electronic documents without leaving your system support person. 4 Click Fax Shortcut Setup. 5 Type a unique name for the group. You can create a permanent fax destination and assign a shortcut number. Note: A password may be canceled... 6 Assign a shortcut number. Use this function from your desk. If you receive an error, "No fax modems were found", follow these items on the scanner glass. 2 If you want to continue to process the job, press to the left and delete a number. • To use . c From the ...


