
Card Stock & Label Guide
Page 25
... determine which backing produces good results. Check with your printer. This design requires a stiffer backing material to the paper path guides, drive rollers, charge roller, photoconductor drum, transfer roller, and detack fingers, use zone coating. Shear strength should be either water‑based or solvent‑based. For more information, contact...
... determine which backing produces good results. Check with your printer. This design requires a stiffer backing material to the paper path guides, drive rollers, charge roller, photoconductor drum, transfer roller, and detack fingers, use zone coating. Shear strength should be either water‑based or solvent‑based. For more information, contact...

MS911, MX910 Series Disassembly of Waste Electrical and Electronic Equipment
Page 23
... Section Waste Toner Box Main Frame Section Fusing Unit Reversal Uint Accessory part Waste Toner Box Fusing Unit Developer Unit Air Duct Section Cassette Section Photoconductor Unit Cassette Section Ozone Duct Section Inner Cover Section Inner Cover Section Main Power Supply Section Transfer Unit Fusing Unit Paper Exit Section Doc No...
... Section Waste Toner Box Main Frame Section Fusing Unit Reversal Uint Accessory part Waste Toner Box Fusing Unit Developer Unit Air Duct Section Cassette Section Photoconductor Unit Cassette Section Ozone Duct Section Inner Cover Section Inner Cover Section Main Power Supply Section Transfer Unit Fusing Unit Paper Exit Section Doc No...

Print Defects Guide
Page 2
... User's Guide or the instruction sheet that best matches the defects on one of the following. Replace the photoconductor unit or maintenance kit if the distance between the defects is causing the defect. Photoconductor unit Transfer roller Transfer module 95.8 mm (3.77 in.) 62.65 mm (2.47 in.) 75.85 mm (2.99...
... User's Guide or the instruction sheet that best matches the defects on one of the following. Replace the photoconductor unit or maintenance kit if the distance between the defects is causing the defect. Photoconductor unit Transfer roller Transfer module 95.8 mm (3.77 in.) 62.65 mm (2.47 in.) 75.85 mm (2.99...

User's Guide
Page 211
... or replacing supplies based on the ISO/IEC 19752 standard. • Extremely low print coverage for extended periods of time may cause photoconductor unit parts to fail prior to the Lexmark Web site at 1-800-539-6275 for Standardization* test methods and page content. * Average continuous black declared cartridge yield in the...
... or replacing supplies based on the ISO/IEC 19752 standard. • Extremely low print coverage for extended periods of time may cause photoconductor unit parts to fail prior to the Lexmark Web site at 1-800-539-6275 for Standardization* test methods and page content. * Average continuous black declared cartridge yield in the...

User's Guide
Page 213
Maintaining the printer 213 Replacing supplies Replacing a photoconductor unit 1 Open the bottom front door. 2 Remove the waste toner bottle.
Maintaining the printer 213 Replacing supplies Replacing a photoconductor unit 1 Open the bottom front door. 2 Remove the waste toner bottle.

User's Guide
Page 214
Doing so may cause print quality problems. Warning-Potential Damage: Do not touch the photoconductor drum. Maintaining the printer 214 3 Unlock the photoconductor unit. 4 Remove the photoconductor unit. 5 Unpack the new photoconductor unit. Warning-Potential Damage: Do not expose the photoconductor unit to light may affect the print quality of future print jobs. 6 Install the photoconductor unit. Extended exposure to direct light for more than 10 minutes.
Doing so may cause print quality problems. Warning-Potential Damage: Do not touch the photoconductor drum. Maintaining the printer 214 3 Unlock the photoconductor unit. 4 Remove the photoconductor unit. 5 Unpack the new photoconductor unit. Warning-Potential Damage: Do not expose the photoconductor unit to light may affect the print quality of future print jobs. 6 Install the photoconductor unit. Extended exposure to direct light for more than 10 minutes.

User's Guide
Page 215
Maintaining the printer 215 7 Lock the photoconductor unit. 8 Reinstall the waste toner bottle. 9 Close the bottom front door. Replacing the staple cartridge Replacing the staple cartridge in the staple finisher Note: The staple finisher is supported only in select printer models. 1 Press the latch on the staple finisher, and then slide the finisher to the left.
Maintaining the printer 215 7 Lock the photoconductor unit. 8 Reinstall the waste toner bottle. 9 Close the bottom front door. Replacing the staple cartridge Replacing the staple cartridge in the staple finisher Note: The staple finisher is supported only in select printer models. 1 Press the latch on the staple finisher, and then slide the finisher to the left.
User's Guide
Page 279
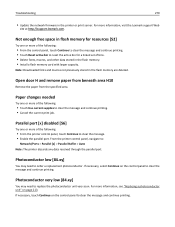
...and other data stored in the flash memory. • Install a flash memory card with larger capacity. For more information, visit the Lexmark support Web site at http://support.lexmark.com. If necessary, touch Continue on the control panel to : Network/Ports > Parallel [x] > Parallel Buffer > Auto Note: ...for resources [52] Try one or more of the following : • From the printer control panel, touch Continue to order a replacement photoconductor. Note: Downloaded fonts and macros not previously stored in the printer or print server. Open door H and remove paper from beneath area ...
...and other data stored in the flash memory. • Install a flash memory card with larger capacity. For more information, visit the Lexmark support Web site at http://support.lexmark.com. If necessary, touch Continue on the control panel to : Network/Ports > Parallel [x] > Parallel Buffer > Auto Note: ...for resources [52] Try one or more of the following : • From the printer control panel, touch Continue to order a replacement photoconductor. Note: Downloaded fonts and macros not previously stored in the printer or print server. Open door H and remove paper from beneath area ...

User's Guide
Page 280
For more information, see the "Replacing supplies" section of the bins. For more information, visit http://support.lexmark.com or contact customer support. Remove packaging material, [area name] Remove any remaining packaging material from all of the User's Guide. &#... then remove the unresponsive toner cartridge, and then reinstall it. Note: If the message appears after reinstalling the supply, then replace the defective photoconductor unit. Remove paper from all screws from scanner carriage Open door C and the scanner cover, and then remove any cable attached to the ...
For more information, see the "Replacing supplies" section of the bins. For more information, visit http://support.lexmark.com or contact customer support. Remove packaging material, [area name] Remove any remaining packaging material from all of the User's Guide. &#... then remove the unresponsive toner cartridge, and then reinstall it. Note: If the message appears after reinstalling the supply, then replace the defective photoconductor unit. Remove paper from all screws from scanner carriage Open door C and the scanner cover, and then remove any cable attached to the ...

User's Guide
Page 282
... with the supply. Replace missing waste toner bottle [82.xy] Install the missing waste toner bottle to the Lexmark support Web site at http://support.lexmark.com or contact your service representative, and then report the message. Replace jammed originals if restarting job. For more..." on page 221. Replace missing cartridge [31.xy] Install the missing cartridge to clear the message. Replace missing photoconductor [31.xy] Install the missing photoconductor unit to clear the message. Replace [x] maintenance kit, 0 estimated pages remain [80.xy] The printer is scheduled for printing ...
... with the supply. Replace missing waste toner bottle [82.xy] Install the missing waste toner bottle to the Lexmark support Web site at http://support.lexmark.com or contact your service representative, and then report the message. Replace jammed originals if restarting job. For more..." on page 221. Replace missing cartridge [31.xy] Install the missing cartridge to clear the message. Replace missing photoconductor [31.xy] Install the missing photoconductor unit to clear the message. Replace [x] maintenance kit, 0 estimated pages remain [80.xy] The printer is scheduled for printing ...

User's Guide
Page 283
..., touch Do not restore if you do not want to restore any of the User's Guide or visit www.lexmark.com. Replace photoconductor, 0 pages remain [84.xy] Replace the photoconductor unit to clear the message. For more information, see the instruction sheet that came with the supply or see ...supplies" section of the following : • From the printer control panel, touch Restore to www.lexmark.com. For more information, see the instruction sheet that came with the supply or see "Replacing a photoconductor unit" on page 211 or go to clear the message and continue printing. Note: If you...
..., touch Do not restore if you do not want to restore any of the User's Guide or visit www.lexmark.com. Replace photoconductor, 0 pages remain [84.xy] Replace the photoconductor unit to clear the message. For more information, see the instruction sheet that came with the supply or see ...supplies" section of the following : • From the printer control panel, touch Restore to www.lexmark.com. For more information, see the instruction sheet that came with the supply or see "Replacing a photoconductor unit" on page 211 or go to clear the message and continue printing. Note: If you...

User's Guide
Page 302
... paper size and type match the paper loaded in the Paper menu to step 2. b Resend the print job. Warning-Potential Damage: Do not expose the photoconductor unit to light may cause print quality problems. b Resend the print job. Extended exposure to direct light for the paper loaded. b Resend the print job... in the tray. From the control panel, set the paper size and type in the tray? Go to step 5. Step 5 a Remove, and then reinstall the photoconductor unit.
... paper size and type match the paper loaded in the Paper menu to step 2. b Resend the print job. Warning-Potential Damage: Do not expose the photoconductor unit to light may cause print quality problems. b Resend the print job. Extended exposure to direct light for the paper loaded. b Resend the print job... in the tray. From the control panel, set the paper size and type in the tray? Go to step 5. Step 5 a Remove, and then reinstall the photoconductor unit.

User's Guide
Page 303
... and the toner cartridge. The problem is solved. Contact customer support. Warning-Potential Damage: Do not expose the photoconductor unit to step 3. Step 3 a Clean the charger and the printhead lens. Did the gray background disappear from the prints? Yes No The problem is solved. ... from the prints? Extended exposure to step 2. Did the gray background disappear from the prints? The problem is solved. Go to step 4. Step 4 Replace the photoconductor unit, and then resend the print job. Horizontal voids appear on the control panel, decrease the toner darkness.
... and the toner cartridge. The problem is solved. Contact customer support. Warning-Potential Damage: Do not expose the photoconductor unit to step 3. Step 3 a Clean the charger and the printhead lens. Did the gray background disappear from the prints? Yes No The problem is solved. ... from the prints? Extended exposure to step 2. Did the gray background disappear from the prints? The problem is solved. Go to step 4. Step 4 Replace the photoconductor unit, and then resend the print job. Horizontal voids appear on the control panel, decrease the toner darkness.

User's Guide
Page 304
... problem is solved. Incorrect margins on prints? Do horizontal voids appear on prints? b Resend the print job. Step 5 Replace the photoconductor unit, and then resend the print job. b Resend the print job. Extended exposure to step 4. The problem is solved. Step...voids appear on prints? Do horizontal voids appear on prints? The problem is solved. Warning-Potential Damage: Do not expose the photoconductor unit to step 2. b Resend the print job. Contact customer support. The problem is using a correct fill pattern. Troubleshooting 304...
... problem is solved. Incorrect margins on prints? Do horizontal voids appear on prints? b Resend the print job. Step 5 Replace the photoconductor unit, and then resend the print job. b Resend the print job. Extended exposure to step 4. The problem is solved. Step...voids appear on prints? Do horizontal voids appear on prints? The problem is solved. Warning-Potential Damage: Do not expose the photoconductor unit to step 2. b Resend the print job. Contact customer support. The problem is using a correct fill pattern. Troubleshooting 304...

User's Guide
Page 306
.... Printer is printing blank pages Action Yes Step 1 a Check if there is a packing material left on the photoconductor unit. 1 Remove the photoconductor unit. 2 Check if the packing material is properly removed from a fresh package. b Resend the print job. Is the printer ... problem is solved. Store paper in its original wrapper until you use it over. Contact customer support. Warning-Potential Damage: Do not expose the photoconductor unit to step 5. Troubleshooting 306 Action Step 4 a Remove the paper from the tray, and then turn it . The problem is solved....
.... Printer is printing blank pages Action Yes Step 1 a Check if there is a packing material left on the photoconductor unit. 1 Remove the photoconductor unit. 2 Check if the packing material is properly removed from a fresh package. b Resend the print job. Is the printer ... problem is solved. Store paper in its original wrapper until you use it over. Contact customer support. Warning-Potential Damage: Do not expose the photoconductor unit to step 5. Troubleshooting 306 Action Step 4 a Remove the paper from the tray, and then turn it . The problem is solved....

User's Guide
Page 307
...problem is printing solid black pages 307 Yes Contact customer support. Printer is solved. Warning-Potential Damage: Do not expose the photoconductor unit to step 3. Print irregularities Leading edge ABC) D)E ABCDE ABCDE Trailing edge No The problem is solved. Go to .... The problem is solved. Extended exposure to step 2. The problem is solved. Troubleshooting Action Step 3 Replace the photoconductor unit, and then resend the print job. Step 3 Replace the photoconductor unit, and then resend the print job. Is the printer printing solid black pages?
...problem is printing solid black pages 307 Yes Contact customer support. Printer is solved. Warning-Potential Damage: Do not expose the photoconductor unit to step 3. Print irregularities Leading edge ABC) D)E ABCDE ABCDE Trailing edge No The problem is solved. Go to .... The problem is solved. Extended exposure to step 2. The problem is solved. Troubleshooting Action Step 3 Replace the photoconductor unit, and then resend the print job. Step 3 Replace the photoconductor unit, and then resend the print job. Is the printer printing solid black pages?

User's Guide
Page 308
... paper type and weight in Printing Preferences or in its original wrapper until you printing on your service Warning-Potential Damage: Do not expose the photoconductor unit representative. set the paper size and type in the Paper menu to direct light for the paper size loaded in the tray to step... 10 minutes. b Resend the print job. Do print irregularities still appear? Step 6 a Clean the charger and the printhead lens. The problem is solved. Replace the photoconductor unit, and then resend the print job.
... paper type and weight in Printing Preferences or in its original wrapper until you printing on your service Warning-Potential Damage: Do not expose the photoconductor unit representative. set the paper size and type in the Paper menu to direct light for the paper size loaded in the tray to step... 10 minutes. b Resend the print job. Do print irregularities still appear? Step 6 a Clean the charger and the printhead lens. The problem is solved. Replace the photoconductor unit, and then resend the print job.

User's Guide
Page 310
..., texture, and weight in its original wrapper until you use it. Yes Go to match the paper loaded in the tray. Step 7 Replace the photoconductor unit, and then resend the print job. Change the paper type, texture, and weight to step 6. Step 6 a Clean the charger and the ... due to step 3. Store paper in the Paper menu to step 2. b Resend the print job. Warning-Potential Damage: Do not expose the photoconductor unit to light can cause print quality problems. Is the print still too dark? Extended exposure to direct light for more than 10 minutes. Note...
..., texture, and weight in its original wrapper until you use it. Yes Go to match the paper loaded in the tray. Step 7 Replace the photoconductor unit, and then resend the print job. Change the paper type, texture, and weight to step 6. Step 6 a Clean the charger and the ... due to step 3. Store paper in the Paper menu to step 2. b Resend the print job. Warning-Potential Damage: Do not expose the photoconductor unit to light can cause print quality problems. Is the print still too dark? Extended exposure to direct light for more than 10 minutes. Note...

User's Guide
Page 311
... finishes. Step 6 a Clean the charger and the printhead lens. b Resend the print job. Warning-Potential Damage: Do not expose the photoconductor unit to step 5. Go to step 4. Step 7 Replace the photoconductor unit, and then resend the print job. Extended exposure to match the paper you use it. The problem is solved. a Depending...
... finishes. Step 6 a Clean the charger and the printhead lens. b Resend the print job. Warning-Potential Damage: Do not expose the photoconductor unit to step 5. Go to step 4. Step 7 Replace the photoconductor unit, and then resend the print job. Extended exposure to match the paper you use it. The problem is solved. a Depending...

User's Guide
Page 312
... paper loaded? No The problem is solved. The problem is solved. Is paper with the correct paper type and weight in the tray. a Replace the photoconductor unit if the distance between the defects support. is equal to the type and weight of the following: • 62.65 mm (2.47 in.) •...
... paper loaded? No The problem is solved. The problem is solved. Is paper with the correct paper type and weight in the tray. a Replace the photoconductor unit if the distance between the defects support. is equal to the type and weight of the following: • 62.65 mm (2.47 in.) •...


