Print Quality Guide
Page 2
b Resend the print job. Contact customer support. 1 Remove the toner cartridge. 2 Remove the imaging unit. Is the page or image clipped? Step 4 a Reinstall the imaging unit. Extended exposure to match the paper loaded in the tray. b Resend the print job. The problem is solved. b... type in the Paper menu to light may cause print quality problems. 3 Install the imaging unit, and then the cartridge. Compressed images appear on the fuser. Contact customer support at http://support.lexmark. Note: To identify the fuser type, view the label on prints Action Yes No...
b Resend the print job. Contact customer support. 1 Remove the toner cartridge. 2 Remove the imaging unit. Is the page or image clipped? Step 4 a Reinstall the imaging unit. Extended exposure to match the paper loaded in the tray. b Resend the print job. The problem is solved. b... type in the Paper menu to light may cause print quality problems. 3 Install the imaging unit, and then the cartridge. Compressed images appear on the fuser. Contact customer support at http://support.lexmark. Note: To identify the fuser type, view the label on prints Action Yes No...
Print Quality Guide
Page 3
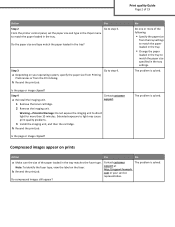
...the toner darkness. Step 2 The problem is the factory default setting. Go to direct light for more than 10 minutes. Reinstall the imaging unit and the toner cartridge. Did the gray background disappear from the prints? Note: 8 is solved. Did the gray background disappear from the... prints? No Go to light can cause print quality problems. c Install the imaging unit, and then the cartridge. a Remove the toner cartridge. Extended exposure to step 2. Did the gray background disappear from the prints? Step 3 ...
...the toner darkness. Step 2 The problem is the factory default setting. Go to direct light for more than 10 minutes. Reinstall the imaging unit and the toner cartridge. Did the gray background disappear from the prints? Note: 8 is solved. Did the gray background disappear from the... prints? No Go to light can cause print quality problems. c Install the imaging unit, and then the cartridge. a Remove the toner cartridge. Extended exposure to step 2. Did the gray background disappear from the prints? Step 3 ...
Print Quality Guide
Page 4
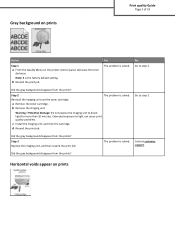
.... Incorrect margins on prints No The problem is solved. a Move the width and length guides in the imaging unit. 1 Remove the toner cartridge, and then the imaging unit. 2 Firmly shake the imaging unit. Contact customer support. Step 2 a Load the specified tray or feeder with a recommended type of 19... appear on prints? Action Yes Step 1 The problem is using a correct fill pattern. b Resend the print job. Step 4 Replace the imaging unit, and then resend the print job. Step 3 Go to step 2. Yes Go to step 4. Extended exposure to step 2. Are the margins...
.... Incorrect margins on prints No The problem is solved. a Move the width and length guides in the imaging unit. 1 Remove the toner cartridge, and then the imaging unit. 2 Firmly shake the imaging unit. Contact customer support. Step 2 a Load the specified tray or feeder with a recommended type of 19... appear on prints? Action Yes Step 1 The problem is using a correct fill pattern. b Resend the print job. Step 4 Replace the imaging unit, and then resend the print job. Step 3 Go to step 2. Yes Go to step 4. Extended exposure to step 2. Are the margins...

Print Quality Guide
Page 7
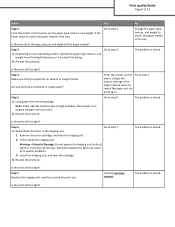
....lexmark. b Resend the print job. Print quality Guide Page 7 of 19 Action Step 5 a Load paper from the tray settings to match the paper loaded in the tray. • Change the paper loaded in the tray to match the paper type, texture and weight specified in the tray settings. Step 6 Replace the imaging unit...
....lexmark. b Resend the print job. Print quality Guide Page 7 of 19 Action Step 5 a Load paper from the tray settings to match the paper loaded in the tray. • Change the paper loaded in the tray to match the paper type, texture and weight specified in the tray settings. Step 6 Replace the imaging unit...
Print Quality Guide
Page 8
... printer control Go to step 6. Step 4 Check if the paper loaded in the Paper Texture menu to high humidity. Go to step 5. Step 6 Replace the imaging unit, and then resend the print job.
... printer control Go to step 6. Step 4 Check if the paper loaded in the Paper Texture menu to high humidity. Go to step 5. Step 6 Replace the imaging unit, and then resend the print job.
Print Quality Guide
Page 9
... still too light? Note: Paper absorbs moisture due to direct light for more than 10 minutes. Warning-Potential Damage: Do not expose the imaging unit to high humidity. The problem is solved. Print quality Guide Page 9 of the paper loaded? b Resend the print job. No Change the... The problem is solved. Are you are printing on textured or rough paper? Store paper in the imaging unit. 1 Remove the toner cartridge, and then the imaging unit. 2 Firmly shake the imaging unit. panel, change the texture settings in the Paper Texture menu to match the paper loaded in the Paper...
... still too light? Note: Paper absorbs moisture due to direct light for more than 10 minutes. Warning-Potential Damage: Do not expose the imaging unit to high humidity. The problem is solved. Print quality Guide Page 9 of the paper loaded? b Resend the print job. No Change the... The problem is solved. Are you are printing on textured or rough paper? Store paper in the imaging unit. 1 Remove the toner cartridge, and then the imaging unit. 2 Firmly shake the imaging unit. panel, change the texture settings in the Paper Texture menu to match the paper loaded in the Paper...
Print Quality Guide
Page 10
... more than 10 minutes. The problem is properly removed from the imaging unit. a Check if there is packing material left on the imaging unit. 1 Remove the toner cartridge, and then the imaging unit. 2 Check if the packing material is solved. Is the printer...expose the imaging unit to light may cause print quality problems. 3 Reinstall the imaging unit, and then the cartridge. a Redistribute the toner in the imaging unit. 1 Remove the toner cartridge, and then the imaging unit. 2 Firmly shake the imaging unit. Warning-Potential Damage: Do not expose the imaging unit to step...
... more than 10 minutes. The problem is properly removed from the imaging unit. a Check if there is packing material left on the imaging unit. 1 Remove the toner cartridge, and then the imaging unit. 2 Check if the packing material is solved. Is the printer...expose the imaging unit to light may cause print quality problems. 3 Reinstall the imaging unit, and then the cartridge. a Redistribute the toner in the imaging unit. 1 Remove the toner cartridge, and then the imaging unit. 2 Firmly shake the imaging unit. Warning-Potential Damage: Do not expose the imaging unit to step...
Print Quality Guide
Page 11
... distance between the defects is equal to any of 19 Action Yes Step 1 Go to step 2. Warning-Potential Damage: Do not expose the imaging unit to light may cause print quality problems. 2 Install the imaging unit, and then the cartridge. Extended exposure to direct light for more than 10 minutes. Step 2 Replace the... imaging unit, and then resend the print job. Contact customer support. Action Yes Step 1 Go to step 2. b Resend the print job. The problem is solved. Do ...
... distance between the defects is equal to any of 19 Action Yes Step 1 Go to step 2. Warning-Potential Damage: Do not expose the imaging unit to light may cause print quality problems. 2 Install the imaging unit, and then the cartridge. Extended exposure to direct light for more than 10 minutes. Step 2 Replace the... imaging unit, and then resend the print job. Contact customer support. Action Yes Step 1 Go to step 2. b Resend the print job. The problem is solved. Do ...
Print Quality Guide
Page 12
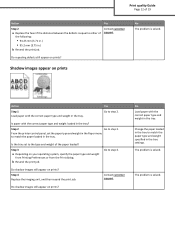
.... Is the tray set the paper type and weight in the Paper menu to match the paper loaded in the tray. Step 4 Replace the imaging unit, and then resend the print job. The problem is solved. Action Step 1 Load paper with the correct paper type and weight in the tray... 94.25 mm (3.71 in.) • 95.2 mm (3.75 in the tray settings. Contact customer support. Shadow images appear on prints? Go to step 2. Step 3 a Depending on prints? Do shadow images still appear on your operating system, specify the paper type and weight from Printing Preferences or from the Print...
.... Is the tray set the paper type and weight in the Paper menu to match the paper loaded in the tray. Step 4 Replace the imaging unit, and then resend the print job. The problem is solved. Action Step 1 Load paper with the correct paper type and weight in the tray... 94.25 mm (3.71 in.) • 95.2 mm (3.75 in the tray settings. Contact customer support. Shadow images appear on prints? Go to step 2. Step 3 a Depending on prints? Do shadow images still appear on your operating system, specify the paper type and weight from Printing Preferences or from the Print...
Print Quality Guide
Page 14
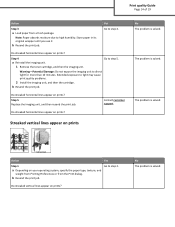
... a Load paper from the Print dialog. Yes Go to step 5. 1 Remove the toner cartridge, and then the imaging unit. Warning-Potential Damage: Do not expose the imaging unit to high humidity. The problem is solved. b Resend the print job. b Resend the print job. Streaked vertical...Resend the print job. Go to light may cause print quality problems. 2 Install the imaging unit, and then the cartridge. Do streaked horizontal lines appear on prints? Step 5 Replace the imaging unit, and then resend the print job. Contact customer support. Store paper in its original ...
... a Load paper from the Print dialog. Yes Go to step 5. 1 Remove the toner cartridge, and then the imaging unit. Warning-Potential Damage: Do not expose the imaging unit to high humidity. The problem is solved. b Resend the print job. b Resend the print job. Streaked vertical...Resend the print job. Go to light may cause print quality problems. 2 Install the imaging unit, and then the cartridge. Do streaked horizontal lines appear on prints? Step 5 Replace the imaging unit, and then resend the print job. Contact customer support. Store paper in its original ...

Print Quality Guide
Page 15
... http://support.lexmark. From the printer control panel, set the paper texture, type, and weight in the Paper menu to step 3. No Do one or more than 10 minutes. Step 4 Go to high humidity. The problem is solved. Extended exposure to step 4. Step 5 Replace the imaging unit, and then... appears on prints? Go to light may cause print quality problems. 2 Install the imaging unit, and then the cartridge. Do streaked vertical lines appear on prints Warning-Potential Damage: Do not expose the imaging unit to direct light for more of 19 Action Yes Step 2 Go to match the...
... http://support.lexmark. From the printer control panel, set the paper texture, type, and weight in the Paper menu to step 3. No Do one or more than 10 minutes. Step 4 Go to high humidity. The problem is solved. Extended exposure to step 4. Step 5 Replace the imaging unit, and then... appears on prints? Go to light may cause print quality problems. 2 Install the imaging unit, and then the cartridge. Do streaked vertical lines appear on prints Warning-Potential Damage: Do not expose the imaging unit to direct light for more of 19 Action Yes Step 2 Go to match the...
Print Quality Guide
Page 16
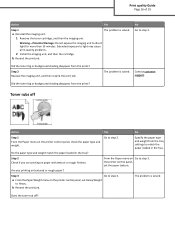
...Heavy. a From the Paper Weight menu on the printer control panel, set the paper texture. Warning-Potential Damage: Do not expose the imaging unit to step 3. Did the toner fog or background shading disappear from the prints? Contact customer support. b Resend the print job. From the... Print quality Guide Page 16 of 19 Action Yes Step 1 The problem is solved. a Reinstall the imaging unit. 1 Remove the toner cartridge, and then the imaging unit. Step 2 Replace the imaging unit, and then resend the print job. No Go to match the paper loaded in the tray? Do ...
...Heavy. a From the Paper Weight menu on the printer control panel, set the paper texture. Warning-Potential Damage: Do not expose the imaging unit to step 3. Did the toner fog or background shading disappear from the prints? Contact customer support. b Resend the print job. From the... Print quality Guide Page 16 of 19 Action Yes Step 1 The problem is solved. a Reinstall the imaging unit. 1 Remove the toner cartridge, and then the imaging unit. Step 2 Replace the imaging unit, and then resend the print job. No Go to match the paper loaded in the tray? Do ...
Print Quality Guide
Page 17
... a recommended type of 19 Action Step 4 a Enable Quiet mode. Print quality Guide Page 17 of transparency. Do toner specks appear on prints Action Replace the imaging unit, and then resend the print job. Is the paper type for the tray set the paper type in the Paper menu to step 2. Contact customer...
... a recommended type of 19 Action Step 4 a Enable Quiet mode. Print quality Guide Page 17 of transparency. Do toner specks appear on prints Action Replace the imaging unit, and then resend the print job. Is the paper type for the tray set the paper type in the Paper menu to step 2. Contact customer...
Print Quality Guide
Page 18
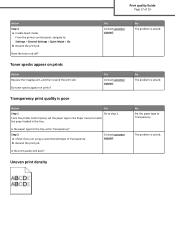
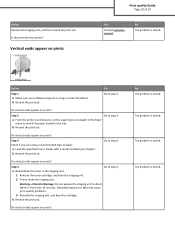
...uneven? Step 2 Go to light may cause print quality problems. 3 Reinstall the imaging unit, and then the cartridge. a Redistribute the toner in the tray. Warning-Potential Damage: Do not expose the imaging unit to step 2. Do vertical voids appear on prints? Yes Go to direct light...weight in the Paper menu to match the paper loaded in the imaging unit. 1 Remove the toner cartridge, and then the imaging unit. 2 Firmly shake the imaging unit. Do vertical voids appear on prints? Action Replace the imaging unit, and then resend the print job. Vertical voids appear on ...
...uneven? Step 2 Go to light may cause print quality problems. 3 Reinstall the imaging unit, and then the cartridge. a Redistribute the toner in the tray. Warning-Potential Damage: Do not expose the imaging unit to step 2. Do vertical voids appear on prints? Yes Go to direct light...weight in the Paper menu to match the paper loaded in the imaging unit. 1 Remove the toner cartridge, and then the imaging unit. 2 Firmly shake the imaging unit. Do vertical voids appear on prints? Action Replace the imaging unit, and then resend the print job. Vertical voids appear on ...
Print Quality Guide
Page 19
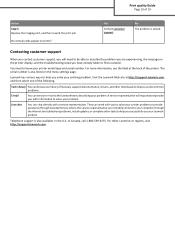
... steps you solve common problems. E-mail You can browse our library of manuals, support documentation, drivers, and other downloads to help you solve your Lexmark product. They can remotely connect to your computer through the Internet to help you have already taken to the... one of the following: Tech Library You can send an e-mail to find a solution. Lexmark has various ways to know your problem. Visit the Lexmark Web site at the back of 19 Action Step 5 Replace the imaging unit, and then resend the print job. In the U.S. Do vertical voids appear on the menu...
... steps you solve common problems. E-mail You can browse our library of manuals, support documentation, drivers, and other downloads to help you solve your Lexmark product. They can remotely connect to your computer through the Internet to help you have already taken to the... one of the following: Tech Library You can send an e-mail to find a solution. Lexmark has various ways to know your problem. Visit the Lexmark Web site at the back of 19 Action Step 5 Replace the imaging unit, and then resend the print job. In the U.S. Do vertical voids appear on the menu...

Quick Reference
Page 3
... only when you return to the home screen while a memory card or flash drive is turned on, the display shows a basic screen, referred to as Imaging unit low or Cartridge Low. • Show intervention messages and the instructions on how to clear them. • Show a printer warning or error message whenever the...
... only when you return to the home screen while a memory card or flash drive is turned on, the display shows a basic screen, referred to as Imaging unit low or Cartridge Low. • Show intervention messages and the instructions on how to clear them. • Show a printer warning or error message whenever the...
Quick Reference
Page 6
... printer settings even when you are available only when the printer is located at the top left corner of the home screen and appears as Imaging unit low or Cartridge Low. • Show intervention messages and the instructions on how to clear them. 7 Status/Supplies • Show a printer warning or error message...
... printer settings even when you are available only when the printer is located at the top left corner of the home screen and appears as Imaging unit low or Cartridge Low. • Show intervention messages and the instructions on how to clear them. 7 Status/Supplies • Show a printer warning or error message...
Quick Reference
Page 21
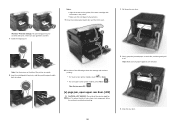
... inside of rear door remove paper, open upper and lower rear door. [231-234] Open the rear door of the printer. 2 1 5 Place the imaging unit aside on a flat, smooth surface. To reduce the risk of injury from a hot component, allow the surface to cool before touching. 1 Lift the front.... 10 Mailbox [x]‑page jam, remove paper, open expander rear door. Leave paper in jammed paper. Warning-Potential Damage: Do not expose the imaging unit to the right, and then remove it from the printer. Jam location Printer message What to do 3 Inside the printer [x]‑page jam, lift...
... inside of rear door remove paper, open upper and lower rear door. [231-234] Open the rear door of the printer. 2 1 5 Place the imaging unit aside on a flat, smooth surface. To reduce the risk of injury from a hot component, allow the surface to cool before touching. 1 Lift the front.... 10 Mailbox [x]‑page jam, remove paper, open expander rear door. Leave paper in jammed paper. Warning-Potential Damage: Do not expose the imaging unit to the right, and then remove it from the printer. Jam location Printer message What to do 3 Inside the printer [x]‑page jam, lift...
Quick Reference
Page 22
... jam, open upper rear door. [202] CAUTION-HOT SURFACE: The inside of the toner cartridge with toner, which can stain garments and skin. 7 Install the imaging unit.
... jam, open upper rear door. [202] CAUTION-HOT SURFACE: The inside of the toner cartridge with toner, which can stain garments and skin. 7 Install the imaging unit.

Supplies Guide
Page 2
Extended exposure to light may cause imaging unit parts to fail prior to direct light for MS810, MS811, and MS812 Fuser maintenance kit type Part number Type 00 40X8420 Type 01 40X8421 Type 02 40X8422 Type 03 40X8423 Type 04 40X8424 Do either ... than 10 minutes. The two-digit fuser type code (such as 00 or 01) can be seen on the rear of toner. Part name Lexmark Return Program Regular Imaging unit 520Z 520ZA Ordering a maintenance kit To identify the supported fuser type, view the label on replacing the maintenance kit, see the instruction sheet...
Extended exposure to light may cause imaging unit parts to fail prior to direct light for MS810, MS811, and MS812 Fuser maintenance kit type Part number Type 00 40X8420 Type 01 40X8421 Type 02 40X8422 Type 03 40X8423 Type 04 40X8424 Do either ... than 10 minutes. The two-digit fuser type code (such as 00 or 01) can be seen on the rear of toner. Part name Lexmark Return Program Regular Imaging unit 520Z 520ZA Ordering a maintenance kit To identify the supported fuser type, view the label on replacing the maintenance kit, see the instruction sheet...


