
User's Guide
Page 5
...Printing photos using the printer control panel ...87 Printing photos from the computer using the printer software 88 Printing photos from a memory device using the printer software 88 Printing photos from a PictBridge-enabled digital camera 90 Printing photos stored on a memory device using the proof sheet 91 Printing photos from a digital camera using DPOF ...92 Scanning 93 Scanning original documents...93 Scanning color or black-and-white original documents 95 Scanning photos for editing...95 Scanning to a computer over a network...96 Canceling scan jobs...96 Copying 98 Making copies...
...Printing photos using the printer control panel ...87 Printing photos from the computer using the printer software 88 Printing photos from a memory device using the printer software 88 Printing photos from a PictBridge-enabled digital camera 90 Printing photos stored on a memory device using the proof sheet 91 Printing photos from a digital camera using DPOF ...92 Scanning 93 Scanning original documents...93 Scanning color or black-and-white original documents 95 Scanning photos for editing...95 Scanning to a computer over a network...96 Canceling scan jobs...96 Copying 98 Making copies...
User's Guide
Page 21
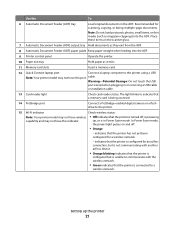
...Document Feeder (ADF) output tray Hold documents as it exits. 11 Memory card slots Insert a memory card. 12 Quick Connect laptop port Connect a laptop computer to a wireless network. Setting up , or is in or removing a USB cable or installation cable. 13 Card reader light Check card reader status. indicates that the printer has not yet been configured for scanning, copying, or faxing multiple-page documents. Note: Do not load postcards, photos, small items, or thin media (such as magazine clippings) into the ADF. 9 Printer control panel Operate the printer. 10 Paper exit tray...
...Document Feeder (ADF) output tray Hold documents as it exits. 11 Memory card slots Insert a memory card. 12 Quick Connect laptop port Connect a laptop computer to a wireless network. Setting up , or is in or removing a USB cable or installation cable. 13 Card reader light Check card reader status. indicates that the printer has not yet been configured for scanning, copying, or faxing multiple-page documents. Note: Do not load postcards, photos, small items, or thin media (such as magazine clippings) into the ADF. 9 Printer control panel Operate the printer. 10 Paper exit tray...
User's Guide
Page 27
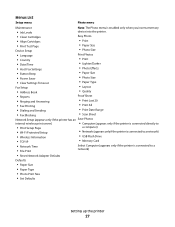
Menus List Setup menu Photo menu Maintenance Note: The Photo menu is enabled only when you insert a memory • Ink Levels device into the printer. • Clean Cartridges • Align Cartridges • Print Test Page Device Setup Easy Photo • Print • Paper Size • Photo Size • Language • Country • Date/Time • Host Fax Settings • Button Beep • Power Saver • Clear Settings Timeout Fax Setup • Address Book Print Photos • Print • Lighter/Darker • Photo Effects • Paper Size • Photo Size ...
Menus List Setup menu Photo menu Maintenance Note: The Photo menu is enabled only when you insert a memory • Ink Levels device into the printer. • Clean Cartridges • Align Cartridges • Print Test Page Device Setup Easy Photo • Print • Paper Size • Photo Size • Language • Country • Date/Time • Host Fax Settings • Button Beep • Power Saver • Clear Settings Timeout Fax Setup • Address Book Print Photos • Print • Lighter/Darker • Photo Effects • Paper Size • Photo Size ...
User's Guide
Page 28
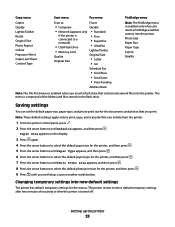
... Size Photo Reprint Collate Pages per Sheet Copies per Sheet Content Type Scan menu Fax menu Scan to Fax to • Computer Quality • Network (appears only • Standard if the printer is connected to these default temporary settings after the printer is turned off: Setting up the printer 28 Saving settings You can set the default paper size, paper type, and photo print size for the documents and photos that you insert a flash drive that you initiate from the printer. 1 From the printer control panel, press . 2 Press the arrow buttons...
... Size Photo Reprint Collate Pages per Sheet Copies per Sheet Content Type Scan menu Fax menu Scan to Fax to • Computer Quality • Network (appears only • Standard if the printer is connected to these default temporary settings after the printer is turned off: Setting up the printer 28 Saving settings You can set the default paper size, paper type, and photo print size for the documents and photos that you insert a flash drive that you initiate from the printer. 1 From the printer control panel, press . 2 Press the arrow buttons...
User's Guide
Page 31
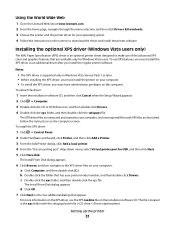
... and copied to your printer model number, and then double-click Drivers. b Double-click the folder that has your computer, and any required Microsoft XPS files are available only for Windows Vista users. To install the XPS driver: 1 Click ΠControl Panel. 2 Under Hardware and Sound, click Printer, and then click Add a Printer. 3 From the Add Printer dialog, click Add a local printer. 4 From the "Use an existing port" drop-down menu, select Virtual printer port for USB, and...
... and copied to your printer model number, and then double-click Drivers. b Double-click the folder that has your computer, and any required Microsoft XPS files are available only for Windows Vista users. To install the XPS driver: 1 Click ΠControl Panel. 2 Under Hardware and Sound, click Printer, and then click Add a Printer. 3 From the Add Printer dialog, click Add a local printer. 4 From the "Use an existing port" drop-down menu, select Virtual printer port for USB, and...
User's Guide
Page 33
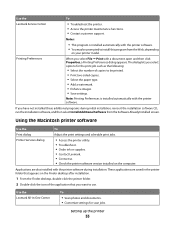
... the paper type. • Add a watermark. • Enhance images. • Save settings. Use the Lexmark Service Center To • Troubleshoot the printer. • Access the printer maintenance functions. • Contact customer support. Note: Printing Preferences is installed automatically with the printer software during initial installation, reinsert the installation software CD, run the installation software, and then select Install Additional Software from the Web, depending on your printer model. Use the Lexmark All-In-One Center To • Scan photos and documents. •...
... the paper type. • Add a watermark. • Enhance images. • Save settings. Use the Lexmark Service Center To • Troubleshoot the printer. • Access the printer maintenance functions. • Contact customer support. Note: Printing Preferences is installed automatically with the printer software during initial installation, reinsert the installation software CD, run the installation software, and then select Install Additional Software from the Web, depending on your printer model. Use the Lexmark All-In-One Center To • Scan photos and documents. •...
User's Guide
Page 34
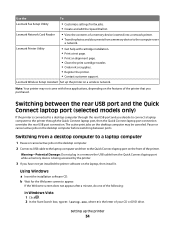
... USB port and you have not yet installed the printer software on a wireless network. Note: Your printer may be canceled. If the Welcome screen does not appear after a minute, do one of the printer. b Wait for fax jobs. • Create and edit the Speed Dial list. Switching between ports. Use the To Lexmark Fax Setup Utility • Customize settings for the Welcome screen to appear. Lexmark Network Card Reader • View the contents of a memory device inserted into a network printer. • Transfer photos...
... USB port and you have not yet installed the printer software on a wireless network. Note: Your printer may be canceled. If the Welcome screen does not appear after a minute, do one of the printer. b Wait for fax jobs. • Create and edit the Speed Dial list. Switching between ports. Use the To Lexmark Fax Setup Utility • Customize settings for the Welcome screen to appear. Lexmark Network Card Reader • View the contents of a memory device inserted into a network printer. • Transfer photos...
User's Guide
Page 46
... appear after a minute, do one of your CD or DVD drive. b Click Run. Installing the printer on other computer on a wireless network (selected models only) 46 Using Windows 1 Insert the installation software CD. b In the Start Search box, type D:\setup.exe, where D is the letter of your CD or DVD drive. Using Macintosh 1 Insert the installation software CD. Using Windows 1 Insert the installation software CD. 2 Wait for the Welcome screen to set up the printer.
... appear after a minute, do one of your CD or DVD drive. b Click Run. Installing the printer on other computer on a wireless network (selected models only) 46 Using Windows 1 Insert the installation software CD. b In the Start Search box, type D:\setup.exe, where D is the letter of your CD or DVD drive. Using Macintosh 1 Insert the installation software CD. Using Windows 1 Insert the installation software CD. 2 Wait for the Welcome screen to set up the printer.
User's Guide
Page 49
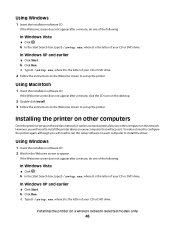
...'t use wireless. 7 Follow the on troubleshooting specific connection types if you have configured your printer: If the printer is currently set up for one of connection. Using Macintosh 1 From the Finder desktop, double-click the printer folder. 2 Double-click Lexmark Wireless Setup Assistant. 3 Follow the instructions on a wireless network (selected models only) 49 Switching between USB and wireless connections (Windows only) You can change the way you currently access your needs. See related topics on -screen instructions to the computer during configuration. Installing the...
...'t use wireless. 7 Follow the on troubleshooting specific connection types if you have configured your printer: If the printer is currently set up for one of connection. Using Macintosh 1 From the Finder desktop, double-click the printer folder. 2 Double-click Lexmark Wireless Setup Assistant. 3 Follow the instructions on a wireless network (selected models only) 49 Switching between USB and wireless connections (Windows only) You can change the way you currently access your needs. See related topics on -screen instructions to the computer during configuration. Installing the...
User's Guide
Page 50
... are using USB connection) 1 From the Finder desktop, double-click the printer folder. 2 Double-click Lexmark Wireless Setup Assistant. 3 Follow the on your printer. Using the printer locally (USB) If the printer is no need to remove the USB cable connecting the printer to the computer during configuration. Switching between USB and wireless connections (Macintosh only) You can change the way you want to switch back to accessing the printer over a wireless connection. b Choose the printer you access your printer depending on -screen instructions for wireless 1 Attach one type...
... are using USB connection) 1 From the Finder desktop, double-click the printer folder. 2 Double-click Lexmark Wireless Setup Assistant. 3 Follow the on your printer. Using the printer locally (USB) If the printer is no need to remove the USB cable connecting the printer to the computer during configuration. Switching between USB and wireless connections (Macintosh only) You can change the way you want to switch back to accessing the printer over a wireless connection. b Choose the printer you access your printer depending on -screen instructions for wireless 1 Attach one type...
User's Guide
Page 103
... paper guide on the ADF tray to the width of the original document. • When using the scanner glass to a working telephone line. 2 Load an original document faceup into the Automatic Document Feeder (ADF) or facedown on the scanner glass. appears after each page is connected to start the fax job. Notes: • You can include a calling card number as part of 30 fax numbers have been entered. 6 Press Color or Black to select a color or black-and-white fax. 7 Press to a working phone line. 2 Load...
... paper guide on the ADF tray to the width of the original document. • When using the scanner glass to a working telephone line. 2 Load an original document faceup into the Automatic Document Feeder (ADF) or facedown on the scanner glass. appears after each page is connected to start the fax job. Notes: • You can include a calling card number as part of 30 fax numbers have been entered. 6 Press Color or Black to select a color or black-and-white fax. 7 Press to a working phone line. 2 Load...
User's Guide
Page 109
... its factory default. e Enter the time using the keypad, and then press . f If the hour you can print reports of faxes sent and/or received. 1 From the printer control panel, press . 2 Press the arrow buttons until Fax Setup appears, and then press . 3 Press the arrow buttons until Turn On/Off appears, and then press . Printing fax activity reports You can block faxes sent from specific numbers and/or all faxes which lists each fax setting in the printer...
... its factory default. e Enter the time using the keypad, and then press . f If the hour you can print reports of faxes sent and/or received. 1 From the printer control panel, press . 2 Press the arrow buttons until Fax Setup appears, and then press . 3 Press the arrow buttons until Turn On/Off appears, and then press . Printing fax activity reports You can block faxes sent from specific numbers and/or all faxes which lists each fax setting in the printer...
User's Guide
Page 131
... a VPN Client software installed, check the connections manually using the Windows VPN Client. Note: Make sure you can try uninstalling and reinstalling the software. Cannot print over wireless network If you can access them from the VPN before installing the driver on the computer or before running the wireless setup on your local network and to the same wireless network. MOVE YOUR ACCESS POINT TO MINIMIZE INTERFERENCE There may be displayed. The...
... a VPN Client software installed, check the connections manually using the Windows VPN Client. Note: Make sure you can try uninstalling and reinstalling the software. Cannot print over wireless network If you can access them from the VPN before installing the driver on the computer or before running the wireless setup on your local network and to the same wireless network. MOVE YOUR ACCESS POINT TO MINIMIZE INTERFERENCE There may be displayed. The...
User's Guide
Page 147
... following: CHECK MODE SELECTION To make sure Speed Dial has been programmed for a dial tone. Troubleshooting 147 Can receive but the printer hangs up Speed Dial. • As an alternative, dial the telephone number manually. CHECK DOCUMENT PLACEMENT Load the original document faceup into the Automatic Document Feeder (ADF) or facedown on . CHECK THE DIAL PREFIX SETTING 1 From the printer control panel, press . 2 Press the arrow buttons until Fax Setup appears, and then press . 3 Press the arrow buttons until Dialing and Sending appears, and...
... following: CHECK MODE SELECTION To make sure Speed Dial has been programmed for a dial tone. Troubleshooting 147 Can receive but the printer hangs up Speed Dial. • As an alternative, dial the telephone number manually. CHECK DOCUMENT PLACEMENT Load the original document faceup into the Automatic Document Feeder (ADF) or facedown on . CHECK THE DIAL PREFIX SETTING 1 From the printer control panel, press . 2 Press the arrow buttons until Fax Setup appears, and then press . 3 Press the arrow buttons until Dialing and Sending appears, and...
User's Guide
Page 168
... or receive fax 144 cards loading 66 memory card 85 cartridges, print aligning 114 cleaning 114 installing 111 ordering 118 preserving 117 removing 112 using genuine Lexmark 113 wiping 116 changing default settings 28 Power Saver timeout 28 temporary settings 28 changing wireless settings after installation (Mac) 48 Index 168 changing wireless settings after installation (Windows) 48 checking ink levels 115 cleaning exterior of the printer 117 cleaning print cartridge nozzles 114 Club Internet 47 collating copies 100 Communication not available message 143 configuring IP address 48 connecting...
... or receive fax 144 cards loading 66 memory card 85 cartridges, print aligning 114 cleaning 114 installing 111 ordering 118 preserving 117 removing 112 using genuine Lexmark 113 wiping 116 changing default settings 28 Power Saver timeout 28 temporary settings 28 changing wireless settings after installation (Mac) 48 Index 168 changing wireless settings after installation (Windows) 48 checking ink levels 115 cleaning exterior of the printer 117 cleaning print cartridge nozzles 114 Club Internet 47 collating copies 100 Communication not available message 143 configuring IP address 48 connecting...
User's Guide
Page 169
... Document Feeder (ADF) 71 loading on scanner glass 70, 93 making color or black-and-white scan 95 printing 74 scanning using the printer control panel 93 duplex cover 20 E emission notices 154, 155, 156, 157, 158 enlarging an image 98 envelopes loading 66, 79 printing 79 error messages failed to connect 152 fax error 149 fax mode unsupported 149 no answer 151 phone line busy 150 phone line error 151 remote fax error 150 Ethernet 62 exterior of the printer cleaning 117 F factory default settings resetting internal wireless print server 144 factory default settings, resetting to 119 failed...
... Document Feeder (ADF) 71 loading on scanner glass 70, 93 making color or black-and-white scan 95 printing 74 scanning using the printer control panel 93 duplex cover 20 E emission notices 154, 155, 156, 157, 158 enlarging an image 98 envelopes loading 66, 79 printing 79 error messages failed to connect 152 fax error 149 fax mode unsupported 149 no answer 151 phone line busy 150 phone line error 151 remote fax error 150 Ethernet 62 exterior of the printer cleaning 117 F factory default settings resetting internal wireless print server 144 factory default settings, resetting to 119 failed...
User's Guide
Page 170
... paper, loading 66, 74 parts Automatic Document Feeder (ADF) 20 Automatic Document Feeder (ADF) output tray 20 Automatic Document Feeder (ADF) paper guide 20 Automatic Document Feeder (ADF) tray 20 duplex cover 20 memory card slots 20 paper adjustment lever 20 paper exit tray 20 paper feed guard 20 paper guides 20 paper support 20 PictBridge port 20 power supply port 20 print cartridge carrier 20 printer control panel 20 scanner glass 20 scanner unit 20 top cover 20 USB port 20 Wi-Fi indicator 20 password 56 PBX setting fax 108 phone line busy error message 150 phone line error 151 photo cards...
... paper, loading 66, 74 parts Automatic Document Feeder (ADF) 20 Automatic Document Feeder (ADF) output tray 20 Automatic Document Feeder (ADF) paper guide 20 Automatic Document Feeder (ADF) tray 20 duplex cover 20 memory card slots 20 paper adjustment lever 20 paper exit tray 20 paper feed guard 20 paper guides 20 paper support 20 PictBridge port 20 power supply port 20 print cartridge carrier 20 printer control panel 20 scanner glass 20 scanner unit 20 top cover 20 USB port 20 Wi-Fi indicator 20 password 56 PBX setting fax 108 phone line busy error message 150 phone line error 151 photo cards...
User's Guide
Page 171
... 117 loading documents 70 scanner unit 20 scanning canceling a scan 96 making color or black-and-white scan 95 over a network 96 photos for editing 95 to a computer 93 to a flash drive 93 to a memory card 93 to a network 93 to computer 96 using the printer control panel 93 security wireless network 55 security information 13 wireless network 56 security key 56 Service Center 121 setting up Address Book 106 setting up printer on wireless network (Macintosh) 45 on wireless network (Windows) 45 settings changing Power Saver timeout 28 disabling timeout 28 saving 28 Setup menu Fax Settings List...
... 117 loading documents 70 scanner unit 20 scanning canceling a scan 96 making color or black-and-white scan 95 over a network 96 photos for editing 95 to a computer 93 to a flash drive 93 to a memory card 93 to a network 93 to computer 96 using the printer control panel 93 security wireless network 55 security information 13 wireless network 56 security key 56 Service Center 121 setting up Address Book 106 setting up printer on wireless network (Macintosh) 45 on wireless network (Windows) 45 settings changing Power Saver timeout 28 disabling timeout 28 saving 28 Setup menu Fax Settings List...
User's Guide
Page 172
... messages failed to connect 152 fax error 149 fax mode unsupported 149 no answer 151 phone line busy 150 phone line error 151 remote fax error 150 troubleshooting, fax Caller ID not displayed 149 can receive but not send fax 147 can send but not receive fax 146 cannot send or receive fax 144 printer receives blank fax 148 received fax has poor print quality 148 troubleshooting, setup incorrect language appears on display 121 page does not print 123 power button is not lit 122 software did not install 122 troubleshooting, wireless changing wireless settings after installation (Mac) 48 changing...
... messages failed to connect 152 fax error 149 fax mode unsupported 149 no answer 151 phone line busy 150 phone line error 151 remote fax error 150 troubleshooting, fax Caller ID not displayed 149 can receive but not send fax 147 can send but not receive fax 146 cannot send or receive fax 144 printer receives blank fax 148 received fax has poor print quality 148 troubleshooting, setup incorrect language appears on display 121 page does not print 123 power button is not lit 122 software did not install 122 troubleshooting, wireless changing wireless settings after installation (Mac) 48 changing...
User's Guide
Page 173
network printer does not show up in printer selection list during installation (Windows) 130 printer cannot connect to wireless network 131 Wi-Fi indicator light is blinking orange 137, 140 Wi-Fi indicator light is not lit 134 Wi-Fi indicator light is still orange 142 Wi-Fi indicator 20 description of colors 47 interpreting colors 47 light is not lit 134 Wi-Fi indicator light is blinking...
network printer does not show up in printer selection list during installation (Windows) 130 printer cannot connect to wireless network 131 Wi-Fi indicator light is blinking orange 137, 140 Wi-Fi indicator light is not lit 134 Wi-Fi indicator light is still orange 142 Wi-Fi indicator 20 description of colors 47 interpreting colors 47 light is not lit 134 Wi-Fi indicator light is blinking...

