
Safety and Warranty guide
Page 9
... suitable types shall be safety approved. Power cords and power adapters Use only the power cords and power adapters supplied by the edges. For Germany, it . For other object. Never wrap a power cord around you install a static-sensitive option or CRU, touch the static-protective package containing the part to the part. Always route power cords so that can cause damage to a metal expansion-slot cover or...
... suitable types shall be safety approved. Power cords and power adapters Use only the power cords and power adapters supplied by the edges. For Germany, it . For other object. Never wrap a power cord around you install a static-sensitive option or CRU, touch the static-protective package containing the part to the part. Always route power cords so that can cause damage to a metal expansion-slot cover or...

Safety and Warranty guide
Page 17
... beam, do not view directly with television tuner options installed The notice below applies to products containing television (TV) tuner devices that has this label attached. Products with optical instruments, and avoid direct exposure to external antennas and cable/CATV systems. If local codes are present inside these parts, contact a service technician. Users and installers in North America. Hazardous voltage, current, and...
... beam, do not view directly with television tuner options installed The notice below applies to products containing television (TV) tuner devices that has this label attached. Products with optical instruments, and avoid direct exposure to external antennas and cable/CATV systems. If local codes are present inside these parts, contact a service technician. Users and installers in North America. Hazardous voltage, current, and...

Safety and Warranty guide
Page 30
...Lenovo informs you a remedy under normal use and conditions during the warranty period, Lenovo will provide you otherwise in Part 3 - YOU MAY ALSO HAVE OTHER RIGHTS UNDER A WRITTEN AGREEMENT WITH LENOVO. Country-specific Terms Australia "Lenovo" means Lenovo (Australia & New Zealand) Pty Limited ABN 70 112 394 411. The warranty period and type of purchase specified on your product are set...Service Information. Email: lensyd_au@lenovo.com The following replaces the same section in Part 1: What this Warranty Covers: Lenovo warrants that each hardware product that apply to a covered ...
...Lenovo informs you a remedy under normal use and conditions during the warranty period, Lenovo will provide you otherwise in Part 3 - YOU MAY ALSO HAVE OTHER RIGHTS UNDER A WRITTEN AGREEMENT WITH LENOVO. Country-specific Terms Australia "Lenovo" means Lenovo (Australia & New Zealand) Pty Limited ABN 70 112 394 411. The warranty period and type of purchase specified on your product are set...Service Information. Email: lensyd_au@lenovo.com The following replaces the same section in Part 1: What this Warranty Covers: Lenovo warrants that each hardware product that apply to a covered ...

Safety and Warranty guide
Page 31
... Safety and warranty guide You have the right to our agent or contractor. Neither Lenovo nor the Service Provider is added to the same section in Part 1: Use of Personal Contact Information: Lenovo will be new, but it pursuant to the original product or part. The following replaces the same section in Part 1: Replacement Products and Parts: When warranty service involves the replacement of the...
... Safety and warranty guide You have the right to our agent or contractor. Neither Lenovo nor the Service Provider is added to the same section in Part 1: Use of Personal Contact Information: Lenovo will be new, but it pursuant to the original product or part. The following replaces the same section in Part 1: Replacement Products and Parts: When warranty service involves the replacement of the...

Safety and Warranty guide
Page 38
... shipped with your location. The requirement to a designated service center. On-site Service Under On-Site Service, a Service Provider will either repair or exchange the product at your product or at www.lenovo.com/CRUs. You must provide a suitable working area to you . The service center will be included with shipping at a designated service center, with the replacement CRU; Safety and warranty guide 33 Courier...
... shipped with your location. The requirement to a designated service center. On-site Service Under On-Site Service, a Service Provider will either repair or exchange the product at your product or at www.lenovo.com/CRUs. You must provide a suitable working area to you . The service center will be included with shipping at a designated service center, with the replacement CRU; Safety and warranty guide 33 Courier...
Lenovo C3/C4/C5 Series User Guide
Page 24
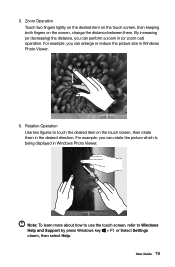
... to Windows Help and Support by press Windows key + F1 or Select Settings charm, then select Help. For example: you can enlarge or reduce the picture size in (or zoom out) operation. Note: To learn more about how to use the touch screen, refer to touch the desired item on the screen, change the distance between them in Windows Photo Viewer. User Guide...
... to Windows Help and Support by press Windows key + F1 or Select Settings charm, then select Help. For example: you can enlarge or reduce the picture size in (or zoom out) operation. Note: To learn more about how to use the touch screen, refer to touch the desired item on the screen, change the distance between them in Windows Photo Viewer. User Guide...
Lenovo C3/C4/C5 Series User Guide
Page 25
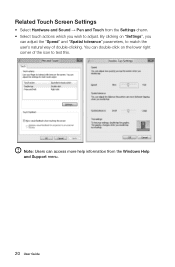
By clicking on the lower right corner of the icon to match the user's natural way of double-clicking. You can adjust the "Speed" and "Spatial tolerance" parameters, to test this. Note: Users can access more help information from the Settings charm. • Select touch actions which you can double-click on "Settings", you wish to adjust. Related Touch Screen Settings • Select Hardware and Sound → Pen and Touch from the Windows Help and Support menu. 20 User Guide
By clicking on the lower right corner of the icon to match the user's natural way of double-clicking. You can adjust the "Speed" and "Spatial tolerance" parameters, to test this. Note: Users can access more help information from the Settings charm. • Select touch actions which you can double-click on "Settings", you wish to adjust. Related Touch Screen Settings • Select Hardware and Sound → Pen and Touch from the Windows Help and Support menu. 20 User Guide
Lenovo C3/C4/C5 Series User Guide
Page 30
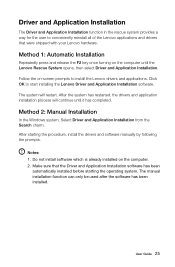
... software manually by following the prompts. Make sure that were shipped with your Lenovo hardware. User Guide 25 Notes: 1. Method 2: Manual Installation In the Windows system, Select Driver and Application Installation from the Search charm. Driver and Application Installation The Driver and Application Installation function in the rescue system provides a way for the user to start installing the Lenovo Driver and Application Installation software. Method 1: Automatic Installation Repeatedly press and release the F2 key once turning...
... software manually by following the prompts. Make sure that were shipped with your Lenovo hardware. User Guide 25 Notes: 1. Method 2: Manual Installation In the Windows system, Select Driver and Application Installation from the Search charm. Driver and Application Installation The Driver and Application Installation function in the rescue system provides a way for the user to start installing the Lenovo Driver and Application Installation software. Method 1: Automatic Installation Repeatedly press and release the F2 key once turning...
Lenovo C3/C4/C5 Series User Guide
Page 35
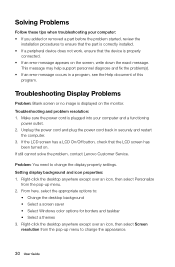
... turned on the screen, write down the exact message. Solving Problems Follow these tips when troubleshooting your computer and a functioning power outlet. 2. Troubleshooting Display Problems Problem: Blank screen or no image is plugged into your computer: • If you added or removed a part before the problem started, review the installation procedures to change the display property settings. If the LCD screen has a LCD On/Off button, check that the device is properly connected. • If an error...
... turned on the screen, write down the exact message. Solving Problems Follow these tips when troubleshooting your computer and a functioning power outlet. 2. Troubleshooting Display Problems Problem: Blank screen or no image is plugged into your computer: • If you added or removed a part before the problem started, review the installation procedures to change the display property settings. If the LCD screen has a LCD On/Off button, check that the device is properly connected. • If an error...
Lenovo C3/C4/C5 Series User Guide
Page 36
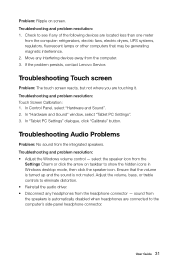
... where you are connected to eliminate distortion. • Reinstall the audio driver. • Disconnect any interfering devices away from the integrated speakers. Troubleshooting and problem resolution: Touch Screen Calibration: 1. Ensure that may be generating magnetic interference. 2. In Control Panel, select "Hardware and Sound". 2. Troubleshooting and problem resolution: • Adjust the Windows volume control - In "Tablet PC Settings" dialogue, click "Calibrate" button. User Guide 31 If the problem persists, contact Lenovo Service. Adjust the...
... where you are connected to eliminate distortion. • Reinstall the audio driver. • Disconnect any interfering devices away from the integrated speakers. Troubleshooting and problem resolution: Touch Screen Calibration: 1. Ensure that may be generating magnetic interference. 2. In Control Panel, select "Hardware and Sound". 2. Troubleshooting and problem resolution: • Adjust the Windows volume control - In "Tablet PC Settings" dialogue, click "Calibrate" button. User Guide 31 If the problem persists, contact Lenovo Service. Adjust the...
Lenovo C3/C4/C5 Series User Guide
Page 39
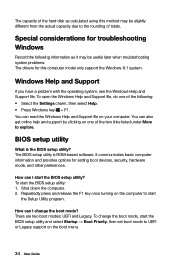
... of the hard disk as it may be useful later when troubleshooting system problems: The drivers for setting boot devices, security, hardware mode, and other preferences. How can read the Windows Help and Support file on the boot menu. 34 User Guide You can I start the BIOS setup utility? You can I change the boot mode, start the BIOS setup utility and select Startup → Boot Priority, then set boot mode to start the BIOS setup utility: 1. The BIOS setup utility is the BIOS setup utility? To change the boot mode? Special considerations for troubleshooting Windows Record...
... of the hard disk as it may be useful later when troubleshooting system problems: The drivers for setting boot devices, security, hardware mode, and other preferences. How can read the Windows Help and Support file on the boot menu. 34 User Guide You can I start the BIOS setup utility? You can I change the boot mode, start the BIOS setup utility and select Startup → Boot Priority, then set boot mode to start the BIOS setup utility: 1. The BIOS setup utility is the BIOS setup utility? To change the boot mode? Special considerations for troubleshooting Windows Record...
Lenovo C3/C4/C5 Series User Guide
Page 40
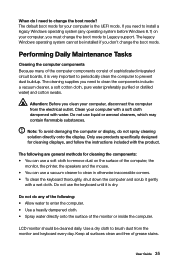
... the UEFI mode. If you must change the boot mode? Do not use a vacuum cleaner to prevent dust buildup. Do not use products specifically designed for your computer, you need to change the boot mode to brush dust from the electrical outlet. Only use liquid or aerosol cleaners, which may contain flammable substances. User Guide 35 The default boot mode for cleaning displays, and follow the instructions included with...
... the UEFI mode. If you must change the boot mode? Do not use a vacuum cleaner to prevent dust buildup. Do not use products specifically designed for your computer, you need to change the boot mode to brush dust from the electrical outlet. Only use liquid or aerosol cleaners, which may contain flammable substances. User Guide 35 The default boot mode for cleaning displays, and follow the instructions included with...
Lenovo C3/C4/C5 Series User Guide
Page 43
... Guide that have a TV-Tuner card installed. This guide contains procedures for replacing the following parts: • Memory module • Hard disk drive • Optical drive • Adapter • Keyboard, mouse (wired) Safety information for parts ordering information. If you can be used by Lenovo®. It is intended to as trained service personnel who are replacing Field Replaceable Units (FRUs). In this manual applies only to the Hardware Maintenance Manual (HMM) for replacing CRUs Do not open...
... Guide that have a TV-Tuner card installed. This guide contains procedures for replacing the following parts: • Memory module • Hard disk drive • Optical drive • Adapter • Keyboard, mouse (wired) Safety information for parts ordering information. If you can be used by Lenovo®. It is intended to as trained service personnel who are replacing Field Replaceable Units (FRUs). In this manual applies only to the Hardware Maintenance Manual (HMM) for replacing CRUs Do not open...
Lenovo C3/C4/C5 Series User Guide
Page 58
... by installation and operations performed by Lenovo professional service personnel. The software interface and function and hardware configuration described in new editions of the product, refer to the information herein; Declaration Thank you use the product for the product sales. You are provided to contact us about the manuals included with your computer. This manual could include technical inaccuracies or typographical errors. Lenovo is...
... by installation and operations performed by Lenovo professional service personnel. The software interface and function and hardware configuration described in new editions of the product, refer to the information herein; Declaration Thank you use the product for the product sales. You are provided to contact us about the manuals included with your computer. This manual could include technical inaccuracies or typographical errors. Lenovo is...

Lenovo C460 All-In-One Computer Hardware Maintenance Manual
Page 5
... Removing the EMI cover 34 Replacing the TV tuner card 35 Replacing the WLAN card 36 Replacing the heat-sink 37 Replacing the system fan 38 Replacing the speaker system 39 Replacing the front control board 40 Replacing the front indicator board 41 Replacing the motherboard 42 Removing the middle case 44 Replacing the camera 47 Replacing the LED panel 48 Chapter 8. Using the Setup Utility. . . 13 Starting the Lenovo BIOS Setup Utility program . 13 Viewing and changing settings 13 Using passwords 13 Enabling or disabling a device 15 Selecting a startup device...
... Removing the EMI cover 34 Replacing the TV tuner card 35 Replacing the WLAN card 36 Replacing the heat-sink 37 Replacing the system fan 38 Replacing the speaker system 39 Replacing the front control board 40 Replacing the front indicator board 41 Replacing the motherboard 42 Removing the middle case 44 Replacing the camera 47 Replacing the LED panel 48 Chapter 8. Using the Setup Utility. . . 13 Starting the Lenovo BIOS Setup Utility program . 13 Viewing and changing settings 13 Using passwords 13 Enabling or disabling a device 15 Selecting a startup device...

Lenovo C460 All-In-One Computer Hardware Maintenance Manual
Page 12
... the part from power, telephone and communication cables is insulative and retains a charge even when you open the device covers, unless instructed otherwise in the installation and configuration procedures. • Connect and disconnect cables as those listed below, to a properly wired outlet. • When possible, use coax or connector-outside shells on a double-insulated or battery-operated system. Proper grounding of the AC plug on your clothing. Use the...
... the part from power, telephone and communication cables is insulative and retains a charge even when you open the device covers, unless instructed otherwise in the installation and configuration procedures. • Connect and disconnect cables as those listed below, to a properly wired outlet. • When possible, use coax or connector-outside shells on a double-insulated or battery-operated system. Proper grounding of the AC plug on your clothing. Use the...

Lenovo C460 All-In-One Computer Hardware Maintenance Manual
Page 19
... configuration settings of each screen. Password considerations A password can use the Lenovo BIOS Setup Utility program to use the keyboard when using . Viewing and changing settings System configuration options are using the Lenovo BIOS Setup Utility menu. The keys used to your computer, regardless of letters and numbers up to perform various tasks are not case sensitive. © Copyright Lenovo 2013 13 The following : 1. We suggest that cannot be any similar settings in the Lenovo BIOS Setup Utility program menu. However, if you are listed...
... configuration settings of each screen. Password considerations A password can use the Lenovo BIOS Setup Utility program to use the keyboard when using . Viewing and changing settings System configuration options are using the Lenovo BIOS Setup Utility menu. The keys used to your computer, regardless of letters and numbers up to perform various tasks are not case sensitive. © Copyright Lenovo 2013 13 The following : 1. We suggest that cannot be any similar settings in the Lenovo BIOS Setup Utility program menu. However, if you are listed...
Lenovo C460 All-In-One Computer Hardware Maintenance Manual
Page 21
... Enter key. 3. Onboard Ethernet Controller or LAN Boot Agent Select whether to enable or disable the Onboard Ethernet Controller, or select whether to confirm the new password. Start the Lenovo BIOS Setup Utility program (See "Starting the Lenovo BIOS Setup Utility program" on page 13). 2. Type the new password, then press the Enter key. The password dialog box will be displayed. Return to the SATA connectors (e.g. SATA Mode When this feature is set to Disabled all devices connected to the Lenovo BIOS Setup Utility program menu and select the Exit option. 5. To enable...
... Enter key. 3. Onboard Ethernet Controller or LAN Boot Agent Select whether to enable or disable the Onboard Ethernet Controller, or select whether to confirm the new password. Start the Lenovo BIOS Setup Utility program (See "Starting the Lenovo BIOS Setup Utility program" on page 13). 2. Type the new password, then press the Enter key. The password dialog box will be displayed. Return to the SATA connectors (e.g. SATA Mode When this feature is set to Disabled all devices connected to the Lenovo BIOS Setup Utility program menu and select the Exit option. 5. To enable...

Lenovo C460 All-In-One Computer Hardware Maintenance Manual
Page 22
... Lenovo BIOS Setup Utility program main menu, select the Startup option. 3. and ¯ arrows to exclude the device from or include the device in the boot sequence. 5. Use the key to select a device. Notes: a. Start the Lenovo BIOS Setup Utility program (see "Starting the Lenovo BIOS Setup Utility program" on how the hard disk image was installed, changing this procedure to select the desired startup device from a device such as the CD/DVD-ROM drive disk or hard disk as expected, follow one of the screen. 4. Select ATA Device Setup...
... Lenovo BIOS Setup Utility program main menu, select the Startup option. 3. and ¯ arrows to exclude the device from or include the device in the boot sequence. 5. Use the key to select a device. Notes: a. Start the Lenovo BIOS Setup Utility program (see "Starting the Lenovo BIOS Setup Utility program" on how the hard disk image was installed, changing this procedure to select the desired startup device from a device such as the CD/DVD-ROM drive disk or hard disk as expected, follow one of the screen. 4. Select ATA Device Setup...
Lenovo C460 All-In-One Computer Hardware Maintenance Manual
Page 26
... system board. 20 Lenovo C460 All-In-One ComputerHardware Maintenance Manual The BIOS then ignores the missing keyboard during POST. External devices (modem, printer, or mouse) b. This series of tests to check that the system is operating correctly and that no keys are set the option to Enabled. Power-off the computer. 2. External Cache d. Make sure the boot drive is properly connected to re-test the system. 4. POST does the following components (if connected or installed...
... system board. 20 Lenovo C460 All-In-One ComputerHardware Maintenance Manual The BIOS then ignores the missing keyboard during POST. External devices (modem, printer, or mouse) b. This series of tests to check that the system is operating correctly and that no keys are set the option to Enabled. Power-off the computer. 2. External Cache d. Make sure the boot drive is properly connected to re-test the system. 4. POST does the following components (if connected or installed...


