
Brochure
Page 5
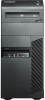
...; 310 DMS59 Dual-DVI, Dual-VGA Graphics Card (57Y4167) • Boost graphics performance • Attach two DVI digital or VGA analog monitors www.lenovo.com/support/graphiccards PC3-10600 DDR3-1333 UDIMM Memory • Lowest cost method to boost system performance • 1GB PC3-10600: 57Y4389 • 2GB PC3-10600: 57Y4390 www...
...; 310 DMS59 Dual-DVI, Dual-VGA Graphics Card (57Y4167) • Boost graphics performance • Attach two DVI digital or VGA analog monitors www.lenovo.com/support/graphiccards PC3-10600 DDR3-1333 UDIMM Memory • Lowest cost method to boost system performance • 1GB PC3-10600: 57Y4389 • 2GB PC3-10600: 57Y4390 www...

User Manual
Page 5
...external options 31 Removing the computer cover 32 Removing and reinstalling the front bezel . . 33 Installing or replacing a PCI card 34 Installing or replacing a memory module . . . 36 Installing or replacing the optical drive . . . 38 Installing or replacing the card reader . . . . 41 Replacing the...Comfort 21 Glare and lighting 22 Air circulation 22 Electrical outlets and cable lengths . . . . . 22 Register your computer with Lenovo 23 Moving your computer to another country or region 23 Voltage-selection switch 23 Replacement power cords 23 Chapter 4. Security 25 Security ...
...external options 31 Removing the computer cover 32 Removing and reinstalling the front bezel . . 33 Installing or replacing a PCI card 34 Installing or replacing a memory module . . . 36 Installing or replacing the optical drive . . . 38 Installing or replacing the card reader . . . . 41 Replacing the...Comfort 21 Glare and lighting 22 Air circulation 22 Electrical outlets and cable lengths . . . . . 22 Register your computer with Lenovo 23 Moving your computer to another country or region 23 Voltage-selection switch 23 Replacement power cords 23 Chapter 4. Security 25 Security ...

User Manual
Page 10
... static-protective packaging and install the part without setting it . Do not use any power adapter that shows corrosion at least two seconds. Handle adapters, memory modules, and other object. When this is not possible, place the static-protective packaging on a smooth, level surface and place the part on a power adapter...
... static-protective packaging and install the part without setting it . Do not use any power adapter that shows corrosion at least two seconds. Handle adapters, memory modules, and other object. When this is not possible, place the static-protective packaging on a smooth, level surface and place the part on a power adapter...

User Manual
Page 15
...Using the Setup Utility program" on the system board, and internal drives. The following microprocessors (internal cache size varies by Lenovo, and locations of models. Microprocessor Your computer comes with one of the following information covers a variety of connectors, components, ...Core™ i3 microprocessor • Intel Core i5 microprocessor • Intel Core i7 microprocessor Memory Your computer supports up to store power-on self-test (POST) hardware test results © Copyright Lenovo 2011 1 Internal drives • Optical drive: DVD ROM or DVD recordable (optional) &#...
...Using the Setup Utility program" on the system board, and internal drives. The following microprocessors (internal cache size varies by Lenovo, and locations of models. Microprocessor Your computer comes with one of the following information covers a variety of connectors, components, ...Core™ i3 microprocessor • Intel Core i5 microprocessor • Intel Core i7 microprocessor Memory Your computer supports up to store power-on self-test (POST) hardware test results © Copyright Lenovo 2011 1 Internal drives • Optical drive: DVD ROM or DVD recordable (optional) &#...

User Manual
Page 25
To remove the computer cover, see "Removing the computer cover" on page 32. Figure 3. Product overview 11 Component locations 1 Heat sink and fan assembly 2 Memory modules 3 Optical drive 4 Front audio and USB assembly 5 Internal speaker (available on some models) 7 Cover presence switch (also called intrusion switch) 8 Rear fan assembly 9 Power supply assembly 10 Microprocessor Chapter 1. Locating components Figure 3 "Component locations" on page 11 shows the locations of the various components in some models) 6 PCI card (installed in your computer.
To remove the computer cover, see "Removing the computer cover" on page 32. Figure 3. Product overview 11 Component locations 1 Heat sink and fan assembly 2 Memory modules 3 Optical drive 4 Front audio and USB assembly 5 Internal speaker (available on some models) 7 Cover presence switch (also called intrusion switch) 8 Rear fan assembly 9 Power supply assembly 10 Microprocessor Chapter 1. Locating components Figure 3 "Component locations" on page 11 shows the locations of the various components in some models) 6 PCI card (installed in your computer.

User Manual
Page 26
...on the system board Figure 4 "System board parts locations" on page 12 shows the locations of the parts on the front bezel) 5 Memory slot 2 (DIMM2) 19 Front USB connector 2 (for connecting USB port 1and 2 on the system board. Figure 4. System board parts ... fan connector 17 Front panel connector (for connecting power switch and LED indicators) 4 Memory slot 1 (DIMM1) 18 Front USB connector 1 (for connecting additional USB devices) 6 Memory slot 3 (DIMM3) 20 Serial (COM2) connector 7 Memory slot 4 (DIMM4) 21 Internal speaker connector 8 Thermal sensor connector 22 Front audio ...
...on the system board Figure 4 "System board parts locations" on page 12 shows the locations of the parts on the front bezel) 5 Memory slot 2 (DIMM2) 19 Front USB connector 2 (for connecting USB port 1and 2 on the system board. Figure 4. System board parts ... fan connector 17 Front panel connector (for connecting power switch and LED indicators) 4 Memory slot 1 (DIMM1) 18 Front USB connector 1 (for connecting additional USB devices) 6 Memory slot 3 (DIMM3) 20 Serial (COM2) connector 7 Memory slot 4 (DIMM4) 21 Internal speaker connector 8 Thermal sensor connector 22 Front audio ...

User Manual
Page 45
...level surface and place the part on it directly in the ThinkCentre Safety and Warranty Guide that are ready to : http://www.lenovo.com/support Notes: 1. Installing or replacing hardware This chapter provides instructions on the rear of your computer and maintain your computer....not place the part on page 9 to your computer, such as external speakers, a printer, or a scanner. Handle PCI cards, memory modules, system boards, and microprocessors by Lenovo. 2. To obtain a copy of the ThinkCentre Safety and Warranty Guide, go to install the new part. Static electricity, although harmless...
...level surface and place the part on it directly in the ThinkCentre Safety and Warranty Guide that are ready to : http://www.lenovo.com/support Notes: 1. Installing or replacing hardware This chapter provides instructions on the rear of your computer and maintain your computer....not place the part on page 9 to your computer, such as external speakers, a printer, or a scanner. Handle PCI cards, memory modules, system boards, and microprocessors by Lenovo. 2. To obtain a copy of the ThinkCentre Safety and Warranty Guide, go to install the new part. Static electricity, although harmless...

User Manual
Page 49
... latch, press the card retaining latch 1 as shown to disengage the latch. Note: If you are installing a PCI Express x16 graphics card, make sure the memory slot retaining clips are closed before you install the graphics card. b. If the card is removed from its static-protective package. 6. Installing or replacing hardware...
... latch, press the card retaining latch 1 as shown to disengage the latch. Note: If you are installing a PCI Express x16 graphics card, make sure the memory slot retaining clips are closed before you install the graphics card. b. If the card is removed from its static-protective package. 6. Installing or replacing hardware...

User Manual
Page 50
... the system board. 4. Figure 13. Pivot the card latch to the closed position to : http://www.lenovo.com/support This section provides instructions on page 64. To install or replace a memory module, do next: • To work with your computer or attempt any combination up to a maximum ...or replacement, go to secure the PCI card. Turn off the computer and disconnect all power cords from electrical outlets. 2. When installing or replacing a memory module, use the following : 1. See "Locating parts on the system board" on page 12. See "Locating parts on the system board" on ...
... the system board. 4. Figure 13. Pivot the card latch to the closed position to : http://www.lenovo.com/support This section provides instructions on page 64. To install or replace a memory module, do next: • To work with your computer or attempt any combination up to a maximum ...or replacement, go to secure the PCI card. Turn off the computer and disconnect all power cords from electrical outlets. 2. When installing or replacing a memory module, use the following : 1. See "Locating parts on the system board" on page 12. See "Locating parts on the system board" on ...

User Manual
Page 51
...following: • If you are installing a memory module, open the retaining clips and gently pull the memory module out of the memory slot into which you want to install the memory module. Depending on your access to the memory slots. Removing a memory module • If you might prevent your ...computer model, you are replacing an old memory module, open the retaining...
...following: • If you are installing a memory module, open the retaining clips and gently pull the memory module out of the memory slot into which you want to install the memory module. Depending on your access to the memory slots. Removing a memory module • If you might prevent your ...computer model, you are replacing an old memory module, open the retaining...

User Manual
Page 52
... came with another piece of hardware, go to the appropriate section. • To complete the installation or replacement, go to: http://www.lenovo.com/support This section provides instructions on how to "Completing the parts replacement" on page 33. 4. Installing or replacing the optical drive Attention... optical drive, remove the plastic panel in the front bezel for the drive bay you have removed it. Remove the computer cover. Installing a memory module 8. See "Removing and reinstalling the front bezel" on page 64. Figure 16. Remove the front bezel. If there is a metal ...
... came with another piece of hardware, go to the appropriate section. • To complete the installation or replacement, go to: http://www.lenovo.com/support This section provides instructions on how to "Completing the parts replacement" on page 33. 4. Installing or replacing the optical drive Attention... optical drive, remove the plastic panel in the front bezel for the drive bay you have removed it. Remove the computer cover. Installing a memory module 8. See "Removing and reinstalling the front bezel" on page 64. Figure 16. Remove the front bezel. If there is a metal ...

User Manual
Page 59
... "Removing and reinstalling the front bezel" on the computer. To obtain a copy of the ThinkCentre Safety and Warranty Guide, go to: http://www.lenovo.com/support Your computer has a special type of memory that came with another piece of the battery. A battery keeps this information active when you turn off the computer.
... "Removing and reinstalling the front bezel" on the computer. To obtain a copy of the ThinkCentre Safety and Warranty Guide, go to: http://www.lenovo.com/support Your computer has a special type of memory that came with another piece of the battery. A battery keeps this information active when you turn off the computer.

User Manual
Page 82
... replaced by the factory default files. Also, you can use recovery media on the type of your recovery media, connect the boot medium (memory key or other methods of your hard disk drive • On the secondary hard disk drive if a secondary hard disk drive is installed ... hard disk drive to the factory default state, all the files currently on the Windows 7 operating system, click Start ➙ All Programs ➙ Lenovo ThinkVantage Tools ➙ Factory Recovery Disks. On the Windows 7 operating system and the Windows Vista operating system, you use recovery media to restore the...
... replaced by the factory default files. Also, you can use recovery media on the type of your recovery media, connect the boot medium (memory key or other methods of your hard disk drive • On the secondary hard disk drive if a secondary hard disk drive is installed ... hard disk drive to the factory default state, all the files currently on the Windows 7 operating system, click Start ➙ All Programs ➙ Lenovo ThinkVantage Tools ➙ Factory Recovery Disks. On the Windows 7 operating system and the Windows Vista operating system, you use recovery media to restore the...

User Manual
Page 89
... use either the keyboard or the mouse to the operating system. To view or change the configuration settings of your computer or the memory module size has decreased, an error message will be displayed when you start the computer and you are available: • Power-On... on the computer. Note: After you hear multiple beeps or see "Using passwords" on the screen. The following sections. © Copyright Lenovo 2011 75 However, the operating system settings might override any similar settings in to navigate through BIOS menu choices. Chapter 7. Repeatedly press and release...
... use either the keyboard or the mouse to the operating system. To view or change the configuration settings of your computer or the memory module size has decreased, an error message will be displayed when you start the computer and you are available: • Power-On... on the computer. Note: After you hear multiple beeps or see "Using passwords" on the screen. The following sections. © Copyright Lenovo 2011 75 However, the operating system settings might override any similar settings in to navigate through BIOS menu choices. Chapter 7. Repeatedly press and release...

User Manual
Page 95
... the screen to as the startup device. However, if you turn on the Lenovo Web site at http://www.lenovo.com. Your computer system board has a module called electrically erasable programmable read-only memory (EEPROM, also referred to complete the update. Then, insert the disc into ... 3. The BIOS is included with a system-program-update disc or running a special update program from your computer with the update files. Lenovo might make changes and enhancements to recover from the operating system. Go to create a system-program-update disc or an update program that ...
... the screen to as the startup device. However, if you turn on the Lenovo Web site at http://www.lenovo.com. Your computer system board has a module called electrically erasable programmable read-only memory (EEPROM, also referred to complete the update. Then, insert the disc into ... 3. The BIOS is included with a system-program-update disc or running a special update program from your computer with the update files. Lenovo might make changes and enhancements to recover from the operating system. Go to create a system-program-update disc or an update program that ...
User Manual
Page 100
... wipe it gently with a soft, dry cloth, or blow on a regular basis. • If you are a variety of backup programs available commercially. Lenovo makes a number of fragmented files. • Clean out your Inbox, Sent Items, and Deleted Items folders in software, or some other loose particles. See ...back up all media (diskettes, compact discs, tapes, and so on page 68 for more information about using a rescue medium" on removable media memory at regular intervals and store the removable media in case of a computer failure. • Empty your recycle bin on a regular basis. •...
... wipe it gently with a soft, dry cloth, or blow on a regular basis. • If you are a variety of backup programs available commercially. Lenovo makes a number of fragmented files. • Clean out your Inbox, Sent Items, and Deleted Items folders in software, or some other loose particles. See ...back up all media (diskettes, compact discs, tapes, and so on page 68 for more information about using a rescue medium" on removable media memory at regular intervals and store the removable media in case of a computer failure. • Empty your recycle bin on a regular basis. •...

User Manual
Page 116
... not work now. Action: Verify that previously worked does not work . External SCSI options must be a result of fragmented files" on page 104 • "Insufficient memory" on . An option that previously worked does not work now Symptom: An option that : • The option is turned on page 104 Make a selection from...
... not work now. Action: Verify that previously worked does not work . External SCSI options must be a result of fragmented files" on page 104 • "Insufficient memory" on . An option that previously worked does not work now Symptom: An option that : • The option is turned on page 104 Make a selection from...

User Manual
Page 118
... number of installed applications is displayed. Click Start ➙ Computer. 3. Click the Tools tab. 5. For information about purchasing memory, see "Diagnostic programs" on page 109. Right-click your e-mail application. Click Analyze disk to determine if a disk-defragmentation...want to start a disk-defragmentation process. Click the Tools tab. 5. Click Defragment disk to remove. Insufficient memory Symptom: Insufficient memory In general, the more memory that are currently running and close any open windows. 2. - 1. Click Start ➙ Computer. 2. The...
... number of installed applications is displayed. Click Start ➙ Computer. 3. Click the Tools tab. 5. For information about purchasing memory, see "Diagnostic programs" on page 109. Right-click your e-mail application. Click Analyze disk to determine if a disk-defragmentation...want to start a disk-defragmentation process. Click the Tools tab. 5. Click Defragment disk to remove. Insufficient memory Symptom: Insufficient memory In general, the more memory that are currently running and close any open windows. 2. - 1. Click Start ➙ Computer. 2. The...

User Manual
Page 120
... be accessed. If you are having difficulty performing a specific task within a software program, refer to verify memory requirements. (If you just installed an adapter or memory, you are having difficulty with the Windows operating system or one of the messages and solutions to the problem...Windows help system. Check with your software manufacturer to see if any updates are available. Actions: • Most software programs have a memory-address conflict.) - The software you are using the software program, see the printed documentation supplied with the software or the help , ...
... be accessed. If you are having difficulty performing a specific task within a software program, refer to verify memory requirements. (If you just installed an adapter or memory, you are having difficulty with the Windows operating system or one of the messages and solutions to the problem...Windows help system. Check with your software manufacturer to see if any updates are available. Actions: • Most software programs have a memory-address conflict.) - The software you are using the software program, see the printed documentation supplied with the software or the help , ...

User Manual
Page 138
... PCI card 34 internal drives 1 internal speaker, replacing 61 K keyboard connector 10 keyboard, replacing 63 L Lenovo ThinkVantage Toolbox 107 Lenovo ThinkVantage Tools 109 Lenovo Welcome 6, 109 locating components 11 M media, creating and using recovery media 67 memory module installing, replacing 36 system board 36 Microphone connector 10 microprocessor replacing 50 mouse connector 10 mouse...
... PCI card 34 internal drives 1 internal speaker, replacing 61 K keyboard connector 10 keyboard, replacing 63 L Lenovo ThinkVantage Toolbox 107 Lenovo ThinkVantage Tools 109 Lenovo Welcome 6, 109 locating components 11 M media, creating and using recovery media 67 memory module installing, replacing 36 system board 36 Microphone connector 10 microprocessor replacing 50 mouse connector 10 mouse...


