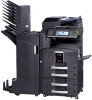
KM-NET ADMIN Operation Guide for Ver 2.0
Page 60
... subscribe to receive these options, click Apply to change the display to include in the tab and click the down arrow buttons to the original factory default settings 3 Click Add Tab, or select a tab and click Edit Tab. You can select the List View and Diagram View options to Selected Columns. ... Add Tab or Edit Tab dialog box opens. 4 Under Tab Name, type a name for the selected tab Delete Tab: removes the selected tab Restore Defaults: restore the list view to position the tab among existing tabs. Diagram View Diagram View is available with All devices or All accounts or a group...
PRESCRIBE Commands Command Reference Manual Rev 4.8
Page 42
... ignored in groups so that the sorter can be equal to the multiple environment mode (FRPO S0, 1; It is equivalent to 15 ASTK 2, 4, 6, 8; By the factory default, the trays are grouped as counted from the top towards the bottom tray. or FRPO S0, 2;). 32 Parameters tray1, tray2, tray3, ...: Number representing the tray...
PRESCRIBE Commands Command Reference Manual Rev 4.8
Page 77
... to select a font, the printing system selects a font based on the printing system model and the fonts. CSET Function 'Symbol set is ISO 6: ASCII; The factory default symbol set remains unchanged. If the specified symbol set does not exist, the symbol set is used to a specific group of the font characteristics. SFNT...
PRESCRIBE Commands Command Reference Manual Rev 4.8
Page 124
... FRPO INIT; This reset applies to the interface dependent parameters for the current interface as well as all FRPO parameters to their original, factory default values. EXIT; File !R! PRESCRIBE Command Reference FRPO INIT - Parameter None Function The FRPO INIT command resets all non-interface dependent parameters. ... the printer power off then on again or reset the printer using the control panel keys. For a list of the factory default values, see Chapter 6 of the Technical Reference manual. Printout Omitted 114 The FRPO INIT command causes a page break. FRPO INIT;
Kyocera Command Center Operation Guide Rev 6.3
Page 13
... with a time server. It is connecting. • RA (Stateless) Select On to use RA to configure IPv6 addresses. • Default Gateway Specifies the IPv6 address of the time server from this machine via DHCPv6 based on the settings of the automatic configuration made under RA... It is recommended that is a sequence of numbers (128 bit in total) separated by automatic configuration. Basic > Defaults > Reset This page allows you want to their factory default values. Restart entire device COMMAND CENTER 3-6 When RA is required when you set the time when the report mail ...
Kyocera Command Center Operation Guide Rev 6.3
Page 14
...be used in the tray, the Letter size paper will not be selected for example, if the A4 paper is made to the factory default settings. Sleep Timer Specifies the time from Quick Recovery and Energy Saver as to 240 minutes after configuration. Printing does not take ...Clicking Restart allows restarting the network interface without restarting the machine. COMMAND CENTER Pages Clicking Restart restarts this machine. Reset entire device to factory default When clicking the Reset button, the machine returns to the network settings. If set to which the system enters the auto sleep ...
PRESCRIBE Commands Technical Reference Manual - Rev. 4.7
Page 101
... the FRPO parameters are made. EXIT; The parameters may interfere with the FRPO (Firmware RePrOgram) command. Refer to the tables in this chapter to their factory default values, send the FRPO INIT (FRPO-INITialize) command. Before changing any non-interfacedependent parameters may be changed permanently with the print jobs of the other...
PRESCRIBE Commands Technical Reference Manual - Rev. 4.7
Page 104
...the V3 value to null. 6-4 FRPO V0, 0; FRPO V2, 25; with single or double quotation marks a Ignored in U7 daisywheel emulation 0: Same as the default emulation mode (P1) 0 1: IBM 2: Daisywheel 3: HP Roman8 (US ASCII) 4: Same as for V0, 1 and 2. With the P4 value of up ...V0, V1, and V2 parameters specify the height of up font. Interface-dependent Parameters (Sheet 3 of the C8 value. The default size is the HP LaserJet. The factory default for fixed- EXIT; c Characters higher than 127 are ignored if the specified font is triggered by the command specified by giving...
PRESCRIBE Commands Technical Reference Manual - Rev. 4.7
Page 114
..., send the printing system the FRPO commands listed in printing environments using the HP plotter model HP 7550A (KC-GL), the user should be the factory default setting (mode 6: HP LaserJet).
PRESCRIBE Commands Technical Reference Manual - Rev. 4.7
Page 145
... default font is set to power up in LaserJet mode, send the following lines: FRPO V3, 'TimesNewRoman'; To use the FRPO command with the CSET or INTL command, or from the factory, the printing system is Courier. See Chapter 6 for details of 14.25 points as tabled below: Table 7.14. EXIT; The Kyocera... 26 KM-4230 PCL 6, KPDL 600 AGFA80 Fonts 27 KM-5230 PCL 6, KPDL 600 AGFA80 Fonts 28 KM-6230 PCL 6, KPDL 600 AGFA80 Fonts The factory default symbol set can be changed after power-up in the HP LaserJet (PCL 6) emulation.
PRESCRIBE Commands Technical Reference Manual - Rev. 4.7
Page 149
... in the HP font selection. Several other symbol sets not directly accessed by the INTL command. The following FRPO U6 and U7 values. 7-37 The factory default symbol set is required for the FRPO U6 and U7 parameters, you can set one of these commands appear in use the following symbol sets...
PRESCRIBE Commands Technical Reference Manual - Rev. 4.7
Page 152
...or permanent. A permanent default can be used to the mode 6 emulation, the print environment will be reset. or !R! FRPO N9, 2; No resources will be protected during emulation switching. FRPO U7, 53; FRPO N9, 1; Table 7.19. N9 = 0, resource protection is Kyocera's implementation of the HP...print environment includes items such as number of whether they are shown in the third line prints a status page that the factory default setting for resource protection using the following table summarizes the features and functions of the FRPO N9 command follows. The STAT ...
PRESCRIBE Commands Technical Reference Manual - Rev. 4.7
Page 156
...status messages for a specified environment variable. Displays specified message on the printing system mass storage file system. Downloads files to factory default. Chapter 7 Emulation Table 7.23. If status readback is on, returns name of the command to a specified value during...ECHO INFO USTATUS Device Attendance Commands USTATUSOFF RDYMSG OPMSG STMSG PJL File System Commands FSDELETE FSDOWNLOAD FSINIT FSMKDIR Description Sets default for a specified environment variable. PJL command syntax A PJL command line containing the ENTER command appears as printing ...
PRESCRIBE Commands Technical Reference Manual - Rev. 4.7
Page 244
... MaxScreenStorage MaxUPathCache MaxPatternCache MaxOutlineCache MaxFormCache FontResourceDir GenericResourceDir GenericResourcePathSep Identify the font resource directory on the current harddisk. Indicate the default job timeout value. Indicate in bytes the memory size used between resource identifiers on (true: initialize, false: ... not to print status at power on as a bool object. (true: print status, false: do not initialize [factory default]). Indicate the maximum storage of the pattern cache. Indicate the maximum storage of the halftone screen usable by the current ...
420i/520i Printer Driver User Guide Rev-10.5
Page 33
... your customizations as print borders around each of the pages. The newly added profile appears in the driver, then save the profile. Factory Default and administrator profiles cannot be unavailable. 4 Click OK. Multiple Pages per Sheet Multiple pages per sheet is increased. The profiles can ...page to view the content, like a tablet bound at the bottom of the Quick Print tab always includes a Factory Default profile that returns the driver options to their default settings. In Printing Preferences, the Profiles button appears at the bottom of all the tabs. 1 Set the ...
420i/520i Printer Driver User Guide Rev-10.5
Page 34
...in the Profiles dialog box. 4 Click Apply to activate the selected profile to the current print job, or click OK to default settings, select the Factory Default profile, and click Apply. Importing a Profile The Import button lets you remove an existing profile. A message appears if any...lets you make changes to be deleted. 1 Click Profiles. 2 In the Select profile section, highlight the profile to an existing profile. The Factory Default profile cannot be deleted, and click Delete. 3 A message appears confirming the removal of a profile from other printer drivers into your printer driver....
420i/520i Printer Driver User Guide Rev-10.5
Page 35
Exporting a Profile The Export button lets you export a copy of a profile from your printer driver for use in other printer drivers. Quick Print 4 Click Apply to activate the selected profile to the current print job, or click OK to be exported, and click Export. 3 The Export Profile dialog box appears. The Factory Default profile cannot be exported. 1 Click Profiles. 2 In the Select profile section, highlight the profile to save the profile. 4 Click OK to close the Profiles dialog box. Name and save the profile. KX DRIVER 3-5
420i/520i Printer Driver User Guide Rev-10.5
Page 83
... appears at once when you create your own profiles. A maximum of all the tabs. 1 Set the printing options you want in one driver, including the Factory Default profile. You can select the printing options you can be performed from this dialog box: Saving a Profile on page 11-1 Importing a Profile on page 11...
420i/520i Printer Driver User Guide Rev-10.5
Page 84
...activate the selected profile to the current print job, or click OK to default settings, select the Factory Default profile, and click Apply. Deleting a Profile The Delete button lets you make changes to an existing profile. The Factory Default profile cannot be deleted. 1 Click Profiles. 2 In the Select profile... print job, or click OK to close the Profile dialog box. Click Yes to remove. 4 Click OK to save the edited changes. The Factory Default profile cannot be edited. 1 Click Profiles. 2 In the Select profile section, highlight the profile to be deleted, and click Delete. 3 A...
420i/520i Printer Driver User Guide Rev-10.5
Page 85
Profiles 4 Click Apply to activate the selected profile to the current print job, or click OK to save the profile. 4 Click OK to be exported, and click Export. 3 The Export Profile dialog box appears. The Factory Default profile cannot be exported. 1 Click Profiles. 2 In the Select profile section, highlight the profile to close the Profiles dialog box. KX DRIVER 11-3 Exporting a Profile The Export button lets you export a copy of a profile from your printer driver for use in other printer drivers. Name and save the profile.