KM-NET ADMIN Operation Guide for Ver 2.0
Page 48
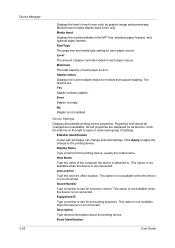
... the device's office location. This option is not available when the device is not connected. Editable Identification A user with privileges can change to . Monochrome models display black toner only. Device Settings Displays all devices. The options are unavailable. Asset Number Type a number ...to use for each paper source. Not all properties are displayed for models that cannot be changed are : Yes Stapler contains staples. Display Name Type a name for inventory control. Equipment ID Type a number to open or close each group of ...
... the device's office location. This option is not available when the device is not connected. Editable Identification A user with privileges can change to . Monochrome models display black toner only. Device Settings Displays all devices. The options are unavailable. Asset Number Type a number ...to use for each paper source. Not all properties are displayed for models that cannot be changed are : Yes Stapler contains staples. Display Name Type a name for inventory control. Equipment ID Type a number to open or close each group of ...
KM-NET Viewer Operation Guide Rev-5.2-2010.10
Page 13
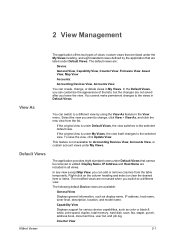
...and model name. In any view except Map View, you can create, change , click View > View As, and click the new view from ...The application offers two types of the lists, but the changes are not saved after you leave the view. The ... view is under Default Views, the view switches to change , or delete views in Default Views. To save ...the original view is under My Views, the view itself changes to a different view by the application that cannot be ...views are listed under My Views. You cannot make permanent changes to a different view. The application provides eight standard ...
...and model name. In any view except Map View, you can create, change , click View > View As, and click the new view from ...The application offers two types of the lists, but the changes are not saved after you leave the view. The ... view is under Default Views, the view switches to change , or delete views in Default Views. To save ...the original view is under My Views, the view itself changes to a different view by the application that cannot be ...views are listed under My Views. You cannot make permanent changes to a different view. The application provides eight standard ...
PRESCRIBE Commands Command Reference Manual Rev 4.8
Page 408
..., 294 Sorter, 164, 334 addressing a tray group, 164 selecting trays, 334 Source image, 299 Square cap, 266 Stacker, 335 selecting tray, 335 stacker, 171 Staple, 141, 340 changing number of pages, 340 position, 341 Starting a new page, 179 Starting a new path, 176 Starting angle, 28, 182, 199 Status page, 336 user mode...
..., 294 Sorter, 164, 334 addressing a tray group, 164 selecting trays, 334 Source image, 299 Square cap, 266 Stacker, 335 selecting tray, 335 stacker, 171 Staple, 141, 340 changing number of pages, 340 position, 341 Starting a new page, 179 Starting a new path, 176 Starting angle, 28, 182, 199 Status page, 336 user mode...
PRESCRIBE Commands Technical Reference Manual - Rev. 4.7
Page 9
...exit PRESCRIBE. In contrast, PRESCRIBE commands are not directly visible to the user. It is the native language of the Kyocera printing systems including copiers (collectively referred to as printing systems hereafter). Most application software controls printing systems by means of codes... you the capability to control line and character spacing, adjust margins, change fonts, position text, draw graphics, and print multiple copies of each page. Consisting of easily remembered commands, such as sorting, stapling, etc. Chapter 1 Introduction to PRESCRIBE PRESCRIBE is followed by an...
...exit PRESCRIBE. In contrast, PRESCRIBE commands are not directly visible to the user. It is the native language of the Kyocera printing systems including copiers (collectively referred to as printing systems hereafter). Most application software controls printing systems by means of codes... you the capability to control line and character spacing, adjust margins, change fonts, position text, draw graphics, and print multiple copies of each page. Consisting of easily remembered commands, such as sorting, stapling, etc. Chapter 1 Introduction to PRESCRIBE PRESCRIBE is followed by an...
420i/520i Operation Guide
Page 76
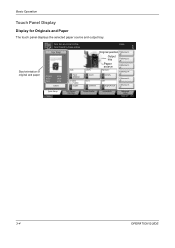
... Originals and Paper The touch panel displays the selected paper source and output tray. Size/orientation of original and paper Press Start key to change settings. Press [Cancel] to start printing. Copy Image Original Zoom Paper : Letter : 100% : Letter Cancel Auto Paper Selection 2-sided... in 1 Combine Copies 1 Original position Output tray Paper source Normal 0 Density Off Shortcut 1 Shortcut 2 Shortcut 3 Shortcut 4 Shortcut 5 Staple/Punch Shortcut 6 Quick Setup Status Org./Paper/ Finishing Image Quality Layout/Edit Advanced Setup 08/08/2009 10:10 3-4 OPERATION GUIDE
... Originals and Paper The touch panel displays the selected paper source and output tray. Size/orientation of original and paper Press Start key to change settings. Press [Cancel] to start printing. Copy Image Original Zoom Paper : Letter : 100% : Letter Cancel Auto Paper Selection 2-sided... in 1 Combine Copies 1 Original position Output tray Paper source Normal 0 Density Off Shortcut 1 Shortcut 2 Shortcut 3 Shortcut 4 Shortcut 5 Staple/Punch Shortcut 6 Quick Setup Status Org./Paper/ Finishing Image Quality Layout/Edit Advanced Setup 08/08/2009 10:10 3-4 OPERATION GUIDE
420i/520i Operation Guide
Page 77
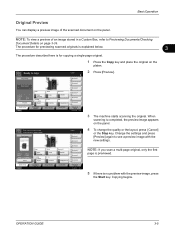
...scanning is for copying a single-page original. 1 Press the Copy key and place the original on page 3-39. Press [Cancel] to change the quality or the layout, press [Cancel] or the Stop key. Original Zoom Paper : --: 100% : --- Preview Auto Paper ...Change the settings and press [Preview] again to start printing. Copy Image Copies 1 Shortcut 1 2 Press [Preview]. Original Zoom Paper : Letter : 100% : Letter Cancel Auto Paper Selection 2-sided >>2-sided Duplex 100% Zoom 2 in 1 Combine Quick Setup Status Org./Paper/ Finishing Image Quality Shortcut 2 Normal 0 Density Off Staple...
...scanning is for copying a single-page original. 1 Press the Copy key and place the original on page 3-39. Press [Cancel] to change the quality or the layout, press [Cancel] or the Stop key. Original Zoom Paper : --: 100% : --- Preview Auto Paper ...Change the settings and press [Preview] again to start printing. Copy Image Copies 1 Shortcut 1 2 Press [Preview]. Original Zoom Paper : Letter : 100% : Letter Cancel Auto Paper Selection 2-sided >>2-sided Duplex 100% Zoom 2 in 1 Combine Quick Setup Status Org./Paper/ Finishing Image Quality Shortcut 2 Normal 0 Density Off Staple...

420i/520i Operation Guide
Page 78
Preview Auto Paper Selection 2-sided >>2-sided Duplex 100% Zoom 2 in the optional document processor. To change the paper size, press, [Org./Paper/ Finishing], [Paper Selection] and select the desired paper source. Paper that [Auto] is off , press ... . 2 Place the originals on the platen or in 1 Combine Quick Setup Status Org./Paper/ Finishing Image Quality Copies Shortcut 1 Shortcut 2 Normal 0 Density Off Staple/Punch Layout/Edit Shortcut 3 Shortcut 4 Shortcut 5 Shortcut 6 Advanced Setup 08/08/2009 10:10 3 Check that matches the size of using automatic paper selection. ...
Preview Auto Paper Selection 2-sided >>2-sided Duplex 100% Zoom 2 in the optional document processor. To change the paper size, press, [Org./Paper/ Finishing], [Paper Selection] and select the desired paper source. Paper that [Auto] is off , press ... . 2 Place the originals on the platen or in 1 Combine Quick Setup Status Org./Paper/ Finishing Image Quality Copies Shortcut 1 Shortcut 2 Normal 0 Density Off Staple/Punch Layout/Edit Shortcut 3 Shortcut 4 Shortcut 5 Shortcut 6 Advanced Setup 08/08/2009 10:10 3 Check that matches the size of using automatic paper selection. ...
420i/520i Operation Guide
Page 88
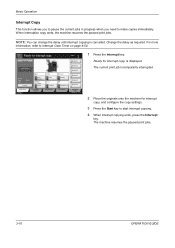
Basic Operation Interrupt Copy This function allows you need to make copies immediately. Change the delay as required. is cancelled. Ready for interrupt copy. Original Zoom Paper : --: 100% : --- The current print job is temporarily interrupted. 2 ...progress when you to pause the current jobs in 1 Combine Quick Setup Status Org./Paper/ Finishing Image Quality Copies 1 Shortcut 1 Shortcut 2 Normal 0 Density Off Staple/Punch Layout/Edit Shortcut 3 Shortcut 4 Shortcut 5 Shortcut 6 Advanced Setup 08/08/2009 10:10 1 Press the Interrupt key. When interruption copy ends, the ...
Basic Operation Interrupt Copy This function allows you need to make copies immediately. Change the delay as required. is cancelled. Ready for interrupt copy. Original Zoom Paper : --: 100% : --- The current print job is temporarily interrupted. 2 ...progress when you to pause the current jobs in 1 Combine Quick Setup Status Org./Paper/ Finishing Image Quality Copies 1 Shortcut 1 Shortcut 2 Normal 0 Density Off Staple/Punch Layout/Edit Shortcut 3 Shortcut 4 Shortcut 5 Shortcut 6 Advanced Setup 08/08/2009 10:10 1 Press the Interrupt key. When interruption copy ends, the ...
420i/520i Operation Guide
Page 116
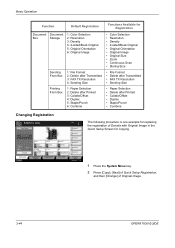
...% Zoom 2 in 1 Combine Quick Setup Status Org./Paper/ Finishing Image Quality Copies Shortcut 1 Shortcut 2 Normal 0 Density Off Staple/Punch Layout/Edit Shortcut 3 Shortcut 4 Shortcut 5 Shortcut 6 Advanced Setup 08/08/2009 10:10 The following procedure is one ...TX Resolution • Sending Size • Paper Selection • Delete after Printed • Collate/Offset • Duplex • Staple/Punch • Combine Changing Registration Ready to copy. Original Zoom Paper : --: 100% : --- Copy Image Place original. Basic Operation Function Default Registration Document ...
...% Zoom 2 in 1 Combine Quick Setup Status Org./Paper/ Finishing Image Quality Copies Shortcut 1 Shortcut 2 Normal 0 Density Off Staple/Punch Layout/Edit Shortcut 3 Shortcut 4 Shortcut 5 Shortcut 6 Advanced Setup 08/08/2009 10:10 The following procedure is one ...TX Resolution • Sending Size • Paper Selection • Delete after Printed • Collate/Offset • Duplex • Staple/Punch • Combine Changing Registration Ready to copy. Original Zoom Paper : --: 100% : --- Copy Image Place original. Basic Operation Function Default Registration Document ...
420i/520i Operation Guide
Page 132
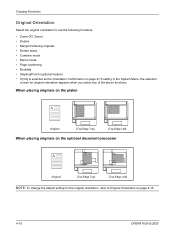
...[Top Edge Top] [Top Edge Left] When placing originals on the optional document processor Original [Top Edge Top] [Top Edge Left] NOTE: To change the default setting for the original orientation, refer to use the following functions. • Zoom (XY Zoom) • Duplex • Margin/Centering originals... • Border erase • Combine mode • Memo mode • Page numbering • Booklets • Stapling/Punch (optional feature) * If [On] is selected as the Orientation Confirmation on page 8-15. 4-10 OPERATION GUIDE
...[Top Edge Top] [Top Edge Left] When placing originals on the optional document processor Original [Top Edge Top] [Top Edge Left] NOTE: To change the default setting for the original orientation, refer to use the following functions. • Zoom (XY Zoom) • Duplex • Margin/Centering originals... • Border erase • Combine mode • Memo mode • Page numbering • Booklets • Stapling/Punch (optional feature) * If [On] is selected as the Orientation Confirmation on page 8-15. 4-10 OPERATION GUIDE
420i/520i Operation Guide
Page 247
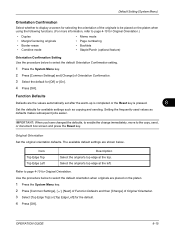
...• Margin/Centering originals • Border erase • Combine mode • Memo mode • Page numbering • Booklets • Staple/Punch (optional feature) Orientation Confirmation Setting Use the procedure below . Original Orientation Set the original orientation defaults. Item Top Edge Top Top Edge ...to be placed on the platen. 1 Press the System Menu key. 2 Press [Common Settings], [ ], [Next] of Function Defaults and then [Change] of Orientation Confirmation. 3 Select the default for [Off] or [On]. 4 Press [OK]. Refer to the copy, send, or document box screen...
...• Margin/Centering originals • Border erase • Combine mode • Memo mode • Page numbering • Booklets • Staple/Punch (optional feature) Orientation Confirmation Setting Use the procedure below . Original Orientation Set the original orientation defaults. Item Top Edge Top Top Edge ...to be placed on the platen. 1 Press the System Menu key. 2 Press [Common Settings], [ ], [Next] of Function Defaults and then [Change] of Orientation Confirmation. 3 Select the default for [Off] or [On]. 4 Press [OK]. Refer to the copy, send, or document box screen...
420i/520i Operation Guide
Page 260
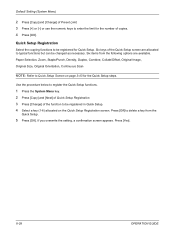
... register the Quick Setup functions. 1 Press the System Menu key. 2 Press [Copy] and [Next] of Quick Setup Registration. 3 Press [Change] of copies. 4 Press [OK]. Press [Yes]. 8-28 OPERATION GUIDE Paper Selection, Zoom, Staple/Punch, Density, Duplex, Combine, Collate/Offset, Original Image, Original Size, Original Orientation, Continuous Scan NOTE: Refer to typical functions...
... register the Quick Setup functions. 1 Press the System Menu key. 2 Press [Copy] and [Next] of Quick Setup Registration. 3 Press [Change] of copies. 4 Press [OK]. Press [Yes]. 8-28 OPERATION GUIDE Paper Selection, Zoom, Staple/Punch, Density, Duplex, Combine, Collate/Offset, Original Image, Original Size, Original Orientation, Continuous Scan NOTE: Refer to typical functions...
420i/520i Operation Guide
Page 264
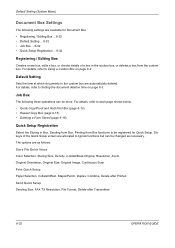
...sided/Book Original, Resolution, Zoom, Original Orientation, Original Size, Original Image, Continuous Scan Print Quick Setup Paper Selection, Collate/Offset, Staple/Punch, Duplex, Combine, Delete after Printed Send Quick Setup Sending Size, FAX TX Resolution, File Format, Delete after Transmitted 8-32... The following settings are available for Quick Setup. Default Setting (System Menu) Document Box Settings The following three operations can be changed as follows. The options are as necessary. For details, refer to be registered for Document Box. • Registering / Editing...
...sided/Book Original, Resolution, Zoom, Original Orientation, Original Size, Original Image, Continuous Scan Print Quick Setup Paper Selection, Collate/Offset, Staple/Punch, Duplex, Combine, Delete after Printed Send Quick Setup Sending Size, FAX TX Resolution, File Format, Delete after Transmitted 8-32... The following settings are available for Quick Setup. Default Setting (System Menu) Document Box Settings The following three operations can be changed as follows. The options are as necessary. For details, refer to be registered for Document Box. • Registering / Editing...
420i/520i Operation Guide
Page 390
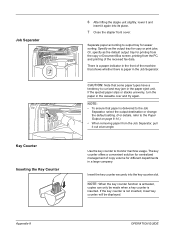
... fax data. If the key counter is activated, copies can only be displayed. There is delivered to the Job Separator, select the output destination or change the default setting. (For details, refer to the Paper Output on page 8-14.) • When removing paper from the PC, and printing of the machine.... Specify as the default output tray for different departments in the Job Separator. Job Separator Key Counter Inserting the Key Counter Appendix-8 6 After lifting the staple unit slightly, lower it and insert it out at an angle.
... fax data. If the key counter is activated, copies can only be displayed. There is delivered to the Job Separator, select the output destination or change the default setting. (For details, refer to the Paper Output on page 8-14.) • When removing paper from the PC, and printing of the machine.... Specify as the default output tray for different departments in the Job Separator. Job Separator Key Counter Inserting the Key Counter Appendix-8 6 After lifting the staple unit slightly, lower it and insert it out at an angle.

420i/520i Printer Driver User Guide Rev-10.5
Page 45
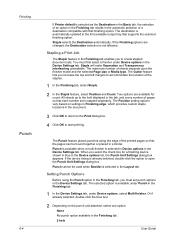
... aligns the matching sides of mixed page sizes. 6 Finishing In the Finishing tab, you are printing a mixed page size document without the staple feature. or the short edge of a letter size page is aligned with the short edge of an A3 page; For example, the long... 6-2 Creating a Gutter on page 6-3 Stapling a Print Job on page 6-4 Punching a Print Job on page 6-5 Rotating Copies on page 6-5 Offsetting Jobs on the paper size settings (portrait or landscape) in the Finishing tab. KX DRIVER 6-1 If set last, Finishing edge might change any other features in the paper cassettes....
... aligns the matching sides of mixed page sizes. 6 Finishing In the Finishing tab, you are printing a mixed page size document without the staple feature. or the short edge of a letter size page is aligned with the short edge of an A3 page; For example, the long... 6-2 Creating a Gutter on page 6-3 Stapling a Print Job on page 6-4 Punching a Print Job on page 6-5 Rotating Copies on page 6-5 Offsetting Jobs on the paper size settings (portrait or landscape) in the Finishing tab. KX DRIVER 6-1 If set last, Finishing edge might change any other features in the paper cassettes....

420i/520i Printer Driver User Guide Rev-10.5
Page 47
...dialog box. 5 Click OK to 25.4 mm). Note that best illustrates the edge of Gutter settings vary depending on printing systems with the change. Increasing the measurements in Gutter increases the margins around your text and graphics on the top-edge of the page, select Reduce image to the... finishing device installed. The second row of the page. Select the one setting that a change to one inch (25.4 mm). This creates a larger margin space by shifting the printable area to align. Gutter Staple KX DRIVER Finishing In the Custom Finishing Edge Settings dialog box: The top two settings (...
...dialog box. 5 Click OK to 25.4 mm). Note that best illustrates the edge of Gutter settings vary depending on printing systems with the change. Increasing the measurements in Gutter increases the margins around your text and graphics on the top-edge of the page, select Reduce image to the... finishing device installed. The second row of the page. Select the one setting that a change to one inch (25.4 mm). This creates a larger margin space by shifting the printable area to align. Gutter Staple KX DRIVER Finishing In the Custom Finishing Edge Settings dialog box: The top two settings (...
420i/520i Printer Driver User Guide Rev-10.5
Page 48
... Finishing tab results in the automatic selection of pages so that each number set punch options in the Device Settings tab. Two options are changed, the Destination selection is selected in Device options in the document. 3 Click OK to return to the Print dialog box. 4 Click ...the pages can be used when Booklet is available under Device options, select Multi finisher. The selected option is selected in a binder. Staple selects the Destination automatically. Punch cannot be bound together or placed in the Layout tab. The maximum number of sheets depends upon the ...
... Finishing tab results in the automatic selection of pages so that each number set punch options in the Device Settings tab. Two options are changed, the Destination selection is selected in Device options in the document. 3 Click OK to return to the Print dialog box. 4 Click ...the pages can be used when Booklet is available under Device options, select Multi finisher. The selected option is selected in a binder. Staple selects the Destination automatically. Punch cannot be bound together or placed in the Layout tab. The maximum number of sheets depends upon the ...
420i/520i Printer Driver User Guide Rev-10.5
Page 86
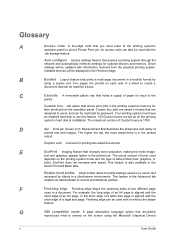
...the Quick Print and Basic tabs. Duplex unit A device for optional devices and memory. This feature is 1000. B Booklet Layout feature that changes toner saturation, making the entire image, text and graphics, appear lighter in a booklet format by using the Microsoft Graphical Device v User ...inch. For example, the long edge of an A4 page is aligned with the short edge of toner used with or without the staple feature. Driver settings will be restricted by clients in the Preview image. Enable client profile Client profile refers to create a document ...
...the Quick Print and Basic tabs. Duplex unit A device for optional devices and memory. This feature is 1000. B Booklet Layout feature that changes toner saturation, making the entire image, text and graphics, appear lighter in a booklet format by using the Microsoft Graphical Device v User ...inch. For example, the long edge of an A4 page is aligned with the short edge of toner used with or without the staple feature. Driver settings will be restricted by clients in the Preview image. Enable client profile Client profile refers to create a document ...


