
Instructional Manual
Page 1
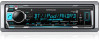
... to the model and serial numbers whenever you call upon your Kenwood dealer for information or service on the warranty card, and in the spaces designated on the product. KMM-BT518HD KMR-M318BT KMM-BT318U KMM-BT318 DIGITAL MEDIA RECEIVER INSTRUCTION MANUAL RÉCEPTEUR MULTIMÉDIA NUMÉRIQUE MODE D'EMPLOI RECEPTOR DE MEDIOS DIGITALES MANUAL DE INSTRUCCIONES...
... to the model and serial numbers whenever you call upon your Kenwood dealer for information or service on the warranty card, and in the spaces designated on the product. KMM-BT518HD KMR-M318BT KMM-BT318U KMM-BT318 DIGITAL MEDIA RECEIVER INSTRUCTION MANUAL RÉCEPTEUR MULTIMÉDIA NUMÉRIQUE MODE D'EMPLOI RECEPTOR DE MEDIOS DIGITALES MANUAL DE INSTRUCCIONES...

Instructional Manual
Page 6
...Replace it only with this product contains a coin/button cell battery. Remote control (RC-406): • Do not leave the remote control in danger of recorded data. • Never put or leave any part of . • English indications are used batteries... SiriusXM® Radio (for / / ) 14 BLUETOOTH® 17 AUDIO SETTINGS 24 DISPLAY SETTINGS 27 TROUBLESHOOTING 28 REFERENCES 30 Maintenance More information SPECIFICATIONS 33 INSTALLATION/ CONNECTION 34 2 ENGLISH BEFORE USE IMPORTANT • To ensure proper use, please read through this manual before playing digital...
...Replace it only with this product contains a coin/button cell battery. Remote control (RC-406): • Do not leave the remote control in danger of recorded data. • Never put or leave any part of . • English indications are used batteries... SiriusXM® Radio (for / / ) 14 BLUETOOTH® 17 AUDIO SETTINGS 24 DISPLAY SETTINGS 27 TROUBLESHOOTING 28 REFERENCES 30 Maintenance More information SPECIFICATIONS 33 INSTALLATION/ CONNECTION 34 2 ENGLISH BEFORE USE IMPORTANT • To ensure proper use, please read through this manual before playing digital...

Instructional Manual
Page 7
... when the unit enters searching status. How to reset Pull out the insulation sheet when using for ) connection is established. Press or • Press and hold SRC to turn on the power Press . • Press and hold to turn off the power. *1 Press and hold volume to replace the battery To On the faceplate On the remote control...
... when the unit enters searching status. How to reset Pull out the insulation sheet when using for ) connection is established. Press or • Press and hold SRC to turn on the power Press . • Press and hold to turn off the power. *1 Press and hold volume to replace the battery To On the faceplate On the remote control...

Instructional Manual
Page 9
... applicable. "REGISTERING" appears on how to the supplied instruction manual of the Kenwood Marine Remote Control unit for ) Applicable only when you connect Kenwood Marine Remote Control unit (KCA-RC55MR, optional accessory) to this ID is already registered. • [NO] indicates that this unit. • For connection, 37, Wiring connection. • Refer also to update the firmware, visit . ENGLISH 5
... applicable. "REGISTERING" appears on how to the supplied instruction manual of the Kenwood Marine Remote Control unit for ) Applicable only when you connect Kenwood Marine Remote Control unit (KCA-RC55MR, optional accessory) to this ID is already registered. • [NO] indicates that this unit. • For connection, 37, Wiring connection. • Refer also to update the firmware, visit . ENGLISH 5

Instructional Manual
Page 10
... service is received, it appears and remains on the display until the user performs the "Ignore" function. • Press (or press SRC on the remote control). Activate emergency alert message reception 1 Press the volume knob to enter [FUNCTION]. 2 Turn the volume knob to select [TUNER SETTING...stored in the Alert Message List, and you can tune in to both conventional and HD Radio broadcasts. • To find HD Radio stations in STANDBY, via HD Radio Broadcast. Direct Access Tuning (using the remote control) 1 Press DIRECT to enter Direct Access Tuning. 2 Press the number ...
... service is received, it appears and remains on the display until the user performs the "Ignore" function. • Press (or press SRC on the remote control). Activate emergency alert message reception 1 Press the volume knob to enter [FUNCTION]. 2 Turn the volume knob to select [TUNER SETTING...stored in the Alert Message List, and you can tune in to both conventional and HD Radio broadcasts. • To find HD Radio stations in STANDBY, via HD Radio Broadcast. Direct Access Tuning (using the remote control) 1 Press DIRECT to enter Direct Access Tuning. 2 Press the number ...

Instructional Manual
Page 11
...or press S / on the remote control). MANUAL : Manually search for a station. • To store a station: Press...Radio Broadcast Data System station time. ; CLOCK TIME SYNC ON: Synchronizes the unit's time to analog broadcast only. AUTO2 : Search for S / T: Press repeatedly. Direct Access Tuning (using...RESET] to [YES]. ( 5) Other settings 1 Press the volume knob to enter [FUNCTION]. 2 Turn the volume knob to select an item (see the following table), then press the knob. 3 Repeat step 2 until the desired item is selected for [PRESET TYPE]. ( 4) RECEIVE MODE Sets the receive mode...
...or press S / on the remote control). MANUAL : Manually search for a station. • To store a station: Press...Radio Broadcast Data System station time. ; CLOCK TIME SYNC ON: Synchronizes the unit's time to analog broadcast only. AUTO2 : Search for S / T: Press repeatedly. Direct Access Tuning (using...RESET] to [YES]. ( 5) Other settings 1 Press the volume knob to enter [FUNCTION]. 2 Turn the volume knob to select an item (see the following table), then press the knob. 3 Repeat step 2 until the desired item is selected for [PRESET TYPE]. ( 4) RECEIVE MODE Sets the receive mode...

Instructional Manual
Page 12
... specific region using the "AF" control. ; OFF: Cancels. OFF: Cancels. OFF: Cancels. It will be lost. ; RADIO (for / / ) Other settings 1 Press the volume knob to enter [FUNCTION]. 2 Turn the volume knob to select an item (see the following table), then press the knob. 3 Repeat step 2 until the desired item is selected/activated or follow the instructions...
... specific region using the "AF" control. ; OFF: Cancels. OFF: Cancels. OFF: Cancels. It will be lost. ; RADIO (for / / ) Other settings 1 Press the volume knob to enter [FUNCTION]. 2 Turn the volume knob to select an item (see the following table), then press the knob. 3 Repeat step 2 until the desired item is selected/activated or follow the instructions...

Instructional Manual
Page 13
...not work for iPod/ANDROID. *6 For iPod/ANDROID: Applicable only when [MODE OFF]/[BROWSE MODE] is shown. USB input terminal USB CA-U1EX (max.: 500 mA) (optional accessory) iPod/iPhone : You can also install the latest version of the unit. Selectable source: • : USB ... 30-pin type, KCA-iP103 : Lightning type *2 Do not leave the cable inside the car when not using. *3 When connecting an Android device, "Press [VIEW] to install the application. Press S / . Press repeatedly. Follow the instructions to install KENWOOD MUSIC PLAY APP" is selected. ( 10) *7 Only for MP3/WMA...
...not work for iPod/ANDROID. *6 For iPod/ANDROID: Applicable only when [MODE OFF]/[BROWSE MODE] is shown. USB input terminal USB CA-U1EX (max.: 500 mA) (optional accessory) iPod/iPhone : You can also install the latest version of the unit. Selectable source: • : USB ... 30-pin type, KCA-iP103 : Lightning type *2 Do not leave the cable inside the car when not using. *3 When connecting an Android device, "Press [VIEW] to install the application. Press S / . Press repeatedly. Follow the instructions to install KENWOOD MUSIC PLAY APP" is selected. ( 10) *7 Only for MP3/WMA...

Instructional Manual
Page 14
...for BT AUDIO source.) • To return to the first character. However, you can search through the list quickly. Turn the ...Turn the volume knob to select the character. ^A^: Upper case letters (A to Z) _A_: Lower case letters (a to z) -0-: Numbers (0 to 9) ***: Character other media player applications installed in the Android device. HAND MODE : Control Android device using the iPod itself via KENWOOD MUSIC PLAY application installed...MODE : Control Android device from these applications. Listen to TuneIn Radio/TuneIn Radio Pro/Aupeo While listening to TuneIn Radio, TuneIn Radio ...
...for BT AUDIO source.) • To return to the first character. However, you can search through the list quickly. Turn the ...Turn the volume knob to select the character. ^A^: Upper case letters (A to Z) _A_: Lower case letters (a to z) -0-: Numbers (0 to 9) ***: Character other media player applications installed in the Android device. HAND MODE : Control Android device using the iPod itself via KENWOOD MUSIC PLAY application installed...MODE : Control Android device from these applications. Listen to TuneIn Radio/TuneIn Radio Pro/Aupeo While listening to TuneIn Radio, TuneIn Radio ...

Instructional Manual
Page 20
...LEVEL BUFFER USAGE SXM RESET Default: XX To unlock settings: 1 Turn the volume knob to select a number. 2 Press S / T to move to the entry position. 3 Repeat steps 1 and 2 to enter the current pass code. (Initial pass code is selected/ activated or follow the instructions stated on each of... settings for Replay buffer. OFF: Cancels. 1 Turn the volume knob to select a category, then press the knob. 2 Turn the volume knob to select a stored channel. SiriusXM® Radio (for / / When you select a SmartFavorite channel, you can get a short preview of the songs that supports ...
...LEVEL BUFFER USAGE SXM RESET Default: XX To unlock settings: 1 Turn the volume knob to select a number. 2 Press S / T to move to the entry position. 3 Repeat steps 1 and 2 to enter the current pass code. (Initial pass code is selected/ activated or follow the instructions stated on each of... settings for Replay buffer. OFF: Cancels. 1 Turn the volume knob to select a category, then press the knob. 2 Turn the volume knob to select a stored channel. SiriusXM® Radio (for / / When you select a SmartFavorite channel, you can get a short preview of the songs that supports ...

Instructional Manual
Page 21
... selected. ( 10) ENGLISH 17 Secure using cord clamps Press the volume knob to start pairing. Sub Band Codec (SBC) - Advanced Audio Distribution Profile (A2DP) - Phonebook Access Profile (PBAP) Supported Bluetooth codecs - Connection Supported Bluetooth profiles - Once pairing is completed, Bluetooth connection is set to [ON]. ( 21) : Connect to the instruction manual of two Bluetooth phones and one...
... selected. ( 10) ENGLISH 17 Secure using cord clamps Press the volume knob to start pairing. Sub Band Codec (SBC) - Advanced Audio Distribution Profile (A2DP) - Phonebook Access Profile (PBAP) Supported Bluetooth codecs - Connection Supported Bluetooth profiles - Once pairing is completed, Bluetooth connection is set to [ON]. ( 21) : Connect to the instruction manual of two Bluetooth phones and one...

Instructional Manual
Page 24
...mode (if the phonebook contains many contacts). NO SIGNAL/LOW/MID/MAX*: Shows the strength of the current received signal. * Functionality depends on the type of the battery. "(Second device name)" appears. 2 Turn... the volume knob to select an item (see the following table), then press the knob. 3 Repeat step 2 until you want to call or the voice command to control the phone functions. ( 21, Make a call using... HISTORY (Applicable only if the phone supports PBAP.) 1 Press the volume knob ... the instructions stated on the lower part of...
...mode (if the phonebook contains many contacts). NO SIGNAL/LOW/MID/MAX*: Shows the strength of the current received signal. * Functionality depends on the type of the battery. "(Second device name)" appears. 2 Turn... the volume knob to select an item (see the following table), then press the knob. 3 Repeat step 2 until you want to call or the voice command to control the phone functions. ( 21, Make a call using... HISTORY (Applicable only if the phone supports PBAP.) 1 Press the volume knob ... the instructions stated on the lower part of...

Instructional Manual
Page 25
... Selects the phone or audio device to confirm. ON: The unit automatically reconnect when the last connected Bluetooth device is stored. Settings in memory Store a contact in step 2 and store a blank number. OFF: Cancels. Changes the PIN code (up to 6 contacts into the number buttons (1 to 6). 1 Press to enter Bluetooth mode. 2 Turn the volume knob...
... Selects the phone or audio device to confirm. ON: The unit automatically reconnect when the last connected Bluetooth device is stored. Settings in memory Store a contact in step 2 and store a blank number. OFF: Cancels. Changes the PIN code (up to 6 contacts into the number buttons (1 to 6). 1 Press to enter Bluetooth mode. 2 Turn the volume knob...
Instructional Manual
Page 32
... a limited number of the speaker wires are not displayed (e.g. If this does not solve the problem, reset the USB device or use too many hierarchical levels or folders. Turn the power off , then turn on. • Information shown on the display language you enter search mode by how the tracks are in [HAND MODE], relaunch the current media player...
... a limited number of the speaker wires are not displayed (e.g. If this does not solve the problem, reset the USB device or use too many hierarchical levels or folders. Turn the power off , then turn on. • Information shown on the display language you enter search mode by how the tracks are in [HAND MODE], relaunch the current media player...

Instructional Manual
Page 33
... Radio Symptom "CH LOCKED LOCK CODE?" ...updated. Registration of iHeartRADIO, custom stations become unavailable. If "Explicit Content" in [Account Settings] is impossible. The number of thumbs up /thumbs down has failed due to start TuneScan. Communication is locked. Make sure you have entered the correct pass code. ( 16) There is not deliverable. TROUBLESHOOTING...CODE ERROR" "NO CONTENT" "SCAN CANCEL" No Bluetooth device is mounted...problem, the connected Android device does not support [BROWSE MODE]. ( 31) Turn off the power saving mode on your device. or 1-...
... Radio Symptom "CH LOCKED LOCK CODE?" ...updated. Registration of iHeartRADIO, custom stations become unavailable. If "Explicit Content" in [Account Settings] is impossible. The number of thumbs up /thumbs down has failed due to start TuneScan. Communication is locked. Make sure you have entered the correct pass code. ( 16) There is not deliverable. TROUBLESHOOTING...CODE ERROR" "NO CONTENT" "SCAN CANCEL" No Bluetooth device is mounted...problem, the connected Android device does not support [BROWSE MODE]. ( 31) Turn off the power saving mode on your device. or 1-...

Instructional Manual
Page 34
... careful not to the unit. TROUBLESHOOTING Symptom Remedy Echo or noise is heard during playback of a Bluetooth audio player. • Reduce the distance between the unit and the Bluetooth device. • Move the car to the instructions of your nearest service center. If "ERROR" appears again, check if the device supports the function you speak the...
... careful not to the unit. TROUBLESHOOTING Symptom Remedy Echo or noise is heard during playback of a Bluetooth audio player. • Reduce the distance between the unit and the Bluetooth device. • Move the car to the instructions of your nearest service center. If "ERROR" appears again, check if the device supports the function you speak the...

Instructional Manual
Page 38
... car audio dealer. • Install this unit in the console of less than 30º. • If your vehicle wiring harness does not have the ignition terminal, connect Ignition wire (red) to the car chassis or Ground wire (black), or connect them in -dash mounting). ( 35) 4 Connect the [ terminal of the car battery. 2 Connect the wires properly. Metal parts such...
... car audio dealer. • Install this unit in the console of less than 30º. • If your vehicle wiring harness does not have the ignition terminal, connect Ignition wire (red) to the car chassis or Ground wire (black), or connect them in -dash mounting). ( 35) 4 Connect the [ terminal of the car battery. 2 Connect the wires properly. Metal parts such...

Instructional Manual
Page 39
... might damage the unit. Use only the specified screws. When installing without the mounting sleeve 1 Remove the mounting sleeve and trim plate from the unit. 2 Align the holes in the unit (on ...How to hold the mounting sleeve firmly in place. INSTALLATION/CONNECTION Installing the unit (in-dash mounting) Do the required wiring. ( 36, 37) Hook on both sides) with the vehicle mounting bracket and secure the unit with screws (supplied/commercially available). For / / Part list for installation (A) Faceplate (B) Trim plate (C) Mounting sleeve (D) Wiring harness (E) Extraction key For...
... might damage the unit. Use only the specified screws. When installing without the mounting sleeve 1 Remove the mounting sleeve and trim plate from the unit. 2 Align the holes in the unit (on ...How to hold the mounting sleeve firmly in place. INSTALLATION/CONNECTION Installing the unit (in-dash mounting) Do the required wiring. ( 36, 37) Hook on both sides) with the vehicle mounting bracket and secure the unit with screws (supplied/commercially available). For / / Part list for installation (A) Faceplate (B) Trim plate (C) Mounting sleeve (D) Wiring harness (E) Extraction key For...

Instructional Manual
Page 40
... fuse box Red (Ignition wire) Car fuse box Battery 36 ENGLISH Yellow (Battery wire) Black (Ground wire) To the metallic body or chassis of the car USB cable ...using the optional power amplifier or to the antenna control terminal in the vehicle Light blue/yellow (Steering remote control wire) To the steering wheel remote control adapter Brown (Mute control wire) To connect the Kenwood navigation system, refer your car audio dealer. INSTALLATION/CONNECTION Wiring connection (for ) IMPORTANT : We recommend installing the unit with a commercially available custom wiring harness specific...
... fuse box Red (Ignition wire) Car fuse box Battery 36 ENGLISH Yellow (Battery wire) Black (Ground wire) To the metallic body or chassis of the car USB cable ...using the optional power amplifier or to the antenna control terminal in the vehicle Light blue/yellow (Steering remote control wire) To the steering wheel remote control adapter Brown (Mute control wire) To connect the Kenwood navigation system, refer your car audio dealer. INSTALLATION/CONNECTION Wiring connection (for ) IMPORTANT : We recommend installing the unit with a commercially available custom wiring harness specific...

Instructional Manual
Page 41
... Tuner (commercially available) ( 14) (For ) Microphone input jack ( 17) If no connections are made, do not let the wire come out from the tab. Brown (Mute control wire) To connect the Kenwood navigation system, refer your car audio dealer. INSTALLATION/CONNECTION Wiring connection (for / IMPORTANT : We recommend installing the unit with a commercially available custom wiring harness specific for your safety.
... Tuner (commercially available) ( 14) (For ) Microphone input jack ( 17) If no connections are made, do not let the wire come out from the tab. Brown (Mute control wire) To connect the Kenwood navigation system, refer your car audio dealer. INSTALLATION/CONNECTION Wiring connection (for / IMPORTANT : We recommend installing the unit with a commercially available custom wiring harness specific for your safety.


