other
Page 1
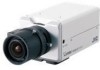
... have not been evaluated by UL to be found on V.NETWORKS B download page) Operating Environment Recommended Computer Specifications OS CPU VN-V25U/VN-V26U VN-X35U Memory capacity Free hard disk space Display and video card VN-V25U/VN-V26U VN-X35U Web browser : Windows XP (Professional or Home Edition)(SP2)... or repairs to NTSC or PAL 2 Reboot the camera by JVC. The appliance may result in fire, electric shock, or other rules in your national legislation. READ ME FIRST IP CAMERA VN-V25U/VN-V26U MEGAPIXEL IP CAMERA VN-X35U LST0744-001B Thank you for purchasing this appliance, ask...
... have not been evaluated by UL to be found on V.NETWORKS B download page) Operating Environment Recommended Computer Specifications OS CPU VN-V25U/VN-V26U VN-X35U Memory capacity Free hard disk space Display and video card VN-V25U/VN-V26U VN-X35U Web browser : Windows XP (Professional or Home Edition)(SP2)... or repairs to NTSC or PAL 2 Reboot the camera by JVC. The appliance may result in fire, electric shock, or other rules in your national legislation. READ ME FIRST IP CAMERA VN-V25U/VN-V26U MEGAPIXEL IP CAMERA VN-X35U LST0744-001B Thank you for purchasing this appliance, ask...
other
Page 2
... Configure the Internet Explorer settings in the sequence of [Settings]-[Control Panel]-[Network and Sharing Center]-[Manage network connections]. 2 The computer on VN-X35U, you can monitor JPEG and MPEG4 images and audio (VN-V26U/VN-X35U only). Windows Vista: ● Select in order to the camera. B Specify the [IP address]. (For example, use of the Built-in...
... Configure the Internet Explorer settings in the sequence of [Settings]-[Control Panel]-[Network and Sharing Center]-[Manage network connections]. 2 The computer on VN-X35U, you can monitor JPEG and MPEG4 images and audio (VN-V26U/VN-X35U only). Windows Vista: ● Select in order to the camera. B Specify the [IP address]. (For example, use of the Built-in...

Instruction Manual
Page 1
IP CAMERA VN-V25U VN-V26U VN-X35U VN-V225U series VN-X235U series INSTRUCTIONS (Setting) Thank you for purchasing this unit, please read the instructions carefully to ensure the best possible performance. LST0886-001A Before operating this JVC product.
IP CAMERA VN-V25U VN-V26U VN-X35U VN-V225U series VN-X235U series INSTRUCTIONS (Setting) Thank you for purchasing this unit, please read the instructions carefully to ensure the best possible performance. LST0886-001A Before operating this JVC product.
Instruction Manual
Page 2
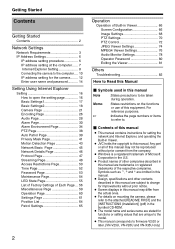
...on mounting the camera, please refer to the attached [READ ME FIRST] and the [INSTRUCTIONS (Installation)] (pdf) in this manual are unique to the model. ● This manual corresponds to firmware V2.00 or later. (VN-V25U, VN-V26U and VN-X35U only) 2 ... items to refer to. Ⅵ Contents of this manual ● This manual contains instructions for setting the network and Internet Explorer, and operating the Built-in this manual Note :States precautions to be reproduced without prior consent... this Manual Ⅵ Symbols used in Viewer. ● JVC holds the copyright to this manual.
...on mounting the camera, please refer to the attached [READ ME FIRST] and the [INSTRUCTIONS (Installation)] (pdf) in this manual are unique to the model. ● This manual corresponds to firmware V2.00 or later. (VN-V25U, VN-V26U and VN-X35U only) 2 ... items to refer to. Ⅵ Contents of this manual ● This manual contains instructions for setting the network and Internet Explorer, and operating the Built-in this manual Note :States precautions to be reproduced without prior consent... this Manual Ⅵ Symbols used in Viewer. ● JVC holds the copyright to this manual.

Instruction Manual
Page 3
... 3 KB to 33 KB Ⅵ VFS(Variable File Size) (TX) is applicable to VN-X series only. If the entire bandwidth is used by the multicast stream, control of this camera via the network may fail. ● Data volume to be easily forecasted. Bit Rate of JPEG Stream The...under the CBR system, but forecast of the bit rate is difficult. Network Settings Network Requirements ● Ensure that the target file size is the average size of multiple JPEG images. Ⅵ AFS (Average File Size) (TX) is applicable to VN-X series only. Selectable Range for 2 Picture 3 Quality 4 (Medium...
... 3 KB to 33 KB Ⅵ VFS(Variable File Size) (TX) is applicable to VN-X series only. If the entire bandwidth is used by the multicast stream, control of this camera via the network may fail. ● Data volume to be easily forecasted. Bit Rate of JPEG Stream The...under the CBR system, but forecast of the bit rate is difficult. Network Settings Network Requirements ● Ensure that the target file size is the average size of multiple JPEG images. Ⅵ AFS (Average File Size) (TX) is applicable to VN-X series only. Selectable Range for 2 Picture 3 Quality 4 (Medium...

Instruction Manual
Page 4
... highest bit rate within the distribution streams. For "Client number Priority" mode, if there are distributed at the frame rate requested by camera (Example) When camera sends out 2 audio streams and receives 1 audio stream, data volume will be received. For JPEG distribution, you can accept 20 distribution... 4 below 20 Mbps 10 Mbps and 2 below 10 Mbps 20 Mbps 3 to 4 5 Mbps 20 Mbps 5 to 20 1 Mbps 20 Mbps Network Settings Network Requirements (continued) Bit Rate of Audio Only 1 audio data stream can be reduced such that the distribution bit rate to each client is less than...
... highest bit rate within the distribution streams. For "Client number Priority" mode, if there are distributed at the frame rate requested by camera (Example) When camera sends out 2 audio streams and receives 1 audio stream, data volume will be received. For JPEG distribution, you can accept 20 distribution... 4 below 20 Mbps 10 Mbps and 2 below 10 Mbps 20 Mbps 3 to 4 5 Mbps 20 Mbps 5 to 20 1 Mbps 20 Mbps Network Settings Network Requirements (continued) Bit Rate of Audio Only 1 audio data stream can be reduced such that the distribution bit rate to each client is less than...

Instruction Manual
Page 5
... 10 Mbps 5 to be installed. Audio may be interrupted. Protocol/Port No. Sending alarm 5 Network Delay When the client acquires JPEG via multicast. When there is determined by receiving data via TCP, camera will drop. In the case of distributions bit rate 2 and below . Purpose of Use Source... maximum of MPEG4, noise interference may occur and playback may be interrupted. Network Jitter When there is received, and therefore the frame rate will send out data while checking the ACK from camera, the image frame rate may drop. Audio may fail. List of MPEG4...
... 10 Mbps 5 to be installed. Audio may be interrupted. Protocol/Port No. Sending alarm 5 Network Delay When the client acquires JPEG via multicast. When there is determined by receiving data via TCP, camera will drop. In the case of distributions bit rate 2 and below . Purpose of Use Source... maximum of MPEG4, noise interference may occur and playback may be interrupted. Network Jitter When there is received, and therefore the frame rate will send out data while checking the ACK from camera, the image frame rate may drop. Audio may fail. List of MPEG4...

Instruction Manual
Page 6
....255.255.0 Default gateway : None Memo: ● To set a static IP address for the camera, connect the camera, the switching hub and the computer for setting using a network that enables communication with the following IP address after startup. Step1 IP address setting at factory default is... Explorer Setting (APage 8) Configure the Internet Explorer settings in order to the computer (APage 10) Connect the computer and the camera. Network Settings IP Address Settings IP address setting procedure Follow the procedure below to ADHCP DisableB or ADHCP EnableB. ⅷ Set up of only...
....255.255.0 Default gateway : None Memo: ● To set a static IP address for the camera, connect the camera, the switching hub and the computer for setting using a network that enables communication with the following IP address after startup. Step1 IP address setting at factory default is... Explorer Setting (APage 8) Configure the Internet Explorer settings in order to the computer (APage 10) Connect the computer and the camera. Network Settings IP Address Settings IP address setting procedure Follow the procedure below to ADHCP DisableB or ADHCP EnableB. ⅷ Set up of only...

Instruction Manual
Page 7
... make use 192.168.0.100) Memo: Make sure that is launched automatically selects the connected network ● Right-click and select [Properties]. ● Check to ensure that enables communication with the camera. The computer on the ALocal Area Connection PropertiesB screen 7 B Specify the [IP address]....Mask] to a value that you have any queries. (Use 255.255.255.0 when the camera is in this item are selected. Click [OK] on which Internet Explorer is appropriate for Microsoft Networks] and [Internet Protocol(TCP/IP)] check boxes are intended for Windows XP users. 1. ...
... make use 192.168.0.100) Memo: Make sure that is launched automatically selects the connected network ● Right-click and select [Properties]. ● Check to ensure that enables communication with the camera. The computer on the ALocal Area Connection PropertiesB screen 7 B Specify the [IP address]....Mask] to a value that you have any queries. (Use 255.255.255.0 when the camera is in this item are selected. Click [OK] on which Internet Explorer is appropriate for Microsoft Networks] and [Internet Protocol(TCP/IP)] check boxes are intended for Windows XP users. 1. ...

Instruction Manual
Page 9
... the Internet Explorer is set the pop-up block to AdisableB. ● Selecting [Tool]-[Pop-up Blocker]-[Turn Off Pop-up block function of camera as well 9 In the opened window to open the [Security Settings] window. Follow the steps below to AEnableB. When plug-in tools such as... camera, select [Tool]-[Pop-up Blocker]-[Turn On Pop-up Blocker], followed by selecting [Tool]-[Pop-up Blocker]-[Pop-up Blocker Settings] window. Set all sites...
... the Internet Explorer is set the pop-up block to AdisableB. ● Selecting [Tool]-[Pop-up Blocker]-[Turn Off Pop-up block function of camera as well 9 In the opened window to open the [Security Settings] window. Follow the steps below to AEnableB. When plug-in tools such as... camera, select [Tool]-[Pop-up Blocker]-[Turn On Pop-up Blocker], followed by selecting [Tool]-[Pop-up Blocker]-[Pop-up Blocker Settings] window. Set all sites...

Instruction Manual
Page 10
...the CD-ROM supplied with this case, change the proxy settings of the Internet Explorer. Ⅵ When the IP address of the camera is unknown IP address settings cannot be able to AadminB by default. In this product. 2. You can use the following IP address ... method to identify the IP address. ● Search for access to AjvcB by default. http://192.168.0.2 B Click [Go]. Network Settings IP Address Settings (continued) Connecting the camera to proceed. 10 ROM. T For details on [Search tool], please refer to the AReadmeB file in the LAN using [Search tool...
...the CD-ROM supplied with this case, change the proxy settings of the Internet Explorer. Ⅵ When the IP address of the camera is unknown IP address settings cannot be able to AadminB by default. In this product. 2. You can use the following IP address ... method to identify the IP address. ● Search for access to AjvcB by default. http://192.168.0.2 B Click [Go]. Network Settings IP Address Settings (continued) Connecting the camera to proceed. 10 ROM. T For details on [Search tool], please refer to the AReadmeB file in the LAN using [Search tool...

Instruction Manual
Page 11
The operator password entry screen appears A B A Enter the password (default is AjvcB) of camera is stored on the computer. B Click [OK]. Proceed to configure the IP address setting for the camera. (A Page 12) 11 3. Built-in Viewer of AoperatorB authority. Memo: ● The operator password entry screen does not appear if the password is displayed 4.
The operator password entry screen appears A B A Enter the password (default is AjvcB) of camera is stored on the computer. B Click [OK]. Proceed to configure the IP address setting for the camera. (A Page 12) 11 3. Built-in Viewer of AoperatorB authority. Memo: ● The operator password entry screen does not appear if the password is displayed 4.

Instruction Manual
Page 12
...value in the [IP Address], [Subnet Mask] and [Default Gateway] fields. B Select the [Time Zone]. Network Settings IP Address Settings (continued) IP address setting for the camera 1 Click [Details] of the camera to ADHCP EnableB, and click the [OK] button. Connection may fail if the above setting is Disabled). For... the DHCP server. Note: ● Set the DHCP server such that the same IP address is always assigned to the camera, consult your network administrator. Enter the values you wish to specify in the [IP Address], [Subnet Mask] and [Default Gateway] fields. ● When ...
...value in the [IP Address], [Subnet Mask] and [Default Gateway] fields. B Select the [Time Zone]. Network Settings IP Address Settings (continued) IP address setting for the camera 1 Click [Details] of the camera to ADHCP EnableB, and click the [OK] button. Connection may fail if the above setting is Disabled). For... the DHCP server. Note: ● Set the DHCP server such that the same IP address is always assigned to the camera, consult your network administrator. Enter the values you wish to specify in the [IP Address], [Subnet Mask] and [Default Gateway] fields. ● When ...

Instruction Manual
Page 13
... [Normal size (96DPI)] and reboot windows 13 To enable access to camera from the connected computer may fail when the IP address of the opened screen appears strange, check using the new IP address. A Click [Start]-[Control ... the [Time Zone]. C Click [OK]. 3 A confirmation screen appears Click [OK]. Memo: ● Access from the same computer, alter the IP address at the computer accordingly. Camera restarts using the following procedures.
... [Normal size (96DPI)] and reboot windows 13 To enable access to camera from the connected computer may fail when the IP address of the opened screen appears strange, check using the new IP address. A Click [Start]-[Control ... the [Time Zone]. C Click [OK]. 3 A confirmation screen appears Click [OK]. Memo: ● Access from the same computer, alter the IP address at the computer accordingly. Camera restarts using the following procedures.
Instruction Manual
Page 14
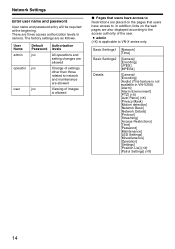
The factory settings are three access authorization levels to camera. User Name admin operator user Default Password jvc jvc jvc Authorization levels All operations and setting changes are allowed Change of images is ...be required at the beginning. Basic Settings1 Basic Settings2 Details [Network] [Time] [Camera] [Encoding] [JPEG] [MPEG4] [Camera] [Encoding] [Audio] (This feature is not available in VN-V25U) [Alarm] [Alarm Environment] [PTZ] (TX) [Auto Patrol] (TX) [Privacy Mask] [Motion detection] [Network Basic] [Network Details] [Protocol] [Streaming] [Access Restrictions] [Time]...
The factory settings are three access authorization levels to camera. User Name admin operator user Default Password jvc jvc jvc Authorization levels All operations and setting changes are allowed Change of images is ...be required at the beginning. Basic Settings1 Basic Settings2 Details [Network] [Time] [Camera] [Encoding] [JPEG] [MPEG4] [Camera] [Encoding] [Audio] (This feature is not available in VN-V25U) [Alarm] [Alarm Environment] [PTZ] (TX) [Auto Patrol] (TX) [Privacy Mask] [Motion detection] [Network Basic] [Network Details] [Protocol] [Streaming] [Access Restrictions] [Time]...

Instruction Manual
Page 15
Press the [Yes] button to the factory settings. 15 Otherwise, changes may not be saved, and camera may be displayed, change the Internet Explorer settings as follows. ● Open [Tool]-[Internet Options]-[Security] and select the [Trusted sites] ... after the settings are changed. If you do not want this warning screen to VN-X series only. Basic Settings2 [Camera] [Encoding] [JPEG] [MPEG4] Details ● user [Camera] [Encoding] [Audio] (This feature is not available in VN-V25U) [Alarm] [Alarm Environment] [PTZ] (TX) [Auto Patrol] (TX) [Privacy Mask] [Motion detection] [Streaming] ...
Press the [Yes] button to the factory settings. 15 Otherwise, changes may not be saved, and camera may be displayed, change the Internet Explorer settings as follows. ● Open [Tool]-[Internet Options]-[Security] and select the [Trusted sites] ... after the settings are changed. If you do not want this warning screen to VN-X series only. Basic Settings2 [Camera] [Encoding] [JPEG] [MPEG4] Details ● user [Camera] [Encoding] [Audio] (This feature is not available in VN-V25U) [Alarm] [Alarm Environment] [PTZ] (TX) [Auto Patrol] (TX) [Privacy Mask] [Motion detection] [Streaming] ...

Instruction Manual
Page 16
Click [Details]. ● [Basic Settings1] page will be opened if accessed by user name AadminB. (A Page 17) ● [Basic Settings2] page will be opened if accessed by user name AuserB. (A Page 59) 16 Click 2. Enter IP address of camera in the address bar of Internet Explorer (A Page 10) A unified viewer is opened if accessed by user name AoperatorB. (A Page 18) ● [Miscellaneous] page will be opened . Setting Using Internet Explorer Setting How to open the setting page 1.
Click [Details]. ● [Basic Settings1] page will be opened if accessed by user name AadminB. (A Page 17) ● [Basic Settings2] page will be opened if accessed by user name AuserB. (A Page 59) 16 Click 2. Enter IP address of camera in the address bar of Internet Explorer (A Page 10) A unified viewer is opened if accessed by user name AoperatorB. (A Page 18) ● [Miscellaneous] page will be opened . Setting Using Internet Explorer Setting How to open the setting page 1.

Instruction Manual
Page 17
...address of Internet Explorer. ● Enter the model name in lowercase letters. For setting the subnet mask of camera. Displays the clock time of the computer on camera. 17 For setting the time zone. Network A IP Setting B IP Address C Subnet Mask D Default Gateway Time E Time F Time Zone G ...to be used during access using AadminB. ● Click [Basic Settings1]. ● Press the [OK] button to set a default gateway. Connect camera to a network environment with the 192.168.0.2 IP address and 255.255.255.0 subnet mask in about 2 minutes after changing the time. Click the [Set] ...
...address of Internet Explorer. ● Enter the model name in lowercase letters. For setting the subnet mask of camera. Displays the clock time of the computer on camera. 17 For setting the time zone. Network A IP Setting B IP Address C Subnet Mask D Default Gateway Time E Time F Time Zone G ...to be used during access using AadminB. ● Click [Basic Settings1]. ● Press the [OK] button to set a default gateway. Connect camera to a network environment with the 192.168.0.2 IP address and 255.255.255.0 subnet mask in about 2 minutes after changing the time. Click the [Set] ...

Instruction Manual
Page 19
... QVGA VGA JPEG only 3 VGA QVGA MPEG4 only 4 VGA VGA JPEG/MPEG4 Ⅵ Combination of distribution sizes and available features of the camera. (A Page 21) LCD1,LCD2 : Picture quality setting for selection according to the user's preference. For selecting the monitor type according to ...four (TV) or eight (TX) different patterns. Refer to display the video images. (TV) is applicable to VN-V series only. (TX) is displayed in white on viewer. 19 A Camera ID B Monitor Type C Encoding Character strings entered here will be written to the JPEG comment segment (item name...
... QVGA VGA JPEG only 3 VGA QVGA MPEG4 only 4 VGA VGA JPEG/MPEG4 Ⅵ Combination of distribution sizes and available features of the camera. (A Page 21) LCD1,LCD2 : Picture quality setting for selection according to the user's preference. For selecting the monitor type according to ...four (TV) or eight (TX) different patterns. Refer to display the video images. (TV) is applicable to VN-V series only. (TX) is displayed in white on viewer. 19 A Camera ID B Monitor Type C Encoding Character strings entered here will be written to the JPEG comment segment (item name...

Instruction Manual
Page 21
...restore the settings of this page to enable the new settings. ● If the [OK] button is for setting the camera's parameters. Click A B C D E F G H I J K L M N O 21 Camera Page This page is pressed upon entering an invalid value, a warning message will appear and the entry will be denied. ...This page can be used during access using AadminB or AoperatorB. ● Click [Advanced Settings] to display setting menu. ● Click [Camera]. ● Press the [OK] button to the factory settings, press [Initialize] button. Press the [Cancel] button to restore the invalid entry to...
...restore the settings of this page to enable the new settings. ● If the [OK] button is for setting the camera's parameters. Click A B C D E F G H I J K L M N O 21 Camera Page This page is pressed upon entering an invalid value, a warning message will appear and the entry will be denied. ...This page can be used during access using AadminB or AoperatorB. ● Click [Advanced Settings] to display setting menu. ● Click [Camera]. ● Press the [OK] button to the factory settings, press [Initialize] button. Press the [Cancel] button to restore the invalid entry to...


