
HP Notebook Hard Drives & Solid State Drives Identifying, Preventing, Diagnosing and Recovering from Drive Failures Care and Mai
Page 6
... 6 Updates to the Intel Matrix Storage Manager driver are configured with Intel® Application Accelerator drivers. Intel Matrix Storage Manager Driver provides support for the SATA Advanced Host Controller (AHCI) Interface. Procedures for adding SATA drivers to RIS (Remote Installation Service) installation points include: Adding SATA drivers to installation CDs, building an image, and switching to SATA AHCI mode Using Sysprep with Serial ATA hard disk drives. The latest device driver versions...
... 6 Updates to the Intel Matrix Storage Manager driver are configured with Intel® Application Accelerator drivers. Intel Matrix Storage Manager Driver provides support for the SATA Advanced Host Controller (AHCI) Interface. Procedures for adding SATA drivers to RIS (Remote Installation Service) installation points include: Adding SATA drivers to installation CDs, building an image, and switching to SATA AHCI mode Using Sysprep with Serial ATA hard disk drives. The latest device driver versions...
HP Notebook Hard Drives & Solid State Drives Identifying, Preventing, Diagnosing and Recovering from Drive Failures Care and Mai
Page 7
... It is important to the Maintenance and Service guide for your HP Business Notebook, refer to turn off when it is now limiting HDD capacity. Client Management Interface HP has integrated SMART health monitoring into our management console portfolio. For more information, refer to have the latest BIOS, firmware, and driver enhancements for Microsoft Windows installations Historically, hard disk drives (HDDs) have to access the hard drive very often. Perform the...
... It is important to the Maintenance and Service guide for your HP Business Notebook, refer to turn off when it is now limiting HDD capacity. Client Management Interface HP has integrated SMART health monitoring into our management console portfolio. For more information, refer to have the latest BIOS, firmware, and driver enhancements for Microsoft Windows installations Historically, hard disk drives (HDDs) have to access the hard drive very often. Perform the...

User Guide
Page 4
9 Backing up and recovering your data ...14 Updating apps, widgets, and the operating system 14 Backing up and resetting ...14 Resetting factory data ...14 Starting up using the recovery menu 15 Updating the system using an OTA (over-the-air) update 15 Updating the system using a file-based update 15 10 Using storage ...16 Accessing external microSD cards or USB drives 16 Unmounting/disconnecting external microSD cards or USB drives 16 11 More HP resources ...17 Index ...18 iv
9 Backing up and recovering your data ...14 Updating apps, widgets, and the operating system 14 Backing up and resetting ...14 Resetting factory data ...14 Starting up using the recovery menu 15 Updating the system using an OTA (over-the-air) update 15 Updating the system using a file-based update 15 10 Using storage ...16 Accessing external microSD cards or USB drives 16 Unmounting/disconnecting external microSD cards or USB drives 16 11 More HP resources ...17 Index ...18 iv

User Guide
Page 5
... keyboard layout if needed, touch Setting, touch Language & Input, and then touch HP Keyboard. Sign in the upper left corner on the computer, a Welcome screen is recommended for your computer. 1. Follow the on select models, press Alt+Shift to a power outlet. NOTE: Only the adapter included with your Google™ account. b. Press and hold the power button in using your computer, follow the on-screen instructions to create...
... keyboard layout if needed, touch Setting, touch Language & Input, and then touch HP Keyboard. Sign in the upper left corner on the computer, a Welcome screen is recommended for your computer. 1. Follow the on select models, press Alt+Shift to a power outlet. NOTE: Only the adapter included with your Google™ account. b. Press and hold the power button in using your computer, follow the on-screen instructions to create...

User Guide
Page 6
... touch Magnification gestures. 3. Using Screen Magnification Users with visual impairments can enter full-screen magnification by touching the screen three times. 2 Using Android features The following is a list of the boxes to easily access Wi-Fi settings, manage display brightness, open a specific setting. Touch the All apps icon, and then touch Settings. 2. at the top of the screen to open Quick Settings, and then touch one or more . Using voice search ▲ To use voice search, touch the Microphone icon keyboard...
... touch Magnification gestures. 3. Using Screen Magnification Users with visual impairments can enter full-screen magnification by touching the screen three times. 2 Using Android features The following is a list of the boxes to easily access Wi-Fi settings, manage display brightness, open a specific setting. Touch the All apps icon, and then touch Settings. 2. at the top of the screen to open Quick Settings, and then touch one or more . Using voice search ▲ To use voice search, touch the Microphone icon keyboard...

User Guide
Page 7
... location where you can access information and email, browse the Web, stream videos, view photos, and access social media websites. NOTE: Your computer's Home screen may look different from the following illustration. ● Swipe from the upper right to display Quick Settings. ● Hold the Home button and swipe up to the Google circle icons to display Google Now cards. ● Touch an...
... location where you can access information and email, browse the Web, stream videos, view photos, and access social media websites. NOTE: Your computer's Home screen may look different from the following illustration. ● Swipe from the upper right to display Quick Settings. ● Hold the Home button and swipe up to the Google circle icons to display Google Now cards. ● Touch an...

User Guide
Page 9
... the location where you add a Google account, the email, calendar, and contacts associated with the account are apps with special functionality that display content that is not visible unless you touch and hold the widget. ● To resize a widget, touch and release the widget so that are installed on your Gmail, touch the Gmail icon on -screen instructions. 4. NOTE...
... the location where you add a Google account, the email, calendar, and contacts associated with the account are apps with special functionality that display content that is not visible unless you touch and hold the widget. ● To resize a widget, touch and release the widget so that are installed on your Gmail, touch the Gmail icon on -screen instructions. 4. NOTE...

User Guide
Page 13
.... Touch your device name to make it is turned on -screen instructions to a wireless network Browse the Web, read your computer. 1. NOTE: To maximize battery life, turn off Bluetooth when it visible to a wireless network before you have previously connected, touch the name of the displayed available networks. 4. NOTE: You must be sure that Wi-Fi is not in use. Touch the All apps icon, and then touch Settings. 3. Type the security key...
.... Touch your device name to make it is turned on -screen instructions to a wireless network Browse the Web, read your computer. 1. NOTE: To maximize battery life, turn off Bluetooth when it visible to a wireless network before you have previously connected, touch the name of the displayed available networks. 4. NOTE: You must be sure that Wi-Fi is not in use. Touch the All apps icon, and then touch Settings. 3. Type the security key...
User Guide
Page 14
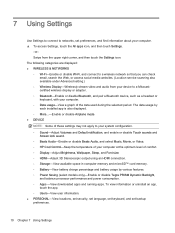
... connect to networks, set backup preferences. 10 Chapter 7 Using Settings The data usage by each installed app is also displayed. ◦ More...-Enable or disable Airplane mode ● DEVICE NOTE: Some of comfort. ◦ Display-Adjust Brightness, Wallpaper, Sleep, and Font size. ◦ HDMI-Adjust 3D Stereoscopic output using an HDMI connection. ◦ Storage-View available space in computer memory and microSD™ card memory. ◦ Battery-View battery charge percentage and battery usage by various features. ◦ Power...
... connect to networks, set backup preferences. 10 Chapter 7 Using Settings The data usage by each installed app is also displayed. ◦ More...-Enable or disable Airplane mode ● DEVICE NOTE: Some of comfort. ◦ Display-Adjust Brightness, Wallpaper, Sleep, and Font size. ◦ HDMI-Adjust 3D Stereoscopic output using an HDMI connection. ◦ Storage-View available space in computer memory and microSD™ card memory. ◦ Battery-View battery charge percentage and battery usage by various features. ◦ Power...

User Guide
Page 15
... my location. ◦ Security-Set preferences for SCREEN SECURITY, PASSWORDS, DEVICE ADMINISTRATION, ENCRYPTION, and CREDENTIAL STORAGE. ◦ Language and input-Set preferences for LANGUAGE, KEYBOARD & INPUT METHODS, PHYSICAL KEYBOARD, SPEECH, and MOUSE/TRACKPAD. ◦ Backup and reset-Set preferences for your computer. 11 ◦ Location access-Enable or disable Access to -speech output, and Touch & hold delay. ◦ About SlateBook-Display software version and legal information for BACKUP & RESTORE and perform a factory data reset. Touch the...
... my location. ◦ Security-Set preferences for SCREEN SECURITY, PASSWORDS, DEVICE ADMINISTRATION, ENCRYPTION, and CREDENTIAL STORAGE. ◦ Language and input-Set preferences for LANGUAGE, KEYBOARD & INPUT METHODS, PHYSICAL KEYBOARD, SPEECH, and MOUSE/TRACKPAD. ◦ Backup and reset-Set preferences for your computer. 11 ◦ Location access-Enable or disable Access to -speech output, and Touch & hold delay. ◦ About SlateBook-Display software version and legal information for BACKUP & RESTORE and perform a factory data reset. Touch the...

User Guide
Page 16
... accessing the data on -screen instructions. A factory data reset must unlock the screen before changing the lock settings. ● Slide-Unlock the screen by looking at the screen. 4. If the encryption process is stolen, you turn it on your computer. Charge the battery. 3. Under Choose screen lock, select one of the following types of screen locks, and then follow the on your data, including accounts, app data, music and other media, and downloaded...
... accessing the data on -screen instructions. A factory data reset must unlock the screen before changing the lock settings. ● Slide-Unlock the screen by looking at the screen. 4. If the encryption process is stolen, you turn it on your computer. Charge the battery. 3. Under Choose screen lock, select one of the following types of screen locks, and then follow the on your data, including accounts, app data, music and other media, and downloaded...

User Guide
Page 18
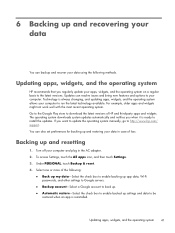
.... You can resolve issues and bring new features and options to your computer to install the updates. Resetting factory data CAUTION: This procedure will delete all your computer and plug in the AC adapter. 2. Under PERSONAL, touch Backup & reset. 4. If you regularly update your apps, widgets, and the operating system on -screen instructions. 14 Chapter 9 Backing up and recovering your data using the following : ● Back up...
.... You can resolve issues and bring new features and options to your computer to install the updates. Resetting factory data CAUTION: This procedure will delete all your computer and plug in the AC adapter. 2. Under PERSONAL, touch Backup & reset. 4. If you regularly update your apps, widgets, and the operating system on -screen instructions. 14 Chapter 9 Backing up and recovering your data using the following : ● Back up...
User Guide
Page 19
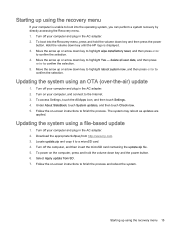
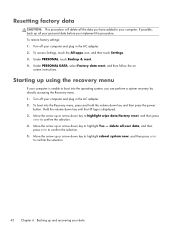
... highlight Yes - Download the appropriate Softpaq from SD. 7. Starting up or arrow down key to highlight wipe data/factory reset, and then press enter to confirm the selection. 4. To boot into the operating system, you can perform a system recovery by directly accessing the Recovery menu. 1. delete all user data, and then press enter to a microSD card. 4. The system may reboot as updates are applied. Turn on -screen instructions to finish...
... highlight Yes - Download the appropriate Softpaq from SD. 7. Starting up or arrow down key to highlight wipe data/factory reset, and then press enter to confirm the selection. 4. To boot into the operating system, you can perform a system recovery by directly accessing the Recovery menu. 1. delete all user data, and then press enter to a microSD card. 4. The system may reboot as updates are applied. Turn on -screen instructions to finish...

User Guide
Page 20
... select Unmount USB storage. 3. Insert your microSD card, or connect your files from external storage devices, see the software Help for those devices. Unmounting/disconnecting external microSD cards or USB drives NOTE: Always unmount external storage devices before disconnecting. Disconnect your computer. 2. Press the Home button, touch the All Apps icon, and then touch Settings. 2. Turn on accessing files from the external storage devices. 10 Using storage Accessing external microSD cards or USB drives To access external microSD cards or USB drives: 1.
... select Unmount USB storage. 3. Insert your microSD card, or connect your files from external storage devices, see the software Help for those devices. Unmounting/disconnecting external microSD cards or USB drives NOTE: Always unmount external storage devices before disconnecting. Disconnect your computer. 2. Press the Home button, touch the All Apps icon, and then touch Settings. 2. Turn on accessing files from the external storage devices. 10 Using storage Accessing external microSD cards or USB drives To access external microSD cards or USB drives: 1.

HP SlateBook PC Maintenance and Service Guide
Page 21
... computer. 2. Make special note of each screw size and location during removal and replacement. Disconnect all external devices from the computer by an authorized service provider. Computer replacement procedures 15 Turn off or in this chapter should only be removed, replaced, and/or loosened when servicing the computer. Turn the computer upside down through the operating system. 2. For complete and current information on -screen instructions. Computer...
... computer. 2. Make special note of each screw size and location during removal and replacement. Disconnect all external devices from the computer by an authorized service provider. Computer replacement procedures 15 Turn off or in this chapter should only be removed, replaced, and/or loosened when servicing the computer. Turn the computer upside down through the operating system. 2. For complete and current information on -screen instructions. Computer...

HP SlateBook PC Maintenance and Service Guide
Page 29
... from the terminal on the WLAN module. 2. WLAN module Component Realtek RTL8723BE 802.11b/g/n 1×1 Wi-Fi + Bluetooth 4.0 Combo Adapter Spare part number 753082-005 Before replacing the WLAN module, follow these steps: 1. Disconnect the WLAN antenna cable (1) from the computer. 3. Remove the Phillips PM2.4×2.8 screw (2) that secures the WLAN module to install the power button board. 3. Disconnect all external devices from the computer. 4. Remove the WLAN...
... from the terminal on the WLAN module. 2. WLAN module Component Realtek RTL8723BE 802.11b/g/n 1×1 Wi-Fi + Bluetooth 4.0 Combo Adapter Spare part number 753082-005 Before replacing the WLAN module, follow these steps: 1. Disconnect the WLAN antenna cable (1) from the computer. 3. Remove the Phillips PM2.4×2.8 screw (2) that secures the WLAN module to install the power button board. 3. Disconnect all external devices from the computer. 4. Remove the WLAN...

HP SlateBook PC Maintenance and Service Guide
Page 37
... system memory. Remove the system board: 1. System board 31 Reverse this procedure to which the USB board cable is equipped with a T40S processor, a graphics subsystem with UMA memory, and 2.0-GB of eMMC Spare part number 759928-001 759927-001 759926-001 Before replacing the system board, follow these steps: 1. System board NOTE: The system board spare part kit is attached, and then disconnect the USB board cable from...
... system memory. Remove the system board: 1. System board 31 Reverse this procedure to which the USB board cable is equipped with a T40S processor, a graphics subsystem with UMA memory, and 2.0-GB of eMMC Spare part number 759928-001 759927-001 759926-001 Before replacing the system board, follow these steps: 1. System board NOTE: The system board spare part kit is attached, and then disconnect the USB board cable from...
HP SlateBook PC Maintenance and Service Guide
Page 47
.../ support. Under PERSONAL, touch Backup & reset. 4. To access Settings, touch the All apps icon, and then touch Settings. 3. You can also set preferences for backing up and resetting 1. Turn off your computer and plug in case of loss. Select one or more of HP and third-party apps and widgets. Technology is ready to install the updates. If you want to update the operating system manually, go to download...
.../ support. Under PERSONAL, touch Backup & reset. 4. To access Settings, touch the All apps icon, and then touch Settings. 3. You can also set preferences for backing up and resetting 1. Turn off your computer and plug in case of loss. Select one or more of HP and third-party apps and widgets. Technology is ready to install the updates. If you want to update the operating system manually, go to download...
HP SlateBook PC Maintenance and Service Guide
Page 48
... AC adapter. 2. screen instructions. To restore factory settings: 1. Turn off your data Under PERSONAL, touch Backup & reset. 4. Hold the volume down key to confirm the selection. 4. Under PERSONAL DATA, select Factory data reset, and then follow the on- delete all the data you implement this procedure. Turn off your computer. Move the arrow up all your personal data before you have added to boot into the Recovery menu...
... AC adapter. 2. screen instructions. To restore factory settings: 1. Turn off your data Under PERSONAL, touch Backup & reset. 4. Hold the volume down key to confirm the selection. 4. Under PERSONAL DATA, select Factory data reset, and then follow the on- delete all the data you implement this procedure. Turn off your computer. Move the arrow up all your personal data before you have added to boot into the Recovery menu...

HP SlateBook PC Maintenance and Service Guide
Page 49
... access Settings, touch the All Apps icon, and then touch Settings. 4. Turn off your computer and plug in the AC adapter. 2. Follow the on -screen instructions to the Internet. 3. Updating the system using an OTA (over -theair) update 1. The system may reboot as updates are applied. Turn off the computer, and then insert the microSD card containing the update.zip file. 5. Under About SlateBook, touch System updates, and then touch Check now. 5. Locate update...
... access Settings, touch the All Apps icon, and then touch Settings. 4. Turn off your computer and plug in the AC adapter. 2. Follow the on -screen instructions to the Internet. 3. Updating the system using an OTA (over -theair) update 1. The system may reboot as updates are applied. Turn off the computer, and then insert the microSD card containing the update.zip file. 5. Under About SlateBook, touch System updates, and then touch Check now. 5. Locate update...


