HP Notebook Hard Drives & Solid State Drives Identifying, Preventing, Diagnosing and Recovering from Drive Failures Care and Ma
Page 6
... to 150MB/sec transfer rate for notebook PC models that could affect hard disk drive performance and reliability. Page 6 Procedures for adding SATA drivers to RIS (Remote Installation Service) installation points include: • Adding SATA drivers to installation CDs, building an image, and switching to the Intel Matrix Storage Manager driver are configured with Intel Matrix Storage Manager Technology. Updates to SATA AHCI mode • Using Sysprep with Serial ATA hard disk drives.
... to 150MB/sec transfer rate for notebook PC models that could affect hard disk drive performance and reliability. Page 6 Procedures for adding SATA drivers to RIS (Remote Installation Service) installation points include: • Adding SATA drivers to installation CDs, building an image, and switching to the Intel Matrix Storage Manager driver are configured with Intel Matrix Storage Manager Technology. Updates to SATA AHCI mode • Using Sysprep with Serial ATA hard disk drives.
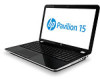
User Guide
Page 5
... and software information 4 Locating hardware ...4 Locating software ...4 Right side ...5 Left side ...6 Display ...8 Top ...9 TouchPad ...9 Lights ...10 Buttons and speakers ...11 Keys ...12 Bottom ...13 Labels ...14 3 Connecting to a network ...15 Connecting to a wireless network ...15 Using the wireless controls 15 Using the wireless button 15 Using operating system controls 16 Using a WLAN ...16 Using an Internet service provider 16 Setting up a WLAN 16 Configuring a wireless router 17 Protecting your WLAN 17 Connecting to a WLAN 18 Using Bluetooth wireless devices (select models...
... and software information 4 Locating hardware ...4 Locating software ...4 Right side ...5 Left side ...6 Display ...8 Top ...9 TouchPad ...9 Lights ...10 Buttons and speakers ...11 Keys ...12 Bottom ...13 Labels ...14 3 Connecting to a network ...15 Connecting to a wireless network ...15 Using the wireless controls 15 Using the wireless button 15 Using operating system controls 16 Using a WLAN ...16 Using an Internet service provider 16 Setting up a WLAN 16 Configuring a wireless router 17 Protecting your WLAN 17 Connecting to a WLAN 18 Using Bluetooth wireless devices (select models...
User Guide
Page 7
... Storing a user-replaceable battery 39 Disposing of a user-replaceable battery 40 Replacing a user-replaceable battery 40 Running on external AC power ...40 Troubleshooting power problems 41 HP CoolSense (select models only 41 Refreshing your software content with Intel Smart Connect Technology (select models only 41 Shutting down (turning off) the computer 42 7 Managing and sharing information ...43 Using a USB device ...43 Connecting a USB device 44 Removing a USB device ...44 Inserting and removing a digital storage card 45 Using optical drives ...46 Inserting an optical disc ...47...
... Storing a user-replaceable battery 39 Disposing of a user-replaceable battery 40 Replacing a user-replaceable battery 40 Running on external AC power ...40 Troubleshooting power problems 41 HP CoolSense (select models only 41 Refreshing your software content with Intel Smart Connect Technology (select models only 41 Shutting down (turning off) the computer 42 7 Managing and sharing information ...43 Using a USB device ...43 Connecting a USB device 44 Removing a USB device ...44 Inserting and removing a digital storage card 45 Using optical drives ...46 Inserting an optical disc ...47...
User Guide
Page 8
... wireless network ...63 Backing up your software applications and information 63 Using an optional security cable lock 63 10 Using Setup Utility (BIOS) and System Diagnostics 65 Starting Setup Utility (BIOS) ...65 Updating the BIOS ...65 Determining the BIOS version 65 Downloading a BIOS update 66 Using System Diagnostics ...67 11 Backing up, restoring, and recovering ...68 Creating recovery media and backups 68 Creating HP Recovery media 69 Restore and recovery ...70 Using Windows Refresh for quick and easy recovery 71 Remove everything and reinstall Windows 71 Recovering using HP...
... wireless network ...63 Backing up your software applications and information 63 Using an optional security cable lock 63 10 Using Setup Utility (BIOS) and System Diagnostics 65 Starting Setup Utility (BIOS) ...65 Updating the BIOS ...65 Determining the BIOS version 65 Downloading a BIOS update 66 Using System Diagnostics ...67 11 Backing up, restoring, and recovering ...68 Creating recovery media and backups 68 Creating HP Recovery media 69 Restore and recovery ...70 Using Windows Refresh for quick and easy recovery 71 Remove everything and reinstall Windows 71 Recovering using HP...

User Guide
Page 11
... wireless network. See details in Connecting to a network on page 15. ● Take a minute to browse the printed Windows 8 Basics guide to use the familiar Start menu from the Windows desktop. HP Quick Start (select models only) HP Quick Start gives you haven't already done so, connect to the computer Start screen from the Windows desktop, click the HP Quick Start icon on the taskbar. Best practices To get the most out of your hard drive by creating recovery discs...
... wireless network. See details in Connecting to a network on page 15. ● Take a minute to browse the printed Windows 8 Basics guide to use the familiar Start menu from the Windows desktop. HP Quick Start (select models only) HP Quick Start gives you haven't already done so, connect to the computer Start screen from the Windows desktop, click the HP Quick Start icon on the taskbar. Best practices To get the most out of your hard drive by creating recovery discs...

User Guide
Page 25
... Bluetooth-enabled devices such as computers, phones, printers, headsets, speakers, and cameras. In a PAN, each device communicates directly with other devices, and devices must be equipped with a wireless router or a wireless access point. ● Bluetooth device (select models only)-Creates a personal area network (PAN) to connect to turn on or turn on . Using the wireless controls You can control the wireless devices in Help and Support. If the wireless light is amber when all wireless devices are off. The wireless light indicates...
... Bluetooth-enabled devices such as computers, phones, printers, headsets, speakers, and cameras. In a PAN, each device communicates directly with other devices, and devices must be equipped with a wireless router or a wireless access point. ● Bluetooth device (select models only)-Creates a personal area network (PAN) to connect to turn on or turn on . Using the wireless controls You can control the wireless devices in Help and Support. If the wireless light is amber when all wireless devices are off. The wireless light indicates...

User Guide
Page 26
... the Start screen, type h, and then select Help and Support. From the Start screen, type n, and then select Settings. 2. NOTE: The terms wireless router and wireless access point are linked by a wireless router or a wireless access point. The illustration below shows an example of hardware or software. NOTE: Your ISP will help set up the modem, install a network cable to connect your computer, you have a built-in your wireless router to use operating system controls...
... the Start screen, type h, and then select Help and Support. From the Start screen, type n, and then select Settings. 2. NOTE: The terms wireless router and wireless access point are linked by a wireless router or a wireless access point. The illustration below shows an example of hardware or software. NOTE: Your ISP will help set up the modem, install a network cable to connect your computer, you have a built-in your wireless router to use operating system controls...

User Guide
Page 31
...) jack/Audio-in (microphone). External monitor port Connects an external VGA monitor or projector. From the Start screen, type h, and then select Help and Support. This jack does not support optional microphone-only devices. For details about different types of applications. NOTE: Be sure that the device cable has a 4conductor connector that allows you to Help and Support. Using the webcam Your computer has an integrated webcam, a powerful social networking tool that supports both audio-out (headphone) and audio-in (microphone) jack Connects optional powered...
...) jack/Audio-in (microphone). External monitor port Connects an external VGA monitor or projector. From the Start screen, type h, and then select Help and Support. This jack does not support optional microphone-only devices. For details about different types of applications. NOTE: Be sure that the device cable has a 4conductor connector that allows you to Help and Support. Using the webcam Your computer has an integrated webcam, a powerful social networking tool that supports both audio-out (headphone) and audio-in (microphone) jack Connects optional powered...

User Guide
Page 36
... touch gestures by changing settings, button configurations, click speed, and pointer options. The guide provides information on common tasks using touch gestures, pointing devices and the keyboard Some computer models may also have special action keys or hot key functions on the keyboard to turn a gesture off . 2. Select Synaptics TouchPad. 3. Using TouchPad gestures A TouchPad allows you want to perform routine tasks. TIP: Use the left and right buttons on the computer. From the Start screen, type c, select Control Panel...
... touch gestures by changing settings, button configurations, click speed, and pointer options. The guide provides information on common tasks using touch gestures, pointing devices and the keyboard Some computer models may also have special action keys or hot key functions on the keyboard to turn a gesture off . 2. Select Synaptics TouchPad. 3. Using TouchPad gestures A TouchPad allows you want to perform routine tasks. TIP: Use the left and right buttons on the computer. From the Start screen, type c, select Control Panel...

User Guide
Page 42
... type, select items, scroll and to the previous screen. The keyboard also allows you to use an action key function, press and hold down the key. TIP: The Windows key on opening Setup Utility (BIOS), and then follow the instructions at the factory. To use action keys and hot keys to support. You can also alternate images among other devices that key. To activate the assigned function after you hold the key. CAUTION: Use extreme care when making changes...
... type, select items, scroll and to the previous screen. The keyboard also allows you to use an action key function, press and hold down the key. TIP: The Windows key on opening Setup Utility (BIOS), and then follow the instructions at the factory. To use action keys and hot keys to support. You can also alternate images among other devices that key. To activate the assigned function after you hold the key. CAUTION: Use extreme care when making changes...

User Guide
Page 48
... 6 Managing power To access battery information, from the computer (3). Identifying low battery levels When a battery that you are not using them. ● Disconnect unused external devices that are not plugged into an external power source, such as an external hard drive connected to a USB port. ● Stop, disable, or remove any external media cards that is no longer holding a charge, run Battery Check in Power Options. ● Remove a user-replaceable battery from the computer when it from the Start screen, type support, select the HP Support...
... 6 Managing power To access battery information, from the computer (3). Identifying low battery levels When a battery that you are not using them. ● Disconnect unused external devices that are not plugged into an external power source, such as an external hard drive connected to a USB port. ● Stop, disable, or remove any external media cards that is no longer holding a charge, run Battery Check in Power Options. ● Remove a user-replaceable battery from the computer when it from the Start screen, type support, select the HP Support...

User Guide
Page 53
... devices use , see Connecting to a CD, DVD, or (on your phone or camera. Using a USB device Most computers have more than one type of USB ports you to read or write to a network on page 15. others have on page 4 for all of external devices-such as an optical drive or hard drive, or insert a digital storage card directly from your computer, also allows quick data transfer. Some devices come with software...
... devices use , see Connecting to a CD, DVD, or (on your phone or camera. Using a USB device Most computers have more than one type of USB ports you to read or write to a network on page 15. others have on page 4 for all of external devices-such as an optical drive or hard drive, or insert a digital storage card directly from your computer, also allows quick data transfer. Some devices come with software...

User Guide
Page 56
... support playback of your wireless feature. 46 Chapter 7 Managing and sharing information The DVDs can be used in the drive. Follow the on-screen instructions to install the update. ● If lines appear on the display when viewing a BD, they can be changed or erased; The write process is sensitive to vibration. ● Make sure you have installed the latest software updates for best performance of new...
... support playback of your wireless feature. 46 Chapter 7 Managing and sharing information The DVDs can be used in the drive. Follow the on-screen instructions to install the update. ● If lines appear on the display when viewing a BD, they can be changed or erased; The write process is sensitive to vibration. ● Make sure you have installed the latest software updates for best performance of new...

User Guide
Page 65
... down the computer through the operating system. 1. Disconnect all batteries before adding or replacing memory modules. Follow the on in Hibernation, turn the computer on -screen instructions. The memory module slots are not sure whether the computer is like a desk overflowing with a second memory module, be upgraded by touching a grounded metal object. NOTE: To use a dual-channel configuration with work, your physical work and the memory is on, in your...
... down the computer through the operating system. 1. Disconnect all batteries before adding or replacing memory modules. Follow the on in Hibernation, turn the computer on -screen instructions. The memory module slots are not sure whether the computer is like a desk overflowing with a second memory module, be upgraded by touching a grounded metal object. NOTE: To use a dual-channel configuration with work, your physical work and the memory is on, in your...

User Guide
Page 72
..., install all critical updates from the Start screen, type c, and then select Control Panel. For more information, see Updating programs and drivers on page 58. There are two types of both hardware and software. Using antivirus software Computer viruses can detect most viruses, destroy them to function abnormally. Antivirus software can disable programs, utilities, or the operating system, or cause them , and in order to fully protect your home network to...
..., install all critical updates from the Start screen, type c, and then select Control Panel. For more information, see Updating programs and drivers on page 58. There are two types of both hardware and software. Using antivirus software Computer viruses can detect most viruses, destroy them to function abnormally. Antivirus software can disable programs, utilities, or the operating system, or cause them , and in order to fully protect your home network to...
User Guide
Page 76
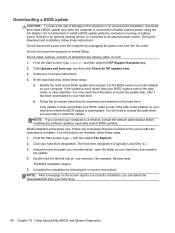
... currently installed on -screen instructions to download your computer to a network, consult the network administrator before installing any software updates, especially system BIOS updates. At the download area, follow these steps: 1. BIOS installation procedures vary. The BIOS installation begins. 5. b. If no instructions are ready to locate the update later, after the download is downloaded. From the Start screen, type e, and then select File Explorer. 2. Click your hard drive that has an .exe extension (for HP updates now. 3. Using the hard drive...
... currently installed on -screen instructions to download your computer to a network, consult the network administrator before installing any software updates, especially system BIOS updates. At the download area, follow these steps: 1. BIOS installation procedures vary. The BIOS installation begins. 5. b. If no instructions are ready to locate the update later, after the download is downloaded. From the Start screen, type e, and then select File Explorer. 2. Click your hard drive that has an .exe extension (for HP updates now. 3. Using the hard drive...
User Guide
Page 80
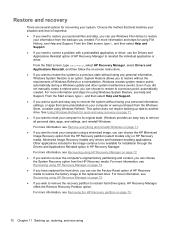
... Reinstall option of HP Recovery media to restore the factory image to be available for installation through the Drivers and Applications Reinstall option in HP Recovery Manager. For more information, see Help and Support. For more information and steps for using File History, see Recovering using HP Recovery Manager on -screen instructions. ● If you want a quick and easy way to recover the computer's original factory partitioning and content, you created. From the Start screen, type recovery, select HP Recovery Manager, select Drivers and...
... Reinstall option of HP Recovery media to restore the factory image to be available for installation through the Drivers and Applications Reinstall option in HP Recovery Manager. For more information, see Help and Support. For more information and steps for using File History, see Recovering using HP Recovery Manager on -screen instructions. ● If you want a quick and easy way to recover the computer's original factory partitioning and content, you created. From the Start screen, type recovery, select HP Recovery Manager, select Drivers and...

User Guide
Page 83
... BIOS where the computer looks for an optical drive or a USB flash drive. From the Start screen, type recovery, and then select HP Recovery Manager. 2. Insert the first HP Recovery disc you to remove the HP Recovery partition to boot from the boot options menu. 4. You can change the selection for startup information. Follow the on page 73. 3. Removing the HP Recovery partition HP Recovery Manager software allows you created into the optical drive on -screen instructions. If possible, back up hard drive space. See Changing the computer boot order on -screen...
... BIOS where the computer looks for an optical drive or a USB flash drive. From the Start screen, type recovery, and then select HP Recovery Manager. 2. Insert the first HP Recovery disc you to remove the HP Recovery partition to boot from the boot options menu. 4. You can change the selection for startup information. Follow the on page 73. 3. Removing the HP Recovery partition HP Recovery Manager software allows you created into the optical drive on -screen instructions. If possible, back up hard drive space. See Changing the computer boot order on -screen...

User Guide
Page 87
... do 2 H hard drive HP 3D DriveGuard 54 hard drive light 7 hard drive, identifying 13 HDMI configuring audio 24 HDMI port, connecting 24 HDMI port, identifying 6, 21 headphones, connecting 22 Hibernation exiting 36 initiated during critical battery level 39 initiating 36 high-definition devices, connecting 24, 25 hot keys description 34 reveal system information 34 using 34 HP 3D DriveGuard 54 HP and third-party software updates, installing 63 HP Recovery Manager 72 correcting boot problems 73 starting 72 HP Recovery media creating 69 recovery 73 HP Recovery partition 72 recovery 72 removing 73...
... do 2 H hard drive HP 3D DriveGuard 54 hard drive light 7 hard drive, identifying 13 HDMI configuring audio 24 HDMI port, connecting 24 HDMI port, identifying 6, 21 headphones, connecting 22 Hibernation exiting 36 initiated during critical battery level 39 initiating 36 high-definition devices, connecting 24, 25 hot keys description 34 reveal system information 34 using 34 HP 3D DriveGuard 54 HP and third-party software updates, installing 63 HP Recovery Manager 72 correcting boot problems 73 starting 72 HP Recovery media creating 69 recovery 73 HP Recovery partition 72 recovery 72 removing 73...

User Guide
Page 88
... 56 removing 56 replacing 55 memory module service door, removing 56 microphone, connecting 22 minimized image creating 72 minimized image recovery 72 mouse, external setting preferences 26 mute light, identifying 10 N network jack, identifying 5 num lock key, identifying 12, 34 O operating environment 75 optical disc inserting 47 removing 48 Optical drive eject button, identifying 5 optical drive, identifying 5 original system recovery 72 P passwords Setup Utility (BIOS) 61 Windows 61 pinching TouchPad gesture 28 ports external monitor 6, 21, 23 HDMI 6, 21, 24 Intel Wireless Display 25...
... 56 removing 56 replacing 55 memory module service door, removing 56 microphone, connecting 22 minimized image creating 72 minimized image recovery 72 mouse, external setting preferences 26 mute light, identifying 10 N network jack, identifying 5 num lock key, identifying 12, 34 O operating environment 75 optical disc inserting 47 removing 48 Optical drive eject button, identifying 5 optical drive, identifying 5 original system recovery 72 P passwords Setup Utility (BIOS) 61 Windows 61 pinching TouchPad gesture 28 ports external monitor 6, 21, 23 HDMI 6, 21, 24 Intel Wireless Display 25...


