
Start Here
Page 5
1 Introducing Windows 10 This guide describes new Windows® 10 features, which may update some of the information provided with your country. Select Drivers & Downloads, and then follow the on-screen instructions. 1 Go to http://www.hp.com/ support, and select your computer. These new features include the following: ● Enhanced Start menu ● Shut down from the Start menu ● Improved search options ● Enhanced backup and recovery information For details about your computer hardware and software, see the User Guide.
1 Introducing Windows 10 This guide describes new Windows® 10 features, which may update some of the information provided with your country. Select Drivers & Downloads, and then follow the on-screen instructions. 1 Go to http://www.hp.com/ support, and select your computer. These new features include the following: ● Enhanced Start menu ● Shut down from the Start menu ● Improved search options ● Enhanced backup and recovery information For details about your computer hardware and software, see the User Guide.
Start Here
Page 7
... keyboard, connect the keyboard to create system restore points and create backups of creating recovery media and backups are available on the HP website. You can obtain recovery media for most products. ● Creating recovery media and backups ● Restoring and recovering your system For additional information, refer to the HP support assistant app. ▲ Type support in cases where the hard drive is disabled by default. IMPORTANT: For a tablet with the computer. For information on creating recovery media, see Recovering using the recovery media...
... keyboard, connect the keyboard to create system restore points and create backups of creating recovery media and backups are available on the HP website. You can obtain recovery media for most products. ● Creating recovery media and backups ● Restoring and recovering your system For additional information, refer to the HP support assistant app. ▲ Type support in cases where the hard drive is disabled by default. IMPORTANT: For a tablet with the computer. For information on creating recovery media, see Recovering using the recovery media...

Start Here
Page 8
... be used to AC power before you begin creating the recovery media. ◦ The creation process can also be connected directly to a USB port on -screen instructions. ◦ Be sure that will be used to customize the system or restore the factory image if you replace the hard drive. ◦ Only one set of personal information, see Using Windows tools on page 4. ● If your computer must use HP Recovery Manager to the keyboard...
... be used to AC power before you begin creating the recovery media. ◦ The creation process can also be connected directly to a USB port on -screen instructions. ◦ Be sure that will be used to customize the system or restore the factory image if you replace the hard drive. ◦ Only one set of personal information, see Using Windows tools on page 4. ● If your computer must use HP Recovery Manager to the keyboard...
Start Here
Page 9
... level of HP Recovery media. If you have replaced the hard drive, you can obtain recovery media for recovering your system from backup, refreshing the computer, and resetting the computer to its original factory state by using HP Recovery Manager on page 3. ● On select products, if you want to remove the recovery partition to its original state. Restore and recovery There are available on page 3. ● To use the Factory Reset option (select products...
... level of HP Recovery media. If you have replaced the hard drive, you can obtain recovery media for recovering your system from backup, refreshing the computer, and resetting the computer to its original factory state by using HP Recovery Manager on page 3. ● On select products, if you want to remove the recovery partition to its original state. Restore and recovery There are available on page 3. ● To use the Factory Reset option (select products...
Start Here
Page 10
... you start HP Recovery Manager from the hard drive and re-creating the partitions. Using HP Recovery media to retain. To start the recovery process. ● System Recovery-Reinstalls the original operating system, and then configures the settings for the programs that was installed at the factory. ● Factory Reset-Restores the computer to perform a system recovery without keyboards: Turn on or restart the tablet, and then quickly hold down button; Follow the on -screen instructions. Using HP Recovery media, you want to recover You...
... you start HP Recovery Manager from the hard drive and re-creating the partitions. Using HP Recovery media to retain. To start the recovery process. ● System Recovery-Reinstalls the original operating system, and then configures the settings for the programs that was installed at the factory. ● Factory Reset-Restores the computer to perform a system recovery without keyboards: Turn on or restart the tablet, and then quickly hold down button; Follow the on -screen instructions. Using HP Recovery media, you want to recover You...
Start Here
Page 11
...then quickly hold down button; Type recovery in BIOS where the computer looks for boot options. IMPORTANT: After you remove the HP Recovery partition, you want to free up hard drive space. Removing the HP Recovery partition (select products only) HP Recovery Manager software allows you remove the Recovery partition, create HP Recovery media; Follow these steps. 1. Access BIOS: For computers or tablets with a detachable keyboard, connect the keyboard to the keyboard dock before you to remove the HP Recovery partition to boot. 4. For tablets without keyboards: ▲ Turn on...
...then quickly hold down button; Type recovery in BIOS where the computer looks for boot options. IMPORTANT: After you remove the HP Recovery partition, you want to free up hard drive space. Removing the HP Recovery partition (select products only) HP Recovery Manager software allows you remove the Recovery partition, create HP Recovery media; Follow these steps. 1. Access BIOS: For computers or tablets with a detachable keyboard, connect the keyboard to the keyboard dock before you to remove the HP Recovery partition to boot. 4. For tablets without keyboards: ▲ Turn on...
Maintenance and Service Guide
Page 5
... ...11 Keyboard base components ...14 Miscellaneous parts ...16 4 Removal and replacement preliminary requirements 17 Tools required ...17 Service considerations ...17 Plastic parts ...17 Cables and connectors ...18 Drive handling ...18 Grounding guidelines ...19 Electrostatic discharge damage ...19 Packaging and transporting guidelines 20 Workstation guidelines 20 5 Slate removal and replacement procedures 22 Component replacement procedures ...22 Display panel assembly ...22 Power button board ...25 Volume control board ...26 Webcam/microphone module ...27 RTC battery...
... ...11 Keyboard base components ...14 Miscellaneous parts ...16 4 Removal and replacement preliminary requirements 17 Tools required ...17 Service considerations ...17 Plastic parts ...17 Cables and connectors ...18 Drive handling ...18 Grounding guidelines ...19 Electrostatic discharge damage ...19 Packaging and transporting guidelines 20 Workstation guidelines 20 5 Slate removal and replacement procedures 22 Component replacement procedures ...22 Display panel assembly ...22 Power button board ...25 Volume control board ...26 Webcam/microphone module ...27 RTC battery...
Maintenance and Service Guide
Page 6
... Keyboard/base removal and replacement procedures 44 Keyboard/base component replacement procedures 44 Bottom cover ...44 Docking board ...46 TouchPad board ...47 Hinge assembly ...50 7 Using Setup Utility (BIOS) ...53 Starting Setup Utility (BIOS) ...53 Updating Setup Utility (BIOS) ...53 Determining the BIOS version ...53 Downloading a BIOS update ...54 8 Using HP PC Hardware Diagnostics (UEFI) ...55 Downloading HP PC Hardware Diagnostics (UEFI) to a USB device 55 9 Specifications ...57 Dimensions ...57 Operating environment ...57 Input power ...58 10 Backing up, restoring, and recovering...
... Keyboard/base removal and replacement procedures 44 Keyboard/base component replacement procedures 44 Bottom cover ...44 Docking board ...46 TouchPad board ...47 Hinge assembly ...50 7 Using Setup Utility (BIOS) ...53 Starting Setup Utility (BIOS) ...53 Updating Setup Utility (BIOS) ...53 Determining the BIOS version ...53 Downloading a BIOS update ...54 8 Using HP PC Hardware Diagnostics (UEFI) ...55 Downloading HP PC Hardware Diagnostics (UEFI) to a USB device 55 9 Specifications ...57 Dimensions ...57 Operating environment ...57 Input power ...58 10 Backing up, restoring, and recovering...
Maintenance and Service Guide
Page 10
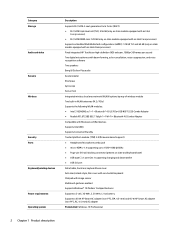
.../g/n 1×1 Wi-Fi + Bluetooth 4.0 Combo Adapter Compatible with MiraCast-certified devices Supports Intel WiDi Supports Connected Standby Trusted platform module (TPM) 2.0 (firmware-based support) ● Headphone/microphone combo jack ● micro-HDMI v 1.4 supporting up to 1920×1080 @ 60Hz ● Pogo-pin (10-pin) docking connector (present on slate and keyboard base) ● USB type C 3.1 port Gen 1 supporting charging and data transfer ● USB 2.0 port Detachable, hardcase, keyboard base cover Full-sized, island...
.../g/n 1×1 Wi-Fi + Bluetooth 4.0 Combo Adapter Compatible with MiraCast-certified devices Supports Intel WiDi Supports Connected Standby Trusted platform module (TPM) 2.0 (firmware-based support) ● Headphone/microphone combo jack ● micro-HDMI v 1.4 supporting up to 1920×1080 @ 60Hz ● Pogo-pin (10-pin) docking connector (present on slate and keyboard base) ● USB type C 3.1 port Gen 1 supporting charging and data transfer ● USB 2.0 port Detachable, hardcase, keyboard base cover Full-sized, island...
Maintenance and Service Guide
Page 30
NOTE: HP continually improves and changes product parts. Turn off or in Hibernation, turn the slate on -screen instructions. CAUTION: When using the case utility tool to separate the display back cover from the slate. 3. Display panel assembly Description Display panel assembly (12.0-in the area near the power button (3). Remove the display panel assembly: CAUTION: Before positioning the slate with the display panel facing down through the operating system. 2. Insert a case utility tool (1) or similar...
NOTE: HP continually improves and changes product parts. Turn off or in Hibernation, turn the slate on -screen instructions. CAUTION: When using the case utility tool to separate the display back cover from the slate. 3. Display panel assembly Description Display panel assembly (12.0-in the area near the power button (3). Remove the display panel assembly: CAUTION: Before positioning the slate with the display panel facing down through the operating system. 2. Insert a case utility tool (1) or similar...
Maintenance and Service Guide
Page 38
...-Fi + Bluetooth 4.0 Combo Adapter Spare part number 806723-005 792610-005 CAUTION: To prevent an unresponsive system, replace the wireless module only with a wireless module authorized for use in the slate by first unplugging the power cord from the AC outlet and then unplugging the AC adapter from the terminals on the WLAN module. Disconnect all external devices connected to the display back cover. (The WLAN module tilts up...
...-Fi + Bluetooth 4.0 Combo Adapter Spare part number 806723-005 792610-005 CAUTION: To prevent an unresponsive system, replace the wireless module only with a wireless module authorized for use in the slate by first unplugging the power cord from the AC outlet and then unplugging the AC adapter from the terminals on the WLAN module. Disconnect all external devices connected to the display back cover. (The WLAN module tilts up...
Maintenance and Service Guide
Page 52
... size and location during removal and replacement. Turn off or in Hibernation, turn the slate on -screen instructions. Disconnect the power from the slate by an authorized service provider. Disconnect all external devices from the keyboard/base. If you . 2. Disconnect the slate from the slate. 4. Remove the keyboard/base rubber foot strip (1). 3. Users accessing these steps: 1. Bottom cover Description Bottom cover Spare part number 841544-001 Before disassembling the keyboard/base, follow...
... size and location during removal and replacement. Turn off or in Hibernation, turn the slate on -screen instructions. Disconnect the power from the slate by an authorized service provider. Disconnect all external devices from the keyboard/base. If you . 2. Disconnect the slate from the slate. 4. Remove the keyboard/base rubber foot strip (1). 3. Users accessing these steps: 1. Bottom cover Description Bottom cover Spare part number 841544-001 Before disassembling the keyboard/base, follow...

Maintenance and Service Guide
Page 61
... select Specifications. ● Setup Utility (BIOS) 1. To check for the types of devices installed, the startup sequence of the computer, and the amount of system and extended memory. Type support in compressed files called SoftPaqs. Select Main, select System Information, and then make note of Setup Utility (BIOS) may be in notebook mode and you need to your computer. Errors can prevent the computer from operating properly. ▲ Turn on -screen instructions. Some download...
... select Specifications. ● Setup Utility (BIOS) 1. To check for the types of devices installed, the startup sequence of the computer, and the amount of system and extended memory. Type support in compressed files called SoftPaqs. Select Main, select System Information, and then make note of Setup Utility (BIOS) may be in notebook mode and you need to your computer. Errors can prevent the computer from operating properly. ▲ Turn on -screen instructions. Some download...
Maintenance and Service Guide
Page 62
... your hard drive designation. Follow the on -screen instructions. 4. Click your BIOS version, make a note of the date, name, or other identifier. The hard drive designation is connected to reliable external power using the AC adapter. Using the hard drive path you are ready to install the update. Follow the on -screen instructions to download your hard drive. 54 Chapter 7 Using Setup Utility (BIOS) Identify the most recent BIOS update and compare it has been downloaded to your computer is downloaded. b. BIOS installation...
... your hard drive designation. Follow the on -screen instructions. 4. Click your BIOS version, make a note of the date, name, or other identifier. The hard drive designation is connected to reliable external power using the AC adapter. Using the hard drive path you are ready to install the update. Follow the on -screen instructions to download your hard drive. 54 Chapter 7 Using Setup Utility (BIOS) Identify the most recent BIOS update and compare it has been downloaded to your computer is downloaded. b. BIOS installation...

Maintenance and Service Guide
Page 67
... operating system in cases where the hard drive is disabled by default. IMPORTANT: If you can be at least 70% charged before beginning any recovery process. This step creates a backup of creating recovery media and backups are available using the recovery media, see Recovering using HP Recovery Manager on the HP website. For more information, see Using Windows tools on -screen instructions. Creating recovery media and backups 59 See the Worldwide Telephone Numbers booklet included with a detachable keyboard, connect the keyboard to create HP Recovery media after you start...
... operating system in cases where the hard drive is disabled by default. IMPORTANT: If you can be at least 70% charged before beginning any recovery process. This step creates a backup of creating recovery media and backups are available using the recovery media, see Recovering using HP Recovery Manager on the HP website. For more information, see Using Windows tools on -screen instructions. Creating recovery media and backups 59 See the Worldwide Telephone Numbers booklet included with a detachable keyboard, connect the keyboard to create HP Recovery media after you start...
Maintenance and Service Guide
Page 68
... create DVD media yourself, you can exit the program before you replace the hard drive. ◦ Only one set up , restoring, and recovering Do not interrupt the creation process. ◦ If necessary, you successfully set of recovery media can use an external optical drive (purchased separately) to create recovery discs. Type recovery in a safe place. ◦ HP Recovery Manager examines the computer and determines the required storage capacity for the media that the computer is disabled...
... create DVD media yourself, you can exit the program before you replace the hard drive. ◦ Only one set up , restoring, and recovering Do not interrupt the creation process. ◦ If necessary, you successfully set of recovery media can use an external optical drive (purchased separately) to create recovery discs. Type recovery in a safe place. ◦ HP Recovery Manager examines the computer and determines the required storage capacity for the media that the computer is disabled...
Maintenance and Service Guide
Page 69
... resetting the computer to reclaim hard drive space, HP Recovery Manager offers the Remove Recovery Partition option. If you have not already created recovery media, see the Get started app. ▲ Select the Start button, and then select the Get started ● HP Recovery Manager recovers only software that best matches your system from the HP Restore and recovery 61 If you have replaced the hard drive, you must be used as a final attempt to recover the computer's original factory partition and...
... resetting the computer to reclaim hard drive space, HP Recovery Manager offers the Remove Recovery Partition option. If you have not already created recovery media, see the Get started app. ▲ Select the Start button, and then select the Get started ● HP Recovery Manager recovers only software that best matches your system from the HP Restore and recovery 61 If you have replaced the hard drive, you must be used as a final attempt to recover the computer's original factory partition and...
Maintenance and Service Guide
Page 70
... select HP Recovery Environment. - Using HP Recovery media, you start HP Recovery Manager from the boot options menu. 3. This method can be used if your computer display when you can use HP Recovery media to perform a system recovery without keyboards: Turn on or restart the tablet, and then quickly hold f11 as you press the power button. then select f11. 2. See Changing the computer boot order on -screen instructions. 62 Chapter 10 Backing up any personal data you to recover the...
... select HP Recovery Environment. - Using HP Recovery media, you start HP Recovery Manager from the boot options menu. 3. This method can be used if your computer display when you can use HP Recovery media to perform a system recovery without keyboards: Turn on or restart the tablet, and then quickly hold f11 as you press the power button. then select f11. 2. See Changing the computer boot order on -screen instructions. 62 Chapter 10 Backing up any personal data you to recover the...
Maintenance and Service Guide
Page 76
... 2 audio-in jack 7 audio-out jack 7 B backups 59 battery removal 38 spare part number 13, 38 BIOS determining version 53 downloading an update 54 starting the Setup Utility 53 updating 53 boot order changing 63 bottom cover removal 44 spare part number 15, 44 bottom-edge components 9 buttons power 6 volume 7 C cables removal 39 spare part numbers 39 cables, service considerations 18 chipset, product description 1 components bottom edge 9 display 5 left side 7 right side 8 top edge 6 connector board removal 34 spare part number 12, 34 connector board bracket removal 34 spare part number 12, 34...
... 2 audio-in jack 7 audio-out jack 7 B backups 59 battery removal 38 spare part number 13, 38 BIOS determining version 53 downloading an update 54 starting the Setup Utility 53 updating 53 boot order changing 63 bottom cover removal 44 spare part number 15, 44 bottom-edge components 9 buttons power 6 volume 7 C cables removal 39 spare part numbers 39 cables, service considerations 18 chipset, product description 1 components bottom edge 9 display 5 left side 7 right side 8 top edge 6 connector board removal 34 spare part number 12, 34 connector board bracket removal 34 spare part number 12, 34...

Maintenance and Service Guide
Page 77
... audio 2 chipset 1 display panel 1 graphics 1 memory 1 microphone 2 operating system 2, 3 ports 2 power requirements 2 processors 1 product name 1 security 2 sensors 2 serviceability 3 storage 2 video 2 wireless 2 product name 1 R recover options 61 recovery discs 60, 62 HP Recovery Manager 61 media 62 starting 62 supported discs 60 system 61 USB flash drive 62 using HP Recovery media 60 recovery media creating 59 creating using HP Recovery Manager 60 recovery partition removing 64 removal/replacement procedures 22, 44 right-side components 8 RJ45-to-USB adapter dongle, spare part number...
... audio 2 chipset 1 display panel 1 graphics 1 memory 1 microphone 2 operating system 2, 3 ports 2 power requirements 2 processors 1 product name 1 security 2 sensors 2 serviceability 3 storage 2 video 2 wireless 2 product name 1 R recover options 61 recovery discs 60, 62 HP Recovery Manager 61 media 62 starting 62 supported discs 60 system 61 USB flash drive 62 using HP Recovery media 60 recovery media creating 59 creating using HP Recovery Manager 60 recovery partition removing 64 removal/replacement procedures 22, 44 right-side components 8 RJ45-to-USB adapter dongle, spare part number...


