Troubleshooting & Maintenance Guide
Page 3
... of dust, dirt, and heat 15 Cleaning the computer and monitor 16 Cleaning the computer vents ...16 Cleaning the keyboard and mouse 16 Cleaning the touch screen (select models only 16 ENWW iii
... of dust, dirt, and heat 15 Cleaning the computer and monitor 16 Cleaning the computer vents ...16 Cleaning the keyboard and mouse 16 Cleaning the touch screen (select models only 16 ENWW iii

Troubleshooting & Maintenance Guide
Page 20
.... 2. Turn the mouse upside down, and rotate the ball-cover ring counterclockwise to dust the computer case and the monitor case. Cleaning the touch screen (select models only) CAUTION: Do not spray or place the cleaner directly on the keyboard keys and along the grooves. 2. Use ...Clean the rollers inside : 1. Cleaning the keyboard and mouse When cleaning the keyboard keys, use water on a battery-powered vacuum cleaner, to the touch screen. 16 Chapter 4 Maintenance ENWW Wipe the body of electric shock.) 1. spray the cleaner into the cloth, and then wipe the sides and ...
.... 2. Turn the mouse upside down, and rotate the ball-cover ring counterclockwise to dust the computer case and the monitor case. Cleaning the touch screen (select models only) CAUTION: Do not spray or place the cleaner directly on the keyboard keys and along the grooves. 2. Use ...Clean the rollers inside : 1. Cleaning the keyboard and mouse When cleaning the keyboard keys, use water on a battery-powered vacuum cleaner, to the touch screen. 16 Chapter 4 Maintenance ENWW Wipe the body of electric shock.) 1. spray the cleaner into the cloth, and then wipe the sides and ...
Troubleshooting & Maintenance Guide
Page 21
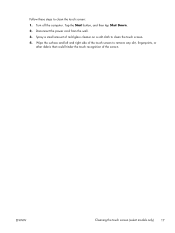
Wipe the surface and left and right side of the screen. Tap the Start button, and then tap Shut Down. 2. Spray a small amount of mild glass cleaner on a soft cloth to remove any dirt, fingerprints, or other debris that could hinder the touch recognition of the touch screen to clean the touch screen. 4. ENWW Cleaning the touch screen (select models only) 17 Disconnect the power cord from the wall. 3. Follow these steps to clean the touch screen: 1. Turn off the computer.
Wipe the surface and left and right side of the screen. Tap the Start button, and then tap Shut Down. 2. Spray a small amount of mild glass cleaner on a soft cloth to remove any dirt, fingerprints, or other debris that could hinder the touch recognition of the touch screen to clean the touch screen. 4. ENWW Cleaning the touch screen (select models only) 17 Disconnect the power cord from the wall. 3. Follow these steps to clean the touch screen: 1. Turn off the computer.
Wall Mounting Guide
Page 5
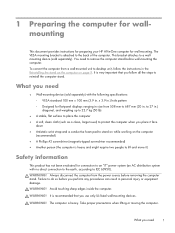
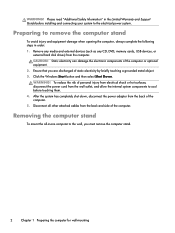
... Preparing the computer for wallmounting This document provides instructions for preparing your HP All-in-One computer for connection to an "IT" power system... personal injury or equipment damage. To convert the computer from a wall-mounted unit to reinstall the computer stand. to 27 in the Reinstalling the stand on the computer on the computer (recommended) ● A Phillips #2 screwdriver (magnetic-tipped.... WARNING! The VESA mounting bracket is heavy. Avoid touching sharp edges inside the computer. This bracket attaches to remove the computer stand before you need 1
... Preparing the computer for wallmounting This document provides instructions for preparing your HP All-in-One computer for connection to an "IT" power system... personal injury or equipment damage. To convert the computer from a wall-mounted unit to reinstall the computer stand. to 27 in the Reinstalling the stand on the computer on the computer (recommended) ● A Phillips #2 screwdriver (magnetic-tipped.... WARNING! The VESA mounting bracket is heavy. Avoid touching sharp edges inside the computer. This bracket attaches to remove the computer stand before you need 1
Wall Mounting Guide
Page 6
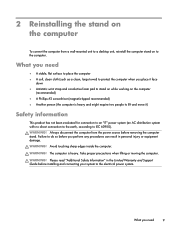
... hot surfaces, disconnect the power cord from the computer. Disconnect all -in-one computer to the wall, you are discharged of static electricity by briefly touching a grounded metal object. 3. Preparing to the electrical power system. Click the Windows Start button and then select Shut Down. Ensure that you must remove the... computer stand To avoid injury and equipment damage when opening the computer, always complete the following steps in the Limited Warranty and Support Guide before touching them. 4. Please read "Additional Safety Information" in order: 1.
... hot surfaces, disconnect the power cord from the computer. Disconnect all -in-one computer to the wall, you are discharged of static electricity by briefly touching a grounded metal object. 3. Preparing to the electrical power system. Click the Windows Start button and then select Shut Down. Ensure that you must remove the... computer stand To avoid injury and equipment damage when opening the computer, always complete the following steps in the Limited Warranty and Support Guide before touching them. 4. Please read "Additional Safety Information" in order: 1.
Wall Mounting Guide
Page 13
... been evaluated for connection to an "IT" power system (an AC distribution system with no direct connection to the earth, according to IEC 60950). Avoid touching sharp edges inside the computer. The computer is heavy and might require two people to lift and move it face down ● Antistatic wrist strap...
... been evaluated for connection to an "IT" power system (an AC distribution system with no direct connection to the earth, according to IEC 60950). Avoid touching sharp edges inside the computer. The computer is heavy and might require two people to lift and move it face down ● Antistatic wrist strap...
Wall Mounting Guide
Page 14
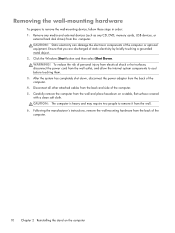
CAUTION: The computer is heavy and may require two people to cool before touching them. 3. Remove any media and external devices (such as any CD, DVD, memory cards, USB devices, or external hard disk drives) from the wall and ...place facedown on the computer WARNING! Disconnect all other attached cables from the back and side of static electricity by briefly touching a grounded metal object. 2. Ensure that you are discharged of the computer. 5. To reduce the risk of the computer. 10 Chapter 2 Reinstalling the stand on a stable...
CAUTION: The computer is heavy and may require two people to cool before touching them. 3. Remove any media and external devices (such as any CD, DVD, memory cards, USB devices, or external hard disk drives) from the wall and ...place facedown on the computer WARNING! Disconnect all other attached cables from the back and side of static electricity by briefly touching a grounded metal object. 2. Ensure that you are discharged of the computer. 5. To reduce the risk of the computer. 10 Chapter 2 Reinstalling the stand on a stable...

Quick Setup Guide
Page 12
... Do not use a low setting on the screen; Turn off the computer. Use a clean, dry cloth and isopropyl (rubbing) alcohol to the touch screen. 8 Chapter 4 Maintaining your computer Cleaning the keyboard and mouse When cleaning the keyboard keys, use an abrasive cleaner or cloth when cleaning the...are completely dry, replace the ball and ballcover ring. Wipe the body of the screen, because this could hinder the touch recognition of the touch screen to clean the touch screen: 1. If you have a roller-ball mouse, clean the ball and rollers inside the mouse with a cotton ...
... Do not use a low setting on the screen; Turn off the computer. Use a clean, dry cloth and isopropyl (rubbing) alcohol to the touch screen. 8 Chapter 4 Maintaining your computer Cleaning the keyboard and mouse When cleaning the keyboard keys, use an abrasive cleaner or cloth when cleaning the...are completely dry, replace the ball and ballcover ring. Wipe the body of the screen, because this could hinder the touch recognition of the touch screen to clean the touch screen: 1. If you have a roller-ball mouse, clean the ball and rollers inside the mouse with a cotton ...


