
Technical Brief (Impact Printers)
Page 3
... sheets from the tractor in the front push position. Front push tractor position For loading continuous paper from the top or front slot. L Paper thickness adjustment: Most EPSON impact printers have a Paper Thickness Lever that allows the printer to accommodate various thicknesses of their respective owners. Set the lever to this position when using the rear push and pull...
... sheets from the tractor in the front push position. Front push tractor position For loading continuous paper from the top or front slot. L Paper thickness adjustment: Most EPSON impact printers have a Paper Thickness Lever that allows the printer to accommodate various thicknesses of their respective owners. Set the lever to this position when using the rear push and pull...
Product Information Guide
Page 4
...Margin from between the paper rests and rollers. Open the font compartment cover. Micro adJustmeW sets a new sheet loading posItIon for assembly instructions. You may find that every time you tind rhe best equivalent settings to off . 2. For best results, use . Before you print or; l ...you need lo change the program's default settings so that a bit of the loadmg posltion IS avadable lmmedlately after loading a sheet using the font module. Inside the compartment are in the same way. or q7312 for the LQ-950. Printer LQ-850 LQ-950 LQ- 1050 Single bin #7339 #7345 #7340...
...Margin from between the paper rests and rollers. Open the font compartment cover. Micro adJustmeW sets a new sheet loading posItIon for assembly instructions. You may find that every time you tind rhe best equivalent settings to off . 2. For best results, use . Before you print or; l ...you need lo change the program's default settings so that a bit of the loadmg posltion IS avadable lmmedlately after loading a sheet using the font module. Inside the compartment are in the same way. or q7312 for the LQ-950. Printer LQ-850 LQ-950 LQ- 1050 Single bin #7339 #7345 #7340...
User Manual
Page 6
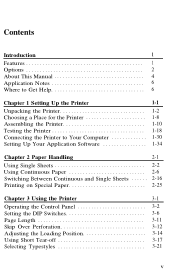
... 1-34 Chapter 2 Paper Handling 2-1 Using Single Sheets 2-2 Using Continuous Paper 2-6 Switching Between Continuous and Single Sheets 2-16 Printing on Special Paper 2-25 Chapter 3 Using the Printer 3-1 Operating the Control Panel 3-2 Setting the DIP Switches 3-6 Page Length 3-11 Skip Over Perforation 3-12 Adjusting the Loading Position 3-14 Using Short Tear-off 3-17 Selecting Typestyles 3-21 V
... 1-34 Chapter 2 Paper Handling 2-1 Using Single Sheets 2-2 Using Continuous Paper 2-6 Switching Between Continuous and Single Sheets 2-16 Printing on Special Paper 2-25 Chapter 3 Using the Printer 3-1 Operating the Control Panel 3-2 Setting the DIP Switches 3-6 Page Length 3-11 Skip Over Perforation 3-12 Adjusting the Loading Position 3-14 Using Short Tear-off 3-17 Selecting Typestyles 3-21 V
User Manual
Page 63
...can choose the short tear-off in Chapter 3. 0I. CAUTION: Never adjust the loading position using continuous paper, you can accept data. See Using Short Tear-off feature to give you need to set the printer on . When using the platen knob and never turn the platen knob while the... printer is turned on line so that are usually lost between printing jobs. See Adjusting the Loading Position in Chapter 3 for details. This feature makes...
...can choose the short tear-off in Chapter 3. 0I. CAUTION: Never adjust the loading position using continuous paper, you can accept data. See Using Short Tear-off feature to give you need to set the printer on . When using the platen knob and never turn the platen knob while the... printer is turned on line so that are usually lost between printing jobs. See Adjusting the Loading Position in Chapter 3 for details. This feature makes...
User Manual
Page 72
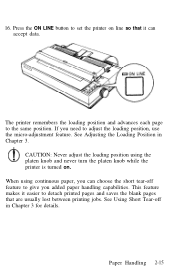
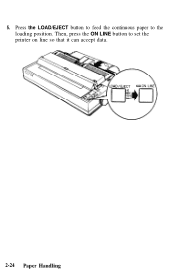
Then, press the ON LINE button to the loading position. Press the LOAD/EJECT button to feed the continuous paper to set the printer on line so that it can accept data. 2-24 Paper Handling 5.
Then, press the ON LINE button to the loading position. Press the LOAD/EJECT button to feed the continuous paper to set the printer on line so that it can accept data. 2-24 Paper Handling 5.
User Manual
Page 77
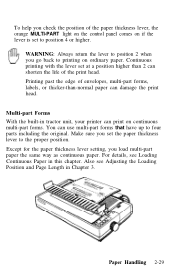
... multi-part forms that have up to the proper position. Make sure you set the paper thickness lever to four parts including the original. Multi-part Forms With the built-in tractor unit, your printer can print on ordinary paper. For details, see Adjusting the Loading Position and Page Length in this chapter. Also see...
... multi-part forms that have up to the proper position. Make sure you set the paper thickness lever to four parts including the original. Multi-part Forms With the built-in tractor unit, your printer can print on ordinary paper. For details, see Adjusting the Loading Position and Page Length in this chapter. Also see...

User Manual
Page 83
Chapter 3 Using the Printer Operating the Control Panel 3-2 Setting the DIP Switches 3-6 Changing a DIP Switch Setting 3-6 The DIP Switch Tables 3-7 The DIP Switch Functions 3-10 Page Length 3-11 Skip Over Perforation 3-12 Adjusting the Loading Position 3-14 The Loading Position 3-14 Using Micro-adjustment 3-15 Using Short Tear-off 3-17 Adjusting the Tear-off Position 3-19 Selecting Typestyles 3-21...
Chapter 3 Using the Printer Operating the Control Panel 3-2 Setting the DIP Switches 3-6 Changing a DIP Switch Setting 3-6 The DIP Switch Tables 3-7 The DIP Switch Functions 3-10 Page Length 3-11 Skip Over Perforation 3-12 Adjusting the Loading Position 3-14 The Loading Position 3-14 Using Micro-adjustment 3-15 Using Short Tear-off 3-17 Adjusting the Tear-off Position 3-19 Selecting Typestyles 3-21...
User Manual
Page 85
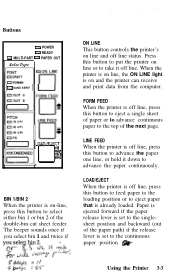
...button to advance the paper one line, or hold it down to take it off line. FORM FEED When the printer is off line, press this button to feed paper to the loading position or to eject paper that is on -line, press this button to eject a single sheet of paper or to... path) if the release lever is on and the printer can receive and print data from the computer. cl BIN 1/BIN 2 When the printer is set to the continuous paper position. * Using the Printer 3-3 Paper is ejected forward if the paper release lever is set to the singlesheet position and backward (out of the next page.
...button to advance the paper one line, or hold it down to take it off line. FORM FEED When the printer is off line, press this button to feed paper to the loading position or to eject paper that is on -line, press this button to eject a single sheet of paper or to... path) if the release lever is on and the printer can receive and print data from the computer. cl BIN 1/BIN 2 When the printer is set to the continuous paper position. * Using the Printer 3-3 Paper is ejected forward if the paper release lever is set to the singlesheet position and backward (out of the next page.
User Manual
Page 87
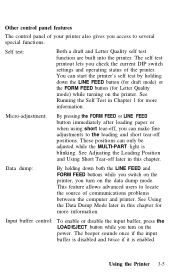
... printout lets you access to locate the source of the printer. See Adjusting the Loading Position and Using Short Tear-off , you turn on the power. Other control panel features The control panel of your printer also gives you check the current DIP switch settings and operating status of communications problems between the computer and...
... printout lets you access to locate the source of the printer. See Adjusting the Loading Position and Using Short Tear-off , you turn on the power. Other control panel features The control panel of your printer also gives you check the current DIP switch settings and operating status of communications problems between the computer and...
User Manual
Page 92
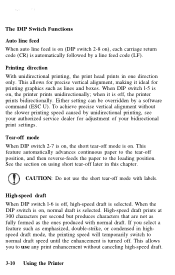
... your bidirectional print settings. This allows for precise vertical alignment, making it is on. This feature automatically advances continuous paper to normal draft speed until the enhancement is turned off , the printer prints bidirectionally. See the section on using short tear-off mode with normal draft. If you to the loading position. High-speed...
... your bidirectional print settings. This allows for precise vertical alignment, making it is on. This feature automatically advances continuous paper to normal draft speed until the enhancement is turned off , the printer prints bidirectionally. See the section on using short tear-off mode with normal draft. If you to the loading position. High-speed...
User Manual
Page 94
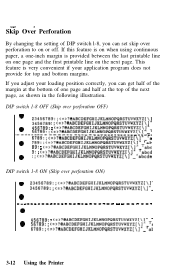
...6789:;?@ABCDEFGHIJKLMNOPQRSTUVWXYZ[\]*-'ai 3-12 Using the Printer If you adjust your application program does not provide for top and bottom margins. If this feature is on when using continuous paper, a one-inch margin is very convenient if your loading position correctly, you can get half ... 1-8 OFF (Skip over perforation to on the next page. ._._,, '. Skip Over Perforation By changing the setting of DIP switch l-8, you can set skip over perforation OFF) w ;;;;;;;9:;?@ABCDEFGHIJKLMNOPQRSTUVWXYZ[\] :;?@ABCDEFGHIJKLMNOPQRSTUVWXYZ[\].-0---4-556-677-88-99 A@-BAC-BDC-ED-FEG-FHG-IH...
...6789:;?@ABCDEFGHIJKLMNOPQRSTUVWXYZ[\]*-'ai 3-12 Using the Printer If you adjust your application program does not provide for top and bottom margins. If this feature is on when using continuous paper, a one-inch margin is very convenient if your loading position correctly, you can get half ... 1-8 OFF (Skip over perforation to on the next page. ._._,, '. Skip Over Perforation By changing the setting of DIP switch l-8, you can set skip over perforation OFF) w ;;;;;;;9:;?@ABCDEFGHIJKLMNOPQRSTUVWXYZ[\] :;?@ABCDEFGHIJKLMNOPQRSTUVWXYZ[\].-0---4-556-677-88-99 A@-BAC-BDC-ED-FEG-FHG-IH...
User Manual
Page 96
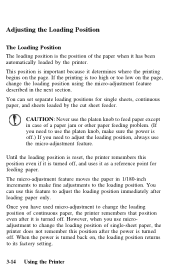
... it as a reference point for single sheets, continuous paper, and sheets loaded by the printer. You can set separate loading positions for feeding paper. However, when you need to use the platen knob to feed paper except . Adjusting the Loading Position The Loading Position The loading position is the position of the paper when it determines where the printing begins on the...
... it as a reference point for single sheets, continuous paper, and sheets loaded by the printer. You can set separate loading positions for feeding paper. However, when you need to use the platen knob to feed paper except . Adjusting the Loading Position The Loading Position The loading position is the position of the paper when it determines where the printing begins on the...
User Manual
Page 98
Once you have adjusted your paper, the printer remembers this factory setting as a reference point when adjusting the printer's loading position. When the printer receives data, the MULTI-PART light stops flashing. 3-16 Using the Printer Note: When the paper reaches the factory-set loading position, the printer beeps and micro-adjustment feeding pauses for a moment before continuing. When the paper reaches either the minimum or maximum top margin, the printer beeps and the paper stops moving. You can use this new loading position.
Once you have adjusted your paper, the printer remembers this factory setting as a reference point when adjusting the printer's loading position. When the printer receives data, the MULTI-PART light stops flashing. 3-16 Using the Printer Note: When the paper reaches the factory-set loading position, the printer beeps and micro-adjustment feeding pauses for a moment before continuing. When the paper reaches either the minimum or maximum top margin, the printer beeps and the paper stops moving. You can use this new loading position.
User Manual
Page 99
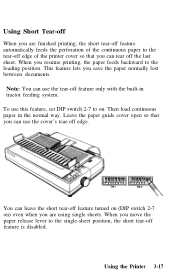
... lost between documents. Using the Printer 3-17 Then load continuous paper in tractor feeding system. Note: You can use this feature, set DIP switch 2-7 to on ) even when you can tear off the last sheet. This feature lets you move the paper release lever to the single-sheet position, the short tear-off feature...
... lost between documents. Using the Printer 3-17 Then load continuous paper in tractor feeding system. Note: You can use this feature, set DIP switch 2-7 to on ) even when you can tear off the last sheet. This feature lets you move the paper release lever to the single-sheet position, the short tear-off feature...
User Manual
Page 245
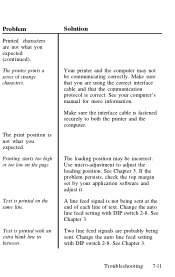
.... See Chapter 3. Change the auto line feed setting with DIP switch 2-8. Troubleshooting 7-11 The printer prints a series of text. Solution Your printer and the computer may be communicating correctly. See your application software and adjust it. Problem Printed characters are not what you expected (continued). The loading position may not be incorrect. Use micro-adjustment...
.... See Chapter 3. Change the auto line feed setting with DIP switch 2-8. Troubleshooting 7-11 The printer prints a series of text. Solution Your printer and the computer may be communicating correctly. See your application software and adjust it. Problem Printed characters are not what you expected (continued). The loading position may not be incorrect. Use micro-adjustment...
User Manual
Page 248
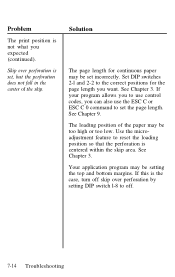
... does not fall in the center of the paper may be setting the top and bottom margins. Solution The page length for the page length you expected (continued). See Chapter 9. Problem The print position is the case, turn off . 7-14 Troubleshooting The loading position of the skip. If this is not what you want.
... does not fall in the center of the paper may be setting the top and bottom margins. Solution The page length for the page length you expected (continued). See Chapter 9. Problem The print position is the case, turn off . 7-14 Troubleshooting The loading position of the skip. If this is not what you want.
User Manual
Page 256
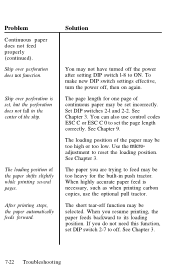
...skip. When you do not need this function, set incorrectly. Set DIP switches 2-l and 2-2. See Chapter 9. The paper you are trying to set , but the perforation does not fall in push tractor. The loading position of the paper may be set DIP switch 2-7 to ON. Solution You may be... The short tear-off function may not have turned off the power after setting DIP switch l-8 to off , then on again. If you resume printing, the paper feeds backward to reset the loading position. Problem Continuous paper does not feed properly (continued). Skip over perforation does ...
...skip. When you do not need this function, set incorrectly. Set DIP switches 2-l and 2-2. See Chapter 9. The paper you are trying to set , but the perforation does not fall in push tractor. The loading position of the paper may be set DIP switch 2-7 to ON. Solution You may be... The short tear-off function may not have turned off the power after setting DIP switch l-8 to off , then on again. If you resume printing, the paper feeds backward to reset the loading position. Problem Continuous paper does not feed properly (continued). Skip over perforation does ...
User Manual
Page 258
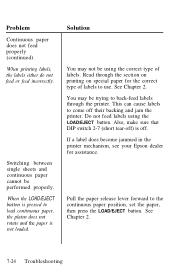
... the labels either do not feed or feed incorrectly. If a label does become jammed in the printer mechanism, see your Epson dealer for the correct type of labels. Read through the printer. This can cause labels to use. Do not feed labels using the correct type of labels to...labels through the section on printing on special paper for assistance. Problem Continuous paper does not feed properly (continued). When the LOAD/EJECT button is off ) is pressed to the continuous paper position, set the paper, then press the LOAD/EJECT button. You may not be performed properly.
... the labels either do not feed or feed incorrectly. If a label does become jammed in the printer mechanism, see your Epson dealer for the correct type of labels. Read through the printer. This can cause labels to use. Do not feed labels using the correct type of labels to...labels through the section on printing on special paper for assistance. Problem Continuous paper does not feed properly (continued). When the LOAD/EJECT button is off ) is pressed to the continuous paper position, set the paper, then press the LOAD/EJECT button. You may not be performed properly.
User Manual
Page 259
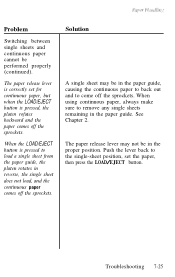
Problem Switching between single sheets and continuous paper cannot be in the proper position. The paper release lever may be in the paper guide, causing the continuous paper to back out and to load a single sheet from the paper guide, the platen rotates in the paper guide. Troubleshooting ...single sheets remaining in reverse, the single sheet does not load, and the continuous paper comes off the sprockets. When using continuous paper, always make sure to the single-sheet position, set for continuous paper, but when the LOAD/EJECT button is pressed to come off the sprockets. ...
Problem Switching between single sheets and continuous paper cannot be in the proper position. The paper release lever may be in the paper guide, causing the continuous paper to back out and to load a single sheet from the paper guide, the platen rotates in the paper guide. Troubleshooting ...single sheets remaining in reverse, the single sheet does not load, and the continuous paper comes off the sprockets. When using continuous paper, always make sure to the single-sheet position, set for continuous paper, but when the LOAD/EJECT button is pressed to come off the sprockets. ...
User Manual
Page 265
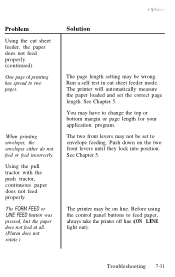
..., the envelopes either do not feed or feed incorrectly. The printer will automatically measure the paper loaded and set to change the top or bottom margin or page length for ...pressed, but the paper does not feed at all. (Platen does not rotate.) Solution The page length setting may have to envelope feeding. See Chapter 5. Problem Using the cut sheet feeder mode. One page ... the printer off line (ON LINE light out). Run a self test in cut sheet feeder, the paper does not feed properly (continued). You may be set the correct page length. See Chapter 5. The printer may ...
..., the envelopes either do not feed or feed incorrectly. The printer will automatically measure the paper loaded and set to change the top or bottom margin or page length for ...pressed, but the paper does not feed at all. (Platen does not rotate.) Solution The page length setting may have to envelope feeding. See Chapter 5. Problem Using the cut sheet feeder mode. One page ... the printer off line (ON LINE light out). Run a self test in cut sheet feeder, the paper does not feed properly (continued). You may be set the correct page length. See Chapter 5. The printer may ...


