
Technical Brief (Impact Printers)
Page 1
... a registered trademark of multi-part forms that can all have finer printhead pins which determines the type of printing and the number of Seiko Epson Corporation. 1/00 Other trademarks are either 9- Contents This technical brief provides detailed information on the following topics, related to all EPSON impact printers: Functionality M Printing technology M Control code/emulation M Paper handling M SmartPark™ settings Versatility M Flexible interfacing M Built...
... a registered trademark of multi-part forms that can all have finer printhead pins which determines the type of printing and the number of Seiko Epson Corporation. 1/00 Other trademarks are either 9- Contents This technical brief provides detailed information on the following topics, related to all EPSON impact printers: Functionality M Printing technology M Control code/emulation M Paper handling M SmartPark™ settings Versatility M Flexible interfacing M Built...
Technical Brief (Impact Printers)
Page 4
... Page 4 L LL Functionality-SmartPark™ settings EPSON SmartPark settings, which make the printers compatible with virtually any Windows system environment. Automatic tear-off , paper parking, and microfeed adjustments. Bundled Microsoft Windows® 3.1x, Windows NT 3.51/4.0, Windows 95 and Windows 98 drivers guarantees ease of use right out of built-in 2-point increments, available on EPSON 24-pin impact printers Barcode fonts-available on the control panel. EPSON impact printers offers these types...
... Page 4 L LL Functionality-SmartPark™ settings EPSON SmartPark settings, which make the printers compatible with virtually any Windows system environment. Automatic tear-off , paper parking, and microfeed adjustments. Bundled Microsoft Windows® 3.1x, Windows NT 3.51/4.0, Windows 95 and Windows 98 drivers guarantees ease of use right out of built-in 2-point increments, available on EPSON 24-pin impact printers Barcode fonts-available on the control panel. EPSON impact printers offers these types...

Technical Brief (Impact Printers)
Page 5
... NT 4.0 users can add an optional Ethernet card to have access to each printer L EPSON Remote! Simplifies setup when installing multiple printers-just make the necessary changes in the software utility, and download the settings to the Printer Status Monitor. Manual Front : 17 inch Manual Front : 8.5mm Print Direction : Bi-d Skip over hold : OFF Interface mode : Auto I/F interval : 10s Input Buffer : ON Auto Tear off : OFF Auto Line Feed : OFF Control Code : ESC/P 0 slash : OFF Buzzer : ON Roll Paper : OFF...
... NT 4.0 users can add an optional Ethernet card to have access to each printer L EPSON Remote! Simplifies setup when installing multiple printers-just make the necessary changes in the software utility, and download the settings to the Printer Status Monitor. Manual Front : 17 inch Manual Front : 8.5mm Print Direction : Bi-d Skip over hold : OFF Interface mode : Auto I/F interval : 10s Input Buffer : ON Auto Tear off : OFF Auto Line Feed : OFF Control Code : ESC/P 0 slash : OFF Buzzer : ON Roll Paper : OFF...
Product Information Guide
Page 2
... the 10 Inch (254 mm) width paper is used . 0.98 inches (25 mm) or more (both sides) when the 4 to 9.5 inch (101 mm to 3 sheets m&ding the ongmal. Pin Printers Envelope Note: Envelope printing is a list of ribbon: MCBF: #7753: 2.000,ooO characters (in black: #7753 Life expectancy of Epson interfaces that are compatible with backing) 0.0025 to 0.0055 inches (0.065 to...
... the 10 Inch (254 mm) width paper is used . 0.98 inches (25 mm) or more (both sides) when the 4 to 9.5 inch (101 mm to 3 sheets m&ding the ongmal. Pin Printers Envelope Note: Envelope printing is a list of ribbon: MCBF: #7753: 2.000,ooO characters (in black: #7753 Life expectancy of Epson interfaces that are compatible with backing) 0.0025 to 0.0055 inches (0.065 to...
Product Information Guide
Page 4
... Enable Printable Characters . . . . 9-37 55 37 Enable Upper Control Codes . . . 9-37 58 .3A Copy ROM to RAM 9-36 60 3c Select Unidirectional Mode (one line, or hold it off line, press this button to elect a single sheet of communications problems between the computer and printer. I Commands in Chapter I .LOAD/EJECT This button is on the printer. Micro-adjustment: By pressing the FORM FEED button immediately after loading paper or when using...
... Enable Printable Characters . . . . 9-37 55 37 Enable Upper Control Codes . . . 9-37 58 .3A Copy ROM to RAM 9-36 60 3c Select Unidirectional Mode (one line, or hold it off line, press this button to elect a single sheet of communications problems between the computer and printer. I Commands in Chapter I .LOAD/EJECT This button is on the printer. Micro-adjustment: By pressing the FORM FEED button immediately after loading paper or when using...
Product Information Guide
Page 6
...-Pin Printers This is not set correctly. Cut-Sheet Feeder/ Single-Sheet Operation The page length will have to be adjusted (shortened) to 61 lines per page if your system must be checked before using the printer This will usually work for the next-best model selection. NEW LQ-510 DOT-MATRIX PRINTER Installation/Support Tips Software The type of the second page if the page length is usually done through a setup menu. DIP Switch Settings The default settings will...
...-Pin Printers This is not set correctly. Cut-Sheet Feeder/ Single-Sheet Operation The page length will have to be adjusted (shortened) to 61 lines per page if your system must be checked before using the printer This will usually work for the next-best model selection. NEW LQ-510 DOT-MATRIX PRINTER Installation/Support Tips Software The type of the second page if the page length is usually done through a setup menu. DIP Switch Settings The default settings will...
Product Support Bulletin(s)
Page 3
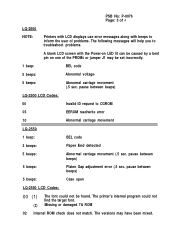
... 4 LQ-2500 NOTE: Printers with LCD displays use error messages along with beeps to inform the user of problems. The following messages will help you to CGROM 03 EEROM read/write error 10 Abnormal carriage movement LQ-2550 1 beep: BEL code 3 beeps: Paper End detected 5 beeps: Abnormal carriage movement (.5 sec. pause between beeps) LQ-2500 LCD Codes: 00 Invalid ID request to troubleshoot problems. A blank LCD screen with the Power...
... 4 LQ-2500 NOTE: Printers with LCD displays use error messages along with beeps to inform the user of problems. The following messages will help you to CGROM 03 EEROM read/write error 10 Abnormal carriage movement LQ-2550 1 beep: BEL code 3 beeps: Paper End detected 5 beeps: Abnormal carriage movement (.5 sec. pause between beeps) LQ-2500 LCD Codes: 00 Invalid ID request to troubleshoot problems. A blank LCD screen with the Power...
Product Support Bulletin(s)
Page 4
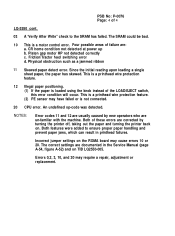
... Illegal paper positioning. (1) If the paper is loaded using the knob instead of 4 LQ-2550 cont. 03 A 'Verify After Write" check to ensure proper paper handling and prevent paper jams, which can result in the Service Manual (page A-54, figure A-52) and on the ROMA board may require a repair, adjustment or replacement. Incorrect jumper settings on TIB LQ2550-005. CR home condition not detected at power up...
... Illegal paper positioning. (1) If the paper is loaded using the knob instead of 4 LQ-2550 cont. 03 A 'Verify After Write" check to ensure proper paper handling and prevent paper jams, which can result in the Service Manual (page A-54, figure A-52) and on the ROMA board may require a repair, adjustment or replacement. Incorrect jumper settings on TIB LQ2550-005. CR home condition not detected at power up...
User Manual
Page 62
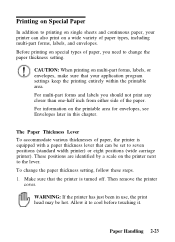
... envelopes, make sure that can also print on a wide variety of paper types, including multi-part forms, labels, and envelopes. For multi-part forms and labels you need to change the paper thickness setting, follow these steps. 1. Make sure that the printer is equipped with a paper thickness lever that your printer can be hot. Printing on Special Paper In addition to printing on single sheets and continuous paper, your application program settings keep...
... envelopes, make sure that can also print on a wide variety of paper types, including multi-part forms, labels, and envelopes. For multi-part forms and labels you need to change the paper thickness setting, follow these steps. 1. Make sure that the printer is equipped with a paper thickness lever that your printer can be hot. Printing on Special Paper In addition to printing on single sheets and continuous paper, your application program settings keep...
User Manual
Page 65
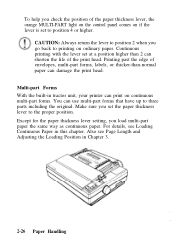
Make sure you load multi-part paper the same way as continuous paper. Multi-part Forms With the built-in this chapter. For details, see Page Length and Adjusting the Loading Position in Chapter 3. 2-26 Paper Handling Also see Loading Continuous Paper in tractor unit, your printer can print on ordinary paper. Except for the paper thickness lever setting, you set to three parts including the original. To help you check the position...
Make sure you load multi-part paper the same way as continuous paper. Multi-part Forms With the built-in this chapter. For details, see Page Length and Adjusting the Loading Position in Chapter 3. 2-26 Paper Handling Also see Loading Continuous Paper in tractor unit, your printer can print on ordinary paper. Except for the paper thickness lever setting, you set to three parts including the original. To help you check the position...
User Manual
Page 97
Chapter 4 Software and Graphics Enhancing Your Printing 4-2 Character Spacing 4-2 Character Size 4-3 Special Effects and Emphasis 4-4 Graphics 4-7 The Print Head 4-8 The Graphics Command 4-11 Column Reservation Numbers 4-12 A Simple Graphics Program 4-12 Designing Your Own Graphics 4-13 User-defined Characters 4-17 Designing Your Characters 4-17 Defining Your Characters 4-19 Sending Information to Your Printer 4-21 Printing User-defined Characters 4-24 Copying ROM Characters to RAM 4-25 Letter Quality Characters 4-26 Mixing Print Styles 4-27 Software and Graphics 4-1
Chapter 4 Software and Graphics Enhancing Your Printing 4-2 Character Spacing 4-2 Character Size 4-3 Special Effects and Emphasis 4-4 Graphics 4-7 The Print Head 4-8 The Graphics Command 4-11 Column Reservation Numbers 4-12 A Simple Graphics Program 4-12 Designing Your Own Graphics 4-13 User-defined Characters 4-17 Designing Your Characters 4-17 Defining Your Characters 4-19 Sending Information to Your Printer 4-21 Printing User-defined Characters 4-24 Copying ROM Characters to RAM 4-25 Letter Quality Characters 4-26 Mixing Print Styles 4-27 Software and Graphics 4-1
User Manual
Page 123
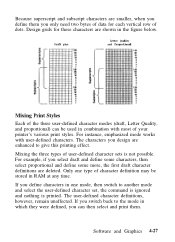
... unaffected. Design grids for each vertical row of user-defined character sets is printed. For example, if you design are shown in RAM at any time. Software and Graphics 4-27 For instance, emphasized mode works with most of character definition may be used in combination with user-defined characters. If you define characters in one type of your printer's various print styles.
... unaffected. Design grids for each vertical row of user-defined character sets is printed. For example, if you design are shown in RAM at any time. Software and Graphics 4-27 For instance, emphasized mode works with most of character definition may be used in combination with user-defined characters. If you define characters in one type of your printer's various print styles.
User Manual
Page 147
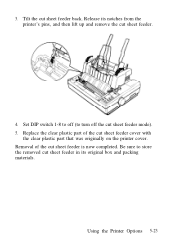
Removal of the cut sheet feeder is now completed. Replace the clear plastic part of the cut sheet feeder cover with the clear plastic part that was originally on the printer cover. Release its original box and packing materials. Be sure to turn off (to store the removed cut sheet feeder mode). 5. Set DIP switch 1-8 to off the cut sheet feeder in its notches from the printer's pins, and then lift up and remove the cut sheet feeder back. 3. Tilt the cut sheet feeder. 4. Using the Printer Options 5-23
Removal of the cut sheet feeder is now completed. Replace the clear plastic part of the cut sheet feeder cover with the clear plastic part that was originally on the printer cover. Release its original box and packing materials. Be sure to turn off (to store the removed cut sheet feeder mode). 5. Set DIP switch 1-8 to off the cut sheet feeder in its notches from the printer's pins, and then lift up and remove the cut sheet feeder back. 3. Tilt the cut sheet feeder. 4. Using the Printer Options 5-23

User Manual
Page 183
... software may not be installed properly for possible printer problems. Power is plugged properly into the outlet to set the printer on . Load paper in the printer. 7-2 Troubleshooting Printing This section supplies solutions for your printer. If the electrical outlet is on. Press the ON LINE button to determine whether the outlet is turned on line. Check both the printer and the computer specifications. l The PAPER OUT light is controlled by an outside switch...
... software may not be installed properly for possible printer problems. Power is plugged properly into the outlet to set the printer on . Load paper in the printer. 7-2 Troubleshooting Printing This section supplies solutions for your printer. If the electrical outlet is on. Press the ON LINE button to determine whether the outlet is turned on line. Check both the printer and the computer specifications. l The PAPER OUT light is controlled by an outside switch...
User Manual
Page 184
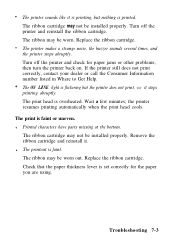
... several times, and the printer stops abruptly. Turn off the printer and reinstall the ribbon cartridge. If the printer still does not print correctly, contact your dealer or call the Consumer Information number listed in Where to Get Help. Wait a few minutes; The print is flickering but nothing is overheated. The ribbon cartridge may be installed properly. l The printout is set correctly for paper jams or other problems; Replace...
... several times, and the printer stops abruptly. Turn off the printer and reinstall the ribbon cartridge. If the printer still does not print correctly, contact your dealer or call the Consumer Information number listed in Where to Get Help. Wait a few minutes; The print is flickering but nothing is overheated. The ribbon cartridge may be installed properly. l The printout is set correctly for paper jams or other problems; Replace...
User Manual
Page 192
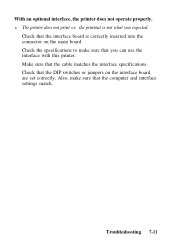
Check the specifications to make sure that the interface board is not what you can use the interface with this printer. Make sure that you expected. Also, make sure that the cable matches the interface specifications. Troubleshooting 7-11 Check that the computer and interface settings match. Check that the DIP switches or jumpers on the main board. l The printer does not print or the printout is correctly inserted into the connector on the interface board are set correctly. With an optional interface, the printer does not operate properly.
Check the specifications to make sure that the interface board is not what you can use the interface with this printer. Make sure that you expected. Also, make sure that the cable matches the interface specifications. Troubleshooting 7-11 Check that the computer and interface settings match. Check that the DIP switches or jumpers on the main board. l The printer does not print or the printout is correctly inserted into the connector on the interface board are set correctly. With an optional interface, the printer does not operate properly.
User Manual
Page 221
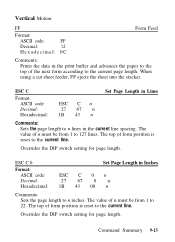
... form position is reset to the current line. Overrides the DIP switch setting for page length. The top of form position is reset to the current line. Overrides the DIP switch setting for page length. ESC C Set Page Length in Lines Format: ASCII code: Decimal: Hexadecimal: ESC C n 27 67 n 1B 43 n Comments: Sets the page length to n inches. When using a cut sheet feeder, FF ejects the sheet into the stacker...
... form position is reset to the current line. Overrides the DIP switch setting for page length. The top of form position is reset to the current line. Overrides the DIP switch setting for page length. ESC C Set Page Length in Lines Format: ASCII code: Decimal: Hexadecimal: ESC C n 27 67 n 1B 43 n Comments: Sets the page length to n inches. When using a cut sheet feeder, FF ejects the sheet into the stacker...
User Manual
Page 245
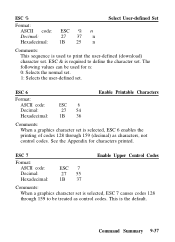
...) as control codes. ESC 7 Format: ASCII code: Decimal: Hexadecimal: ESC 7 27 55 1B 37 Enable Upper Control Codes Comments: When a graphics character set is the default. ESC % Format: ASCII code: ESC % n Decimal: 27 37 n Hexadecimal: 1B 25 n Select User-defined Set Comments: This sequence is selected, ESC 6 enables the printing of codes 128 through 159 to be used to define the character set is used for characters printed...
...) as control codes. ESC 7 Format: ASCII code: Decimal: Hexadecimal: ESC 7 27 55 1B 37 Enable Upper Control Codes Comments: When a graphics character set is the default. ESC % Format: ASCII code: ESC % n Decimal: 27 37 n Hexadecimal: 1B 25 n Select User-defined Set Comments: This sequence is selected, ESC 6 enables the printing of codes 128 through 159 to be used to define the character set is used for characters printed...

User Manual
Page 264
... tractor unit An optional device that feeds continuous paper through the printer. The portion of the printer. Draft is used to its ROM. reset To return a printer to produce more polished documents. serial interface A serial interface transmits data one bit at a time. When the self test is turned off and on instructions and built-in which the character width varies from character to store power-on . proportional printing Printing...
... tractor unit An optional device that feeds continuous paper through the printer. The portion of the printer. Draft is used to its ROM. reset To return a printer to produce more polished documents. serial interface A serial interface transmits data one bit at a time. When the self test is turned off and on instructions and built-in which the character width varies from character to store power-on . proportional printing Printing...
User Manual
Page 269
...14 cleaning, 6-2-3 connecting to computer, 1-22-24 dimensions, 8-8 location for, 1-5-6 options, using, 5-1-46 parts, 1-2 specifications, 8-2-8 stand, 1-6 testing, 1-15-21 transporting, 6-10-11 unpacking, 1-2-4 weight, 8-8 Printing characters, 4-24 direction, 3-14, 8-2 enhancing, 4-2-6 problems and solutions, 7-2-6 specifications, 8-2-3 Problems, see Troubleshooting Proportional width characters, 4-26, 9-25, A-2-5 Protective materials, removing, 1-3-4 Pull tractor, 5-24-36 installation, 5-24 paper handling, 5-27-33 removing, 5-33-36 R READY light, 3-2 Reloading paper, 2-7 Replacement ribbons...
...14 cleaning, 6-2-3 connecting to computer, 1-22-24 dimensions, 8-8 location for, 1-5-6 options, using, 5-1-46 parts, 1-2 specifications, 8-2-8 stand, 1-6 testing, 1-15-21 transporting, 6-10-11 unpacking, 1-2-4 weight, 8-8 Printing characters, 4-24 direction, 3-14, 8-2 enhancing, 4-2-6 problems and solutions, 7-2-6 specifications, 8-2-3 Problems, see Troubleshooting Proportional width characters, 4-26, 9-25, A-2-5 Protective materials, removing, 1-3-4 Pull tractor, 5-24-36 installation, 5-24 paper handling, 5-27-33 removing, 5-33-36 R READY light, 3-2 Reloading paper, 2-7 Replacement ribbons...


