Product Support Bulletin(s)
Page 3
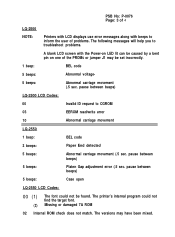
...you to CGROM 03 EEROM read/write error 10 Abnormal carriage movement LQ-2550 1 beep: BEL code 3 beeps: Paper End detected 5 beeps: Abnormal carriage movement (.5 sec. The printer's internal program could not be set incorrectly. 1 beep: BEL ...code 5 beeps: Abnormal voltage- 5 beeps: Abnormal carriage movement (.5 sec. The versions may be found. pause between beeps) 5 beeps: Platen Gap adjustment error (.5 sec. pause between beeps) LQ-2500 LCD Codes: 00 Invalid ID request to troubleshoot...
...you to CGROM 03 EEROM read/write error 10 Abnormal carriage movement LQ-2550 1 beep: BEL code 3 beeps: Paper End detected 5 beeps: Abnormal carriage movement (.5 sec. The printer's internal program could not be set incorrectly. 1 beep: BEL ...code 5 beeps: Abnormal voltage- 5 beeps: Abnormal carriage movement (.5 sec. The versions may be found. pause between beeps) 5 beeps: Platen Gap adjustment error (.5 sec. pause between beeps) LQ-2500 LCD Codes: 00 Invalid ID request to troubleshoot...

User Manual
Page 5
... 4-1 Enhancing Your Printing 4-2 Graphics 4-9 User-defined Characters 4-20 Chapter 5 Using the Printer Options 5-1 The Cut Sheet Feeder 5-2 The Pull Tractor 5-17 The Multi-Font Module 5-28 The Interface Boards 5-34 Chapter 6 Maintenance 6-1 Cleaning the Printer 6-2 Replacing the Ribbon 6-4 Transporting the Printer 6-10 Chapter 7 Troubleshooting 7-1 Problems and Solutions 7-2 Power Supply 7-4 P r i n t i n g 7-5 Paper Handling 7-14 Options 7-24...
... 4-1 Enhancing Your Printing 4-2 Graphics 4-9 User-defined Characters 4-20 Chapter 5 Using the Printer Options 5-1 The Cut Sheet Feeder 5-2 The Pull Tractor 5-17 The Multi-Font Module 5-28 The Interface Boards 5-34 Chapter 6 Maintenance 6-1 Cleaning the Printer 6-2 Replacing the Ribbon 6-4 Transporting the Printer 6-10 Chapter 7 Troubleshooting 7-1 Problems and Solutions 7-2 Power Supply 7-4 P r i n t i n g 7-5 Paper Handling 7-14 Options 7-24...
User Manual
Page 12
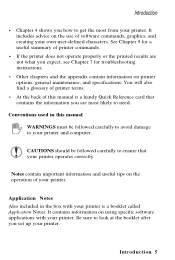
... the information you are not what you expect, see Chapter 7 for troubleshooting instructions. • Other chapters and the appendix contain information on using specific software applications with your printer is a booklet called Application Notes. Conventions used in the box with your printer. CAUTIONS should be followed carefully to avoid damage to get the...
... the information you are not what you expect, see Chapter 7 for troubleshooting instructions. • Other chapters and the appendix contain information on using specific software applications with your printer is a booklet called Application Notes. Conventions used in the box with your printer. CAUTIONS should be followed carefully to avoid damage to get the...
User Manual
Page 177
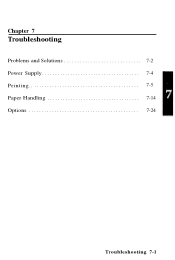
Chapter 7 Troubleshooting Problems and Solutions 7-2 Power Supply 7-4 Printing 7-5 Paper Handling 7-14 Options 7-24 Troubleshooting 7-1
Chapter 7 Troubleshooting Problems and Solutions 7-2 Power Supply 7-4 Printing 7-5 Paper Handling 7-14 Options 7-24 Troubleshooting 7-1
User Manual
Page 178
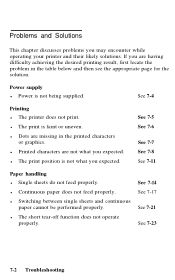
... graphics. l The print position is not what you may encounter while operating your printer and their likely solutions. See 7-14 See 7-17 See 7-21 See 7-23 7-2 Troubleshooting l The short tear-off function does not operate properly. See 7-4 Printing l The printer does not print. See 7-5 See 7-6 See 7-7 See 7-8 See 7-11 Paper handling l Single sheets...
... graphics. l The print position is not what you may encounter while operating your printer and their likely solutions. See 7-14 See 7-17 See 7-21 See 7-23 7-2 Troubleshooting l The short tear-off function does not operate properly. See 7-4 Printing l The printer does not print. See 7-5 See 7-6 See 7-7 See 7-8 See 7-11 Paper handling l Single sheets...
User Manual
Page 179
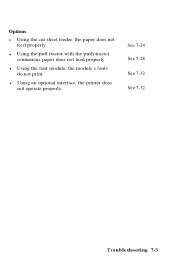
l Using the pull tractor with the push tractor, continuous paper does not feed properly. See 7-24 See 7-28 See 7-32 See 7-32 Troubleshooting 7-3 l Using the font module, the module's fonts do not print. Options l Using the cut sheet feeder, the paper does not feed properly. l Using an optional interface, the printer does not operate properly.
l Using the pull tractor with the push tractor, continuous paper does not feed properly. See 7-24 See 7-28 See 7-32 See 7-32 Troubleshooting 7-3 l Using the font module, the module's fonts do not print. Options l Using the cut sheet feeder, the paper does not feed properly. l Using an optional interface, the printer does not operate properly.

User Manual
Page 180
... not properly plugged into the outlet to determine whether the outlet is operating properly. The power switch is off the printer and see that is not controlled by an outside switch. 7-4 Troubleshooting Power is not being supplied. Turn off . Power Supply Problem Power is not being supplied to the electrical outlet. Plug...
... not properly plugged into the outlet to determine whether the outlet is operating properly. The power switch is off the printer and see that is not controlled by an outside switch. 7-4 Troubleshooting Power is not being supplied. Turn off . Power Supply Problem Power is not being supplied to the electrical outlet. Plug...
User Manual
Page 181
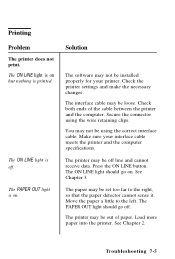
... into the printer. The printer may be off . Check the printer settings and make the necessary changes. You may not be using the wire retaining clips. Move the paper a little to the right, so that the paper detector cannot sense it. The PAPER OUT light should go off. Troubleshooting 7-5 The... PAPER OUT light is on . The ON LINE light is on but nothing is off line and cannot receive data. See Chapter 2. Check both ends of paper. Make sure your printer. Solution The software may not be installed properly...
... into the printer. The printer may be off . Check the printer settings and make the necessary changes. You may not be using the wire retaining clips. Move the paper a little to the right, so that the paper detector cannot sense it. The PAPER OUT light should go off. Troubleshooting 7-5 The... PAPER OUT light is on . The ON LINE light is on but nothing is off line and cannot receive data. See Chapter 2. Check both ends of paper. Make sure your printer. Solution The software may not be installed properly...
User Manual
Page 182
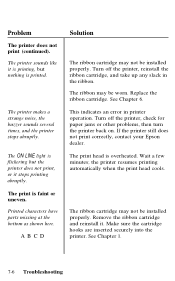
... turn the printer back on. See Chapter 1. 7-6 Troubleshooting the printer resumes printing automatically when the print head cools. Remove the ribbon cartridge and reinstall it stops printing abruptly. Printed characters have parts missing at the bottom as shown here. If the printer still does not print correctly, contact your Epson dealer. The printer sounds like it...
... turn the printer back on. See Chapter 1. 7-6 Troubleshooting the printer resumes printing automatically when the print head cools. Remove the ribbon cartridge and reinstall it stops printing abruptly. Printed characters have parts missing at the bottom as shown here. If the printer still does not print correctly, contact your Epson dealer. The printer sounds like it...
User Manual
Page 183
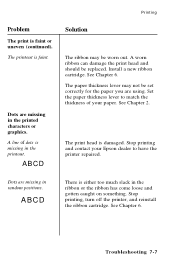
Dots are missing in the ribbon or the ribbon has come loose and gotten caught on something. Stop printing and contact your paper. Troubleshooting 7-7 ABCD Solution Printing The ribbon may not be set correctly for the paper you are missing in the printout. ABCD There is ...characters or graphics. The paper thickness lever may be replaced. Set the paper thickness lever to have the printer repaired. The print head is faint or uneven (continued). A line of your Epson dealer to match the thickness of dots is faint. A worn ribbon can damage the print head and ...
Dots are missing in the ribbon or the ribbon has come loose and gotten caught on something. Stop printing and contact your paper. Troubleshooting 7-7 ABCD Solution Printing The ribbon may not be set correctly for the paper you are missing in the printout. ABCD There is ...characters or graphics. The paper thickness lever may be replaced. Set the paper thickness lever to have the printer repaired. The print head is faint or uneven (continued). A line of your Epson dealer to match the thickness of dots is faint. A worn ribbon can damage the print head and ...
User Manual
Page 184
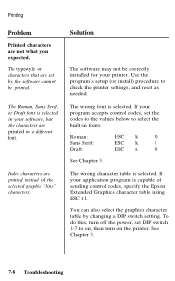
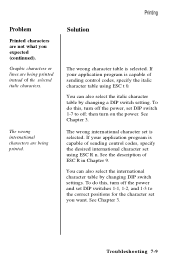
...Epson Extended Graphics character table using ESC t l. The wrong font is capable of the selected graphic "line" characters. If your software, but the characters are set DIP switch 1-7 to check the printer settings, and reset as needed. To do this, turn off the power, set by changing a DIP switch setting. See Chapter 3. 7-8 Troubleshooting... Solution The software may not be printed. The wrong character table is selected in your application program is selected. Use the program's setup (or install) procedure to on, then turn on the printer. The ...
...Epson Extended Graphics character table using ESC t l. The wrong font is capable of the selected graphic "line" characters. If your software, but the characters are set DIP switch 1-7 to check the printer settings, and reset as needed. To do this, turn off the power, set by changing a DIP switch setting. See Chapter 3. 7-8 Troubleshooting... Solution The software may not be printed. The wrong character table is selected in your application program is selected. Use the program's setup (or install) procedure to on, then turn on the printer. The ...
User Manual
Page 185
... not what you want. Graphic characters or lines are being printed instead of sending control codes, specify the italic character table using ESC R n. See Chapter 3. Troubleshooting 7-9 To do this , turn off the power, set DIP switch 1-7 to off the power and set DIP switches 1-1, 1-2, and 1-3 to the correct positions for the...
... not what you want. Graphic characters or lines are being printed instead of sending control codes, specify the italic character table using ESC R n. See Chapter 3. Troubleshooting 7-9 To do this , turn off the power, set DIP switch 1-7 to off the power and set DIP switches 1-1, 1-2, and 1-3 to the correct positions for the...
User Manual
Page 186
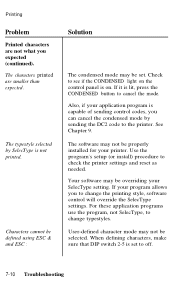
If it is lit, press the CONDENSED button to off. 7-10 Troubleshooting Your software may not be set to cancel the mode. User-defined character mode may be properly installed for your SelecType setting. When defining characters, ... reset as needed. Characters cannot be defined using ESC & and ESC : Solution The condensed mode may not be overriding your printer. Use the program's setup (or install) procedure to the printer. Printing Problem Printed characters are smaller than expected. The software may be selected. The characters printed are not what you to...
If it is lit, press the CONDENSED button to off. 7-10 Troubleshooting Your software may not be set to cancel the mode. User-defined character mode may be properly installed for your SelecType setting. When defining characters, ... reset as needed. Characters cannot be defined using ESC & and ESC : Solution The condensed mode may not be overriding your printer. Use the program's setup (or install) procedure to the printer. Printing Problem Printed characters are smaller than expected. The software may be selected. The characters printed are not what you to...
User Manual
Page 187
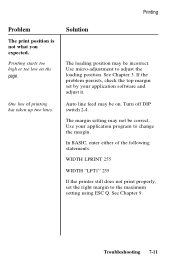
... top margin set the right margin to adjust the loading position. One line of the following statements: WIDTH LPRINT 255 WIDTH "LPT1" 255 If the printer still does not print properly, set by your application program to change the margin. Auto line feed may be correct. Turn off DIP switch 2-4. Printing... to the maximum setting using ESC Q. Use your application software and adjust it. See Chapter 9. Printing Problem The print position is not what you expected. Troubleshooting 7-11 Solution The loading position may not be on the page.
... top margin set the right margin to adjust the loading position. One line of the following statements: WIDTH LPRINT 255 WIDTH "LPT1" 255 If the printer still does not print properly, set by your application program to change the margin. Auto line feed may be correct. Turn off DIP switch 2-4. Printing... to the maximum setting using ESC Q. Use your application software and adjust it. See Chapter 9. Printing Problem The print position is not what you expected. Troubleshooting 7-11 Solution The loading position may not be on the page.
User Manual
Page 188
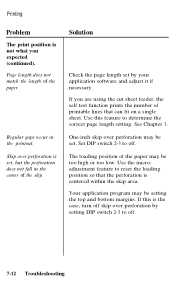
..., the self test function prints the number of the paper may be set by setting DIP switch 2-3 to off . Set DIP switch 2-3 to off . 7-12 Troubleshooting Your application program may be too high or too low. Page length does not match the length of the skip. If you expected (continued). Skip...
..., the self test function prints the number of the paper may be set by setting DIP switch 2-3 to off . Set DIP switch 2-3 to off . 7-12 Troubleshooting Your application program may be too high or too low. Page length does not match the length of the skip. If you expected (continued). Skip...
User Manual
Page 189
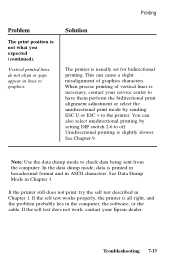
... U or ESC < to the printer. If the self test works properly, the printer is not what you expected (continued). Note: Use the data dump mode to off. Printing Problem The print position is all right, and the problem probably lies in lines or graphics. Troubleshooting 7-13 If the printer still does not print, try...
... U or ESC < to the printer. If the self test works properly, the printer is not what you expected (continued). Note: Use the data dump mode to off. Printing Problem The print position is all right, and the problem probably lies in lines or graphics. Troubleshooting 7-13 If the printer still does not print, try...
User Manual
Page 190
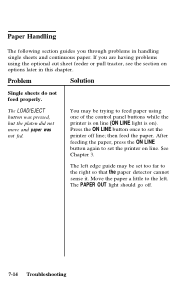
..., see the section on options later in handling single sheets and continuous paper. The left . Move the paper a little to set the printer off . 7-14 Troubleshooting Problem Solution Single sheets do not feed properly. After feeding the paper, press the ON LINE button again to the left edge guide may...the paper detector cannot sense it. Paper Handling The following section guides you are having problems using one of the control panel buttons while the printer is on line (ON LINE light is on line. The LOAD/EJECT button was pressed, but the platen did not move and paper ...
..., see the section on options later in handling single sheets and continuous paper. The left . Move the paper a little to set the printer off . 7-14 Troubleshooting Problem Solution Single sheets do not feed properly. After feeding the paper, press the ON LINE button again to the left edge guide may...the paper detector cannot sense it. Paper Handling The following section guides you are having problems using one of the control panel buttons while the printer is on line (ON LINE light is on line. The LOAD/EJECT button was pressed, but the platen did not move and paper ...
User Manual
Page 191
... is pressed, the paper jams. Solution The paper release lever may be set in use, DIP switch 1-8 should be used with this printer's single-sheet feeding system. When feeding thicker than normal paper, press down freely. Multi-part forms cannot be off. The dimensions of ...switch 1-8 is not in the wrong position. See Chapter 3. See Chapter 2. See Chapter 2. The edge guides may exceed the specified limitations. Troubleshooting 7-15 The cut sheet feeder is on the paper while pressing the LOAD/EJECT button. Adjust the position of the paper. Paper Handling Problem ...
... is pressed, the paper jams. Solution The paper release lever may be set in use, DIP switch 1-8 should be used with this printer's single-sheet feeding system. When feeding thicker than normal paper, press down freely. Multi-part forms cannot be off. The dimensions of ...switch 1-8 is not in the wrong position. See Chapter 3. See Chapter 2. See Chapter 2. The edge guides may exceed the specified limitations. Troubleshooting 7-15 The cut sheet feeder is on the paper while pressing the LOAD/EJECT button. Adjust the position of the paper. Paper Handling Problem ...
User Manual
Page 192
.... When printing on single sheets, use the paper guide in the paper guide before the printer was turned on . The page length setting may have been between the edge guides before you turn the printer on . Solution The paper may be in the correct position. If the page length is... paper feeds through and then out of the printer. Always press the LOAD/EJECT button to eject the paper using the FORM FEED button. You may not fully eject. When the LOAD/EJECT button is incorrectly set by your software settings. 7-16 Troubleshooting The paper does not fully eject. Paper Handling...
.... When printing on single sheets, use the paper guide in the paper guide before the printer was turned on . The page length setting may have been between the edge guides before you turn the printer on . Solution The paper may be in the correct position. If the page length is... paper feeds through and then out of the printer. Always press the LOAD/EJECT button to eject the paper using the FORM FEED button. You may not fully eject. When the LOAD/EJECT button is incorrectly set by your software settings. 7-16 Troubleshooting The paper does not fully eject. Paper Handling...
User Manual
Page 193
... line, then try feeding paper. When using the control panel buttons while the printer is pressed, the platen does not rotate and paper does not feed. Paper Handling Problem Continuous paper does not feed properly. When the LOAD/EJECT ... not feed. Solution You may be pushed back to load the paper. After feeding paper, press the ON LINE button again to set the printer on ). See Chapter 2. Troubleshooting 7-17 Continuous paper may be trying to the continuous paper position. See Chapter 3. When the LOAD/EJECT button is on line (ON LINE...
... line, then try feeding paper. When using the control panel buttons while the printer is pressed, the platen does not rotate and paper does not feed. Paper Handling Problem Continuous paper does not feed properly. When the LOAD/EJECT ... not feed. Solution You may be pushed back to load the paper. After feeding paper, press the ON LINE button again to set the printer on ). See Chapter 2. Troubleshooting 7-17 Continuous paper may be trying to the continuous paper position. See Chapter 3. When the LOAD/EJECT button is on line (ON LINE...