
Users Guide
Page 6
LQ-590II/LQ-590IIN/LQ-2090II/LQ-2090IIN User's Guide Chapter 6 Options and Consumables Replacing the Ribbon Cartridge 122 Genuine Epson ribbon cartridge 122 Replacing the ribbon cartridge 122 Cut-Sheet Feeder 126 Installing the cut-sheet feeder 127 Loading paper in the single-bin... 144 Mechanical 144 Electronic 147 Electrical 148 Environmental 149 System Requirements 149 Paper 150 Recommended printable area 154 Command Lists 156 Epson ESC/P control codes 156 IBM PPDS emulation control codes 157 Standards and Approvals 158 Safety approvals 159 Cleaning the Printer 159...
LQ-590II/LQ-590IIN/LQ-2090II/LQ-2090IIN User's Guide Chapter 6 Options and Consumables Replacing the Ribbon Cartridge 122 Genuine Epson ribbon cartridge 122 Replacing the ribbon cartridge 122 Cut-Sheet Feeder 126 Installing the cut-sheet feeder 127 Loading paper in the single-bin... 144 Mechanical 144 Electronic 147 Electrical 148 Environmental 149 System Requirements 149 Paper 150 Recommended printable area 154 Command Lists 156 Epson ESC/P control codes 156 IBM PPDS emulation control codes 157 Standards and Approvals 158 Safety approvals 159 Cleaning the Printer 159...

Users Guide
Page 13
Improper adjustment of other parts of Technical Devices" (TP TC 020/2011) Manufacturer: SEIKO EPSON CORPORATION Address: 3-5, Owa 3-chome, Suwa-shi, Nagano-ken 392-8502 Japan Telephone: 81-266-52-3131 Safety Instructions 13 otherwise, you ... applications requiring extremely high reliability/safety such as transportation devices related to replace the ribbon cartridge. If you have just used for your printer. ❏ Never replace the print head yourself; LQ-590II/LQ-590IIN/LQ-2090II/LQ-2090IIN User's Guide When operating the printer ❏ Adjust only those controls that has...
Improper adjustment of other parts of Technical Devices" (TP TC 020/2011) Manufacturer: SEIKO EPSON CORPORATION Address: 3-5, Owa 3-chome, Suwa-shi, Nagano-ken 392-8502 Japan Telephone: 81-266-52-3131 Safety Instructions 13 otherwise, you ... applications requiring extremely high reliability/safety such as transportation devices related to replace the ribbon cartridge. If you have just used for your printer. ❏ Never replace the print head yourself; LQ-590II/LQ-590IIN/LQ-2090II/LQ-2090IIN User's Guide When operating the printer ❏ Adjust only those controls that has...

Users Guide
Page 35
...open the sprocket covers. Paper Handling 35 Rear slot: Load paper in the illustration below until the perforation between the platen and the ribbon guide. Then slide the right sprocket to lock it emerges between the first and second pages is even with the printable side facing... width of the printer's ribbon. Note: Make sure the printer is on, a paper jam may occur. 6. Insert the paper into the rear, front, or bottom paper slot as shown in the rear slot with the top of your paper has a clean, straight edge. LQ-590II/LQ-590IIN/LQ-2090II/LQ-2090IIN User's Guide 4.
...open the sprocket covers. Paper Handling 35 Rear slot: Load paper in the illustration below until the perforation between the platen and the ribbon guide. Then slide the right sprocket to lock it emerges between the first and second pages is even with the printable side facing... width of the printer's ribbon. Note: Make sure the printer is on, a paper jam may occur. 6. Insert the paper into the rear, front, or bottom paper slot as shown in the rear slot with the top of your paper has a clean, straight edge. LQ-590II/LQ-590IIN/LQ-2090II/LQ-2090IIN User's Guide 4.

Users Guide
Page 40
...use the Micro Adjust function (described in "Using the Micro Adjust Function" on page 27 or "Loading paper with the top of the printer's ribbon. ! Load continuous paper using the front or rear push tractor as described in "Loading paper with the front push tractor" on page 55) to ...to lose the top-of your push tractor. 4. Caution: Do not pull up the paper by hand to the pull tractor position. LQ-590II/LQ-590IIN: C933761 LQ-2090II/LQ-2090IIN: C933791 Follow these steps to move the paper. 7. Install the other tractor in the pull position as described in "Installing the tractor...
...use the Micro Adjust function (described in "Using the Micro Adjust Function" on page 27 or "Loading paper with the top of the printer's ribbon. ! Load continuous paper using the front or rear push tractor as described in "Loading paper with the front push tractor" on page 55) to ...to lose the top-of your push tractor. 4. Caution: Do not pull up the paper by hand to the pull tractor position. LQ-590II/LQ-590IIN: C933761 LQ-2090II/LQ-2090IIN: C933791 Follow these steps to move the paper. 7. Install the other tractor in the pull position as described in "Installing the tractor...

Users Guide
Page 106
... necessary, reinstall the printer driver. The ribbon has too much slack, the ribbon has come loose, or the ribbon cartridge is incorrect. Check that meets the requirements of both ends of the cable between the printer and the computer are plugged in abnormal situations). LQ-590II/LQ-590IIN/LQ-2090II/LQ-2090IIN User's Guide The printer is not...
... necessary, reinstall the printer driver. The ribbon has too much slack, the ribbon has come loose, or the ribbon cartridge is incorrect. Check that meets the requirements of both ends of the cable between the printer and the computer are plugged in abnormal situations). LQ-590II/LQ-590IIN/LQ-2090II/LQ-2090IIN User's Guide The printer is not...

Users Guide
Page 107
... properly. Remove any slack in the ribbon by turning the ribbon-tightening knob, or reinstall the ribbon cartridge as described in "Replacing the Ribbon Cartridge" on page 122. Fan the paper well before you may damage the printer. LQ-590II/LQ-590IIN/LQ-2090II/LQ-2090IIN User's Guide The paper is worn out.... Cause What to do The ribbon has too much slack, the ribbon has come loose, or the ribbon cartridge is sent at the end of the printer must...
... properly. Remove any slack in the ribbon by turning the ribbon-tightening knob, or reinstall the ribbon cartridge as described in "Replacing the Ribbon Cartridge" on page 122. Fan the paper well before you may damage the printer. LQ-590II/LQ-590IIN/LQ-2090II/LQ-2090IIN User's Guide The paper is worn out.... Cause What to do The ribbon has too much slack, the ribbon has come loose, or the ribbon cartridge is sent at the end of the printer must...

Users Guide
Page 122
... of the print head and other printer parts. Genuine Epson ribbon cartridges are designed and manufactured to install or replace the ribbon cartridge: ! If you need to move the print head by Epson's warranties. Your printer uses the following ribbon cartridge: Epson black ribbon cartridge LQ-590II/LQ-590IIN: S015337 LQ-2090II/LQ-2090IIN: S015335 (For users in America) S015336 (For worldwide...
... of the print head and other printer parts. Genuine Epson ribbon cartridges are designed and manufactured to install or replace the ribbon cartridge: ! If you need to move the print head by Epson's warranties. Your printer uses the following ribbon cartridge: Epson black ribbon cartridge LQ-590II/LQ-590IIN: S015337 LQ-2090II/LQ-2090IIN: S015335 (For users in America) S015336 (For worldwide...

Users Guide
Page 124
Options and Consumables 124 Grasp the ribbon guide and pull it until it up and out of the print head. 6. Grasp the used cartridge by its handle and pull it is out of the printer. 7. Hold both sides of the ribbon guide and pull it until it is out of the cartridge. LQ-590II/LQ-590IIN/LQ-2090II/LQ-2090IIN User's Guide 5.
Options and Consumables 124 Grasp the ribbon guide and pull it until it up and out of the print head. 6. Grasp the used cartridge by its handle and pull it is out of the printer. 7. Hold both sides of the ribbon guide and pull it until it is out of the cartridge. LQ-590II/LQ-590IIN/LQ-2090II/LQ-2090IIN User's Guide 5.

Users Guide
Page 125
Insert the ribbon cartridge into the printer at an angle as shown below, then press firmly on the printer. Slide the ribbon guide into the slots on both sides of the cartridge to fit the plastic hooks into the print head until it clicks in place. ! Caution: When inserting the ribbon guide, press firmly until it clicks. Options and Consumables 125 LQ-590II/LQ-590IIN/LQ-2090II/LQ-2090IIN User's Guide 8. Note: Do not touch the white cable inside the printer. 9.
Insert the ribbon cartridge into the printer at an angle as shown below, then press firmly on the printer. Slide the ribbon guide into the slots on both sides of the cartridge to fit the plastic hooks into the print head until it clicks in place. ! Caution: When inserting the ribbon guide, press firmly until it clicks. Options and Consumables 125 LQ-590II/LQ-590IIN/LQ-2090II/LQ-2090IIN User's Guide 8. Note: Do not touch the white cable inside the printer. 9.

Users Guide
Page 126
Caution: The ribbon should not be twisted or creased. 11. Replace the printer cover by inserting the front tabs into the slots on the printer and lowering the cover into place. ! Cut-Sheet Feeder Two types of optional cut-sheet feeders are available for use with your printer as shown below: Single-bin cut-sheet feeder: LQ-590II/LQ-590IIN C80637* LQ-2090II/LQ-2090IIN C80639* Options and Consumables 126 Turn the ribbon-tightening knob to help feed the ribbon into place. LQ-590II/LQ-590IIN/LQ-2090II/LQ-2090IIN User's Guide 10.
Caution: The ribbon should not be twisted or creased. 11. Replace the printer cover by inserting the front tabs into the slots on the printer and lowering the cover into place. ! Cut-Sheet Feeder Two types of optional cut-sheet feeders are available for use with your printer as shown below: Single-bin cut-sheet feeder: LQ-590II/LQ-590IIN C80637* LQ-2090II/LQ-2090IIN C80639* Options and Consumables 126 Turn the ribbon-tightening knob to help feed the ribbon into place. LQ-590II/LQ-590IIN/LQ-2090II/LQ-2090IIN User's Guide 10.

Users Guide
Page 143
8. knob 12. USB interface 13. serial interface*1 14. ribbon cartridge 11. LAN port*1 *2 16. AC inlet 18. edge guides LQ-590II/LQ-590IIN/LQ-2090II/LQ-2090IIN User's Guide 9. sprockets*3 17. wing 19. paper tension unit 10. parallel interface 15. paper-thickness lever *1 For Network compatible model. *2 For Ethernet cable (Category 5 or better shielded twisted-pair cable) *3 tractor unit parts Product Information 143
8. knob 12. USB interface 13. serial interface*1 14. ribbon cartridge 11. LAN port*1 *2 16. AC inlet 18. edge guides LQ-590II/LQ-590IIN/LQ-2090II/LQ-2090IIN User's Guide 9. sprockets*3 17. wing 19. paper tension unit 10. parallel interface 15. paper-thickness lever *1 For Network compatible model. *2 For Ethernet cable (Category 5 or better shielded twisted-pair cable) *3 tractor unit parts Product Information 143

Users Guide
Page 146
... approx. 9.4 kg (20.7 lb) Black ribbon cartridge S015337 for LQ-590II/LQ-590IIN S015335 for LQ-2090II/LQ-2090IIN (For users in America) S015336 for LQ-2090II/LQ-2090IIN (For worldwide users) Ribbon life approx. 5 million characters (LQ, 10 cpi, 48 dots/character) for LQ-590II/ LQ-590IIN approx. 8 million characters (LQ, 10 cpi, 48 dots/character) for LQ-2090II/ LQ-2090IIN Approx. 55 dB (A) (ISO 7779...
... approx. 9.4 kg (20.7 lb) Black ribbon cartridge S015337 for LQ-590II/LQ-590IIN S015335 for LQ-2090II/LQ-2090IIN (For users in America) S015336 for LQ-2090II/LQ-2090IIN (For worldwide users) Ribbon life approx. 5 million characters (LQ, 10 cpi, 48 dots/character) for LQ-590II/ LQ-590IIN approx. 8 million characters (LQ, 10 cpi, 48 dots/character) for LQ-2090II/ LQ-2090IIN Approx. 55 dB (A) (ISO 7779...

Users Guide
Page 160
...! Make sure the printer is needed. then disconnect the interface cable from getting inside of the printer with mild detergent dissolved in "Replacing the ribbon cartridge" on the printer mechanism or electronic components. ❏ Do not use alcohol or thinners to repack the printer in their original boxes. ...to move the print head by hand to transport your Epson dealer if you have just used the printer, the print head may be hot; Unplug the power cord from the outer case and sheet guide. 4. LQ-590II/LQ-590IIN/LQ-2090II/LQ-2090IIN User's Guide 1. Remove any paper loaded in the ...
...! Make sure the printer is needed. then disconnect the interface cable from getting inside of the printer with mild detergent dissolved in "Replacing the ribbon cartridge" on the printer mechanism or electronic components. ❏ Do not use alcohol or thinners to repack the printer in their original boxes. ...to move the print head by hand to transport your Epson dealer if you have just used the printer, the print head may be hot; Unplug the power cord from the outer case and sheet guide. 4. LQ-590II/LQ-590IIN/LQ-2090II/LQ-2090IIN User's Guide 1. Remove any paper loaded in the ...

Users Guide
Page 161
Make sure that the printer cover and front cover are closed. 6. Product Information 161 LQ-590II/LQ-590IIN/LQ-2090II/LQ-2090IIN User's Guide 5. Repack the printer, sheet guide, ribbon cartridge, wing, tractor unit, wire, and power cord (if necessary) in their original packing materials and place them in the rear push position" on page 22 for instructions on installation procedure.) Also make sure that the paper tension unit is installed and the tractor is installed in the rear push position. (See "Installing the tractor in the printer's original box.
Make sure that the printer cover and front cover are closed. 6. Product Information 161 LQ-590II/LQ-590IIN/LQ-2090II/LQ-2090IIN User's Guide 5. Repack the printer, sheet guide, ribbon cartridge, wing, tractor unit, wire, and power cord (if necessary) in their original packing materials and place them in the rear push position" on page 22 for instructions on installation procedure.) Also make sure that the paper tension unit is installed and the tractor is installed in the rear push position. (See "Installing the tractor in the printer's original box.

Users Guide
Page 167
LQ-590II/LQ-590IIN/LQ-2090II/LQ-2090IIN User's Guide H Hex dump 116 High Speed Draft (HSD 90 I I/F (interface) mode 96 Installing cut-sheet feeder 127 front sheet guide 45 roll paper holder ... Printer driver accessing 59 settings 64, 65 uninstalling 85 Printer Setting 74 R Recommended printable area 154 Removing continuous paper 42 labels 51 roll paper 141 Ribbon cartridge replacing 122 Roll Paper 98 Roll paper loading 138 removing 141 specifications 153 Roll paper holder assembling 137 installing 138 S Self test 115 Index...
LQ-590II/LQ-590IIN/LQ-2090II/LQ-2090IIN User's Guide H Hex dump 116 High Speed Draft (HSD 90 I I/F (interface) mode 96 Installing cut-sheet feeder 127 front sheet guide 45 roll paper holder ... Printer driver accessing 59 settings 64, 65 uninstalling 85 Printer Setting 74 R Recommended printable area 154 Removing continuous paper 42 labels 51 roll paper 141 Ribbon cartridge replacing 122 Roll Paper 98 Roll paper loading 138 removing 141 specifications 153 Roll paper holder assembling 137 installing 138 S Self test 115 Index...
Notices and Warranty
Page 2
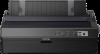
...will be prepared to and from the service location. For warranty service, you use an address in cards, cables, or ribbons 2 Notices What Epson Will Do To Correct Problems: If your product with this statement and be repaired and sent back to return the defective one... warranty for the defective unit, Epson will be new or refurbished to the printer. If Epson authorizes an exchange for the printer expires. If Epson replaces the ribbon as ribbons and applies only to the Epson standard of the warranty service, the replacement ribbon carries the manufacturer's specified usage ...
...will be prepared to and from the service location. For warranty service, you use an address in cards, cables, or ribbons 2 Notices What Epson Will Do To Correct Problems: If your product with this statement and be repaired and sent back to return the defective one... warranty for the defective unit, Epson will be new or refurbished to the printer. If Epson authorizes an exchange for the printer expires. If Epson replaces the ribbon as ribbons and applies only to the Epson standard of the warranty service, the replacement ribbon carries the manufacturer's specified usage ...

Start Here - Installation Guide
Page 2
1 Installing the wing on the printer 2 USB Serial Remove the printer cover Slide the print head so that it does not hit the paper tension unit Note: Do not touch the white cable. 3 OFF 4 From Web site Pull the ribbon guide until it is out of the cartridge Slide the ribbon guide into the print head until it clicks in place From CD-ROM OFF Parallel Network Download and install the Epson software if necessary. Follow the instructions
1 Installing the wing on the printer 2 USB Serial Remove the printer cover Slide the print head so that it does not hit the paper tension unit Note: Do not touch the white cable. 3 OFF 4 From Web site Pull the ribbon guide until it is out of the cartridge Slide the ribbon guide into the print head until it clicks in place From CD-ROM OFF Parallel Network Download and install the Epson software if necessary. Follow the instructions


