Setup Guide
Page 2
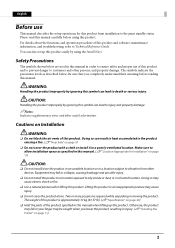
... may cause injury. ❏ Do not carry this product. Safety Precautions The symbols shown below . English Before use of this manual. (U "Location Appropriate for this product and to prevent danger to allow installation space as described below are required while unpacking or ...moving the product. Please read this manual carefully before reading this manual. !WARNING: Handling the product improperly by ignoring this product. Be sure that you lower the product, resulting in injury...
... may cause injury. ❏ Do not carry this product. Safety Precautions The symbols shown below . English Before use of this manual. (U "Location Appropriate for this product and to prevent danger to allow installation space as described below are required while unpacking or ...moving the product. Please read this manual carefully before reading this manual. !WARNING: Handling the product improperly by ignoring this product. Be sure that you lower the product, resulting in injury...
Setup Guide
Page 4
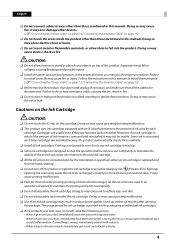
... injury. ❏ Install the cables and optional products in the proper direction according to the proper procedures. Follow the instructions in this manual. Some ink is flashing). Doing so may result in bloodshot eyes or mild inflammation. Cautions on the Ink Cartridge !CAUTION: ❏... ❏ Do not disassemble and remodel the ink cartridge. English ❏ Do not connect cables in ways other than those mentioned in this manual to install them properly. (U "Connecting the Power Cable" on page 12, "Connecting the Interface Cable" on page 13) ❏ Before moving...
... injury. ❏ Install the cables and optional products in the proper direction according to the proper procedures. Follow the instructions in this manual. Some ink is flashing). Doing so may result in bloodshot eyes or mild inflammation. Cautions on the Ink Cartridge !CAUTION: ❏... ❏ Do not disassemble and remodel the ink cartridge. English ❏ Do not connect cables in ways other than those mentioned in this manual to install them properly. (U "Connecting the Power Cable" on page 12, "Connecting the Interface Cable" on page 13) ❏ Before moving...
Setup Guide
Page 30
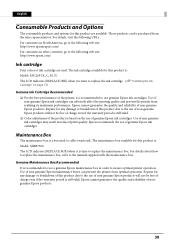
... and options for this product are used to collect waste ink. Repairs for this product due to the use of genuine Epson ink cartridges. Epson cannot guarantee the quality and reliability of charge even if the warranty period is still valid. The ink cartridge available for ... http://www.epsonexpert.com/ For customers in order to the manual supplied with the maintenance box. Use of ink cartridge are available. Repairs for this product due to replace the maintenance box. Epson recommends the use a genuine Epson maintenance box in other countries, go to the following web site...
... and options for this product are used to collect waste ink. Repairs for this product due to the use of genuine Epson ink cartridges. Epson cannot guarantee the quality and reliability of charge even if the warranty period is still valid. The ink cartridge available for ... http://www.epsonexpert.com/ For customers in order to the manual supplied with the maintenance box. Use of ink cartridge are available. Repairs for this product due to replace the maintenance box. Epson recommends the use a genuine Epson maintenance box in other countries, go to the following web site...
Setup Guide
Page 31
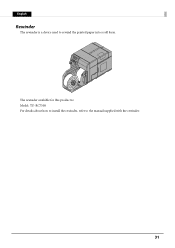
The rewinder available for this product is a device used to the manual supplied with the rewinder. 31 English Rewinder The rewinder is : Model: TU-RC7508 For details about how to install the rewinder, refer to rewind the printed paper into a roll form.
The rewinder available for this product is a device used to the manual supplied with the rewinder. 31 English Rewinder The rewinder is : Model: TU-RC7508 For details about how to install the rewinder, refer to rewind the printed paper into a roll form.

Setup Guide
Page 32
...by any means, electronic, mechanical, photocopying, recording, or otherwise, without the prior written permission of Seiko Epson Corporation. (2) The contents of this manual are subject to change without notice. (3) While every precaution has been taken in addition to strictly comply with ...Seiko Epson Corporation's operating and maintenance instructions. (6) Seiko Epson Corporation shall not be liable for any liability assumed for damages...
...by any means, electronic, mechanical, photocopying, recording, or otherwise, without the prior written permission of Seiko Epson Corporation. (2) The contents of this manual are subject to change without notice. (3) While every precaution has been taken in addition to strictly comply with ...Seiko Epson Corporation's operating and maintenance instructions. (6) Seiko Epson Corporation shall not be liable for any liability assumed for damages...
Start Here
Page 2
...brouillage radio, auquel cas l'utilisateur pourra etre tenu de prendre des mesures adequates. in accordance with the instruction manual, may be modified by Seiko Epson Corporation could void your authority to provide reasonable protection against harmful interference when the equipment is een product van ... IEC 61000-4-11 FCC Compliance Statement for American Users This equipment has been tested and found to comply with the limits for Epson Products This product will invalidate the EMC standards of this device. In ambiente domestico, questo prodotto puo causare interferenze radio. V ...
...brouillage radio, auquel cas l'utilisateur pourra etre tenu de prendre des mesures adequates. in accordance with the instruction manual, may be modified by Seiko Epson Corporation could void your authority to provide reasonable protection against harmful interference when the equipment is een product van ... IEC 61000-4-11 FCC Compliance Statement for American Users This equipment has been tested and found to comply with the limits for Epson Products This product will invalidate the EMC standards of this device. In ambiente domestico, questo prodotto puo causare interferenze radio. V ...

Technical Reference Guide
Page 3
...Install Navi. Two or more people are identified by ignoring this product properly. The weight of this product. Doing so can easily setup this manual are required while unpacking or moving the product. You can result in heat accumulated in the product causing a fire. ("Rear Side" on ... product alone. Make sure to allow installation space as defined below. For Safety This document explains the functions of and how to operate this manual. ("Location Appropriate for Installation" on page 39) CAUTION Do not install/store the product in an unstable location or in a ...
...Install Navi. Two or more people are identified by ignoring this product properly. The weight of this product. Doing so can easily setup this manual are required while unpacking or moving the product. You can result in heat accumulated in the product causing a fire. ("Rear Side" on ... product alone. Make sure to allow installation space as defined below. For Safety This document explains the functions of and how to operate this manual. ("Location Appropriate for Installation" on page 39) CAUTION Do not install/store the product in an unstable location or in a ...
Technical Reference Guide
Page 5
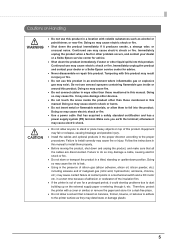
... aerosol sprayers containing flammable gas inside the product other than those mentioned in this manual. Immediately unplug the product when a fault or other problem occurs, and contact your dealer or a Seiko Epson service center for advice. Shut down the product immediately if it may... cause electric shock. Immediately unplug the product and contact your dealer or a Seiko Epson service center for advice. Never disassemble or repair this product. otherwise it produces smoke, a strange odor, or unusual noise. ...
... aerosol sprayers containing flammable gas inside the product other than those mentioned in this manual. Immediately unplug the product when a fault or other problem occurs, and contact your dealer or a Seiko Epson service center for advice. Shut down the product immediately if it may... cause electric shock. Immediately unplug the product and contact your dealer or a Seiko Epson service center for advice. Never disassemble or repair this product. otherwise it produces smoke, a strange odor, or unusual noise. ...
Technical Reference Guide
Page 9
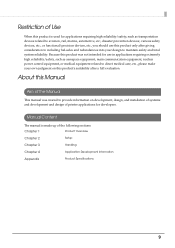
...Because this product was created to provide information on development, design, and installation of systems and development and design of the Manual This manual was not intended for applications requiring high reliability/safety, such as aerospace equipment, main communication equipment, nuclear power control equipment,... this product only after giving consideration to maintain safety and total system reliability. disaster prevention devices; Manual Content The manual is used for use this Manual Aim of printer applications for developers. various safety devices, etc.;
...Because this product was created to provide information on development, design, and installation of systems and development and design of the Manual This manual was not intended for applications requiring high reliability/safety, such as aerospace equipment, main communication equipment, nuclear power control equipment,... this product only after giving consideration to maintain safety and total system reliability. disaster prevention devices; Manual Content The manual is used for use this Manual Aim of printer applications for developers. various safety devices, etc.;
Technical Reference Guide
Page 10
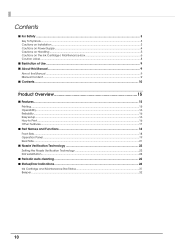
... ...3 Cautions on Power Supply...4 Cautions on Handling ...5 Cautions on the Ink Cartridge / Maintenance box 6 Caution Label ...8 ■ Restriction of Use ...9 ■ About this Manual ...9 Aim of the Manual ...9 Manual Content ...9 ■ Contents...10 Product Overview 15 ■ Features...15 Printing ...15 Operability...16 Reliability...16 Easy setup...16 How to Print ...16 Other...
... ...3 Cautions on Power Supply...4 Cautions on Handling ...5 Cautions on the Ink Cartridge / Maintenance box 6 Caution Label ...8 ■ Restriction of Use ...9 ■ About this Manual ...9 Aim of the Manual ...9 Manual Content ...9 ■ Contents...10 Product Overview 15 ■ Features...15 Printing ...15 Operability...16 Reliability...16 Easy setup...16 How to Print ...16 Other...
Technical Reference Guide
Page 13
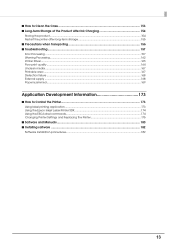
... External supply ...168 Paper is jammed ...169 Application Development Information 173 ■ How to Control the Printer 173 Using label printing application ...173 Using the Epson Inkjet Label Printer SDK 174 Using the ESC/Label commands...174 Changing Printer Settings and Replacing the Printer 175 ■ Software and...
... External supply ...168 Paper is jammed ...169 Application Development Information 173 ■ How to Control the Printer 173 Using label printing application ...173 Using the Epson Inkjet Label Printer SDK 174 Using the ESC/Label commands...174 Changing Printer Settings and Replacing the Printer 175 ■ Software and...
Technical Reference Guide
Page 14
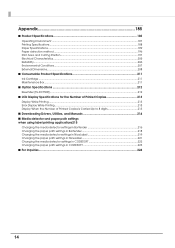
... Printing ...213 Error Display While Printing...213 Display When the Number of Printed Copies is Carried Up to 8 digits 213 ■ Downloading Drivers, Utilities, and Manuals 214 ■ Media detector and paper path settings when using label printing applications215 Changing the media detector settings in BarTender 216 Changing the paper...
... Printing ...213 Error Display While Printing...213 Display When the Number of Printed Copies is Carried Up to 8 digits 213 ■ Downloading Drivers, Utilities, and Manuals 214 ■ Media detector and paper path settings when using label printing applications215 Changing the media detector settings in BarTender 216 Changing the paper...
Technical Reference Guide
Page 67
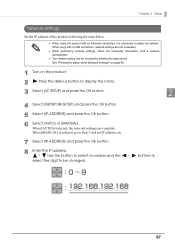
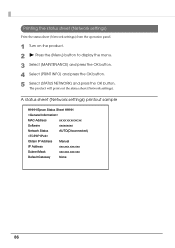
When [MANUAL] is necessary to be checked by printing the status sheet. See "Printing the status sheet (Network settings)" on page 86. 1 Turn on the product. 2 ... [I/F SETUP] and press the OK button. 2 4 Select [NETWORK SETUP] and press the OK button. 5 Select [IP ADDRESS] and press the OK button. 6 Select [AUTO] or [MANUAL]. Chapter 2 Setup Network settings Set the IP address of the product following the steps below. When using with an Ethernet connection, it is selected...
When [MANUAL] is necessary to be checked by printing the status sheet. See "Printing the status sheet (Network settings)" on page 86. 1 Turn on the product. 2 ... [I/F SETUP] and press the OK button. 2 4 Select [NETWORK SETUP] and press the OK button. 5 Select [IP ADDRESS] and press the OK button. 6 Select [AUTO] or [MANUAL]. Chapter 2 Setup Network settings Set the IP address of the product following the steps below. When using with an Ethernet connection, it is selected...
Technical Reference Guide
Page 85
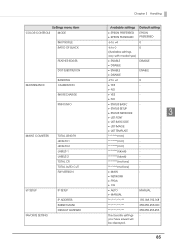
... VERSION I/F SETUP FAVORITE SETTING IP SETUP IP ADDRESS SUBNET MASK DEFAULT GATEWAY Chapter 3 Handling Available settings Default setting EPSON PREFERRED EPSON STANDARD EPSON PREFERRED -6 to +4 0 -6 to 0 0 (Available settings vary with media type) ENABLE DISABLE ...labels] - ********[motions] - ********[motions] - MAIN - NETWORK FPGA CG AUTO MANUAL MANUAL 192.168.192.168 255.255.255.000 255.255.255.255 The favorite settings you have saved will be displayed. 85
... VERSION I/F SETUP FAVORITE SETTING IP SETUP IP ADDRESS SUBNET MASK DEFAULT GATEWAY Chapter 3 Handling Available settings Default setting EPSON PREFERRED EPSON STANDARD EPSON PREFERRED -6 to +4 0 -6 to 0 0 (Available settings vary with media type) ENABLE DISABLE ...labels] - ********[motions] - ********[motions] - MAIN - NETWORK FPGA CG AUTO MANUAL MANUAL 192.168.192.168 255.255.255.000 255.255.255.255 The favorite settings you have saved will be displayed. 85
Technical Reference Guide
Page 86
A status sheet (Network settings) printout sample HHHH Epson Status Sheet HHHH MAC Address xx:xx:xx:xx:xx:xx Software xxxxxxxxx Network Status AUTO(Disconnected) Obtain IP Address Manual IP Address xxx.xxx.xxx.xxx Subnet Mask xxx.xxx.xxx.xxx Default Gateway None 86 The product will print out the status sheet...
A status sheet (Network settings) printout sample HHHH Epson Status Sheet HHHH MAC Address xx:xx:xx:xx:xx:xx Software xxxxxxxxx Network Status AUTO(Disconnected) Obtain IP Address Manual IP Address xxx.xxx.xxx.xxx Subnet Mask xxx.xxx.xxx.xxx Default Gateway None 86 The product will print out the status sheet...

Technical Reference Guide
Page 102
.... Click [Start] to start a nozzle check. Print head maintenance Performs a print head maintenance or nozzle check and sets periodic cleaning. Item Description Print head maintenance Manual head cleaning Perform the nozzle check to start printing the nozzle patterns. Only at the specified time. Click [Start] to automatically recover from the nozzle...
.... Click [Start] to start a nozzle check. Print head maintenance Performs a print head maintenance or nozzle check and sets periodic cleaning. Item Description Print head maintenance Manual head cleaning Perform the nozzle check to start printing the nozzle patterns. Only at the specified time. Click [Start] to automatically recover from the nozzle...
Technical Reference Guide
Page 154
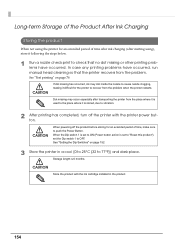
... starting using), store it following the steps below. 1 Run a nozzle check print to check that no dot missing or other printing problems have occurred, run manual head cleaning so that the printer recovers from the problem when the printer restarts. See "Test printing" on page 152 3 Store the printer in the...
... starting using), store it following the steps below. 1 Run a nozzle check print to check that no dot missing or other printing problems have occurred, run manual head cleaning so that the printer recovers from the problem when the printer restarts. See "Test printing" on page 152 3 Store the printer in the...
Technical Reference Guide
Page 162
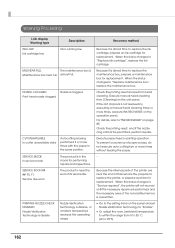
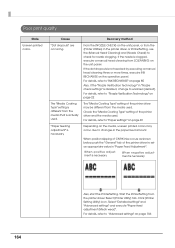
... to "Service required", the printer will not recover until the necessary repairs are near the end of the nonvolatile memory is not resolved by executing a manual head cleaning three or more times without feeding the paper. - Execute paper feed or printing operation. SERVICE MODE In service mode SERVICE SOON ## ##: F0,... cleaning. M/B NEAR FULL The maintenance box is near full almost full. When the status changes to "Replace maintenance box", replace the maintenance box. Execute manual head cleaning from 5 to 35 °C {41 to "INK RECHARGE" on the unit panel.
... to "Service required", the printer will not recover until the necessary repairs are near the end of the nonvolatile memory is not resolved by executing a manual head cleaning three or more times without feeding the paper. - Execute paper feed or printing operation. SERVICE MODE In service mode SERVICE SOON ## ##: F0,... cleaning. M/B NEAR FULL The maintenance box is near full almost full. When the status changes to "Replace maintenance box", replace the maintenance box. Execute manual head cleaning from 5 to 35 °C {41 to "INK RECHARGE" on the unit panel.
Technical Reference Guide
Page 164
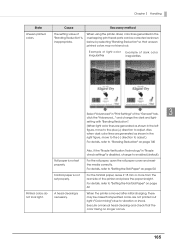
... refer to "Nozzle Verification Technology" on the unit panel, or from the [Printer Utilities] in the printer driver or PrinterSetting, use the [Manual Head Cleaning] and [Nozzle Check] to set an appropriate value in the paper feed amount. "Paper feeding adjustment" is necessary 164 Also, ...shown below, push the "General" tab of the printer driver may occur due to enabled (default). If the nozzle is clogged, execute a manual head cleaning from the media used. Select "Detailed settings" and "Advanced settings" and execute "Paper feed adjustment (Mech wear)". Recovery method From...
... refer to "Nozzle Verification Technology" on the unit panel, or from the [Printer Utilities] in the printer driver or PrinterSetting, use the [Manual Head Cleaning] and [Nozzle Check] to set an appropriate value in the paper feed amount. "Paper feeding adjustment" is necessary 164 Also, ...shown below, push the "General" tab of the printer driver may occur due to enabled (default). If the nozzle is clogged, execute a manual head cleaning from the media used. Select "Detailed settings" and "Advanced settings" and execute "Paper feed adjustment (Mech wear)". Recovery method From...
Technical Reference Guide
Page 165
... color lines are not printed out right ("Color mixing") due to enabled (default). and change to vibration or shock. For details, refer to adjust. Execute a manual head cleaning and check that specified colors are generated as shown in "Nozzle check settings" is moved after initial charging, there may be corrected as...
... color lines are not printed out right ("Color mixing") due to enabled (default). and change to vibration or shock. For details, refer to adjust. Execute a manual head cleaning and check that specified colors are generated as shown in "Nozzle check settings" is moved after initial charging, there may be corrected as...


