Product Support Bulletin(s)
Page 3
... request to troubleshoot problems. A blank LCD screen with beeps to inform the user of the PROMS or jumper J1 may have been mixed. pause between beeps) 5 beeps: Case open LQ-2550 LCD Codes: 00 (1) (2) The font could not find the target font. PSB No: P-0076 Page: 3 of 4 LQ-2500 NOTE: Printers with LCD displays use error messages along with the Power-on LED...
... request to troubleshoot problems. A blank LCD screen with beeps to inform the user of the PROMS or jumper J1 may have been mixed. pause between beeps) 5 beeps: Case open LQ-2550 LCD Codes: 00 (1) (2) The font could not find the target font. PSB No: P-0076 Page: 3 of 4 LQ-2500 NOTE: Printers with LCD displays use error messages along with the Power-on LED...
Product Support Bulletin(s)
Page 4
... prevent paper jams, which can result in the Service Manual (page A-54, figure A-52) and on . CR home condition not detected at power up b. Friction/Tractor feed switching error d. Platen gap motor HP not detected correctly c. This is a printhead wire protection feature. (2) PE sensor may have failed or is a motor control error. Incorrect jumper settings on the ROMA board may require a repair, adjustment or replacement. The...
... prevent paper jams, which can result in the Service Manual (page A-54, figure A-52) and on . CR home condition not detected at power up b. Friction/Tractor feed switching error d. Platen gap motor HP not detected correctly c. This is a printhead wire protection feature. (2) PE sensor may have failed or is a motor control error. Incorrect jumper settings on the ROMA board may require a repair, adjustment or replacement. The...
User Manual
Page 14
... Get Help 6 Chapter 1 Setting Up the Printer 1-2 Unpacking the Printer 1-2 Choosing a Place for the Printer 1-5 Assembling the Printer 1-7 Testing the Printer 1-14 Connecting the Printer to Your Computer 1-23 Setting Up Your Application Software 1-26 Chapter 2 Paper Handling Selecting a Paper Feeding Method Using Single Sheets Using Continuous Paper Switching Between Continuous and Single Sheets Printing on Special Paper 2-1 2-2 2-3 2-7 2-16 2-24 Chapter 3 Using the Printer Operating the Control Panel Setting the DIP Switches Page Length Skip Over Perforation Adjusting...
... Get Help 6 Chapter 1 Setting Up the Printer 1-2 Unpacking the Printer 1-2 Choosing a Place for the Printer 1-5 Assembling the Printer 1-7 Testing the Printer 1-14 Connecting the Printer to Your Computer 1-23 Setting Up Your Application Software 1-26 Chapter 2 Paper Handling Selecting a Paper Feeding Method Using Single Sheets Using Continuous Paper Switching Between Continuous and Single Sheets Printing on Special Paper 2-1 2-2 2-3 2-7 2-16 2-24 Chapter 3 Using the Printer Operating the Control Panel Setting the DIP Switches Page Length Skip Over Perforation Adjusting...
User Manual
Page 17
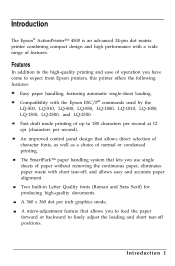
... adjust the loading and short tear-off , and allows easy and accurate paper alignment. An improved control panel design that allows you to feed the paper forward or backward to the high-quality printing and ease of operation you use single sheets of normal or condensed printing. Two built-in Letter Quality fonts (Roman and Sans Serif) for producing high-quality documents. Introduction The Epson...
... adjust the loading and short tear-off , and allows easy and accurate paper alignment. An improved control panel design that allows you to feed the paper forward or backward to the high-quality printing and ease of operation you use single sheets of normal or condensed printing. Two built-in Letter Quality fonts (Roman and Sans Serif) for producing high-quality documents. Introduction The Epson...
User Manual
Page 44
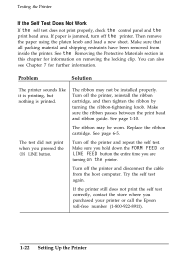
... test did not print when you purchased your printer or call the Epson toll-free number (1-800-922-8911). 1-22 Setting Up the Printer Turn off the printer and repeat the self test. See page 6-5. Make sure you hold down the FORM FEED or LINE FEED button the entire time you are turning on removing the locking clip. Turn off the printer. The ribbon may not be worn. The ribbon may be installed...
... test did not print when you purchased your printer or call the Epson toll-free number (1-800-922-8911). 1-22 Setting Up the Printer Turn off the printer and repeat the self test. See page 6-5. Make sure you hold down the FORM FEED or LINE FEED button the entire time you are turning on removing the locking clip. Turn off the printer. The ribbon may not be worn. The ribbon may be installed...

User Manual
Page 72
... need to printing on single sheets and continuous paper, your application program settings keep the printing entirely within the printable area. Before printing on special types of paper, you should not print any closer than one-half inch from either side of the paper. The Paper Thickness Lever To accommodate various thicknesses of paper types, including multi-part forms, labels, and envelopes. Printing on Special Paper In addition to change the paper...
... need to printing on single sheets and continuous paper, your application program settings keep the printing entirely within the printable area. Before printing on special types of paper, you should not print any closer than one-half inch from either side of the paper. The Paper Thickness Lever To accommodate various thicknesses of paper types, including multi-part forms, labels, and envelopes. Printing on Special Paper In addition to change the paper...
User Manual
Page 76
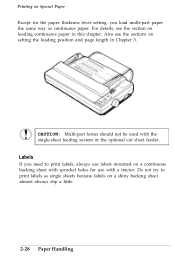
... be used with a tractor. For details, see the sections on loading continuous paper in Chapter 3. Do not try to print labels, always use with the single-sheet feeding system or the optional cut sheet feeder. Labels If you load multi-part paper the same way as single sheets because labels on a continuous backing sheet with sprocket holes for the paper thickness lever setting, you need to print labels...
... be used with a tractor. For details, see the sections on loading continuous paper in Chapter 3. Do not try to print labels, always use with the single-sheet feeding system or the optional cut sheet feeder. Labels If you load multi-part paper the same way as single sheets because labels on a continuous backing sheet with sprocket holes for the paper thickness lever setting, you need to print labels...
User Manual
Page 78
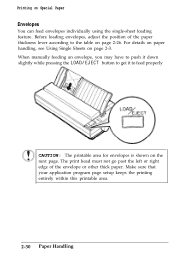
...-sheet loading feature. The print head must not go past the left or right edge of the paper thickness lever according to feed properly CAUTION: The printable area for envelopes is shown on page 2-26. Make sure that your application program page setup keeps the printing entirely within this printable area. 2-30 Paper Handling Before loading envelopes, adjust the position of the envelope or other thick paper. Printing on page 2-3. When manually feeding...
...-sheet loading feature. The print head must not go past the left or right edge of the paper thickness lever according to feed properly CAUTION: The printable area for envelopes is shown on page 2-26. Make sure that your application program page setup keeps the printing entirely within this printable area. 2-30 Paper Handling Before loading envelopes, adjust the position of the envelope or other thick paper. Printing on page 2-3. When manually feeding...
User Manual
Page 81
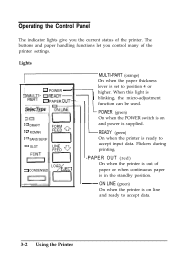
... current status of the printer. LOAD 3 CONDENSED /EJECl -PAPER OUT (red) On when the printer is out of paper or when continuous paper is in the standby position. ~ ON LINE (green) On when the printer is on and power is supplied. '= ROMAN FEED 0 READY (green) '= SANS SERIF ' = SLOT LINE FEED is On when the printer is set to accept data. 3-2 Using the Printer Operating the Control Panel The indicator lights give you control...
... current status of the printer. LOAD 3 CONDENSED /EJECl -PAPER OUT (red) On when the printer is out of paper or when continuous paper is in the standby position. ~ ON LINE (green) On when the printer is on and power is supplied. '= ROMAN FEED 0 READY (green) '= SANS SERIF ' = SLOT LINE FEED is On when the printer is set to accept data. 3-2 Using the Printer Operating the Control Panel The indicator lights give you control...
User Manual
Page 108
... Spacing 4-2 Character Size 4-3 Special Effects and Emphasis 4-4 Selecting Typestyles With Master Select 4-6 Graphics 4-9 The Print Head 4-10 The Graphics Command 4-13 Column Reservation Numbers 4-14 A Simple Graphics Program 4-14 Designing Your Own Graphics 4-15 User-defined Characters 4-20 Designing Your Characters 4-20 Defining Your Characters 4-22 Sending Information to Your Printer 4-24 Printing User-defined Characters 4-27 Copying ROM Characters...
... Spacing 4-2 Character Size 4-3 Special Effects and Emphasis 4-4 Selecting Typestyles With Master Select 4-6 Graphics 4-9 The Print Head 4-10 The Graphics Command 4-13 Column Reservation Numbers 4-14 A Simple Graphics Program 4-14 Designing Your Own Graphics 4-15 User-defined Characters 4-20 Designing Your Characters 4-20 Defining Your Characters 4-22 Sending Information to Your Printer 4-24 Printing User-defined Characters 4-27 Copying ROM Characters...
User Manual
Page 137
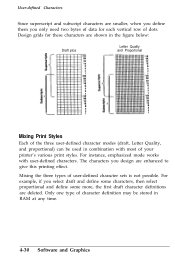
...used in RAM at any time. 4-30 Software and Graphics For instance, emphasized mode works with most of the three user-defined character modes (draft, Letter Quality, and proportional) can be stored in combination with user-defined characters. Design grids for each vertical row of user-defined character sets is not possible. The characters you only need two bytes of data...draft character definitions are smaller, when you define them you design are shown in the figure below: Draft pica Letter Quality and Proportional Mixing Print Styles Each of your printer's various print styles.
...used in RAM at any time. 4-30 Software and Graphics For instance, emphasized mode works with most of the three user-defined character modes (draft, Letter Quality, and proportional) can be stored in combination with user-defined characters. Design grids for each vertical row of user-defined character sets is not possible. The characters you only need two bytes of data...draft character definitions are smaller, when you define them you design are shown in the figure below: Draft pica Letter Quality and Proportional Mixing Print Styles Each of your printer's various print styles.

User Manual
Page 204
... Paper handling l Single sheets do not feed properly. If you may encounter while operating your printer and their likely solutions. See 7-14 See 7-17 See 7-21 See 7-23 7-2 Troubleshooting l Printed characters are not what you expected. l Continuous paper does not feed properly. Problems and Solutions This chapter discusses problems you are missing in the table below and then see the appropriate page...
... Paper handling l Single sheets do not feed properly. If you may encounter while operating your printer and their likely solutions. See 7-14 See 7-17 See 7-21 See 7-23 7-2 Troubleshooting l Printed characters are not what you expected. l Continuous paper does not feed properly. Problems and Solutions This chapter discusses problems you are missing in the table below and then see the appropriate page...

User Manual
Page 207
... software may be using the wire retaining clips. Secure the connector using the correct interface cable. Press the ON LINE button. Troubleshooting 7-5 The ON LINE light is on . Make sure your printer. The paper may not be loose. Check the printer settings and make the necessary changes. The ON LINE light should go on. You may be installed properly for your interface cable meets the printer and the computer specifications. Printing Problem The printer does not print...
... software may be using the wire retaining clips. Secure the connector using the correct interface cable. Press the ON LINE button. Troubleshooting 7-5 The ON LINE light is on . Make sure your printer. The paper may not be loose. Check the printer settings and make the necessary changes. The ON LINE light should go on. You may be installed properly for your interface cable meets the printer and the computer specifications. Printing Problem The printer does not print...
User Manual
Page 208
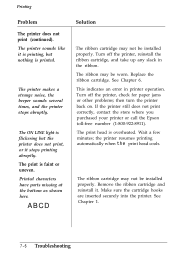
Turn off the printer, check for paper jams or other problems; then turn the printer back on. Wait a few minutes; See Chapter 1. 7-6 Troubleshooting The printer makes a strange noise, the beeper sounds several times, and the printer stops abruptly. ABCD Solution The ribbon cartridge may not be worn. The ribbon may not be installed properly. Remove the ribbon cartridge and reinstall it stops printing abruptly. The print is overheated. The ribbon cartridge may be...
Turn off the printer, check for paper jams or other problems; then turn the printer back on. Wait a few minutes; See Chapter 1. 7-6 Troubleshooting The printer makes a strange noise, the beeper sounds several times, and the printer stops abruptly. ABCD Solution The ribbon cartridge may not be worn. The ribbon may not be installed properly. Remove the ribbon cartridge and reinstall it stops printing abruptly. The print is overheated. The ribbon cartridge may be...
User Manual
Page 217
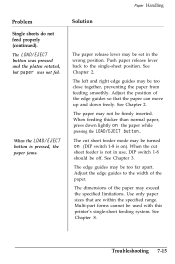
... paper jams. Solution The paper release lever may not be used with this printer's single-sheet feeding system. Troubleshooting 7-15 Paper Handling Problem Single sheets do not feed properly (continued). When the cut sheet feeder mode may be too far apart. Adjust the edge guides to the single-sheet position. See Chapter 8. The paper may be set in use, DIP switch 1-8 should be turned on (DIP switch 1-8 is on the paper while pressing the LOAD/EJECT button...
... paper jams. Solution The paper release lever may not be used with this printer's single-sheet feeding system. Troubleshooting 7-15 Paper Handling Problem Single sheets do not feed properly (continued). When the cut sheet feeder mode may be too far apart. Adjust the edge guides to the single-sheet position. See Chapter 8. The paper may be set in use, DIP switch 1-8 should be turned on (DIP switch 1-8 is on the paper while pressing the LOAD/EJECT button...

User Manual
Page 234
... be loose or not properly connected. Check it properly. The font module may be inserted the wrong way. If your program allows you expected. Options Problem Using the font module, the module's fonts do not print. The printer does not print or the printout is correctly inserted into the connector on the control panel. Align the (> ) marks on the module...
... be loose or not properly connected. Check it properly. The font module may be inserted the wrong way. If your program allows you expected. Options Problem Using the font module, the module's fonts do not print. The printer does not print or the printout is correctly inserted into the connector on the control panel. Align the (> ) marks on the module...

User Manual
Page 235
Options Problem Using an optional interface, the printer does not operate properly (continued). Solution You may be attached at any time. The DIP switches or jumpers on the printer; only one cable may be trying to make sure that the cable matches the specifications of the interface. Troubleshooting 7-33 The printer does not print or the printout is not what you can use a cable with this printer. You...
Options Problem Using an optional interface, the printer does not operate properly (continued). Solution You may be attached at any time. The DIP switches or jumpers on the printer; only one cable may be trying to make sure that the cable matches the specifications of the interface. Troubleshooting 7-33 The printer does not print or the printout is not what you can use a cable with this printer. You...
User Manual
Page 307
... A-7 Cleaning printer, 6-2, -4 Column reservation numbers, 4-14 Command summary, 9-1, - 40 Condensed button, 3-4 Condensed mode, 3-21, 4-4, - 5 Configuring application software, 1-26 Connecting printer, 1-23, - 25 Continuous paper, maximum width, 2-8 loading, 2-8, - 15 Control key table, 9-4 Control panel, 3-2, - 5 buttons, 3-3, - 5 lights, 3-2 Cut sheet feeder, 5-2, - 20 capacity, 8-12 installing, 5-2, - 5 loading paper, 5-6, - 10 mode, 5-5 removing, 5-17, - 20 software control, 5-16 specifications, 8-12, - 13 testing, 5-10, - 13 using, 5-15, -17 D Data dump mode, 3-26, -28 Default settings...
... A-7 Cleaning printer, 6-2, -4 Column reservation numbers, 4-14 Command summary, 9-1, - 40 Condensed button, 3-4 Condensed mode, 3-21, 4-4, - 5 Configuring application software, 1-26 Connecting printer, 1-23, - 25 Continuous paper, maximum width, 2-8 loading, 2-8, - 15 Control key table, 9-4 Control panel, 3-2, - 5 buttons, 3-3, - 5 lights, 3-2 Cut sheet feeder, 5-2, - 20 capacity, 8-12 installing, 5-2, - 5 loading paper, 5-6, - 10 mode, 5-5 removing, 5-17, - 20 software control, 5-16 specifications, 8-12, - 13 testing, 5-10, - 13 using, 5-15, -17 D Data dump mode, 3-26, -28 Default settings...
User Manual
Page 309
..., 3-24 Micro-adjustment, 3-13 Moving printer, 6-11 print head, 1-9 Multi-Font Module, 5-34 - 39 font descriptions, 5-34, -36 installation, 5-37-38 selecting fonts, 5-38 Multi-part forms, 2-27 Multi-part light, 3-2 O On line button, 3-3 On line light, 3-2 Options see Cut-sheet feeder see Interface boards see Multi-Font Module see Pull tractor Outline mode, 4-6, 9-32 Overline mode, 4-5, 9-31 P Page length, 3-10 Paper copy capacity, 8-6 feeding method, 2-2, 8-6 length, 8-3, 8-13 loading, 2-3, - 31 printable...
..., 3-24 Micro-adjustment, 3-13 Moving printer, 6-11 print head, 1-9 Multi-Font Module, 5-34 - 39 font descriptions, 5-34, -36 installation, 5-37-38 selecting fonts, 5-38 Multi-part forms, 2-27 Multi-part light, 3-2 O On line button, 3-3 On line light, 3-2 Options see Cut-sheet feeder see Interface boards see Multi-Font Module see Pull tractor Outline mode, 4-6, 9-32 Overline mode, 4-5, 9-31 P Page length, 3-10 Paper copy capacity, 8-6 feeding method, 2-2, 8-6 length, 8-3, 8-13 loading, 2-3, - 31 printable...
User Manual
Page 310
... Printer cover, 1-13, 2-27 Printer stand, 1-6 Print head, 1-9, 4-10 - 12, 8-6 Printing direction, 8-2 Problems, see Troubleshooting Proportional spacing, 4-2 - 3, 4-6-8, 9-25, A-2-5 Pull tractor, 5-21- 33 installing, 5-21- 33 loading paper, 5-23 - 29 removing, 5-30 - 33 Push tractor, 2-9 - 23 R Ready light, 3-2 Ribbon cartridge installing, 1-8 - 10 replacing, 6-5 - 10 specifications, 8-6 Roman font, 3-20 S Sans serif font, 3-20 SelecType options, 3-19 - 21, 5-34 Self test, printer, 1-15 - 22, 5-10 - 13 Serial interface, see Interface boards Setting up printer, l-l - 26 Shadow mode...
... Printer cover, 1-13, 2-27 Printer stand, 1-6 Print head, 1-9, 4-10 - 12, 8-6 Printing direction, 8-2 Problems, see Troubleshooting Proportional spacing, 4-2 - 3, 4-6-8, 9-25, A-2-5 Pull tractor, 5-21- 33 installing, 5-21- 33 loading paper, 5-23 - 29 removing, 5-30 - 33 Push tractor, 2-9 - 23 R Ready light, 3-2 Ribbon cartridge installing, 1-8 - 10 replacing, 6-5 - 10 specifications, 8-6 Roman font, 3-20 S Sans serif font, 3-20 SelecType options, 3-19 - 21, 5-34 Self test, printer, 1-15 - 22, 5-10 - 13 Serial interface, see Interface boards Setting up printer, l-l - 26 Shadow mode...


