
Product Support Bulletin(s)
Page 4
...be bad. 10 This is loaded using the knob instead of failure are un-familiar with the machine. Physical obstruction such as a jammed ribbon 11 Skewed paper detect error. An undefined op-code was detected. PSB No: P-0076 Page: 4 of these errors are documented in printhead...are : a. Platen gap motor HP not detected correctly c. NOTES: Error codes 11 and 12 are usually caused by turning the printer off, taking out the paper and turning the printer back on. This is a printhead wire protection feature. 12 Illegal paper positioning. (1) If the paper is a motor control error...
...be bad. 10 This is loaded using the knob instead of failure are un-familiar with the machine. Physical obstruction such as a jammed ribbon 11 Skewed paper detect error. An undefined op-code was detected. PSB No: P-0076 Page: 4 of these errors are documented in printhead...are : a. Platen gap motor HP not detected correctly c. NOTES: Error codes 11 and 12 are usually caused by turning the printer off, taking out the paper and turning the printer back on. This is a printhead wire protection feature. 12 Illegal paper positioning. (1) If the paper is a motor control error...

User Manual
Page 7
Chapter 4 Using the Printer Options 4-1 Cut-Sheet Feeder 4-2 Film Ribbon 4-8 Chapter 5 Maintenance and Transportation 5-1 Cleaning the Printer 5-2 Replacing the Ribbon 5-3 Transporting the Printer 5-4 Chapter 6 Troubleshooting 6-1 Problems and Solutions 6-2 Power Supply 6-3 Printing 6-4 Paper Handling 6-8 Options 6-10 Chapter 7 Technical Specifications 7-1 Printer Specifications 7-2 Interface Specifications 7-8 Initialization 7-12 Chapter 8 Command Summary 8-1 Using the Command Summary 8-2 Commands Arranged by Topic 8-3 Appendix A-1 Character...
Chapter 4 Using the Printer Options 4-1 Cut-Sheet Feeder 4-2 Film Ribbon 4-8 Chapter 5 Maintenance and Transportation 5-1 Cleaning the Printer 5-2 Replacing the Ribbon 5-3 Transporting the Printer 5-4 Chapter 6 Troubleshooting 6-1 Problems and Solutions 6-2 Power Supply 6-3 Printing 6-4 Paper Handling 6-8 Options 6-10 Chapter 7 Technical Specifications 7-1 Printer Specifications 7-2 Interface Specifications 7-8 Initialization 7-12 Chapter 8 Command Summary 8-1 Using the Command Summary 8-2 Commands Arranged by Topic 8-3 Appendix A-1 Character...

User Manual
Page 8
...information on these options, see Chapter 4. l Single-bin Cut-Sheet Feeder ( # 7341) The cut -sheet feeder or a film ribbon to 192 characters per second at 12 cpi l Seven built-in Letter Quality fonts for producing high-quality documents l A convenient control... a cut -sheet feeder gives you have come to expect from Epson printers, your printer. Introduction Your new Epson 24-pin dot matrix printer combines a compact design and high performance with the Epson ESC/P® commands used by other Epson LQ printers. It automatically feeds up to enhance use of standard bond paper into...
...information on these options, see Chapter 4. l Single-bin Cut-Sheet Feeder ( # 7341) The cut -sheet feeder or a film ribbon to 192 characters per second at 12 cpi l Seven built-in Letter Quality fonts for producing high-quality documents l A convenient control... a cut -sheet feeder gives you have come to expect from Epson printers, your printer. Introduction Your new Epson 24-pin dot matrix printer combines a compact design and high performance with the Epson ESC/P® commands used by other Epson LQ printers. It automatically feeds up to enhance use of standard bond paper into...

User Manual
Page 9
...the printed results are not what you with even higher quality printing than the standard fabric ribbon. Be sure to your printer. There is also a glossary of printer terms and an index. CAUTIONS must be observed to avoid damage to read this chapter... Chapters 2 and 3 include important information on the operation of your printer. Introduction l Film Ribbon Cartridge ( # 7768) An optional film ribbon cartridge provides you expect, see Chapter 6 for setting up , testing, and connecting the printer. l Chapter 1 contains information on general maintenance, specifications, and...
...the printed results are not what you with even higher quality printing than the standard fabric ribbon. Be sure to your printer. There is also a glossary of printer terms and an index. CAUTIONS must be observed to avoid damage to read this chapter... Chapters 2 and 3 include important information on the operation of your printer. Introduction l Film Ribbon Cartridge ( # 7768) An optional film ribbon cartridge provides you expect, see Chapter 6 for setting up , testing, and connecting the printer. l Chapter 1 contains information on general maintenance, specifications, and...

User Manual
Page 10
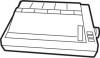
Introduction 3 Name of the Parts paper release lever printer cover control panel Introduction edge guides paper guide compartment cover slot cover platen knob print head ribbon cartridge parallel interface AC inlet power switch Note: In some locations, the power cord is attached to the printer.
Introduction 3 Name of the Parts paper release lever printer cover control panel Introduction edge guides paper guide compartment cover slot cover platen knob print head ribbon cartridge parallel interface AC inlet power switch Note: In some locations, the power cord is attached to the printer.

User Manual
Page 12
Chapter 1 Setting Up the Printer Unpacking the Printer 1-2 Choosing a Place for the Printer 1-4 Assembling the Printer 1-6 Installing the platen knob 1-6 Installing the ribbon cartridge 1-6 Testing the Printer 1-10 Plugging in the printer 1-10 Loading paper 1-11 Running the self test 1-17 Connecting the Printer to Your Computer 1-19 The parallel interface 1-19 Setting Up Your Application Software 1-21 Choosing from a menu 1-21 Setting Up the Printer 1-1
Chapter 1 Setting Up the Printer Unpacking the Printer 1-2 Choosing a Place for the Printer 1-4 Assembling the Printer 1-6 Installing the platen knob 1-6 Installing the ribbon cartridge 1-6 Testing the Printer 1-10 Plugging in the printer 1-10 Loading paper 1-11 Running the self test 1-17 Connecting the Printer to Your Computer 1-19 The parallel interface 1-19 Setting Up Your Application Software 1-21 Choosing from a menu 1-21 Setting Up the Printer 1-1

User Manual
Page 13
Unpacking the Printer When you unpack the printer, make sure that you have all the parts shown below and that none has been damaged. tractor cover printer paper guide paper rest printer cover platen knob power cord ribbon cartridge Selec Type sticker 1-2 Setting Up the Printer
Unpacking the Printer When you unpack the printer, make sure that you have all the parts shown below and that none has been damaged. tractor cover printer paper guide paper rest printer cover platen knob power cord ribbon cartridge Selec Type sticker 1-2 Setting Up the Printer

User Manual
Page 17
... to manually feed paper in the white foam packing material. 1. Installing the ribbon cartridge Before installing the ribbon cartridge, make sure that the printer is turned off. Insert the knob into an electrical outlet. 1-6 Setting Up the Printer Push firmly on the printer's side and rotate it until it slips onto the shaft. 2. You find...
... to manually feed paper in the white foam packing material. 1. Installing the ribbon cartridge Before installing the ribbon cartridge, make sure that the printer is turned off. Insert the knob into an electrical outlet. 1-6 Setting Up the Printer Push firmly on the printer's side and rotate it until it slips onto the shaft. 2. You find...

User Manual
Page 19
Press lightly on both ends of the arrow. This removes any slack in the direction of the cartridge to install. 4. Hold the ribbon cartridge by its handle and push it easier to be sure the hooks are properly seated. 1-8 Setting Up the Printer Turn the ribbon-tightening knob in the ribbon to make it firmly down into position, making sure the plastic hooks fit into the slots. Assembling the Printer 3.
Press lightly on both ends of the arrow. This removes any slack in the direction of the cartridge to install. 4. Hold the ribbon cartridge by its handle and push it easier to be sure the hooks are properly seated. 1-8 Setting Up the Printer Turn the ribbon-tightening knob in the ribbon to make it firmly down into position, making sure the plastic hooks fit into the slots. Assembling the Printer 3.

User Manual
Page 20
Slide the print head from side to side to help feed the ribbon into place. 6. Use a pointed object, such as a ball point pen, to guide the ribbon between the print head and ribbon guide while you turn the ribbon-tightening knob to be sure it moves smoothly. Setting Up the Printer 1-9 Also see that the ribbon is not twisted or creased. Assembling the Printer 5.
Slide the print head from side to side to help feed the ribbon into place. 6. Use a pointed object, such as a ball point pen, to guide the ribbon between the print head and ribbon guide while you turn the ribbon-tightening knob to be sure it moves smoothly. Setting Up the Printer 1-9 Also see that the ribbon is not twisted or creased. Assembling the Printer 5.

User Manual
Page 25
Testing the Printer 8. Make sure your paper has a clean, straight edge and then insert the paper into the printer until it up to the sprocket units. 9. Pull it emerges between the platen and the ribbon guide. Fit the holes of the paper over the tractor pins of the sprocket units, and then close the sprocket covers. 1-14 Setting Up the Printer
Testing the Printer 8. Make sure your paper has a clean, straight edge and then insert the paper into the printer until it up to the sprocket units. 9. Pull it emerges between the platen and the ribbon guide. Fit the holes of the paper over the tractor pins of the sprocket units, and then close the sprocket covers. 1-14 Setting Up the Printer

User Manual
Page 27
Testing the Printer 13. Slide the edge guides to feed the paper until its perforation is just about even with the top of the paper's width. 14. Attach and close the tractor cover. 1-16 Setting Up the Printer Use the platen knob to the center of the ribbon. 15.
Testing the Printer 13. Slide the edge guides to feed the paper until its perforation is just about even with the top of the paper's width. 14. Attach and close the tractor cover. 1-16 Setting Up the Printer Use the platen knob to the center of the ribbon. 15.

User Manual
Page 41
... units. Then insert the paper into the desired paper slot (rear or bottom) until it . 4 Position the paper support midway between the platen and the ribbon guide. Slide the left sprocket unit to approximately 0.5 inches (12 mm) from the far left position and push the lever back to the sprocket units...
... units. Then insert the paper into the desired paper slot (rear or bottom) until it . 4 Position the paper support midway between the platen and the ribbon guide. Slide the left sprocket unit to approximately 0.5 inches (12 mm) from the far left position and push the lever back to the sprocket units...

User Manual
Page 42
... the platen knob to the center of the ribbon. 10. Using Continuous Paper 7. Then slide the edge guides to feed the paper until its flat position over the printer and incoming paper. Attach and close the tractor cover. 11. CAUTION: If you use the platen knob to a position where the paper is...
... the platen knob to the center of the ribbon. 10. Using Continuous Paper 7. Then slide the edge guides to feed the paper until its flat position over the printer and incoming paper. Attach and close the tractor cover. 11. CAUTION: If you use the platen knob to a position where the paper is...

User Manual
Page 68
Chapter 4 Using the Printer Options Cut-Sheet Feeder 4-2 Installing the cut-sheet feeder 4-2 Paper handling 4-4 Removing the cut-sheet feeder 4-7 Film Ribbon 4-8 Using the Printer Options 4-1
Chapter 4 Using the Printer Options Cut-Sheet Feeder 4-2 Installing the cut-sheet feeder 4-2 Paper handling 4-4 Removing the cut-sheet feeder 4-7 Film Ribbon 4-8 Using the Printer Options 4-1

User Manual
Page 75
Install the film ribbon the same way you need especially high quality printing. See Chapter 1. 4-8 Using the Printer Options Use the optional film ribbon only when you install the standard ribbon. For everyday operation, use the standard ribbon. Film Ribbon The optional film ribbon (#7768) provides you with even higher quality printing than the standard fabric ribbon.
Install the film ribbon the same way you need especially high quality printing. See Chapter 1. 4-8 Using the Printer Options Use the optional film ribbon only when you install the standard ribbon. For everyday operation, use the standard ribbon. Film Ribbon The optional film ribbon (#7768) provides you with even higher quality printing than the standard fabric ribbon.

User Manual
Page 76
Chapter 5 Maintenance and Transportation Cleaning the Printer 5-2 Replacing the Ribbon 5-3 Transporting the Printer 5-4 Maintenance and Transportation 5-1
Chapter 5 Maintenance and Transportation Cleaning the Printer 5-2 Replacing the Ribbon 5-3 Transporting the Printer 5-4 Maintenance and Transportation 5-1

User Manual
Page 78
For everyday operations, use ribbons designed for nine-pin printers. l Do not use the standard ribbon. The Epson # 7753 standard fabric or # 7768 film replacement ribbon cartridges are recommended. See Installing the ribbon cartridge in Chapter 1. Maintenance and Transportation 5-3 Note: l Use the optional film ribbon only when you need especially high quality printing. Replacing the Ribbon When your printing becomes too faint, you need to replace the ribbon.
For everyday operations, use ribbons designed for nine-pin printers. l Do not use the standard ribbon. The Epson # 7753 standard fabric or # 7768 film replacement ribbon cartridges are recommended. See Installing the ribbon cartridge in Chapter 1. Maintenance and Transportation 5-3 Note: l Use the optional film ribbon only when you need especially high quality printing. Replacing the Ribbon When your printing becomes too faint, you need to replace the ribbon.

User Manual
Page 79
... 3. then disconnect the interface cable from the electrical outlet; CAUTION: Never hold the printer by the compartment cover even if you to drop the printer. 5-4 Maintenance and Transportation Remove the ribbon cartridge and platen knob. 5. If you have removed the pull tractor and the tractor ...cover, replace them now according to transport your printer some distance, carefully repack the printer using the original box and...
... 3. then disconnect the interface cable from the electrical outlet; CAUTION: Never hold the printer by the compartment cover even if you to drop the printer. 5-4 Maintenance and Transportation Remove the ribbon cartridge and platen knob. 5. If you have removed the pull tractor and the tractor ...cover, replace them now according to transport your printer some distance, carefully repack the printer using the original box and...

User Manual
Page 83
.... Press the ON LINE button to put the printer on . Check that the software is printed. Wait a few minutes; l The ON LINE light is on ribbon installation in the printer. The ribbon cartridge may be installed properly. The ribbon may not be worn out. The print head ...is printed. the printer resumes printing automatically when the print head cools. 6 4 Troubleshooting l The ON...
.... Press the ON LINE button to put the printer on . Check that the software is printed. Wait a few minutes; l The ON LINE light is on ribbon installation in the printer. The ribbon cartridge may be installed properly. The ribbon may not be worn out. The print head ...is printed. the printer resumes printing automatically when the print head cools. 6 4 Troubleshooting l The ON...


