
User Manual
Page 5
... services through a nationwide network of ribbons, supplies, parts, documentation, and accessories for your Epson product t Customer Relations. Where to Get Help for United States Users Epson America provides local customer support and service through the Epson Consumer Resource Center at (800) 922-8911: t Assistance in locating your nearest Authorized Epson Reseller or Service Center t Technical...
... services through a nationwide network of ribbons, supplies, parts, documentation, and accessories for your Epson product t Customer Relations. Where to Get Help for United States Users Epson America provides local customer support and service through the Epson Consumer Resource Center at (800) 922-8911: t Assistance in locating your nearest Authorized Epson Reseller or Service Center t Technical...

User Manual
Page 9
Chapter 5 Maintenance 5-1 Cleaning the Printer 5-2 Replacing the Ribbon 5-3 Transporting the Printer 5-4 Chapter 6 Troubleshooting 6-1 Problems and Solutions 6-2 Power Supply 6-3 Printing 6-4 Paper Handling 6-8 Options 6-10 Chapter 7 Technical Specification Printer Specifications Interface Specifications Initialization 7-1 7-2 7-7 7-10 Chapter 8 Command Summary 8-1 Using the Command Summary 8-2 Commands Arranged by Topic 8-3 Appendix A-1 Character Tables A-2 Glossary GL-1 . . . Vlll
Chapter 5 Maintenance 5-1 Cleaning the Printer 5-2 Replacing the Ribbon 5-3 Transporting the Printer 5-4 Chapter 6 Troubleshooting 6-1 Problems and Solutions 6-2 Power Supply 6-3 Printing 6-4 Paper Handling 6-8 Options 6-10 Chapter 7 Technical Specification Printer Specifications Interface Specifications Initialization 7-1 7-2 7-7 7-10 Chapter 8 Command Summary 8-1 Using the Command Summary 8-2 Commands Arranged by Topic 8-3 Appendix A-1 Character Tables A-2 Glossary GL-1 . . . Vlll

User Manual
Page 13
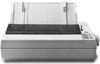
Introduction Names of the Parts paper guide release printer control panel paper tension unit cover ribbon cartridge AC inlet Note: In some locations, the power cord is attached to the printer. 4 Introduction
Introduction Names of the Parts paper guide release printer control panel paper tension unit cover ribbon cartridge AC inlet Note: In some locations, the power cord is attached to the printer. 4 Introduction

User Manual
Page 14
l Chapter 1 Setting Up the Printer Unpacking t h e Printer 1-2 Choosing a Place for t h e Printer 1-3 Assembling t h e Printer 1-5 Installing t h e platen knob 1-5 Installing t h e ribbon cartridge 1-6 Attaching t h e paper guide 1-9 Testing t h e Printer Plugging in the printer Running t h e self test 1-10 1-10 1-10 Connecting t h e Printer to Your Computer 1-13 The parallel interface 1-13 Setting Up Your Application Software 1-14 Choosing from a menu 1-14 Setting Up the Printer l -
l Chapter 1 Setting Up the Printer Unpacking t h e Printer 1-2 Choosing a Place for t h e Printer 1-3 Assembling t h e Printer 1-5 Installing t h e platen knob 1-5 Installing t h e ribbon cartridge 1-6 Attaching t h e paper guide 1-9 Testing t h e Printer Plugging in the printer Running t h e self test 1-10 1-10 1-10 Connecting t h e Printer to Your Computer 1-13 The parallel interface 1-13 Setting Up Your Application Software 1-14 Choosing from a menu 1-14 Setting Up the Printer l -

User Manual
Page 19
Then lift the cover up and off. 2. Slide the print head to the upright position. Then open the paper tension unit cover. 1-6 Setting Up the Printer Raise the printer cover to the middle of the printer. Assembling the Printer Installing the ribbon cartridge Before installing the ribbon cartridge, make sure that the printer is not plugged into an electrical outlet. 1.
Then lift the cover up and off. 2. Slide the print head to the upright position. Then open the paper tension unit cover. 1-6 Setting Up the Printer Raise the printer cover to the middle of the printer. Assembling the Printer Installing the ribbon cartridge Before installing the ribbon cartridge, make sure that the printer is not plugged into an electrical outlet. 1.

User Manual
Page 20
Note: Press lightly on both ends of the arrow. Turn the ribbon-tightening knob in the direction of the cartridge to install. 4. Hold the ribbon cartridge by its handle and push it firmly down into the slots. Setting Up the Printer 1-7 This removes slack from the ribbon, making sure the plastic hooks fit into position, making it easier to make sure the plastic hooks are properly seated. Assembling the Printer 3.
Note: Press lightly on both ends of the arrow. Turn the ribbon-tightening knob in the direction of the cartridge to install. 4. Hold the ribbon cartridge by its handle and push it firmly down into the slots. Setting Up the Printer 1-7 This removes slack from the ribbon, making sure the plastic hooks fit into position, making it easier to make sure the plastic hooks are properly seated. Assembling the Printer 3.

User Manual
Page 21
Use a pointed object, such as a ball point pen, to guide the ribbon between the print head and ribbon guide while you turn the ribbon-tightening knob to make sure that the ribbon is not twisted or creased. 7. Close the paper tension unit cover. 1-8 Also check that it moves smoothly. Slide the print head from side to side to help feed the ribbon into place. 6. Assembling the Printer 5.
Use a pointed object, such as a ball point pen, to guide the ribbon between the print head and ribbon guide while you turn the ribbon-tightening knob to make sure that the ribbon is not twisted or creased. 7. Close the paper tension unit cover. 1-8 Also check that it moves smoothly. Slide the print head from side to side to help feed the ribbon into place. 6. Assembling the Printer 5.

User Manual
Page 69
Interface Boards 3. Remove the push tractor by pressing the tabs on the front of the underside of falling off the table. 4-18 Using the Printer Options CAUTION: Make sure that the printer is not so far forward that its front extends slightly over the edge of a table, allowing access to the openings on both sides using a pointed object. 5. To remove the upper case, first position the printer so that it is in danger of the printer. Remove the paper tension unit cover, ribbon cartridge, and platen knob. 4.
Interface Boards 3. Remove the push tractor by pressing the tabs on the front of the underside of falling off the table. 4-18 Using the Printer Options CAUTION: Make sure that the printer is not so far forward that its front extends slightly over the edge of a table, allowing access to the openings on both sides using a pointed object. 5. To remove the upper case, first position the printer so that it is in danger of the printer. Remove the paper tension unit cover, ribbon cartridge, and platen knob. 4.

User Manual
Page 75
You must not connect two interface cables to disconnect the printer cable from the printer's built-in parallel interface. Reattach the push feed tractor. 5. Carefully insert the control panel cable into place. 4. Press down on the front of the case until it locks into the connector labelled CN3 on the main board. 3. Reattach the ribbon cartridge, paper tension unit cover, and platen knob. Close the upper case. I I 4-24 Using the Printer Options Interface Boards 2. CAUTION: When you install an optional interface board, be sure to the printer at the same time.
You must not connect two interface cables to disconnect the printer cable from the printer's built-in parallel interface. Reattach the push feed tractor. 5. Carefully insert the control panel cable into place. 4. Press down on the front of the case until it locks into the connector labelled CN3 on the main board. 3. Reattach the ribbon cartridge, paper tension unit cover, and platen knob. Close the upper case. I I 4-24 Using the Printer Options Interface Boards 2. CAUTION: When you install an optional interface board, be sure to the printer at the same time.

User Manual
Page 78
WARNING: If the printer has just been used, the print head may be hot. Use only the Epson #8750 standard ribbon cartridge with your printing becomes too faint, you need to replace the ribbon. Let it cool before attempting to replace the ribbon. Maintenance 5-3 See Installing the ribbon cartridge in Chapter 1. Replacing the Ribbon When your printer.
WARNING: If the printer has just been used, the print head may be hot. Use only the Epson #8750 standard ribbon cartridge with your printing becomes too faint, you need to replace the ribbon. Let it cool before attempting to replace the ribbon. Maintenance 5-3 See Installing the ribbon cartridge in Chapter 1. Replacing the Ribbon When your printer.

User Manual
Page 79
Turn off the printer. 2. then disconnect the interface cable from the electrical outlet; Remove the ribbon cartridge and platen knob. 5. Unplug the power cord from the printer. 4. Replace the packing materials and put the printer in its box. 5-4 Maintenance Reattach the printer cover. 6. Remove the paper guide, printer cover, and any installed options. 3. Transporting the Printer If you need to transport your printer some distance, carefully repack the printer using the original box and packing materials, as described below. 1.
Turn off the printer. 2. then disconnect the interface cable from the electrical outlet; Remove the ribbon cartridge and platen knob. 5. Unplug the power cord from the printer. 4. Replace the packing materials and put the printer in its box. 5-4 Maintenance Reattach the printer cover. 6. Remove the paper guide, printer cover, and any installed options. 3. Transporting the Printer If you need to transport your printer some distance, carefully repack the printer using the original box and packing materials, as described below. 1.

User Manual
Page 83
... paper a little to the left. • The printer sounds like it is printing, but nothing is already loaded, the paper may be installed properly. The ribbon may be set too far to put the printer on . Load paper into the printer. Printing This section supplies solutions for your interface cable meets...section on but nothing is printed. If the ON LINE light comes on when you remove the printer cable, either the cable or the interface is bad. • The ONLINE light is on ribbon installation in Chapter 1. Press the ON LINE button to the right for detection by the paper...
... paper a little to the left. • The printer sounds like it is printing, but nothing is already loaded, the paper may be installed properly. The ribbon may be set too far to put the printer on . Load paper into the printer. Printing This section supplies solutions for your interface cable meets...section on but nothing is printed. If the ON LINE light comes on when you remove the printer cable, either the cable or the interface is bad. • The ONLINE light is on ribbon installation in Chapter 1. Press the ON LINE button to the right for detection by the paper...
User Manual
Page 84
... your dealer or a qualified service person. Troubleshooting 6-5 Replace the ribbon cartridge. l Dots are missing in the printout. See the section on ribbon installation in Chapter 1. • The printout is damaged. Printing • The printer makes a strange noise, the buzzer sounds several times, and the printer stops abruptly. The print is either slack in random...
... your dealer or a qualified service person. Troubleshooting 6-5 Replace the ribbon cartridge. l Dots are missing in the printout. See the section on ribbon installation in Chapter 1. • The printout is damaged. Printing • The printer makes a strange noise, the buzzer sounds several times, and the printer stops abruptly. The print is either slack in random...

User Manual
Page 99
Mechanical Paper-feed methods: Friction Push tractor Pull tractor (optional) Cut-sheet feeder (optional) Roll-paper holder (optional) Ribbon: Black ribbon cartridge #8750 Life expectancy at normal temperature. • Printing on 90 g/m2 (24 lb) paper only at 14 dots/character: 3 million characters Technical ... paper jointed by perforations or pasting and with a total thickness of up to 24 lb) Number of copies: With continuous multi-part paper only; Printer Specifications Paper weight: Single sheet 52 g/m2 to 90 g/m2 (14 lb to 24 lb) Continuous paper 52 g/m2 to 82 g/m2 (14...
Mechanical Paper-feed methods: Friction Push tractor Pull tractor (optional) Cut-sheet feeder (optional) Roll-paper holder (optional) Ribbon: Black ribbon cartridge #8750 Life expectancy at normal temperature. • Printing on 90 g/m2 (24 lb) paper only at 14 dots/character: 3 million characters Technical ... paper jointed by perforations or pasting and with a total thickness of up to 24 lb) Number of copies: With continuous multi-part paper only; Printer Specifications Paper weight: Single sheet 52 g/m2 to 90 g/m2 (14 lb to 24 lb) Continuous paper 52 g/m2 to 82 g/m2 (14...

User Manual
Page 126
Printable area, 7-3-4 Printer, 1-6 assembling, 1-5-8 cleaning, 5-2 default settings, 7-10 software, 1-14 specifications, 7-2-6 testing, 1-10-12 transporting, 5-4 unpacking, 1-2 using with application voltage, 7-6 Problems, see Troubleshooting Pull tractor installing, 4-8-9 loading paper, 4-9-12 READY light, 3-2 removing, 4-12 Push tractor, 2-5 sprocket units, 2-5 R Ribbon cartridge installing, 1-5-8 replacing, 5-3 specifications, 7-5 Roll paper holder installing, 4-14 paper handling, 4-15-16 removing, 4-16...
Printable area, 7-3-4 Printer, 1-6 assembling, 1-5-8 cleaning, 5-2 default settings, 7-10 software, 1-14 specifications, 7-2-6 testing, 1-10-12 transporting, 5-4 unpacking, 1-2 using with application voltage, 7-6 Problems, see Troubleshooting Pull tractor installing, 4-8-9 loading paper, 4-9-12 READY light, 3-2 removing, 4-12 Push tractor, 2-5 sprocket units, 2-5 R Ribbon cartridge installing, 1-5-8 replacing, 5-3 specifications, 7-5 Roll paper holder installing, 4-14 paper handling, 4-15-16 removing, 4-16...


