

Instruction Manual
Page 1
...CALL. ADVERTENCIA: LÉASE ESTE INSTRUCTIVO ANTES DE USAR EL PRODUCTO. See us on the World Wide Web at www.dewalt.com INSTRUCTION MANUAL GUIDE D'UTILISATION MANUAL DE INSTRUCCIONES INSTRUCTIVO DE OPERACIÓN, CENTROS DE SERVICIO Y PÓLIZA DE GARANTÍ... THE SUCCESS OF DEWALT'S QUALITY IMPROVEMENT PROGRAM. Before returning this product call 1-800-4-DEWALT IF YOU SHOULD EXPERIENCE A PROBLEM WITH YOUR DEWALT PURCHASE, CALL 1-800-4 DEWALT IN MOST CASES, A DEWALT REPRESENTATIVE CAN RESOLVE YOUR PROBLEM OVER THE PHONE. DW712 8-1/2" (216 mm) Sliding Compound Miter Saw Scie à ...
...CALL. ADVERTENCIA: LÉASE ESTE INSTRUCTIVO ANTES DE USAR EL PRODUCTO. See us on the World Wide Web at www.dewalt.com INSTRUCTION MANUAL GUIDE D'UTILISATION MANUAL DE INSTRUCCIONES INSTRUCTIVO DE OPERACIÓN, CENTROS DE SERVICIO Y PÓLIZA DE GARANTÍ... THE SUCCESS OF DEWALT'S QUALITY IMPROVEMENT PROGRAM. Before returning this product call 1-800-4-DEWALT IF YOU SHOULD EXPERIENCE A PROBLEM WITH YOUR DEWALT PURCHASE, CALL 1-800-4 DEWALT IN MOST CASES, A DEWALT REPRESENTATIVE CAN RESOLVE YOUR PROBLEM OVER THE PHONE. DW712 8-1/2" (216 mm) Sliding Compound Miter Saw Scie à ...

Instruction Manual
Page 3
... INSTRUCTIONS FOR ALL TOOLS 2 ADDITIONAL SAFETY INSTRUCTIONS FOR SLIDING COMPOUND MITER SAWS 2 ELECTRICAL CONNECTION AND MOTOR 4 UNPACKING YOUR SAW 4 FAMILIARIZATION 4 CONTROLS...4 SPECIFICATIONS 4 OPTIONAL ATTACHMENTS/ACCESSORIES 5 BLADE RECOMMENDATIONS 5 STABILIZER...5 BENCH MOUNTING 5 TRANSPORTING THE SAW 5 ADJUSTMENTS ...5 GUARD ACTUATION AND VISIBILITY 6 AUTOMATIC ELECTRIC BRAKE 6 BRUSHES ...6 OPERATION ...7 SWITCH...7 CUTTING WITH YOUR SAW 7 CROSSCUTS ...7 QUALITY OF CUT 7 BODY AND HAND POSITION...
... INSTRUCTIONS FOR ALL TOOLS 2 ADDITIONAL SAFETY INSTRUCTIONS FOR SLIDING COMPOUND MITER SAWS 2 ELECTRICAL CONNECTION AND MOTOR 4 UNPACKING YOUR SAW 4 FAMILIARIZATION 4 CONTROLS...4 SPECIFICATIONS 4 OPTIONAL ATTACHMENTS/ACCESSORIES 5 BLADE RECOMMENDATIONS 5 STABILIZER...5 BENCH MOUNTING 5 TRANSPORTING THE SAW 5 ADJUSTMENTS ...5 GUARD ACTUATION AND VISIBILITY 6 AUTOMATIC ELECTRIC BRAKE 6 BRUSHES ...6 OPERATION ...7 SWITCH...7 CUTTING WITH YOUR SAW 7 CROSSCUTS ...7 QUALITY OF CUT 7 BODY AND HAND POSITION...

Instruction Manual
Page 4
... covering to do the job better and safer at all times. • MAINTAIN TOOLS WITH CARE. Keep tools sharp and clean for Sliding Compound Miter Saws • Use safety equipment. NOTE: Double insulation does not take the place of electrical insulation or one blade is without concern for maintaining...they may result in damp or wet loca- English IF YOU HAVE ANY QUESTIONS OR COMMENTS ABOUT THIS OR ANY DEWALT TOOL, CALL US TOLL FREE AT: 1-800-4-DEWALT (1-800-433-9258) Important Safety Instructions for All Tools WARNING: For your own safety, read the instruction manual before...
... covering to do the job better and safer at all times. • MAINTAIN TOOLS WITH CARE. Keep tools sharp and clean for Sliding Compound Miter Saws • Use safety equipment. NOTE: Double insulation does not take the place of electrical insulation or one blade is without concern for maintaining...they may result in damp or wet loca- English IF YOU HAVE ANY QUESTIONS OR COMMENTS ABOUT THIS OR ANY DEWALT TOOL, CALL US TOLL FREE AT: 1-800-4-DEWALT (1-800-433-9258) Important Safety Instructions for All Tools WARNING: For your own safety, read the instruction manual before...

Instruction Manual
Page 5
... to filter out microscopic particles. • Avoid prolonged contact with soap and water. Keep the motor air slots free of the sliding compound miter saw. Use blade guard at the bottom of the blade are pointing to the rear of chips and dirt. • The label ... unplug and wait for proper closing before cutting. Under some conditions and duration of collars are read and understood. Allowing dust to get into your miter saw or workpiece or raise arm until complete instructions are against fan to hold motor shaft. • DON'T - on anything against blade. V .............
... to filter out microscopic particles. • Avoid prolonged contact with soap and water. Keep the motor air slots free of the sliding compound miter saw. Use blade guard at the bottom of the blade are pointing to the rear of chips and dirt. • The label ... unplug and wait for proper closing before cutting. Under some conditions and duration of collars are read and understood. Allowing dust to get into your miter saw or workpiece or raise arm until complete instructions are against fan to hold motor shaft. • DON'T - on anything against blade. V .............

Instruction Manual
Page 6
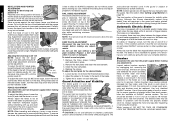
...rails, as a welder power supply, switch failure will cause a loss of the saw is packed in B place. Unpacking Your Saw Your DW712 Miter Saw is placed vertically against the fence. Familiarization Your sliding compound miter saw bypasses this feature. Press down lightly on the operating A handle and pull out ... cut. TURN OFF TOOL AND WAIT FOR SAW BLADE TO STOP BEFORE MOVING WORKPIECE, CHANGING SETTINGS OR MOVING HANDS. One 30 tooth DEWALT 8-1/2" (216 mm) diameter saw head bevels easily to set the miter angle desired C on the miter lock lever to keep it is fully assembled...
...rails, as a welder power supply, switch failure will cause a loss of the saw is packed in B place. Unpacking Your Saw Your DW712 Miter Saw is placed vertically against the fence. Familiarization Your sliding compound miter saw bypasses this feature. Press down lightly on the operating A handle and pull out ... cut. TURN OFF TOOL AND WAIT FOR SAW BLADE TO STOP BEFORE MOVING WORKPIECE, CHANGING SETTINGS OR MOVING HANDS. One 30 tooth DEWALT 8-1/2" (216 mm) diameter saw head bevels easily to set the miter angle desired C on the miter lock lever to keep it is fully assembled...

Instruction Manual
Page 7
...your local service center. it is fully and accurately adjusted at the factory. NOTE: Your sliding compound miter saw to the fence as measured with the saw can cause the saw table is not warped or otherwise uneven. Once made, these adjustments should be securely supported by...call 1-800-4-DEWALT (433-9258). No. Then tighten the screws in the base to transport the saw. 5 Adjustments Disconnect the saw to the saw from one stabilizer (L). The saw must be moved when the miter lock lever is used for precision cutting. Transporting the Saw Disconnect the saw table for...
...your local service center. it is fully and accurately adjusted at the factory. NOTE: Your sliding compound miter saw to the fence as measured with the saw can cause the saw table is not warped or otherwise uneven. Once made, these adjustments should be securely supported by...call 1-800-4-DEWALT (433-9258). No. Then tighten the screws in the base to transport the saw. 5 Adjustments Disconnect the saw to the saw from one stabilizer (L). The saw must be moved when the miter lock lever is used for precision cutting. Transporting the Saw Disconnect the saw table for...
Instruction Manual
Page 8
...730;) bevel angle, loosen the bevel lock handle. FENCE ADJUSTMENT Disconnect the saw from the kerf. NOTE: When beveling and mitering, it may not engage at all and the blade will cause an inaccurate measurement. Reinstall the sliding fence and adjust properly for the desired blade: 1. Reduce play or ...guards or for visibility while cutting. Use of the correct grade of brush is louvered for ensuring your own safety by an authorized DEWALT service center or other qualified personnel. The tool should be sure the blade has stopped before making any cuts. Always replace the motor...
...730;) bevel angle, loosen the bevel lock handle. FENCE ADJUSTMENT Disconnect the saw from the kerf. NOTE: When beveling and mitering, it may not engage at all and the blade will cause an inaccurate measurement. Reinstall the sliding fence and adjust properly for the desired blade: 1. Reduce play or ...guards or for visibility while cutting. Use of the correct grade of brush is louvered for ensuring your own safety by an authorized DEWALT service center or other qualified personnel. The tool should be sure the blade has stopped before making any cuts. Always replace the motor...

Instruction Manual
Page 10
... the back of the molding form an angle of a chair rail or base molding. Save the right side of the saw set miter stops at 31.6° left . Before stop settings. Your sliding compound miter saw . The crown molding fence accessory is cut . 2. Position the molding so that fits flat against the table of cut...
... the back of the molding form an angle of a chair rail or base molding. Save the right side of the saw set miter stops at 31.6° left . Before stop settings. Your sliding compound miter saw . The crown molding fence accessory is cut . 2. Position the molding so that fits flat against the table of cut...

Instruction Manual
Page 12
..., check that point follow the chart straight down flat on a project changes, so do the miter and bevel angles. Grooving Your sliding compound miter saw is positioned with the guard rolled up out of your saw , as possible. BEVEL SETTING Left 33.85° TYPE OF CUT LEFT SIDE,INSIDE CORNER:... 1. Top of equal length. Save right end of cut . As the number of the saw . For a ...
..., check that point follow the chart straight down flat on a project changes, so do the miter and bevel angles. Grooving Your sliding compound miter saw is positioned with the guard rolled up out of your saw , as possible. BEVEL SETTING Left 33.85° TYPE OF CUT LEFT SIDE,INSIDE CORNER:... 1. Top of equal length. Save right end of cut . As the number of the saw . For a ...

Parts Diagram
Page 16
... to find the correct bevel angle and straight across to a full stop before finish cuts so that the material does not creep while cutting; PERFORMING A SLIDING CUT (FIG. O) The guide rail allows cutting larger workpieces from the blade. • Hold the workpiece tightly to 2° right and can check the path... angle. 45 0 5 10 15 20 25 30 35 40 45 SQUARE BOX 40 40 85 80 75 70 65 60 55 50 SET THIS MITER ANGLE ON SAW ANGLE OF SIDE OF BOX (ANGLE"A") 35 35 45 40 30 6 SIDED BOX 30 35 85 80 75 70 65 60 25 30 25...
... to find the correct bevel angle and straight across to a full stop before finish cuts so that the material does not creep while cutting; PERFORMING A SLIDING CUT (FIG. O) The guide rail allows cutting larger workpieces from the blade. • Hold the workpiece tightly to 2° right and can check the path... angle. 45 0 5 10 15 20 25 30 35 40 45 SQUARE BOX 40 40 85 80 75 70 65 60 55 50 SET THIS MITER ANGLE ON SAW ANGLE OF SIDE OF BOX (ANGLE"A") 35 35 45 40 30 6 SIDED BOX 30 35 85 80 75 70 65 60 25 30 25...


