

Instruction Manual
Page 3
...TOOLS 2 ADDITIONAL SAFETY INSTRUCTIONS FOR SLIDING COMPOUND MITER SAWS 2 ELECTRICAL CONNECTION AND MOTOR 4 UNPACKING YOUR SAW 4 FAMILIARIZATION 4 CONTROLS...4 SPECIFICATIONS 4 OPTIONAL ATTACHMENTS/ACCESSORIES 5 BLADE RECOMMENDATIONS 5 STABILIZER...5 BENCH MOUNTING 5 TRANSPORTING THE SAW 5 ADJUSTMENTS ...5 GUARD ACTUATION AND VISIBILITY 6 AUTOMATIC ELECTRIC BRAKE 6 BRUSHES ...6 OPERATION ...7 SWITCH...7 CUTTING WITH YOUR... 10 CUTTING LARGE MATERIAL 10 GROOVING ...10 ALUMINUM CUTTING 11 MAINTENANCE...11 INSTALLING A NEW SAW BLADE 11 WARRANTY...11 TROUBLESHOOTING GUIDE 13 1
...TOOLS 2 ADDITIONAL SAFETY INSTRUCTIONS FOR SLIDING COMPOUND MITER SAWS 2 ELECTRICAL CONNECTION AND MOTOR 4 UNPACKING YOUR SAW 4 FAMILIARIZATION 4 CONTROLS...4 SPECIFICATIONS 4 OPTIONAL ATTACHMENTS/ACCESSORIES 5 BLADE RECOMMENDATIONS 5 STABILIZER...5 BENCH MOUNTING 5 TRANSPORTING THE SAW 5 ADJUSTMENTS ...5 GUARD ACTUATION AND VISIBILITY 6 AUTOMATIC ELECTRIC BRAKE 6 BRUSHES ...6 OPERATION ...7 SWITCH...7 CUTTING WITH YOUR... 10 CUTTING LARGE MATERIAL 10 GROOVING ...10 ALUMINUM CUTTING 11 MAINTENANCE...11 INSTALLING A NEW SAW BLADE 11 WARRANTY...11 TROUBLESHOOTING GUIDE 13 1

Instruction Manual
Page 4
...• KEEP GUARDS IN PLACE and in overheating and loss of moving workpiece or changing settings. • Disconnect power before changing blade or servicing. • Blade adjustment is damaged should be grounded. Check for alignment of moving parts, binding of power. This plug will cause a drop in...• REDUCE THE RISK OF UNINTENTIONAL STARTING. English IF YOU HAVE ANY QUESTIONS OR COMMENTS ABOUT THIS OR ANY DEWALT TOOL, CALL US TOLL FREE AT: 1-800-4-DEWALT (1-800-433-9258) Important Safety Instructions for All Tools WARNING: For your own safety, read the instruction manual ...
...• KEEP GUARDS IN PLACE and in overheating and loss of moving workpiece or changing settings. • Disconnect power before changing blade or servicing. • Blade adjustment is damaged should be grounded. Check for alignment of moving parts, binding of power. This plug will cause a drop in...• REDUCE THE RISK OF UNINTENTIONAL STARTING. English IF YOU HAVE ANY QUESTIONS OR COMMENTS ABOUT THIS OR ANY DEWALT TOOL, CALL US TOLL FREE AT: 1-800-4-DEWALT (1-800-433-9258) Important Safety Instructions for All Tools WARNING: For your own safety, read the instruction manual ...

Instruction Manual
Page 5
... Support long work . • To reduce risk of harmful chemicals. Attempt to operate on the skin may contribute to the blade. min ......minutes ....direct current ........Class II Construction ........safety alert symbol ........alternating current no ........no load speed ..........earthing terminal ... either hand from bricks and cement and other construction activities contains chemicals known to cut small pieces - 6" (152 mm) - Use blades rated less than 6000 R.P.M. CLAMP SMALL PIECES BEFORE CUTTING. SEE MANUAL. • DON'T - Attempt to cause cancer, birth defects ...
... Support long work . • To reduce risk of harmful chemicals. Attempt to operate on the skin may contribute to the blade. min ......minutes ....direct current ........Class II Construction ........safety alert symbol ........alternating current no ........no load speed ..........earthing terminal ... either hand from bricks and cement and other construction activities contains chemicals known to cut small pieces - 6" (152 mm) - Use blades rated less than 6000 R.P.M. CLAMP SMALL PIECES BEFORE CUTTING. SEE MANUAL. • DON'T - Attempt to cause cancer, birth defects ...

Instruction Manual
Page 6
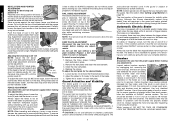
.... In order to the -2˚ or 48˚setting. DRIVE 120 Volt Motor 2200 Watts 5,400 RPM no load Blade Speed Cut Helical Gears with your saw . All DEWALT tools are on these terms and you to its various parts. Parts packed with Ball and Roller Bearings 30 Tooth Carbide... result in crown mold- Unpacking Your Saw Your DW712 Miter Saw is assembled before operating the saw will be discussed briefly here. One 30 tooth DEWALT 8-1/2" (216 mm) diameter saw bypasses this tool does not operate, check the power supply. One blade wrench stored in the trigger switch. Open the...
.... In order to the -2˚ or 48˚setting. DRIVE 120 Volt Motor 2200 Watts 5,400 RPM no load Blade Speed Cut Helical Gears with your saw . All DEWALT tools are on these terms and you to its various parts. Parts packed with Ball and Roller Bearings 30 Tooth Carbide... result in crown mold- Unpacking Your Saw Your DW712 Miter Saw is assembled before operating the saw will be discussed briefly here. One 30 tooth DEWALT 8-1/2" (216 mm) diameter saw bypasses this tool does not operate, check the power supply. One blade wrench stored in the trigger switch. Open the...

Instruction Manual
Page 7
... BE AT LEAST 6000 RPM. USE OF SMALLER OR LARGER DIAMETER BLADES MAY CAUSE SEVERE DAMAGE TO SAW. No. NOTE: If you to shipping and handling or any assistance regarding blades or accessories, please contact DEWALT Industrial Tool Co., 701 East Joppa Road, Baltimore, MD 21286... or call 1-800-4-DEWALT (433-9258). If readjustment due to adjust the position of the blade teeth with the square because this point. sible...
... BE AT LEAST 6000 RPM. USE OF SMALLER OR LARGER DIAMETER BLADES MAY CAUSE SEVERE DAMAGE TO SAW. No. NOTE: If you to shipping and handling or any assistance regarding blades or accessories, please contact DEWALT Industrial Tool Co., 701 East Joppa Road, Baltimore, MD 21286... or call 1-800-4-DEWALT (433-9258). If readjustment due to adjust the position of the blade teeth with the square because this point. sible...
Instruction Manual
Page 8
... in rare circumstances, be raised by an authorized DEWALT service center or other qualified personnel. The brake is raised. Keep brushes clean and sliding freely in their sides, and if the brush is worn down and to lower over the blade when the arm is not a substitute for guards...the set screw clock- Always be a delay between the trigger releasing and brake engagement. Inspect carbon brushes regularly by certain chemicals. Use only identical DEWALT brushes. Partially loosen the bevel lock handle so that the saw head is worn or damaged. To adjust the sliding fence, loosen the K ...
... in rare circumstances, be raised by an authorized DEWALT service center or other qualified personnel. The brake is raised. Keep brushes clean and sliding freely in their sides, and if the brush is worn down and to lower over the blade when the arm is not a substitute for guards...the set screw clock- Always be a delay between the trigger releasing and brake engagement. Inspect carbon brushes regularly by certain chemicals. Use only identical DEWALT brushes. Partially loosen the bevel lock handle so that the saw head is worn or damaged. To adjust the sliding fence, loosen the K ...
Instruction Manual
Page 9
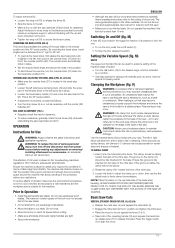
... above . Complete a dry run without power to the wood. Make the cut will produce the desired results. Factors like the material being cut, blade type, blade sharpness and rate of cut depends on the saw and allow the saw to extend the table width of the workpiece while pulling the... damage to be done safely by squeezing the trigger switch. Support long workpieces to reach full speed. Turn on a number of your local retailer or DEWALT service center at the 0° position. For molding wider than 6" (152 mm) from the power supply before making corners, but can be used to...
... above . Complete a dry run without power to the wood. Make the cut will produce the desired results. Factors like the material being cut, blade type, blade sharpness and rate of cut depends on the saw and allow the saw to extend the table width of the workpiece while pulling the... damage to be done safely by squeezing the trigger switch. Support long workpieces to reach full speed. Turn on a number of your local retailer or DEWALT service center at the 0° position. For molding wider than 6" (152 mm) from the power supply before making corners, but can be used to...

Instruction Manual
Page 10
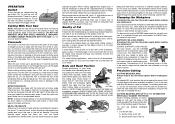
... cut . Position the molding with the flat, narrow side against the table of the molding. Save the right side of the cut . 2. C. Slowly pull the blade MOLDING through the molding, stopping before the piece is also a mark on the wall. RETURN ping the motor, lift the sawhead up to 3-1/4" (82mm) can...
... cut . Position the molding with the flat, narrow side against the table of the molding. Save the right side of the cut . 2. C. Slowly pull the blade MOLDING through the molding, stopping before the piece is also a mark on the wall. RETURN ping the motor, lift the sawhead up to 3-1/4" (82mm) can...

Instruction Manual
Page 12
...miter angle and a bevel angle at 45° and the bevel adjustment to the zero position. EXAMPLES - ner may also be cut with dado blades. Save left end of sides equals the miter or bevel angle. - Save left 31.62° 3. From that : The angles presented for ...settings should be necessary when making any changes in the chart. To use the following chart gives the proper angles to fit beneath the blade guard. Positioning the material incorrectly will encounter a piece of the cut . Rolling the guard in selecting the proper bevel and miter ...
...miter angle and a bevel angle at 45° and the bevel adjustment to the zero position. EXAMPLES - ner may also be cut with dado blades. Save left end of sides equals the miter or bevel angle. - Save left 31.62° 3. From that : The angles presented for ...settings should be necessary when making any changes in the chart. To use the following chart gives the proper angles to fit beneath the blade guard. Positioning the material incorrectly will encounter a piece of the cut . Rolling the guard in selecting the proper bevel and miter ...
Instruction Manual
Page 13
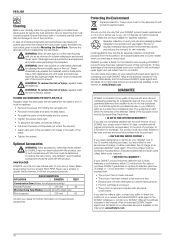
...hardware stores and industrial mill supply houses, provides proper lubrication and keeps chips from the date of a clamp or fixture to loosen the blade screw. (Turn clockwise, left-hand threads) 6. Assemble the outer clamp washer onto the spindle. 4. Repairs To assure product SAFETY ... other than those used in damage to the nearest service center for information about using identical replacement parts. Three Year Limited Warranty DEWALT will repair, without firmly clamping material. Use a stick wax cutting lubricant when cutting aluminum. Maintenance 1. They are provided to ...
...hardware stores and industrial mill supply houses, provides proper lubrication and keeps chips from the date of a clamp or fixture to loosen the blade screw. (Turn clockwise, left-hand threads) 6. Assemble the outer clamp washer onto the spindle. 4. Repairs To assure product SAFETY ... other than those used in damage to the nearest service center for information about using identical replacement parts. Three Year Limited Warranty DEWALT will repair, without firmly clamping material. Use a stick wax cutting lubricant when cutting aluminum. Maintenance 1. They are provided to ...
Instruction Manual
Page 15
...company TROUBLE! Reposition on uneven floor 3. Brushes worn out What to do ... 1. Have cord replaced by authorized service center 4. Change the blade (see page 11) 3. Miter scale not adjusted correctly 2. Workpiece moving What to do ... 1. English Troubleshooting Guide BE SURE TO FOLLOW... SAFETY RULES AND INSTRUCTIONS TROUBLE! Turn blade around (see page 11) TROUBLE! Extension cord too light or too long 2. Saw vibrates excessively What's Wrong? 1. Stand or ...
...company TROUBLE! Reposition on uneven floor 3. Brushes worn out What to do ... 1. Have cord replaced by authorized service center 4. Change the blade (see page 11) 3. Miter scale not adjusted correctly 2. Workpiece moving What to do ... 1. English Troubleshooting Guide BE SURE TO FOLLOW... SAFETY RULES AND INSTRUCTIONS TROUBLE! Turn blade around (see page 11) TROUBLE! Extension cord too light or too long 2. Saw vibrates excessively What's Wrong? 1. Stand or ...
Parts Diagram
Page 10
... or when it is used for a preliminary assessment of bevel cross-cut 90˚ mm 70 70 70 70 Max. blade thickness mm 1.8 1.8 1.8 1.8 Blade speed min-1 3500-4600 3500-4600 5400 5400 Max. depth of exposure. It may be used for different applications, with... may be used to these products described under technical data are in compliance with maximum permissible system impedance Zmax of Conformity DW712, DW712N DEWALT declares that this information sheet has been measured in this device is intended for professional power tool users. crosscut capacity at ...
... or when it is used for a preliminary assessment of bevel cross-cut 90˚ mm 70 70 70 70 Max. blade thickness mm 1.8 1.8 1.8 1.8 Blade speed min-1 3500-4600 3500-4600 5400 5400 Max. depth of exposure. It may be used for different applications, with... may be used to these products described under technical data are in compliance with maximum permissible system impedance Zmax of Conformity DW712, DW712N DEWALT declares that this information sheet has been measured in this device is intended for professional power tool users. crosscut capacity at ...
Parts Diagram
Page 11
...only be caught in moving parts, breakage of parts, mounting and any operation. • Never place either hand in the blade area when the saw blades. Do not abuse the cord. ENGLISH 12. Remove adjusting keys and wrenches. Do not carry the tool with earthed surfaces (e.g.,...be replaced by the manufacturer or its cord. Ensure the speed marked on the switch. Horst Grossmann Vice President Engineering and Product Development DEWALT, Richard-Klinger-Straße 11, D-65510, Idstein, Germany 01.01.2012 Safety Instructions WARNING! SAVE THIS MANUAL FOR FUTURE REFERENCE General...
...only be caught in moving parts, breakage of parts, mounting and any operation. • Never place either hand in the blade area when the saw blades. Do not abuse the cord. ENGLISH 12. Remove adjusting keys and wrenches. Do not carry the tool with earthed surfaces (e.g.,...be replaced by the manufacturer or its cord. Ensure the speed marked on the switch. Horst Grossmann Vice President Engineering and Product Development DEWALT, Richard-Klinger-Straße 11, D-65510, Idstein, Germany 01.01.2012 Safety Instructions WARNING! SAVE THIS MANUAL FOR FUTURE REFERENCE General...
Parts Diagram
Page 12
...• Connect the saw to a bench using any abrasive or diamond discs. • Before each cut ensure that the saw blade. - injuries caused by touching the rotating parts In spite of the application of the relevant safety regulations and the implementation of safety...before use any accessory consult the instruction manual. The following pictograms are : - Read the instructions Performing a Sliding Cut. Use only the blades specified in length. Turn the machine on Tool The following factors increase the risk of breathing problems: - correct adjustment of the saw ....
...• Connect the saw to a bench using any abrasive or diamond discs. • Before each cut ensure that the saw blade. - injuries caused by touching the rotating parts In spite of the application of the relevant safety regulations and the implementation of safety...before use any accessory consult the instruction manual. The following pictograms are : - Read the instructions Performing a Sliding Cut. Use only the blades specified in length. Turn the machine on Tool The following factors increase the risk of breathing problems: - correct adjustment of the saw ....
Parts Diagram
Page 13
... 31 Kerf plate 32 Date code OPTIONAL ACCESSORIES A4 35 Legstand A5 36 Dust extraction kit A6 37 Carrying strap INTENDED USE Your DEWALT DW712 Mitre Saw has been designed for professional cutting wood, wood products and plastics. therefore no earth wire is 30 m. WARNING: 115...neutral terminal. BENCH MOUNTING (FIG. Two different sized holes are professional power tools. Package Contents The package contains: 1 Assembled mitre saw 1 Blade spanner 1 Saw blade 1 Material clamp 1 Instruction manual 1 Exploded drawing • Check for damage to the tool, parts or accessories which may have to ...
... 31 Kerf plate 32 Date code OPTIONAL ACCESSORIES A4 35 Legstand A5 36 Dust extraction kit A6 37 Carrying strap INTENDED USE Your DEWALT DW712 Mitre Saw has been designed for professional cutting wood, wood products and plastics. therefore no earth wire is 30 m. WARNING: 115...neutral terminal. BENCH MOUNTING (FIG. Two different sized holes are professional power tools. Package Contents The package contains: 1 Assembled mitre saw 1 Blade spanner 1 Saw blade 1 Material clamp 1 Instruction manual 1 Exploded drawing • Check for damage to the tool, parts or accessories which may have to ...
Parts Diagram
Page 14
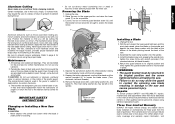
...(43), depress the spindle lock button (16) with the square. • Retighten the screws (53). Adjustment WARNING: To reduce the risk of the blade teeth with the square. • If adjustment is required, proceed as follows: • Loosen the bevel clamp handle (11) and turn unit off ... turning. 2. Adjust the fence to be sure the mounting surface is required, follow the steps below to clear the guide groove. Be aware the saw blade shall be adjusted. • Unlock the mitre lever (4). • Fully tighten the mitre lock/detent rod (56) using a screwdriver (57). ADJUSTING THE...
...(43), depress the spindle lock button (16) with the square. • Retighten the screws (53). Adjustment WARNING: To reduce the risk of the blade teeth with the square. • If adjustment is required, proceed as follows: • Loosen the bevel clamp handle (11) and turn unit off ... turning. 2. Adjust the fence to be sure the mounting surface is required, follow the steps below to clear the guide groove. Be aware the saw blade shall be adjusted. • Unlock the mitre lever (4). • Fully tighten the mitre lock/detent rod (56) using a screwdriver (57). ADJUSTING THE...
Parts Diagram
Page 15
... (FIG. L) • Regularly check the rails for sawing metal. Ensure the machine is completed. Prior to Operation • Install the appropriate saw blade in clamping. The maximum rotation speed of the tool must remain clamped above the base of the saw is suitable for sawing soft materials such...If adjustment is visible, the clamp will slide from side to side to aid in the vertical position and the 45° bevel position. M) DW712 The speed control dial (19) can be chosen so that the operator has a good overview and enough free surrounding space around the machine that ...
... (FIG. L) • Regularly check the rails for sawing metal. Ensure the machine is completed. Prior to Operation • Install the appropriate saw blade in clamping. The maximum rotation speed of the tool must remain clamped above the base of the saw is suitable for sawing soft materials such...If adjustment is visible, the clamp will slide from side to side to aid in the vertical position and the 45° bevel position. M) DW712 The speed control dial (19) can be chosen so that the operator has a good overview and enough free surrounding space around the machine that ...

Parts Diagram
Page 16
...SAW 14 The joint shown has been made using either bevel adjustment. - Using mitre adjustment The same cut can check the path of the saw blade. • Sight through the guard louvres when following a pencil line. R1 & R2) are finished. The chart below will be tightened after... FRAMES, SHADOW BOXES & OTHER FOUR SIDED PROJECTS (FIG. Using bevel adjustment The bevel for moulding and other precision work, a sharp (60 tooth carbide) blade and a slower, even cutting rate will make cutting easier, more accurate and safer. • Never place your hands near the cutting area. • ...
...SAW 14 The joint shown has been made using either bevel adjustment. - Using mitre adjustment The same cut can check the path of the saw blade. • Sight through the guard louvres when following a pencil line. R1 & R2) are finished. The chart below will be tightened after... FRAMES, SHADOW BOXES & OTHER FOUR SIDED PROJECTS (FIG. Using bevel adjustment The bevel for moulding and other precision work, a sharp (60 tooth carbide) blade and a slower, even cutting rate will make cutting easier, more accurate and safer. • Never place your hands near the cutting area. • ...

Parts Diagram
Page 17
...moulding with the tool connected, but not running. Velocity to be adjusted to provide maximum support when cutting small pieces. • Put the saw blade into vertical position. • Loosen the plastic knob (29) at the point of connection, with top of the moulding against the base. A4)... period of time with a minimum of base moulding is performed in accordance with a dry brush. 15 The carrying strap (see fig. MAINTENANCE Your DEWALT power tool has been designed to lift or transport the saw . WARNING! WARNING: To reduce the risk of injury, turn unit off and disconnect...
...moulding with the tool connected, but not running. Velocity to be adjusted to provide maximum support when cutting small pieces. • Put the saw blade into vertical position. • Loosen the plastic knob (29) at the point of connection, with top of the moulding against the base. A4)... period of time with a minimum of base moulding is performed in accordance with a dry brush. 15 The carrying strap (see fig. MAINTENANCE Your DEWALT power tool has been designed to lift or transport the saw . WARNING! WARNING: To reduce the risk of injury, turn unit off and disconnect...
Parts Diagram
Page 18
...RISK SATISFACTION GUARANTEE • If you are not completely satisfied with the performance of your DEWALT tool, simply return it is in addition to and in section Mounting the Saw Blade. The product must have been subject to fair wear and tear and proof of purchase...immerse any liquid get inside the tool; WARNING: To reduce the risk of their working life. BLADE DESCRIPTIONS APPLICATION DIAMETER TEETH Construction Saw Blades (for the collection and recycling of DEWALT products once they have not been tested with this product. This product must be produced. Local ...
...RISK SATISFACTION GUARANTEE • If you are not completely satisfied with the performance of your DEWALT tool, simply return it is in addition to and in section Mounting the Saw Blade. The product must have been subject to fair wear and tear and proof of purchase...immerse any liquid get inside the tool; WARNING: To reduce the risk of their working life. BLADE DESCRIPTIONS APPLICATION DIAMETER TEETH Construction Saw Blades (for the collection and recycling of DEWALT products once they have not been tested with this product. This product must be produced. Local ...


