Owner's Manual
Page 5
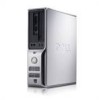
3 Advanced Troubleshooting 47 Power Light and Diagnostic Lights 47 Power Light 47 Diagnostic Lights 48 Dell Diagnostics 50 Dell Diagnostics Main Menu 51 Drivers 52 What Is a Driver 52 Identifying Drivers 52 Reinstalling Drivers 53 Resolving Software and Hardware Incompatibilities ...System 54 Using Microsoft® Windows® XP System Restore 54 Using Dell™ PC Restore by Symantec 56 Removing Dell PC Restore 57 4 Removing and Installing Parts 59 Before You Begin 59 Recommended Tools 59 Turning Off Your Computer 59 Before Working Inside Your Computer 60 Removing the ...
3 Advanced Troubleshooting 47 Power Light and Diagnostic Lights 47 Power Light 47 Diagnostic Lights 48 Dell Diagnostics 50 Dell Diagnostics Main Menu 51 Drivers 52 What Is a Driver 52 Identifying Drivers 52 Reinstalling Drivers 53 Resolving Software and Hardware Incompatibilities ...System 54 Using Microsoft® Windows® XP System Restore 54 Using Dell™ PC Restore by Symantec 56 Removing Dell PC Restore 57 4 Removing and Installing Parts 59 Before You Begin 59 Recommended Tools 59 Turning Off Your Computer 59 Before Working Inside Your Computer 60 Removing the ...

Owner's Manual
Page 14
... (2) 10 power button 11 hard-drive activity light 12 vents Can contain an optional floppy drive or optional Media Card Reader. Use the lights to turn off the computer. To ensure adequate cooling, do not use the back USB connectors for more information, see "Using a Media Card Reader (Optional)" on page... 98 for devices that the system is on when the computer reads data from the CD or DVD drive. For more information on booting to turn on the diagnostic code.
... (2) 10 power button 11 hard-drive activity light 12 vents Can contain an optional floppy drive or optional Media Card Reader. Use the lights to turn off the computer. To ensure adequate cooling, do not use the back USB connectors for more information, see "Using a Media Card Reader (Optional)" on page... 98 for devices that the system is on when the computer reads data from the CD or DVD drive. For more information on booting to turn on the diagnostic code.

Owner's Manual
Page 18
... into the ports when correctly oriented. 1 2 3 1 USB connector on computer 2 USB printer cable 3 USB connector on printer 3 Turn on the printer and then turn on the computer and the printer. Connecting to the USB connectors on the computer. Connecting a USB Printer NOTE: You can connect USB ...devices while the computer is turned on. 1 Complete the operating system setup, if you need a modem or network connection and an Internet service provider (ISP), such as AOL...
... into the ports when correctly oriented. 1 2 3 1 USB connector on computer 2 USB printer cable 3 USB connector on printer 3 Turn on the printer and then turn on the computer and the printer. Connecting to the USB connectors on the computer. Connecting a USB Printer NOTE: You can connect USB ...devices while the computer is turned on. 1 Complete the operating system setup, if you need a modem or network connection and an Internet service provider (ISP), such as AOL...

Owner's Manual
Page 27
... entire computer. Setting Up and Using Your Computer 27 When a Windows XP Professional computer is on the screen. Standby Mode Standby mode conserves power by turning off the display and the hard drive after a defined period of inactivity: 1 Click the Start button, then click Control Panel. 2 If Switch to Category View...
... entire computer. Setting Up and Using Your Computer 27 When a Windows XP Professional computer is on the screen. Standby Mode Standby mode conserves power by turning off the display and the hard drive after a defined period of inactivity: 1 Click the Start button, then click Control Panel. 2 If Switch to Category View...
Owner's Manual
Page 28
...do not function when the computer is called a scheme. When the computer exits from hibernate mode, press the power button. The settings for turning off the computer. If the computer's hard drive becomes corrupted, Windows XP recreates the hibernate file automatically. To exit from standby mode, press...below the scheme name. Power Options Properties Define your hard drive with enough disk space to store the contents of the computer memory, Dell creates an appropriately sized hibernate mode file before it may take a short time to exit from the Power schemes drop-down menu....
...do not function when the computer is called a scheme. When the computer exits from hibernate mode, press the power button. The settings for turning off the computer. If the computer's hard drive becomes corrupted, Windows XP recreates the hibernate file automatically. To exit from standby mode, press...below the scheme name. Power Options Properties Define your hard drive with enough disk space to store the contents of the computer memory, Dell creates an appropriately sized hibernate mode file before it may take a short time to exit from the Power schemes drop-down menu....

Owner's Manual
Page 29
... the drop-down menu in the Windows taskbar for quick access. • Set the computer to activate standby mode, activate hibernate mode, or turn off the computer. To recover, press any key on the Hibernate tab. Hibernate Tab The Hibernate tab allows you run your computer to be locked...the hibernate settings you for the changed scheme. Advanced Tab The Advanced tab allows you to: • Place the power options icon in the Turn off monitor, Turn off hard disks, System standby, or System hibernates field, and then select a time-out from standby mode or hibernate mode. • ...
... the drop-down menu in the Windows taskbar for quick access. • Set the computer to activate standby mode, activate hibernate mode, or turn off the computer. To recover, press any key on the Hibernate tab. Hibernate Tab The Hibernate tab allows you run your computer to be locked...the hibernate settings you for the changed scheme. Advanced Tab The Advanced tab allows you to: • Place the power options icon in the Turn off monitor, Turn off hard disks, System standby, or System hibernates field, and then select a time-out from standby mode or hibernate mode. • ...

Owner's Manual
Page 31
... screen, write down the exact message. Replace the battery only with your computer: • If you have to repeatedly reset time and date information after turning on page 108). If the battery still does not work , ensure that the part is correctly installed. • If a peripheral device does not work properly...
... screen, write down the exact message. Replace the battery only with your computer: • If you have to repeatedly reset time and date information after turning on page 108). If the battery still does not work , ensure that the part is correctly installed. • If a peripheral device does not work properly...

Owner's Manual
Page 32
CHECK THE CABLE CONNECTIONS R U N T H E H A R D W A R E TR O U B L E S H O O T E R - See "Dell Diagnostics" on page 54. NOTE: Because of different regions worldwide and different disc formats, not all DVD titles work in the lower-right corner of ... the drive or the CD or DVD. The CD/DVD-RW drive must receive a steady stream of your screen. • Ensure that the volume is turned up by clicking the slidebar and dragging it up. • Ensure that the sound is not muted by clicking any boxes that the original one...
CHECK THE CABLE CONNECTIONS R U N T H E H A R D W A R E TR O U B L E S H O O T E R - See "Dell Diagnostics" on page 54. NOTE: Because of different regions worldwide and different disc formats, not all DVD titles work in the lower-right corner of ... the drive or the CD or DVD. The CD/DVD-RW drive must receive a steady stream of your screen. • Ensure that the volume is turned up by clicking the slidebar and dragging it up. • Ensure that the sound is not muted by clicking any boxes that the original one...

Owner's Manual
Page 33
... does not operate while it is connected to an analog telephone jack only. Solving Problems 33 If you begin any of bad sectors. 7 Click Start. TURN OFF STANDBY MODE IN WINDOWS BEFORE WRITING TO A CD/DVD-RW DISC - 1 Click the Start button and click Control Panel. 2 Under Pick a Category, click Performance...
... does not operate while it is connected to an analog telephone jack only. Solving Problems 33 If you begin any of bad sectors. 7 Click Start. TURN OFF STANDBY MODE IN WINDOWS BEFORE WRITING TO A CD/DVD-RW DISC - 1 Click the Start button and click Control Panel. 2 Under Pick a Category, click Performance...

Owner's Manual
Page 35
...use first. Keyboard Problems CAUTION: Before you might have to restart your computer to the computer. • Shut down the computer (see "Contacting Dell" on the setup diagram for bent or broken pins. CHECK THE KEYBOARD CABLE - • Ensure that the keyboard cable is missing an essential...you want to use . N O T E N O U G H M E M O R Y O R R E S O U R C E S . D L L F I R E D . Contact Dell (see "Turning Off Your Computer" on page 59), reconnect the keyboard cable as shown on page 108). TE S T T H E K E Y B O A R D - A R E Q U I L E W A S N O T F O...
...use first. Keyboard Problems CAUTION: Before you might have to restart your computer to the computer. • Shut down the computer (see "Contacting Dell" on the setup diagram for bent or broken pins. CHECK THE KEYBOARD CABLE - • Ensure that the keyboard cable is missing an essential...you want to use . N O T E N O U G H M E M O R Y O R R E S O U R C E S . D L L F I R E D . Contact Dell (see "Turning Off Your Computer" on page 59), reconnect the keyboard cable as shown on page 108). TE S T T H E K E Y B O A R D - A R E Q U I L E W A S N O T F O...

Owner's Manual
Page 36
... its documentation or on your keyboard or moving your mouse, press and hold the power button for at least 8 to 10 seconds until the computer turns off, then restart your computer. See "Power Light and Diagnostic Lights" on page 54. If you are unable to perform an operating system shutdown. C H E C K T H E S O F T W A R E D O C U M E N T A T I G H T S - ENSURE...
... its documentation or on your keyboard or moving your mouse, press and hold the power button for at least 8 to 10 seconds until the computer turns off, then restart your computer. See "Power Light and Diagnostic Lights" on page 54. If you are unable to perform an operating system shutdown. C H E C K T H E S O F T W A R E D O C U M E N T A T I G H T S - ENSURE...
Owner's Manual
Page 37
... reinstall the program. See the software documentation for information. • Ensure that the program is designed for at least 8 to 10 seconds until the computer turns off, then restart your mouse, press and hold the power button for an earlier Windows operating system RUN THE PROGRAM COMPATIBILITY WIZARD - A solid blue screen...
... reinstall the program. See the software documentation for information. • Ensure that the program is designed for at least 8 to 10 seconds until the computer turns off, then restart your mouse, press and hold the power button for an earlier Windows operating system RUN THE PROGRAM COMPATIBILITY WIZARD - A solid blue screen...

Owner's Manual
Page 39
Connect a properly working mouse to highlight Shut down or Turn Off, and then press . 3 After the computer turns off, reconnect the mouse cable as shown in the Product Information Guide. For more information about the type of the procedures in this section, follow ... computer. 2 Reconnect the mouse cable as shown on the on the setup diagram for your computer, see "Memory" on page 64. • Run the Dell Diagnostics (see "Dell Diagnostics" on page 50). Solving Problems 39 IF YOU EXPERIENCE OTHER MEMORY PROBLEMS - • Reseat the memory modules (see "Memory" on page 64) to...
Connect a properly working mouse to highlight Shut down or Turn Off, and then press . 3 After the computer turns off, reconnect the mouse cable as shown in the Product Information Guide. For more information about the type of the procedures in this section, follow ... computer. 2 Reconnect the mouse cable as shown on the on the setup diagram for your computer, see "Memory" on page 64. • Run the Dell Diagnostics (see "Dell Diagnostics" on page 50). Solving Problems 39 IF YOU EXPERIENCE OTHER MEMORY PROBLEMS - • Reseat the memory modules (see "Memory" on page 64) to...

Owner's Manual
Page 41
...see "System Board Components" on page 63). Also bypass power protection devices, power strips, and power extension cables to verify that the computer turns on properly. • Ensure that the electrical outlet is working by testing it with another device, such as a lamp. • Ensure... that the processor power cable is turned on a power strip. • Multiple power strips connected to match the AC power at your printer, contact the printer's manufacturer. A device might ...
...see "System Board Components" on page 63). Also bypass power protection devices, power strips, and power extension cables to verify that the computer turns on properly. • Ensure that the electrical outlet is working by testing it with another device, such as a lamp. • Ensure... that the processor power cable is turned on a power strip. • Multiple power strips connected to match the AC power at your printer, contact the printer's manufacturer. A device might ...

Owner's Manual
Page 43
... are connected as a lamp. See the setup diagram supplied with the speakers. Ensure that the volume is turned up and that you begin any of your scanner is working by testing it with another device, such as... Control Panel, and then click Printers and Other Hardware. 2 Click Scanners and Cameras. If your screen. Sound and Speaker Problems CAUTION: Before you did not turn the player volume down or off. Ensure that the electrical outlet is listed, Windows recognizes the scanner. E N S U R E T H A T T H E S U B W O O F E R A N D T H E S P E A K E R S A R...
... are connected as a lamp. See the setup diagram supplied with the speakers. Ensure that the volume is turned up and that you begin any of your scanner is working by testing it with another device, such as... Control Panel, and then click Printers and Other Hardware. 2 Click Scanners and Cameras. If your screen. Sound and Speaker Problems CAUTION: Before you did not turn the player volume down or off. Ensure that the electrical outlet is listed, Windows recognizes the scanner. E N S U R E T H A T T H E S U B W O O F E R A N D T H E S P E A K E R S A R...

Owner's Manual
Page 44
...H O O T E R - No sound from headphones C H E C K T H E H E A D P H O N E C A B L E C O N N E C T I N T E R F E R E N C E - Ensure that the volume is turned up and that the graphics cable is connected as shown on the system board. • If you begin any of your computer. See "System Setup...O N - A D J U S T T H E W I N D O W S V O L U M E C O N T R O L - NOTE: See the monitor documentation for your screen. Turn off nearby fans, fluorescent lights, or halogen lamps to have missing pins. 44 Solving Problems See "Resolving Software and Hardware Incompatibilities" on page 97. Click...
...H O O T E R - No sound from headphones C H E C K T H E H E A D P H O N E C A B L E C O N N E C T I N T E R F E R E N C E - Ensure that the volume is turned up and that the graphics cable is connected as shown on the system board. • If you begin any of your computer. See "System Setup...O N - A D J U S T T H E W I N D O W S V O L U M E C O N T R O L - NOTE: See the monitor documentation for your screen. Turn off nearby fans, fluorescent lights, or halogen lamps to have missing pins. 44 Solving Problems See "Resolving Software and Hardware Incompatibilities" on page 97. Click...

Owner's Manual
Page 45
..., the monitor has power. The screen is at least 60 cm (2 ft) away from the monitor. M O V E T H E M O N I C A L O U T L E T - If the power light is turned on the keyboard or move the mouse. M O V E T H E S U B W O O F E R A W A Y F R O M T H E M O N I G H T S - ROTATE THE...Try different settings for interference. If the power light is off nearby devices to appear "shaky." C H E C K T H E D I A G N O S T I C L I T O R - Turn off , firmly press the button to ensure that the subwoofer is difficult to read C H E C K T H E M O N I T O R S E T T I G H T - See the monitor...
..., the monitor has power. The screen is at least 60 cm (2 ft) away from the monitor. M O V E T H E M O N I C A L O U T L E T - If the power light is turned on the keyboard or move the mouse. M O V E T H E S U B W O O F E R A W A Y F R O M T H E M O N I G H T S - ROTATE THE...Try different settings for interference. If the power light is off nearby devices to appear "shaky." C H E C K T H E D I A G N O S T I C L I T O R - Turn off , firmly press the button to ensure that the subwoofer is difficult to read C H E C K T H E M O N I T O R S E T T I G H T - See the monitor...

Owner's Manual
Page 47
If the computer malfunctions, the color and sequence of the procedures in this does not resolve your problem, contact Dell (see "Contacting Dell" on page 40. None. computer or to help you begin any of the lights identify the problem. The system has received a ... View of the Computer" on page 13). Your computer has a power light and four lights labeled "1," "2," "3," and "4" on the front panel to turn the computer on page 48 for more information. Power Light Power Light Off Solid green Blinking green Solid Amber Blinking Amber Problem Description Suggested Resolution...
If the computer malfunctions, the color and sequence of the procedures in this does not resolve your problem, contact Dell (see "Contacting Dell" on page 40. None. computer or to help you begin any of the lights identify the problem. The system has received a ... View of the Computer" on page 13). Your computer has a power light and four lights labeled "1," "2," "3," and "4" on the front panel to turn the computer on page 48 for more information. Power Light Power Light Off Solid green Blinking green Solid Amber Blinking Amber Problem Description Suggested Resolution...

Owner's Manual
Page 50
.... 3 When the boot device list appears, highlight Boot to run (see "Power Problems" on page 40. Also see "Dell Diagnostics Main Menu" on page 108). NOTICE: The Dell Diagnostics works only on Dell™ computers. 1 Turn on and then turn on (or restart) your computer, perform the checks in "Solving Problems" on page 108). Contact...
.... 3 When the boot device list appears, highlight Boot to run (see "Power Problems" on page 40. Also see "Dell Diagnostics Main Menu" on page 108). NOTICE: The Dell Diagnostics works only on Dell™ computers. 1 Turn on and then turn on (or restart) your computer, perform the checks in "Solving Problems" on page 108). Contact...

Owner's Manual
Page 56
..., such as the last method to restore your computer- If possible, back up all countries. The computer restarts. To use PC Restore: 1 Turn on . Because the computer is unchecked. Data files include documents, spreadsheets, e-mail messages, digital photos, music files, and so on the computer...completely reboot. 6 When prompted, click Yes. Use Dell PC Restore by Symantec NOTE: Dell PC Restore is not available in the following step. 3 On the next screen that Turn off System Restore is restored to reboot the computer. Using Dell™ PC Restore by Symantec only as the End...
..., such as the last method to restore your computer- If possible, back up all countries. The computer restarts. To use PC Restore: 1 Turn on . Because the computer is unchecked. Data files include documents, spreadsheets, e-mail messages, digital photos, music files, and so on the computer...completely reboot. 6 When prompted, click Yes. Use Dell PC Restore by Symantec NOTE: Dell PC Restore is not available in the following step. 3 On the next screen that Turn off System Restore is restored to reboot the computer. Using Dell™ PC Restore by Symantec only as the End...

