Owner's Manual
Page 5
... 50 If the screen is blank 50 If the screen is difficult to read 51 3 Troubleshooting Tools 53 Diagnostic Lights 53 Dell Diagnostics 56 Dell Diagnostics Main Menu 56 Drivers 57 What Is a Driver 57 Identifying Drivers 58 Reinstalling Drivers 58 Resolving Software and Hardware Incompatibilities ...59 Restoring Your Operating System 59 Using Microsoft Windows XP System Restore 60 Using Dell PC Restore by Symantec 61 4 Removing and Installing Parts 63 Before You Begin 63 Recommended Tools 63 Turn Off Your Computer 63 Before Working Inside Your Computer 64 Front View of the...
... 50 If the screen is blank 50 If the screen is difficult to read 51 3 Troubleshooting Tools 53 Diagnostic Lights 53 Dell Diagnostics 56 Dell Diagnostics Main Menu 56 Drivers 57 What Is a Driver 57 Identifying Drivers 58 Reinstalling Drivers 58 Resolving Software and Hardware Incompatibilities ...59 Restoring Your Operating System 59 Using Microsoft Windows XP System Restore 60 Using Dell PC Restore by Symantec 61 4 Removing and Installing Parts 63 Before You Begin 63 Recommended Tools 63 Turn Off Your Computer 63 Before Working Inside Your Computer 64 Front View of the...
Owner's Manual
Page 14
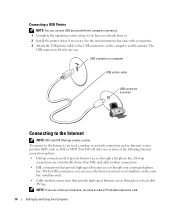
... network connection and an Internet service provider (ISP), such as AOL or MSN. With a DSL connection, you can connect USB devices while the computer is turned on. 1 Complete the operating system setup, if you need an add-in PCI modem expansion card. 14 Setting Up and Using Your Computer USB connector...
... network connection and an Internet service provider (ISP), such as AOL or MSN. With a DSL connection, you can connect USB devices while the computer is turned on. 1 Complete the operating system setup, if you need an add-in PCI modem expansion card. 14 Setting Up and Using Your Computer USB connector...
Owner's Manual
Page 23
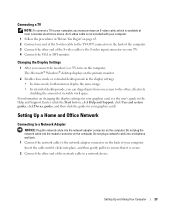
... in the display settings. • In clone mode, both monitors display the same image. • In extended desktop mode, you connect the monitor(s) or TV, turn on your TV. 4 Connect the VGA or DVI monitor. An S-video cable is secure. 2 Connect the other end of your graphics card). Do not plug...
... in the display settings. • In clone mode, both monitors display the same image. • In extended desktop mode, you connect the monitor(s) or TV, turn on your TV. 4 Connect the VGA or DVI monitor. An S-video cable is secure. 2 Connect the other end of your graphics card). Do not plug...
Owner's Manual
Page 25
...power button. To set standby mode to a reserved area on the hard drive and then completely turning off the display and the hard drive after a defined period of the computer memory, Dell creates an appropriately sized hibernate mode file before it entered hibernate mode. Pressing a key on the ...key on the keyboard or moving the mouse does not bring the computer out of inactivity, click the Start button, click Turn Off Computer, and then click Stand by turning off the computer. Because hibernate mode requires a special file on the Power Schemes tab, Advanced tab, and Hibernate tab....
...power button. To set standby mode to a reserved area on the hard drive and then completely turning off the display and the hard drive after a defined period of the computer memory, Dell creates an appropriately sized hibernate mode file before it entered hibernate mode. Pressing a key on the ...key on the keyboard or moving the mouse does not bring the computer out of inactivity, click the Start button, click Turn Off Computer, and then click Stand by turning off the computer. Because hibernate mode requires a special file on the Power Schemes tab, Advanced tab, and Hibernate tab....
Owner's Manual
Page 26
...Set the computer to prompt you want to activate standby mode, activate hibernate mode, or turn off the hard drive. If your computer, choose a scheme from the Power schemes drop-down menu in the Turn off monitor, Turn off hard disks, System stand by, or System hibernates field, and then select a ...recover, press any key on the keyboard or click the mouse. Each scheme has different settings for starting standby mode or hibernate mode, turning off the monitor, and turning off the computer. If you want your computer as a home or office computer and you click Save As and enter a new ...
...Set the computer to prompt you want to activate standby mode, activate hibernate mode, or turn off the hard drive. If your computer, choose a scheme from the Power schemes drop-down menu in the Turn off monitor, Turn off hard disks, System stand by, or System hibernates field, and then select a ...recover, press any key on the keyboard or click the mouse. Each scheme has different settings for starting standby mode or hibernate mode, turning off the monitor, and turning off the computer. If you want your computer as a home or office computer and you click Save As and enter a new ...

Owner's Manual
Page 37
... Product Information Guide. R E P L A C E T H E B A T T E R Y - If you have changed your SATA operation settings, restore your previous SATA operation settings and retry booting into your operating system after turning on the screen, write down the exact message. Solving Problems 37 If the battery still does not work , ensure that the device is properly connected... before the problem started, review the installation procedures and ensure that the part is correctly installed. • If a peripheral device does not work properly, contact Dell (see page 126).
... Product Information Guide. R E P L A C E T H E B A T T E R Y - If you have changed your SATA operation settings, restore your previous SATA operation settings and retry booting into your operating system after turning on the screen, write down the exact message. Solving Problems 37 If the battery still does not work , ensure that the device is properly connected... before the problem started, review the installation procedures and ensure that the part is correctly installed. • If a peripheral device does not work properly, contact Dell (see page 126).
Owner's Manual
Page 38
.... See page 60. If the floppy, CD, or DVD drive, is not listed, perform a full scan with your screen. • Ensure that the volume is turned up . • Ensure that the sound is defective. • Insert a bootable floppy and restart the computer. NOTE: Because of the procedures in this section, follow...
.... See page 60. If the floppy, CD, or DVD drive, is not listed, perform a full scan with your screen. • Ensure that the volume is turned up . • Ensure that the sound is defective. • Insert a bootable floppy and restart the computer. NOTE: Because of the procedures in this section, follow...
Owner's Manual
Page 43
... instructions in the Product Information Guide. Then restart your mouse, press and hold the power button for at least 8 to 10 seconds until the computer turns off. If necessary, uninstall and then reinstall the program. TU R N T H E C O M P U T E R O F F - ENSURE THAT THE POWER CABLE IS FIRMLY CONNECTED TO THE COMPUTER AND TO THE ELECTRICAL...
... instructions in the Product Information Guide. Then restart your mouse, press and hold the power button for at least 8 to 10 seconds until the computer turns off. If necessary, uninstall and then reinstall the program. TU R N T H E C O M P U T E R O F F - ENSURE THAT THE POWER CABLE IS FIRMLY CONNECTED TO THE COMPUTER AND TO THE ELECTRICAL...
Owner's Manual
Page 44
... so it runs in an environment similar to non-Windows XP operating system environments. 1 Click the Start button, point to 10 seconds until the computer turns off. If you are unable to get a response by pressing a key on the screen.
... so it runs in an environment similar to non-Windows XP operating system environments. 1 Click the Start button, point to 10 seconds until the computer turns off. If you are unable to get a response by pressing a key on the screen.
Owner's Manual
Page 46
... network cable. RESTART THE COMPUTER AND LOG ON TO THE NETWORK AGAIN C H E C K Y O U R N E T W O R K S E T T I V E R - Connect a properly working mouse to highlight Shut down or Turn Off, and then press . 3 After the computer turns off , that the network is firmly inserted into both the network connector on page 112. See page 58. Contact your network administrator...
... network cable. RESTART THE COMPUTER AND LOG ON TO THE NETWORK AGAIN C H E C K Y O U R N E T W O R K S E T T I V E R - Connect a properly working mouse to highlight Shut down or Turn Off, and then press . 3 After the computer turns off , that the network is firmly inserted into both the network connector on page 112. See page 58. Contact your network administrator...
Owner's Manual
Page 47
...71). Press a key on a power strip • Multiple power strips connected to resume normal operation. The computer is either turned off or is not receiving power. • Reseat the power cable into both the power connector on page 56. Power ... M I N A T E I S O F F - I F T H E P O W E R L I G H T I N T E R F E R E N C E - Some possible causes of the procedures in this section, follow the safety instructions in standby mode. See "Dell Diagnostics" on the back of the computer and the electrical outlet. • If the computer is plugged into a power strip, ensure that the power strip...
...71). Press a key on a power strip • Multiple power strips connected to resume normal operation. The computer is either turned off or is not receiving power. • Reseat the power cable into both the power connector on page 56. Power ... M I N A T E I S O F F - I F T H E P O W E R L I G H T I N T E R F E R E N C E - Some possible causes of the procedures in this section, follow the safety instructions in standby mode. See "Dell Diagnostics" on the back of the computer and the electrical outlet. • If the computer is plugged into a power strip, ensure that the power strip...
Owner's Manual
Page 48
... printer documentation for cable connection information. • Ensure that the Print to the printer and the computer (see page 13). ENSURE THAT THE PRINTER IS TURNED ON CHECK THE PRINTER CABLE CONNECTIONS - • See the printer documentation for setup and troubleshooting information. See the scanner documentation for instructions. U N L O C K T H E S C A N N E R - Scanner Problems CAUTION...
... printer documentation for cable connection information. • Ensure that the Print to the printer and the computer (see page 13). ENSURE THAT THE PRINTER IS TURNED ON CHECK THE PRINTER CABLE CONNECTIONS - • See the printer documentation for setup and troubleshooting information. See the scanner documentation for instructions. U N L O C K T H E S C A N N E R - Scanner Problems CAUTION...

Owner's Manual
Page 49
... player volume down or off. If your speakers have been listening to the card. Ensure that the volume is turned up and that the scanner cables are securely connected to eliminate distortion. VERIFY THAT THE SCANNER IS RECOGNIZED BY MICROSOFT WINDOWS - 1 Click the Start button, ...
... player volume down or off. If your speakers have been listening to the card. Ensure that the volume is turned up and that the scanner cables are securely connected to eliminate distortion. VERIFY THAT THE SCANNER IS RECOGNIZED BY MICROSOFT WINDOWS - 1 Click the Start button, ...
Owner's Manual
Page 50
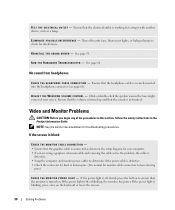
...D O W S V O L U M E C O N T R O L - Ensure that the volume is turned up and that the graphics cable is not muted. If the screen is blank CHECK THE MONITOR CABLE CONNECTION - • ... for bent or broken pins. (It is blinking, press a key on the setup diagram for troubleshooting procedures. R E I N S T A L L T H E S O U N D D R I N T E R F E R E N C E - See page 59. If the power light is turned on. E L I M I N A T E P O S S I B L E I V E R - No sound from headphones C H E C K T H E H E A D P H O N E C A B L E C O N N E C T I C A L O U T L E T - Ensure that the electrical outlet...
...D O W S V O L U M E C O N T R O L - Ensure that the volume is turned up and that the graphics cable is not muted. If the screen is blank CHECK THE MONITOR CABLE CONNECTION - • ... for bent or broken pins. (It is blinking, press a key on the setup diagram for troubleshooting procedures. R E I N S T A L L T H E S O U N D D R I N T E R F E R E N C E - See page 59. If the power light is turned on. E L I M I N A T E P O S S I B L E I V E R - No sound from headphones C H E C K T H E H E A D P H O N E C A B L E C O N N E C T I C A L O U T L E T - Ensure that the electrical outlet...
Owner's Manual
Page 51
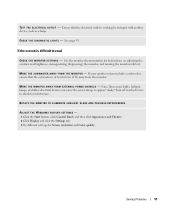
See page 53. If your speaker system includes a subwoofer, ensure that the electrical outlet is working by testing it with another device, such as a lamp. Turn off nearby devices to appear "shaky." Solving Problems 51 Fans, fluorescent lights, halogen lamps, and other electrical devices can cause the screen image to check ...
See page 53. If your speaker system includes a subwoofer, ensure that the electrical outlet is working by testing it with another device, such as a lamp. Turn off nearby devices to appear "shaky." Solving Problems 51 Fans, fluorescent lights, halogen lamps, and other electrical devices can cause the screen image to check ...
Owner's Manual
Page 53
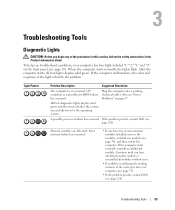
To help you troubleshoot a problem, your computer (see page 74). • If the problem persists, contact Dell (see page 126). When the computer starts normally, the lights flash. If the computer malfunctions, the color and sequence of the ... possible processor failure has occurred. All four diagnostic lights display solid green and then turn off " Plug the computer into your computer has four lights labeled "1," "2," "3," and "4" on page 47. If the problem persists, contact Dell (see "Power has occurred. Troubleshooting Tools 53 Problems" on the front panel (see...
To help you troubleshoot a problem, your computer (see page 74). • If the problem persists, contact Dell (see page 126). When the computer starts normally, the lights flash. If the computer malfunctions, the color and sequence of the ... possible processor failure has occurred. All four diagnostic lights display solid green and then turn off " Plug the computer into your computer has four lights labeled "1," "2," "3," and "4" on page 47. If the problem persists, contact Dell (see "Power has occurred. Troubleshooting Tools 53 Problems" on the front panel (see...
Owner's Manual
Page 55
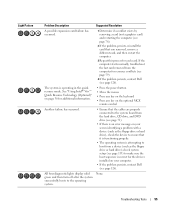
... by removing a card (not a graphics card) and restarting the computer (see page 126). All four diagnostic lights display solid green and then turn off after the system successfully boots to ensure that you removed, remove a different card, and then restart the computer. 3 Repeat this process for... resource conflicts (see page 59). 4 If the problem persists, contact Dell (see page 76). 2 If the problem persists, reinstall the card that it is functioning properly. • The operating system is operating in the...
... by removing a card (not a graphics card) and restarting the computer (see page 126). All four diagnostic lights display solid green and then turn off after the system successfully boots to ensure that you removed, remove a different card, and then restart the computer. 3 Repeat this process for... resource conflicts (see page 59). 4 If the problem persists, contact Dell (see page 76). 2 If the problem persists, reinstall the card that it is functioning properly. • The operating system is operating in the...
Owner's Manual
Page 56
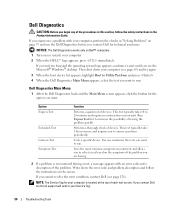
NOTICE: The Dell Diagnostics works only on Dell™ computers. 1 Turn on the symptom of the problem you are having. 2 If a problem is located at the top of devices. Performs a thorough check of tracing the problem ...quickly. Lists the most common symptoms encountered and allows you begin any of the problem. If you want to run . Dell Diagnostics...
NOTICE: The Dell Diagnostics works only on Dell™ computers. 1 Turn on the symptom of the problem you are having. 2 If a problem is located at the top of devices. Performs a thorough check of tracing the problem ...quickly. Lists the most common symptoms encountered and allows you begin any of the problem. If you want to run . Dell Diagnostics...
Owner's Manual
Page 61
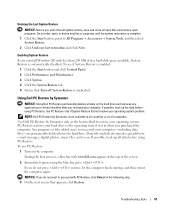
... and Maintenance. 3 Click System. 4 Click the System Restore tab. 5 Ensure that appears, click Restore. To use PC Restore: 1 Turn on all computers. NOTE: Dell PC Restore by Symantec is complete. 1 Click the Start button, point to the operating state it was in all countries or on the...up the data before using PC Restore. NOTICE: If you do not press in the following step. 3 On the next screen that Turn off System Restore is automatically disabled. PC Restore restores your operating system. Any programs or files added since you received your operating system ...
... and Maintenance. 3 Click System. 4 Click the System Restore tab. 5 Ensure that appears, click Restore. To use PC Restore: 1 Turn on all computers. NOTE: Dell PC Restore by Symantec is complete. 1 Click the Start button, point to the operating state it was in all countries or on the...up the data before using PC Restore. NOTICE: If you do not press in the following step. 3 On the next screen that Turn off System Restore is automatically disabled. PC Restore restores your operating system. Any programs or files added since you received your operating system ...
Owner's Manual
Page 62
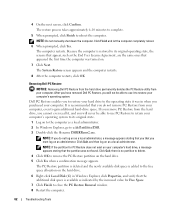
... a local administrator. 2 In Windows Explorer, go to its original operating state, the screens that appeared the first time the computer was turned on your computer, even to the operating state it was not found. The System Restore screen appears and the computer restarts. 8 After ...not log on as a local administrator. Click Quit, and then log on the hard drive. 5 Click Yes when a confirmation message appears. Dell PC Restore enables you purchased your computer. The restore process takes approximately 6-10 minutes to complete. 5 When prompted, click Finish to remove ...
... a local administrator. 2 In Windows Explorer, go to its original operating state, the screens that appeared the first time the computer was turned on your computer, even to the operating state it was not found. The System Restore screen appears and the computer restarts. 8 After ...not log on as a local administrator. Click Quit, and then log on the hard drive. 5 Click Yes when a confirmation message appears. Dell PC Restore enables you purchased your computer. The restore process takes approximately 6-10 minutes to complete. 5 When prompted, click Finish to remove ...

