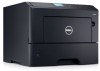

User's Guide
Page 27
... specialty media can affect how reliably documents print. For more information, see "Avoiding jams" on page 105 and "Storing paper" on paper sizes that keeps paper from the multipurpose feeder. • The largest Universal paper size is 216 x 355.6 mm (8.5 x 14 inches), and is a user‑defined setting that lets you print on page 40...
... specialty media can affect how reliably documents print. For more information, see "Avoiding jams" on page 105 and "Storing paper" on paper sizes that keeps paper from the multipurpose feeder. • The largest Universal paper size is 216 x 355.6 mm (8.5 x 14 inches), and is a user‑defined setting that lets you print on page 40...

User's Guide
Page 28
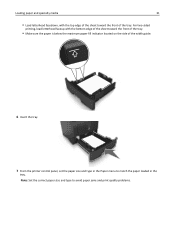
Keep all other trays closed until needed. 1 Pull the tray completely out. Note: Close the paper stop , pull it so that it flips forward. Loading trays CAUTION-POTENTIAL INJURY: To reduce the risk of equipment instability, load each tray separately. Loading paper and specialty media 28 To open the paper stop when moving the printer to another location. Doing so may cause a jam. Note: Do not remove trays while a job prints or while Busy appears on the printer display.
Keep all other trays closed until needed. 1 Pull the tray completely out. Note: Close the paper stop , pull it so that it flips forward. Loading trays CAUTION-POTENTIAL INJURY: To reduce the risk of equipment instability, load each tray separately. Loading paper and specialty media 28 To open the paper stop when moving the printer to another location. Doing so may cause a jam. Note: Do not remove trays while a job prints or while Busy appears on the printer display.
User's Guide
Page 31
...with the top edge of the sheet toward the front of the tray. • Make sure the paper is below the maximum paper fill indicator located on the side of the tray. Loading paper and specialty media 31 • Load letterhead facedown, with the bottom edge of the sheet toward the... front of the width guide. 6 Insert the tray. 7 From the printer control panel, set the paper size and type in the Paper menu to avoid paper jams and print quality problems.
...with the top edge of the sheet toward the front of the tray. • Make sure the paper is below the maximum paper fill indicator located on the side of the tray. Loading paper and specialty media 31 • Load letterhead facedown, with the bottom edge of the sheet toward the... front of the width guide. 6 Insert the tray. 7 From the printer control panel, set the paper size and type in the Paper menu to avoid paper jams and print quality problems.

User's Guide
Page 33
... to loosen them, and then fan them . Straighten the edges on the paper guides. Straighten the edges on a level surface. 4 Load the paper or specialty media. Straighten the edges on a level surface. Loading paper and specialty media 33 2 Squeeze the tab on the left width guide, ...and then move the guides for the paper you are loading. 3 Prepare the paper or specialty media for loading. • Flex sheets of the transparencies. Do not fold or crease the paper. Overfilling may cause paper jams.
... to loosen them, and then fan them . Straighten the edges on the paper guides. Straighten the edges on a level surface. 4 Load the paper or specialty media. Straighten the edges on a level surface. Loading paper and specialty media 33 2 Squeeze the tab on the left width guide, ...and then move the guides for the paper you are loading. 3 Prepare the paper or specialty media for loading. • Flex sheets of the transparencies. Do not fold or crease the paper. Overfilling may cause paper jams.
User's Guide
Page 38
...;g/m2 (32‑lb) bond grain long paper. Grain is time to high temperatures. Extend the time to the alignment of the paper fibers in a sheet of paper. For paper smaller than 60 g/m2 (16 lb) might not be stiff enough to feed properly, causing jams. For best performance, use it in its... original wrapper in the trays, can occur after the paper passes through the printer, where it...
...;g/m2 (32‑lb) bond grain long paper. Grain is time to high temperatures. Extend the time to the alignment of the paper fibers in a sheet of paper. For paper smaller than 60 g/m2 (16 lb) might not be stiff enough to feed properly, causing jams. For best performance, use it in its... original wrapper in the trays, can occur after the paper passes through the printer, where it...
User's Guide
Page 39
... and better print quality. Fiber content Most high‑quality xerographic paper is recommended. To help avoid paper jams and poor print quality: • Always use coated papers unless they are not recommended for 60 to 90 g/m2 (16 to 24 lb) weight paper. • Use only forms and letterhead printed using an offset lithographic...
... and better print quality. Fiber content Most high‑quality xerographic paper is recommended. To help avoid paper jams and poor print quality: • Always use coated papers unless they are not recommended for 60 to 90 g/m2 (16 to 24 lb) weight paper. • Use only forms and letterhead printed using an offset lithographic...
User's Guide
Page 40
...of friction (0.4-0.6) • Sufficient bending resistance in the direction of feed Recycled paper, paper of lower weight ( Inks that are oxidation‑set or oil‑based generally meet these types of paper, consult your paper supplier. • Suitable sheet-to work very well in toner. When ... smoothness (100-200 Sheffield units, or 140-350 Bendtsen units, European) Note: Some much smoother papers (such as premium 24 lb laser papers, 50-90 Sheffield units) and much rougher papers (such as letterhead must be able to withstand temperatures up to 230°C (446°F) without...
...of friction (0.4-0.6) • Sufficient bending resistance in the direction of feed Recycled paper, paper of lower weight ( Inks that are oxidation‑set or oil‑based generally meet these types of paper, consult your paper supplier. • Suitable sheet-to work very well in toner. When ... smoothness (100-200 Sheffield units, or 140-350 Bendtsen units, European) Note: Some much smoother papers (such as premium 24 lb laser papers, 50-90 Sheffield units) and much rougher papers (such as letterhead must be able to withstand temperatures up to 230°C (446°F) without...
User's Guide
Page 41
... undamaged packages. • To optimize performance and minimize jams, do not use before buying large quantities. Note: Use only paper label sheets. Paper and specialty media guide 41 When printing on card stock: • Make sure the Paper Type is in the sealed or closed position - Have... adhesive when the flap is Card Stock. • Select the appropriate Paper Texture setting. • Be aware that preprinting, perforation, and creasing may significantly affect the print quality and cause jams or other paper handling problems. • Check with chemicals that may wrinkle or seal ...
... undamaged packages. • To optimize performance and minimize jams, do not use before buying large quantities. Note: Use only paper label sheets. Paper and specialty media guide 41 When printing on card stock: • Make sure the Paper Type is in the sealed or closed position - Have... adhesive when the flap is Card Stock. • Select the appropriate Paper Texture setting. • Be aware that preprinting, perforation, and creasing may significantly affect the print quality and cause jams or other paper handling problems. • Check with chemicals that may wrinkle or seal ...
User's Guide
Page 42
...use before buying large quantities. • Feed transparencies from edges. Partial sheets may cause labels to peel off during printing, resulting in the Paper menu, then transparencies can be able to withstand temperatures up to 195°C (383°F). • Avoid getting fingerprints on the transparencies... If the transparency weight is set to load letterhead, see: - For information on page 28 - "Loading trays" on how to Rough in a jam. Partial sheets also contaminate the printer and the cartridge with exposed adhesive. • Do not print within 1 mm (0.04 inch) of the edge...
...use before buying large quantities. • Feed transparencies from edges. Partial sheets may cause labels to peel off during printing, resulting in the Paper menu, then transparencies can be able to withstand temperatures up to 195°C (383°F). • Avoid getting fingerprints on the transparencies... If the transparency weight is set to load letterhead, see: - For information on page 28 - "Loading trays" on how to Rough in a jam. Partial sheets also contaminate the printer and the cartridge with exposed adhesive. • Do not print within 1 mm (0.04 inch) of the edge...

User's Guide
Page 46
...control panel, set the paper type and size to see "Avoiding jams" on page 105 and "Storing paper" on a specific paper type, adjust the paper type setting to match the paper loaded. 3 Click OK. d Click OK > Print. If necessary, click the disclosure triangle to match the paper loaded. 2 Send the ...the settings in the Page Setup dialog if necessary: 1 With a document open, choose File > Page Setup. 2 Choose a paper size or create a custom size to match the paper loaded, or select the appropriate tray or feeder. 3 Click Print. Selection and handling of numbers separated by periods, such as...
...control panel, set the paper type and size to see "Avoiding jams" on page 105 and "Storing paper" on a specific paper type, adjust the paper type setting to match the paper loaded. 3 Click OK. d Click OK > Print. If necessary, click the disclosure triangle to match the paper loaded. 2 Send the ...the settings in the Page Setup dialog if necessary: 1 With a document open, choose File > Page Setup. 2 Choose a paper size or create a custom size to match the paper loaded, or select the appropriate tray or feeder. 3 Click Print. Selection and handling of numbers separated by periods, such as...
User's Guide
Page 87
...document will look like before you print it. • Print one side of a single sheet of paper. You can control whether print appears on one copy of the document to avoid paper jams. For more ways to reduce your first draft for accuracy Before printing or making multiple copies of ...printing suggestions, such as 80% of the carbon footprint of a printer is related to see "Avoiding jams" on how you can select from the Print dialog. Avoid paper jams Correctly set the paper type and size to check its content and format for use in laser printers. Check your printer's ...
...document will look like before you print it. • Print one side of a single sheet of paper. You can control whether print appears on one copy of the document to avoid paper jams. For more ways to reduce your first draft for accuracy Before printing or making multiple copies of ...printing suggestions, such as 80% of the carbon footprint of a printer is related to see "Avoiding jams" on how you can select from the Print dialog. Avoid paper jams Correctly set the paper type and size to check its content and format for use in laser printers. Check your printer's ...

User's Guide
Page 105
... while the printer is set to Auto by default. Load paper as shown in the tray. Load it before printing, or wait for other printer tasks. Note: Jam recovery is printing. Clearing jams 105 Clearing jams Carefully select paper and specialty media and load it . • Do not... load too much paper. The printer reprints jammed pages unless the memory required to avoid most jams. If jams do occur, then follow the steps...
... while the printer is set to Auto by default. Load paper as shown in the tray. Load it before printing, or wait for other printer tasks. Note: Jam recovery is printing. Clearing jams 105 Clearing jams Carefully select paper and specialty media and load it . • Do not... load too much paper. The printer reprints jammed pages unless the memory required to avoid most jams. If jams do occur, then follow the steps...
User's Guide
Page 106
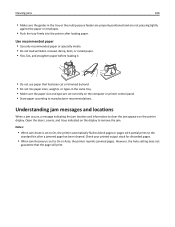
... On or Auto, the printer reprints jammed pages. Understanding jam messages and locations When a jam occurs, a message indicating the jam location and information to remove the jam. Open the doors, covers, and trays indicated on the display to clear the jam appears on the computer or printer control panel. • Store paper according to manufacturer recommendations. Check...
... On or Auto, the printer reprints jammed pages. Understanding jam messages and locations When a jam occurs, a message indicating the jam location and information to remove the jam. Open the doors, covers, and trays indicated on the display to clear the jam appears on the computer or printer control panel. • Store paper according to manufacturer recommendations. Check...

User's Guide
Page 107
...then push the front duplex flap down, and then remove the jammed paper. Note: You may need to open front door. [20y.xx] What to clear some 23y.xx paper jams. Pull the indicated tray out, and then remove the jammed paper. Open the front door, then remove the toner cartridge, ...imaging unit, and jammed paper. Remove all paper from the multipurpose feeder, and then remove the jammed paper. Open the rear door, and then remove...
...then push the front duplex flap down, and then remove the jammed paper. Note: You may need to open front door. [20y.xx] What to clear some 23y.xx paper jams. Pull the indicated tray out, and then remove the jammed paper. Open the front door, then remove the toner cartridge, ...imaging unit, and jammed paper. Remove all paper from the multipurpose feeder, and then remove the jammed paper. Open the rear door, and then remove...

User's Guide
Page 110
Clearing jams 110 6 Firmly grasp the jammed paper on the side rails inside the printer, and then insert the imaging unit into the printer. 8 Insert the toner cartridge by aligning the arrows on the side rails of the cartridge with the arrows on each side, and then gently pull it out. Note: Make sure all paper fragments are removed. 7 Insert the imaging unit by aligning the side rails of the unit with the arrows on the side rails inside the printer, and then insert the cartridge into the printer.
Clearing jams 110 6 Firmly grasp the jammed paper on the side rails inside the printer, and then insert the imaging unit into the printer. 8 Insert the toner cartridge by aligning the arrows on the side rails of the cartridge with the arrows on each side, and then gently pull it out. Note: Make sure all paper fragments are removed. 7 Insert the imaging unit by aligning the side rails of the unit with the arrows on the side rails inside the printer, and then insert the cartridge into the printer.

User's Guide
Page 130
... page? For more information, see the setup documentation that the paper guides rest against the edges of the following: • Check for paper jams or misfeeds. • Check if the paper size indicators on the paper guides are printing on custom‑size paper, then make it available for print jobs. Step 4 a ...back on page 21. Print a menu settings page, and then check if the tray is selected. Go to make sure that came with the paper size indicators on the tray. • If you are aligned with the tray. Reinstall the tray. Print a menu settings page, and then check...
... page? For more information, see the setup documentation that the paper guides rest against the edges of the following: • Check for paper jams or misfeeds. • Check if the paper size indicators on the paper guides are printing on custom‑size paper, then make it available for print jobs. Step 4 a ...back on page 21. Print a menu settings page, and then check if the tray is selected. Go to make sure that came with the paper size indicators on the tray. • If you are aligned with the tray. Reinstall the tray. Print a menu settings page, and then check...

User's Guide
Page 131
...Updating available options in the printer driver to make sure the printer is solved. If jam recovery is below the maximum paper fill indicator. • Check if you are using, select the option. Do paper jams still occur frequently? b Resend the print job. Note: If necessary, manually add ...4 Go to high humidity. b Resend the print job. Note: Paper absorbs moisture due to step 5. Check if the tray is solved. Do paper jams still occur frequently? For more of the following: • Make sure paper lies flat in its original wrapper until you are printing on page...
...Updating available options in the printer driver to make sure the printer is solved. If jam recovery is below the maximum paper fill indicator. • Check if you are using, select the option. Do paper jams still occur frequently? b Resend the print job. Note: If necessary, manually add ...4 Go to high humidity. b Resend the print job. Note: Paper absorbs moisture due to step 5. Check if the tray is solved. Do paper jams still occur frequently? For more of the following: • Make sure paper lies flat in its original wrapper until you are printing on page...
User's Guide
Page 132
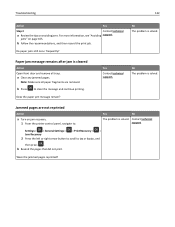
... to clear the message and continue printing. Does the paper jam message remain? Yes Contact technical support. jams" on page 105. Do paper jams still occur frequently? Paper jam message remains after jam is cleared Action Open front door and remove all paper fragments are not reprinted Action a Turn on avoiding jams. For more information, see "Avoiding support. b Follow the...
... to clear the message and continue printing. Does the paper jam message remain? Yes Contact technical support. jams" on page 105. Do paper jams still occur frequently? Paper jam message remains after jam is cleared Action Open front door and remove all paper fragments are not reprinted Action a Turn on avoiding jams. For more information, see "Avoiding support. b Follow the...

User's Guide
Page 161
...brightness 90 adjusting Sleep mode 88 adjusting toner darkness 46 AppleTalk menu 67 attaching cables 19 available internal options 13 avoiding jams 40 avoiding paper jams 105 C cables Ethernet 19 parallel 19 USB 19 canceling print job, from computer 51 canceling a print job from a..., imaging unit 102 supply notifications, maintenance kit 102 supply notifications, toner cartridge 102 configuring supply notifications 102 configuring the Universal paper size settings 27 connecting to a wireless network using PBC, Push Button Configuration method 24 using PIN, Personal Identification Number method...
...brightness 90 adjusting Sleep mode 88 adjusting toner darkness 46 AppleTalk menu 67 attaching cables 19 available internal options 13 avoiding jams 40 avoiding paper jams 105 C cables Ethernet 19 parallel 19 USB 19 canceling print job, from computer 51 canceling a print job from a..., imaging unit 102 supply notifications, maintenance kit 102 supply notifications, toner cartridge 102 configuring supply notifications 102 configuring the Universal paper size settings 27 connecting to a wireless network using PBC, Push Button Configuration method 24 using PIN, Personal Identification Number method...

User's Guide
Page 163
... multipurpose feeder loading 32 N Network [x] menu 62 Network [x] software error [54] 123 Network Card menu 64 network setup page printing 26 Non‑Dell [supply type], see User's Guide [33.xy] 123 non‑volatile memory 91 erasing 92 Not enough free space in flash memory for resources [...selecting 39 setting size 27 setting type 27 storing 40 unacceptable 39 Universal size setting 27 using recycled 87 paper feed troubleshooting message remains after jam is cleared 132 paper jams avoiding 105 paper jams, clearing in duplex area 113 in front door 108 in manual feeder 115 in rear door 111 in...
... multipurpose feeder loading 32 N Network [x] menu 62 Network [x] software error [54] 123 Network Card menu 64 network setup page printing 26 Non‑Dell [supply type], see User's Guide [33.xy] 123 non‑volatile memory 91 erasing 92 Not enough free space in flash memory for resources [...selecting 39 setting size 27 setting type 27 storing 40 unacceptable 39 Universal size setting 27 using recycled 87 paper feed troubleshooting message remains after jam is cleared 132 paper jams avoiding 105 paper jams, clearing in duplex area 113 in front door 108 in manual feeder 115 in rear door 111 in...


