
Pundit-PH3 User''s Manual for English Edition
Page 4
... operating system 3-2 3.2 Support CD information 3-2 3.2.1 Running the support CD 3-2 3.2.2 Drivers menu 3-3 3.2.3 Utilities menu 3-4 3.2.4 ASUS contact information 3-5 3.2.5 Other information 3-6 Chapter 4: Motherboard info 4.1 Motherboard overview 4-2 4.2 Jumpers 4-3 4.3 Connectors 4-5 4.3.1 Rear panel connectors 4-5 4.3.2 Internal connectors 4-5 Chapter 5: BIOS setup 5.1 Managing and updating your BIOS 5-2 5.1.1 ASUS CrashFree BIOS 2 utility 5-2 5.1.2 ASUS Update utility 5-3 5.2 BIOS setup program 5-6 5.2.3 Navigation keys 5-6 5.2.1 BIOS menu screen 5-6 5.2.2 Menu bar...
... operating system 3-2 3.2 Support CD information 3-2 3.2.1 Running the support CD 3-2 3.2.2 Drivers menu 3-3 3.2.3 Utilities menu 3-4 3.2.4 ASUS contact information 3-5 3.2.5 Other information 3-6 Chapter 4: Motherboard info 4.1 Motherboard overview 4-2 4.2 Jumpers 4-3 4.3 Connectors 4-5 4.3.1 Rear panel connectors 4-5 4.3.2 Internal connectors 4-5 Chapter 5: BIOS setup 5.1 Managing and updating your BIOS 5-2 5.1.1 ASUS CrashFree BIOS 2 utility 5-2 5.1.2 ASUS Update utility 5-3 5.2 BIOS setup program 5-6 5.2.3 Navigation keys 5-6 5.2.1 BIOS menu screen 5-6 5.2.2 Menu bar...
Pundit-PH3 User''s Manual for English Edition
Page 8
Chapter 4: Motherboard info This chapter gives information about the ASUS Pundit-PH3 barebone system. Appendix: CPU features The Appendix describes the CPU features and technologies that comes with hardware ...knowledge of the barebone system. This guide is organized This guide contains the following parts: 1. Chapter 1: System introduction This chapter gives a general description of personal computers. This chapter includes the motherboard...
Chapter 4: Motherboard info This chapter gives information about the ASUS Pundit-PH3 barebone system. Appendix: CPU features The Appendix describes the CPU features and technologies that comes with hardware ...knowledge of the barebone system. This guide is organized This guide contains the following parts: 1. Chapter 1: System introduction This chapter gives a general description of personal computers. This chapter includes the motherboard...

Pundit-PH3 User''s Manual for English Edition
Page 10
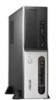
... • Optical drive (CD-ROM/CD-RW/DVD-ROM/DVD-RW) x Cables • AC power cable • Serial ATA signal cable (x 2) 4. Support CD 5. ASUS Pundit-PH3 barebone system with • ASUS motherboard • 275 W PFC power supply unit • CPU fan and heatsink assembly • 6-in-1 storage card reader 2. User guide 6. Accessories • Foot stand...
... • Optical drive (CD-ROM/CD-RW/DVD-ROM/DVD-RW) x Cables • AC power cable • Serial ATA signal cable (x 2) 4. Support CD 5. ASUS Pundit-PH3 barebone system with • ASUS motherboard • 275 W PFC power supply unit • CPU fan and heatsink assembly • 6-in-1 storage card reader 2. User guide 6. Accessories • Foot stand...
Pundit-PH3 User''s Manual for English Edition
Page 12
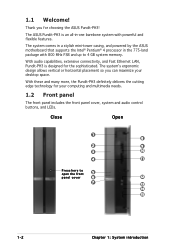
...for your desktop space. With these and many more, the Pundit-PH3 definitely delivers the cutting edge technology for choosing the ASUS Pundit-PH3! 1.1 Welcome! With audio capabilities, extensive connectivity, and Fast Ethernet LAN, Pundit-PH3 is an all-in the 775-land package with powerful and ...1 8 2 9 3 10 4 11 Press here to 4 GB system memory. The ASUS Pundit-PH3 is designed for the sophisticated. The system comes in a stylish mini-tower casing, and powered by the ASUS motherboard that supports the Intel® Pentium® 4 processor in -one barebone system with 800 ...
...for your desktop space. With these and many more, the Pundit-PH3 definitely delivers the cutting edge technology for choosing the ASUS Pundit-PH3! 1.1 Welcome! With audio capabilities, extensive connectivity, and Fast Ethernet LAN, Pundit-PH3 is an all-in the 775-land package with powerful and ...1 8 2 9 3 10 4 11 Press here to 4 GB system memory. The ASUS Pundit-PH3 is designed for the sophisticated. The system comes in a stylish mini-tower casing, and powered by the ASUS motherboard that supports the Intel® Pentium® 4 processor in -one barebone system with 800 ...

Pundit-PH3 User''s Manual for English Edition
Page 16
... bracket. Front panel cover 3. PCI Express x1 slot 8. DIMM sockets 1-6 Chapter 1: System introduction Optical drive lock 4. Power supply unit 7. PCI slots 9. Metal bracket lock 12. ASUS motherboard 11. Hard disk drive lock 6. Hard disk drive bays 5. PCI Express x16 slot 10. LGA775 socket (under the CPU fan and heatsink assembly) 13. Proceed...
... bracket. Front panel cover 3. PCI Express x1 slot 8. DIMM sockets 1-6 Chapter 1: System introduction Optical drive lock 4. Power supply unit 7. PCI slots 9. Metal bracket lock 12. ASUS motherboard 11. Hard disk drive lock 6. Hard disk drive bays 5. PCI Express x16 slot 10. LGA775 socket (under the CPU fan and heatsink assembly) 13. Proceed...

Pundit-PH3 User''s Manual for English Edition
Page 18
.... Central processing unit (CPU) 2. Unplug the power cable from the power outlet and make sure that came with an onboard standby power LED. The system motherboard comes with the component. Expansion card(s) 4. Basic components to install in soft-off mode, and not powered OFF. This LED lights up to indicate that...
.... Central processing unit (CPU) 2. Unplug the power cable from the power outlet and make sure that came with an onboard standby power LED. The system motherboard comes with the component. Expansion card(s) 4. Basic components to install in soft-off mode, and not powered OFF. This LED lights up to indicate that...

Pundit-PH3 User''s Manual for English Edition
Page 21
... the CPU fan and heatsink assembly The system package includes a pre-installed proprietary CPU fan and heatsink assembly to ensure optimum thermal condition and performance. ASUS Pundit-PH3 2-5 Carefully remove the heatsink and fan assembly from the CPU fan connector on the motherboard. 2. 2.4 Installing a CPU The ASUS motherboard comes with other models.
... the CPU fan and heatsink assembly The system package includes a pre-installed proprietary CPU fan and heatsink assembly to ensure optimum thermal condition and performance. ASUS Pundit-PH3 2-5 Carefully remove the heatsink and fan assembly from the CPU fan connector on the motherboard. 2. 2.4 Installing a CPU The ASUS motherboard comes with other models.

Pundit-PH3 User''s Manual for English Edition
Page 22
...left (B) until it is shipment/ transit-related. • The product warranty does not cover damage to a 135º angle. Locate the CPU socket on the motherboard. 2. ASUS will shoulder the cost of the arrow to the socket contacts resulting from the retention tab. Lift the load lever in this section do not... is released from incorrect CPU installation or removal. 2.4.2 CPU installation • Your boxed Intel® Pentium® 4 LGA775 processor package should come with your motherboard to a 100º angle. 2-6 Chapter 2: Basic installation Retention tab Load lever 4.
...left (B) until it is shipment/ transit-related. • The product warranty does not cover damage to a 135º angle. Locate the CPU socket on the motherboard. 2. ASUS will shoulder the cost of the arrow to the socket contacts resulting from the retention tab. Lift the load lever in this section do not... is released from incorrect CPU installation or removal. 2.4.2 CPU installation • Your boxed Intel® Pentium® 4 LGA775 processor package should come with your motherboard to a 100º angle. 2-6 Chapter 2: Basic installation Retention tab Load lever 4.

Pundit-PH3 User''s Manual for English Edition
Page 23
5. Refer to the Appendix for more information on the bottom-left corner of the socket. Close the load plate. Alignment key 7. The socket alignment key should fit into the retention tab. ASUS Pundit-PH3 2-7 Position the CPU over the socket, making sure that the gold triangle is on these CPU features. The motherboard supports Intel® Pentium® 4 LGA775 processors with the Intel® Enhanced Memory 64 Technology (EM64T), Enhanced Intel SpeedStep® Technology (EIST), and Hyper-Threading Technology. Push the load lever until it snaps into the CPU notch. 6.
5. Refer to the Appendix for more information on the bottom-left corner of the socket. Close the load plate. Alignment key 7. The socket alignment key should fit into the retention tab. ASUS Pundit-PH3 2-7 Position the CPU over the socket, making sure that the gold triangle is on these CPU features. The motherboard supports Intel® Pentium® 4 LGA775 processors with the Intel® Enhanced Memory 64 Technology (EM64T), Enhanced Intel SpeedStep® Technology (EIST), and Hyper-Threading Technology. Push the load lever until it snaps into the CPU notch. 6.

Pundit-PH3 User''s Manual for English Edition
Page 24
Orient the heatsink and fan assembly such that the four fasteners match the holes on the motherboard labeled CPU_FAN1. 2-8 Chapter 2: Basic installation Push down two fasteners at a time in place. 3. Connect the CPU fan cable to orient each fastener with the narrow ... outward. (The photo shows the groove shaded for emphasis.) 2. Place the heatsink on top of the groove Make sure to the connector on the motherboard. Fastener Motherboard hole Narrow end of the installed CPU, making sure that the CPU fan cable is closest to secure the heatsink and fan assembly in a diagonal...
Orient the heatsink and fan assembly such that the four fasteners match the holes on the motherboard labeled CPU_FAN1. 2-8 Chapter 2: Basic installation Push down two fasteners at a time in place. 3. Connect the CPU fan cable to orient each fastener with the narrow ... outward. (The photo shows the groove shaded for emphasis.) 2. Place the heatsink on top of the groove Make sure to the connector on the motherboard. Fastener Motherboard hole Narrow end of the installed CPU, making sure that the CPU fan cable is closest to secure the heatsink and fan assembly in a diagonal...

Pundit-PH3 User''s Manual for English Edition
Page 25
...ASUS Pundit-PH3 2-9 Use any of the recommended configurations in the table on the next page. • Install only i d e n t i c a l (the same type and size) DDR DIMM in DIMM_A and DIMM_B. • Always install DIMMs with four Double Data Rate (DDR) Dual Inline Memory Module (DIMM) sockets. 2.5 Installing a DIMM The system motherboard... recommended configurations may detect less than 4 GB system memory when you installed four 1 GB DDR memory. • This motherboard does not support memory modules made up of the sockets: DIMM_A1 DIMM_A2 DIMM_B1 DIMM_B2 ® 184-Pin DDR DIMM Sockets ...
...ASUS Pundit-PH3 2-9 Use any of the recommended configurations in the table on the next page. • Install only i d e n t i c a l (the same type and size) DDR DIMM in DIMM_A and DIMM_B. • Always install DIMMs with four Double Data Rate (DDR) Dual Inline Memory Module (DIMM) sockets. 2.5 Installing a DIMM The system motherboard... recommended configurations may detect less than 4 GB system memory when you installed four 1 GB DDR memory. • This motherboard does not support memory modules made up of the sockets: DIMM_A1 DIMM_A2 DIMM_B1 DIMM_B2 ® 184-Pin DDR DIMM Sockets ...

Pundit-PH3 User''s Manual for English Edition
Page 27
.... 2. Follow these steps to both the motherboard and the components. Unlock a DIMM socket by pressing the retaining clips outward. 3. DO NOT force a DIMM into the socket until the retaining clips snap back in the motherboard. 2. Firmly insert the DIMM into a socket to unlock the DIMM. ASUS Pundit-PH3 2-11 Simultaneously press the retaining clips outward...
.... 2. Follow these steps to both the motherboard and the components. Unlock a DIMM socket by pressing the retaining clips outward. 3. DO NOT force a DIMM into the socket until the retaining clips snap back in the motherboard. 2. Firmly insert the DIMM into a socket to unlock the DIMM. ASUS Pundit-PH3 2-11 Simultaneously press the retaining clips outward...

Pundit-PH3 User''s Manual for English Edition
Page 28
...comply with the PCI Express specifications. The system supports l o w p r o f i l e PCI, PCI Express x16, and PCI Express x1 cards. PCI Express x16 slot This motherboard supports PCI Express x16 graphic cards that comply with PCI specifications. Failure to do so may need to install expansion cards. Lay the system on... removing expansion cards. To install an expansion card: 1. The following figure shows a graphics card installed on the PCI Express x1 slot. The motherboard has two PCI, one PCI Express™ x1, and one PCI Express™ x16 slot. PCI Express x1 slot This...
...comply with the PCI Express specifications. The system supports l o w p r o f i l e PCI, PCI Express x16, and PCI Express x1 cards. PCI Express x16 slot This motherboard supports PCI Express x16 graphic cards that comply with PCI specifications. Failure to do so may need to install expansion cards. Lay the system on... removing expansion cards. To install an expansion card: 1. The following figure shows a graphics card installed on the PCI Express x1 slot. The motherboard has two PCI, one PCI Express™ x1, and one PCI Express™ x16 slot. PCI Express x1 slot This...

Pundit-PH3 User''s Manual for English Edition
Page 30
... Holder for PCI Steering 12* PS/2 Compatible Mouse Port 13 Numeric Data Processor 14* Primary IDE Channel * These IRQs are usually available for the system motherboard PCI slot 1 PCI slot 2 PCI Express x16 slot PCI Express x1 slot1 Onboard USB controller 1 Onboard USB controller 2 Onboard USB controller 3 Onboard USB controller 4 Onboard...
... Holder for PCI Steering 12* PS/2 Compatible Mouse Port 13 Numeric Data Processor 14* Primary IDE Channel * These IRQs are usually available for the system motherboard PCI slot 1 PCI slot 2 PCI Express x16 slot PCI Express x1 slot1 Onboard USB controller 1 Onboard USB controller 2 Onboard USB controller 3 Onboard USB controller 4 Onboard...

Pundit-PH3 User''s Manual for English Edition
Page 31
Refer to the optical drive documentation for details on how to the drive. To install an optical drive: 1. ASUS Pundit-PH3 2-15 2.7 Installing an optical drive The system comes with Pin 1 on both sides of the drive. Carefully pull the IDE and audio cables and plugs ... their respective locations. If you disconnected these plugs, refer to the system. IDE cable Audio cable and plug and plug 5. Lay the system on the motherboard. Connect the IDE cable to the IDE interface at the back of the drive.
Refer to the optical drive documentation for details on how to the drive. To install an optical drive: 1. ASUS Pundit-PH3 2-15 2.7 Installing an optical drive The system comes with Pin 1 on both sides of the drive. Carefully pull the IDE and audio cables and plugs ... their respective locations. If you disconnected these plugs, refer to the system. IDE cable Audio cable and plug and plug 5. Lay the system on the motherboard. Connect the IDE cable to the IDE interface at the back of the drive.

Pundit-PH3 User''s Manual for English Edition
Page 35
Connect the 15-pin SATA power plug from the power supply unit to a SATA connector on the motherboard. The HDD screw lock clicks to indicate that the HDD screws are aligned with the screw rails, push the drive carefully until it is properly ... the drive is completely flushed on the tray. Place the HDD on the bay. 3. When the HDD screws align with the screw holes and rails. 6. ASUS Pundit-PH3 HDD screw lock 2-19 Connect one end of the supplied 7-pin SATA cable to the SATA connector at the back of the drive, then connect...
Connect the 15-pin SATA power plug from the power supply unit to a SATA connector on the motherboard. The HDD screw lock clicks to indicate that the HDD screws are aligned with the screw rails, push the drive carefully until it is properly ... the drive is completely flushed on the tray. Place the HDD on the bay. 3. When the HDD screws align with the screw holes and rails. 6. ASUS Pundit-PH3 HDD screw lock 2-19 Connect one end of the supplied 7-pin SATA cable to the SATA connector at the back of the drive, then connect...

Pundit-PH3 User''s Manual for English Edition
Page 44
... item to install If A u t o r u n is enabled in your computer, browse the contents of the support CD to your system. • Motherboard settings and hardware options vary. Refer to locate the file ASSETUP.EXE from the BIN folder. The CD automatically displays the D r i v e r s ... an operating system This system supports Windows® 2000/2003 Server/XP operating systems (OS). E X E to the optical drive. Visit the ASUS website(www.asus.com) for updates. 3.2.1 Running the support CD Place the support CD to run the CD. 3-2 Chapter 3: Getting started The contents of your...
... item to install If A u t o r u n is enabled in your computer, browse the contents of the support CD to your system. • Motherboard settings and hardware options vary. Refer to locate the file ASSETUP.EXE from the BIN folder. The CD automatically displays the D r i v e r s ... an operating system This system supports Windows® 2000/2003 Server/XP operating systems (OS). E X E to the optical drive. Visit the ASUS website(www.asus.com) for updates. 3.2.1 Running the support CD Place the support CD to run the CD. 3-2 Chapter 3: Getting started The contents of your...
Pundit-PH3 User''s Manual for English Edition
Page 45
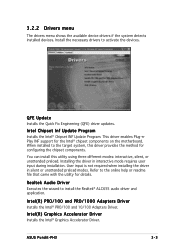
... driver in interactive mode requires user input during installation. You can install this driver provides the method for the Intel® chipset components on the motherboard. ASUS Pundit-PH3 3-3 3.2.2 Drivers menu The drivers menu shows the available device drivers if the system detects installed devices.
... driver in interactive mode requires user input during installation. You can install this driver provides the method for the Intel® chipset components on the motherboard. ASUS Pundit-PH3 3-3 3.2.2 Drivers menu The drivers menu shows the available device drivers if the system detects installed devices.

Pundit-PH3 User''s Manual for English Edition
Page 46
... help for different operating system versions. 3.2.3 Utilities menu The Utilities menu shows the applications and other software that the motherboard supports. ASUS Update The ASUS Update utility allows you keep your computer in a Windows® environment. Microsoft DirectX 9.0c Installs the Microsoft®... speed, CPU temperature, and system voltages, and alerts you of any detected problems. This utility helps you to update the motherboard BIOS in healthy operating condition. Anti-Virus Utility The anti-virus application scans, identifies, and removes computer viruses. USB 2.0 ...
... help for different operating system versions. 3.2.3 Utilities menu The Utilities menu shows the applications and other software that the motherboard supports. ASUS Update The ASUS Update utility allows you keep your computer in a Windows® environment. Microsoft DirectX 9.0c Installs the Microsoft®... speed, CPU temperature, and system voltages, and alerts you of any detected problems. This utility helps you to update the motherboard BIOS in healthy operating condition. Anti-Virus Utility The anti-virus application scans, identifies, and removes computer viruses. USB 2.0 ...

Pundit-PH3 User''s Manual for English Edition
Page 48
Motherboard Info Displays the general specifications of the support CD. Click an icon to display the specified information. 3.2.5 Other information The icons on the top right corner of the screen give additional information on the motherboard and the contents of the motherboard. Browse this CD Displays the support CD contents in graphical format. 3-6 Chapter 3: Getting started
Motherboard Info Displays the general specifications of the support CD. Click an icon to display the specified information. 3.2.5 Other information The icons on the top right corner of the screen give additional information on the motherboard and the contents of the motherboard. Browse this CD Displays the support CD contents in graphical format. 3-6 Chapter 3: Getting started


